This post may contain affiliate links: read full affiliate disclosure.
Every October, you face the same problem. You will walk into a store, see rows of plastic skeletons and expensive inflatables, and ask yourself if you really need to spend that much money just to make your house look festive for one night.
Even if you buy them, the problems do not end. Cheap props break in the rain, lights stop working halfway through, and if you are renting, you cannot even drill holes to hang them up.
That is why making your own Halloween decorations is such a smart idea. When you do it yourself, you control the cost, choose the style, and create decorations that actually last.
In this article, I will show you how to make spooky, renter-friendly, and weatherproof decorations without spending too much.
By the end, you will know how to make pieces that stand out in your neighborhood and are easy to store for next year.
Why Store-Bought Decorations Fail?
If you have ever bought Halloween props from a big-box store, you know the problem. They look great on the shelf, but things are different when you get them home.
The lights in cheap inflatable decorations often stop working after a week. Foam tombstones can fly away with the first strong breeze.
The high price makes the poor quality feel even worse spending $150 on something that only survives one season is not a good deal.
This is why many people turn to do-it-yourself projects. When you build your own props, you choose the materials, make them strong, and save a lot of money.
For example, you can build a sturdy PVC arch covered in pumpkins for less than half the price of a store-bought version, and it will actually last for years.
Light-Up Ghost & Mummy Jars
For a fast and spooky table decoration, you can make a glowing mummy. Just wrap a mason jar with medical gauze.
Then, stick two paper eyes between the gauze layers and add a battery-powered tea light inside to make it glow.
To create a matching ghost, drape some cheesecloth over a small balloon or foam ball. Spray the cloth with starch to hold its shape.
Once it is dry, place another battery light underneath it. This pair looks great on a porch, mantel, or as a centerpiece, where their soft orange light creates a perfect Halloween atmosphere.

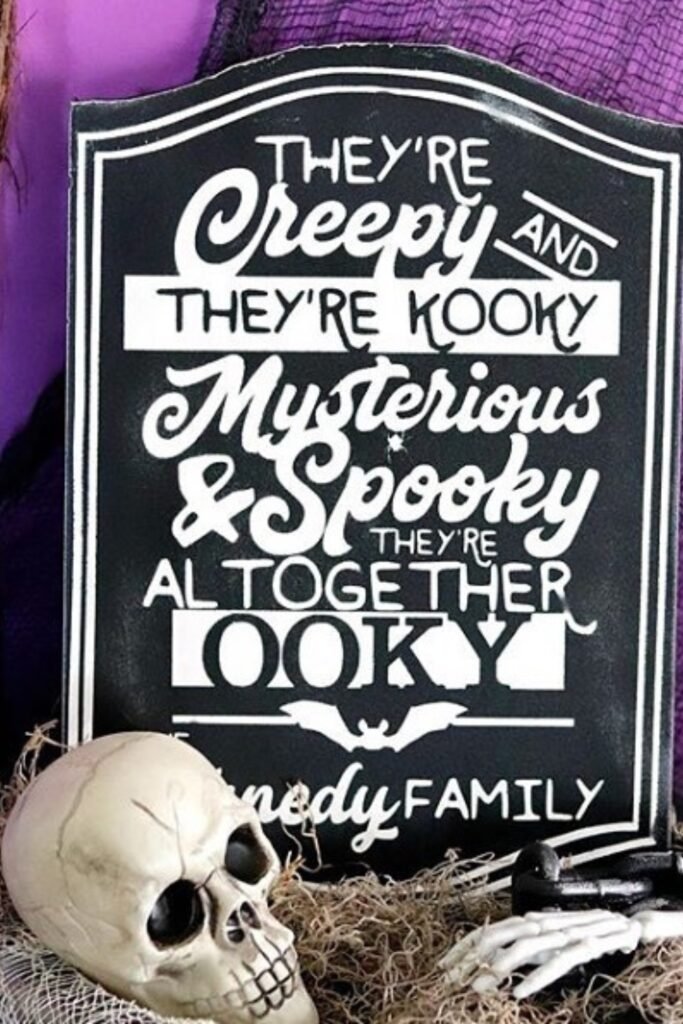
Personalize a Spooky Sign
A custom sign sets the tone for your Halloween display right away.
You can paint a wooden board or use an old picture frame, then stencil a spooky phrase or your family name to make it yours.
Put it on your porch with a broom, skull, or chains around the bottom for extra flair.
This works best at your front door where people see it first; it makes your whole setup look planned rather than thrown together.
Hang a Floating Ghost
Nothing catches the eye like a ghost floating in midair. To make one, drape cheesecloth over a balloon or foam head.
Spray it with fabric stiffener so it keeps its shape. Add felt eyes and paint a banner by hand to give it some character.
Hang it with a fishing line near your porch, doorway, or a tree branch so it moves with the breeze. At night, place a small LED light inside to make it glow and look spooky.

Dress Up the Front Door
Your entryway creates the first impression, so adding a few simple pieces makes it feel complete.
Start with a bold door sign like a skull and crossbones inside a metal hoop and add lightweight banners such as bats or paper streamers to frame the space.
Use command hooks to secure everything so it stays renter-friendly and easy to remove. This works best on front doors where you want to give guests a warning before they even step inside..

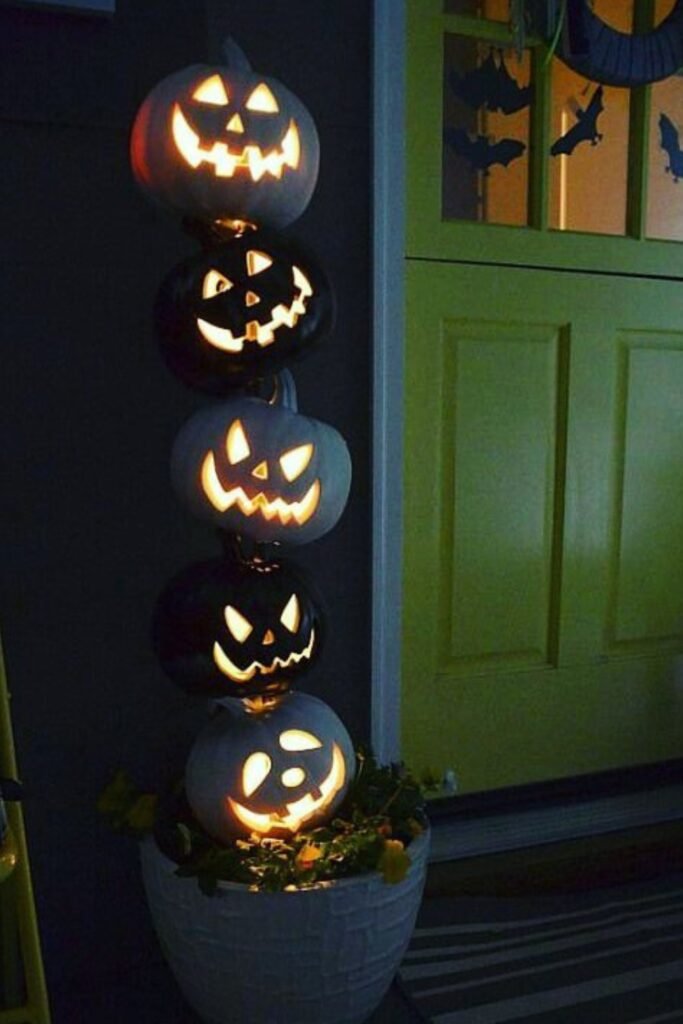
Stack a Pumpkin Totem
If you want a tall decoration that stands out without much hassle, stack foam pumpkins in a planter to make a glowing tower.
Carve different faces on each pumpkin, place battery-powered lights inside, and secure them with a wooden dowel or a sturdy pipe running through the middle to keep them steady.
This setup works best near the front door or on the porch, where the height grabs attention. It is easy to reuse them; just store the pumpkins flat once Halloween is over.
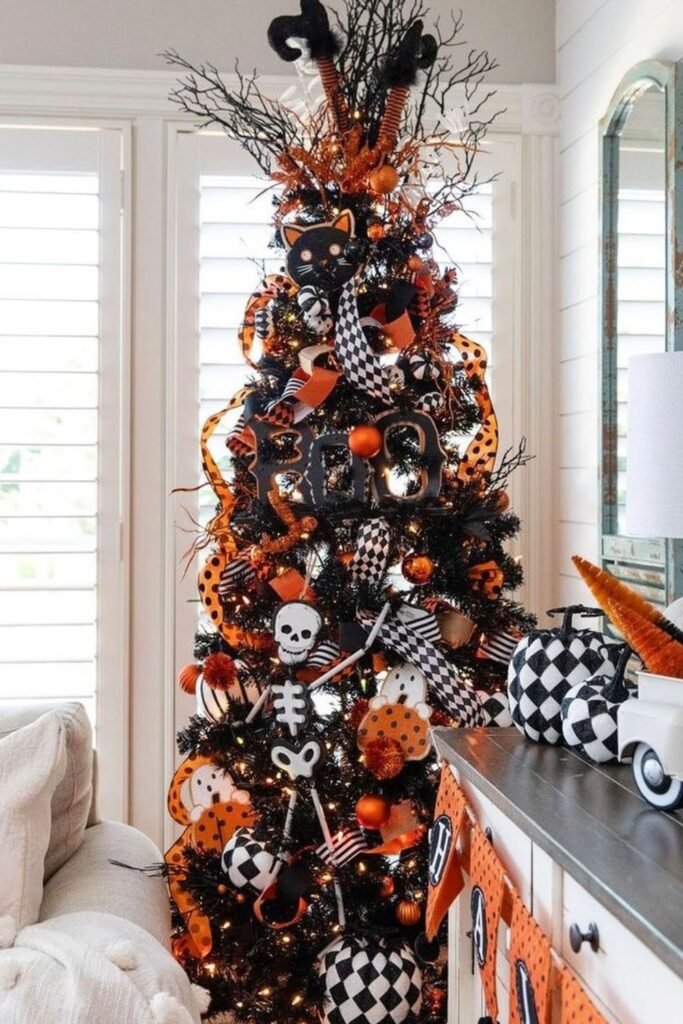
Turn a Tree into Halloween Decor
Keep your Christmas tree up and transform it into a spooky Halloween display.
Replace the Christmas ornaments with orange and black decorations like ribbons, skeleton cutouts, and decorated pumpkins.
String up warm white or orange lights to make those Halloween colors shine.
This trick works perfectly in your living room or entrance hall where people will notice it right away, and you get an eye-catching Halloween setup without spending money on new furniture or decorations.
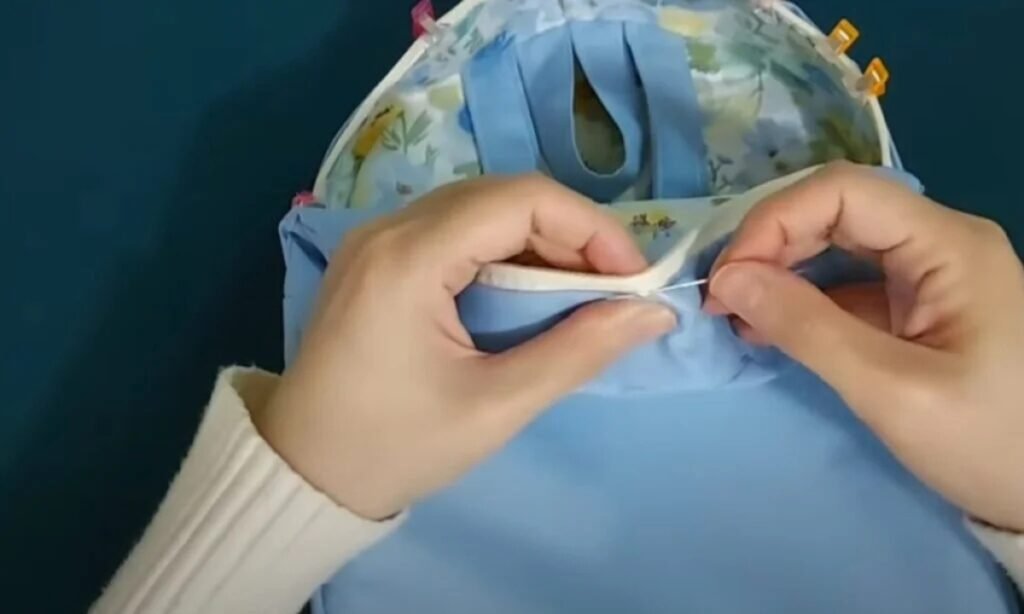
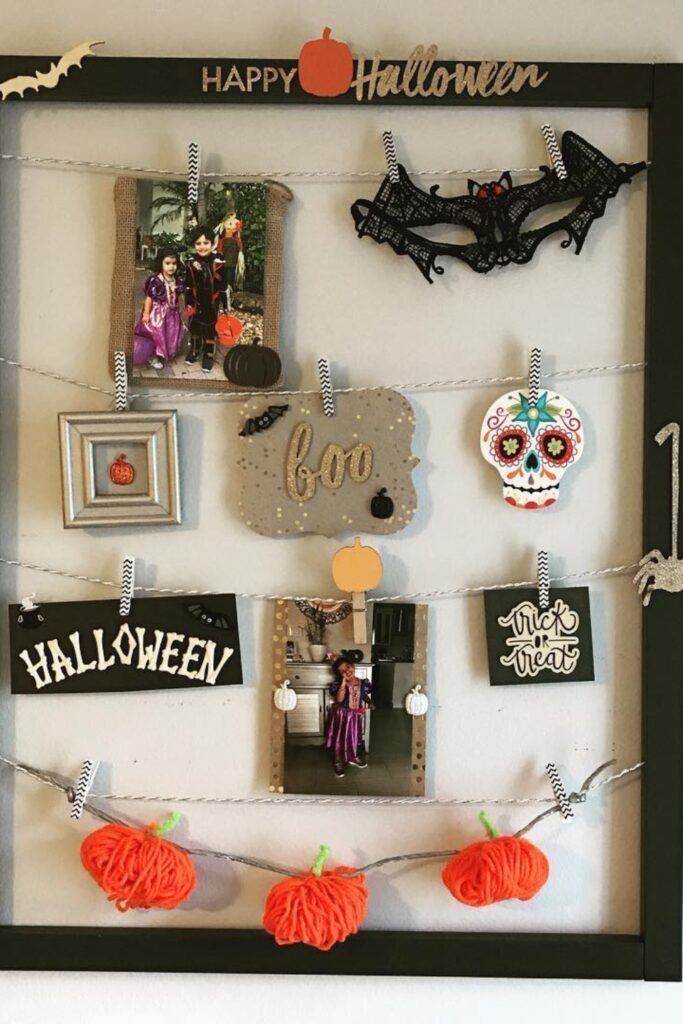
Make a Halloween Memory Board
Want a décor that feels truly yours? Transform an old picture frame into a hanging memory board.
String twine or yarn across the frame and clip on photos, Halloween cards, or small paper cutouts with mini clothespins.
Add yarn pumpkins, bats, or spiders to make it festive. This display works perfectly indoors on a hallway wall or above a console table.
You get a great way to show off family costumes while keeping everything fun and decorative.
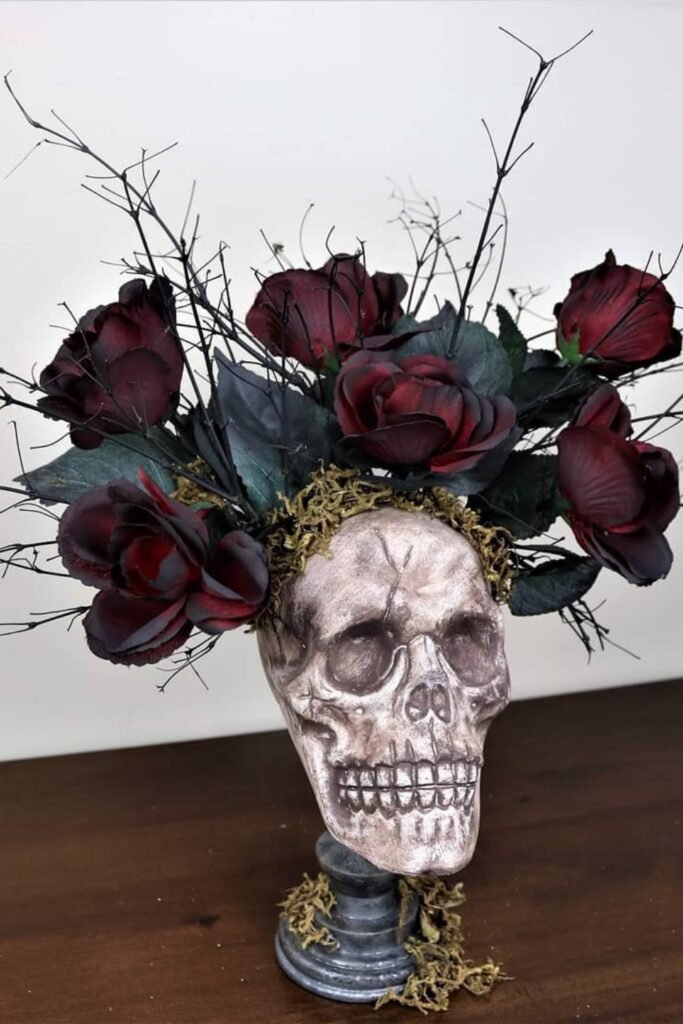
Create a Skull Vase Centerpiece
Turn a simple plastic skull into a dramatic Halloween vase with a few easy steps.
Cut a hole in the top, place floral foam inside, and arrange dark fake roses or branches to create a gothic look.
Add moss around the base to give it an aged and spooky feel.
This makes a perfect centerpiece for your dining table or a striking decoration for your mantel. The mix of flowers and bones will instantly give your room a haunted vibe.
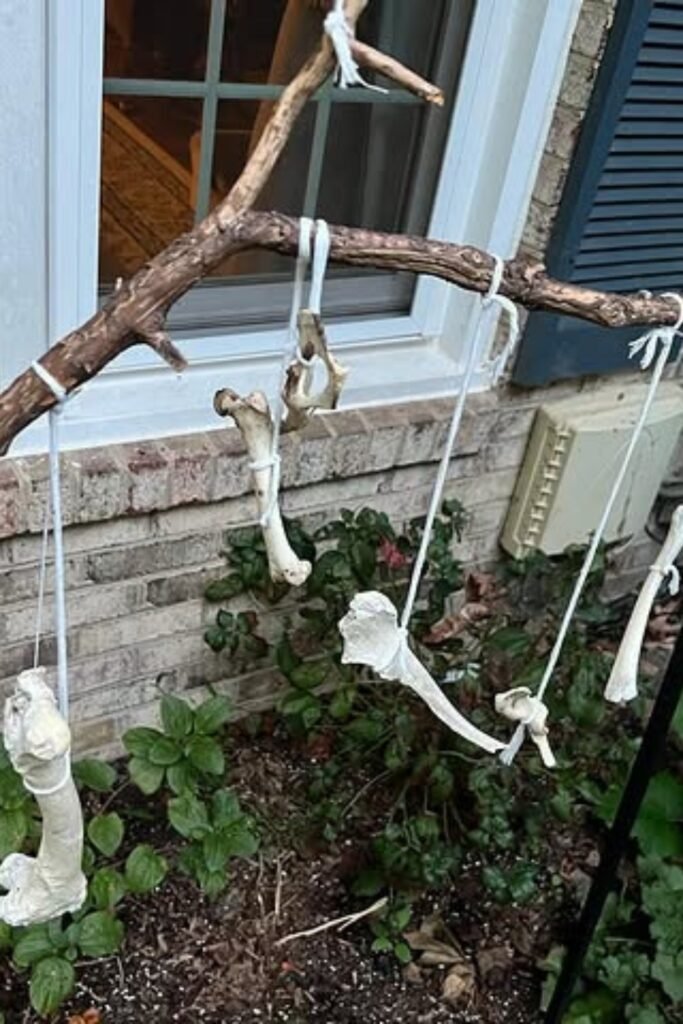
Hang a Bone Wind Chime
For an outdoor decoration that moves with the wind, tie lightweight plastic bones to a sturdy tree branch using twine or rope.
Space them out so they hit each other and make a spooky clattering sound whenever the wind blows.
Hanging it by a window, porch, or garden hook where people walk by it adds a creepy and surprising touch without needing lights or electronics.
To make it even better, spray-paint the bones to look old and weathered.
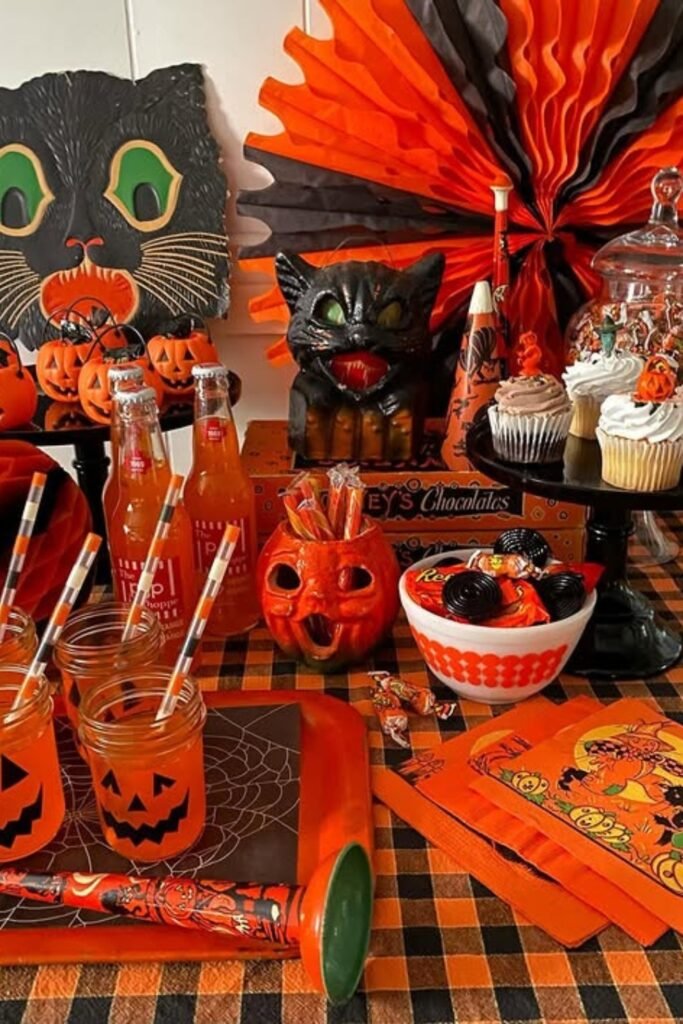
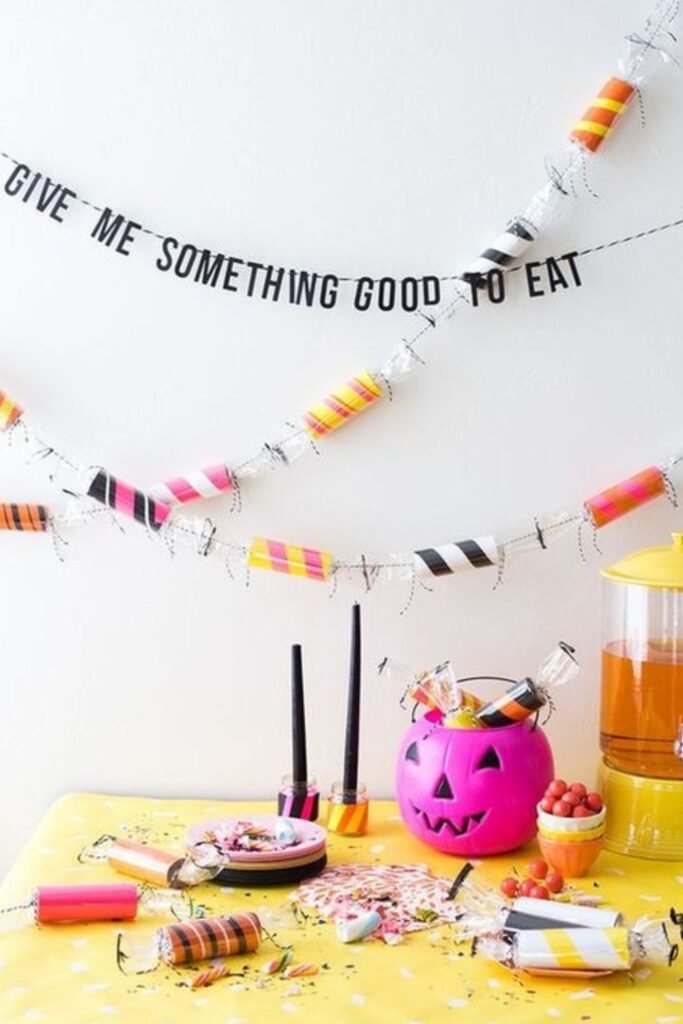
Set Up a Vintage Candy Table
Turn your snack station into a Halloween display by combining classic decorations with themed treats.
Start with a checkered tablecloth as the base. Add paper cats, jack-o’-lantern bowls, and black-and-orange accents to set the mood.
Use mason jars with pumpkin faces as drink cups, and place cupcakes or candy on small cake stands to add height.
This setup is perfect for parties or trick-or-treat night. It looks festive and doubles as décor while guests enjoy their sweets.
Make Candy Garland Decor
Turn your party wall into something fun with a garland that looks like giant candy. Take cardboard tubes and wrap them in striped paper.
Twist clear cellophane around the ends to create that candy wrapper look. String these fake candies along twine for a sweet, playful touch.
Add a simple phrase banner to complete your backdrop. This decoration works great above your snack table or drink station where people naturally gather.
You will make your setup look cheerful right away, and it serves as both decoration and conversation starter without breaking your budget.
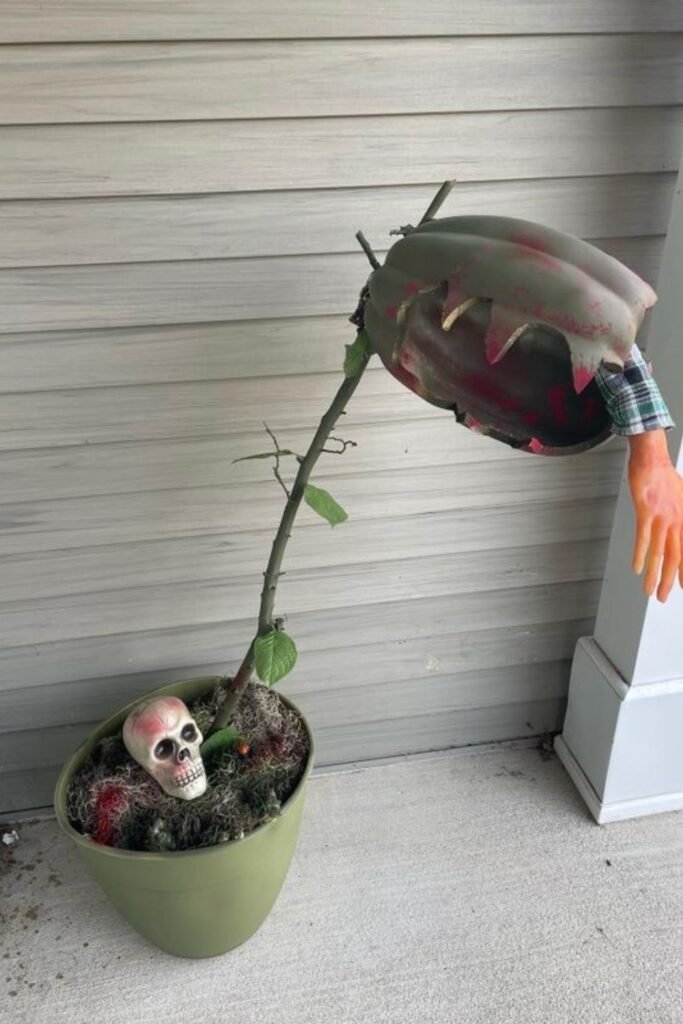
Build a Man-Eating Plant Prop
For a creepy porch decoration, turn a planter into a “killer plant.” Use a large plastic bowl or a papier-mâché form for the head.
Cut jagged teeth around the edge and paint it red and green to give it a gory look.
Attach the head to a wooden stick or a PVC pipe, and add fake leaves to make it look like a stem. Place moss and a skull at the base for an extra spooky touch.
This works best on porches or patios where it can surprise visitors as they walk by.
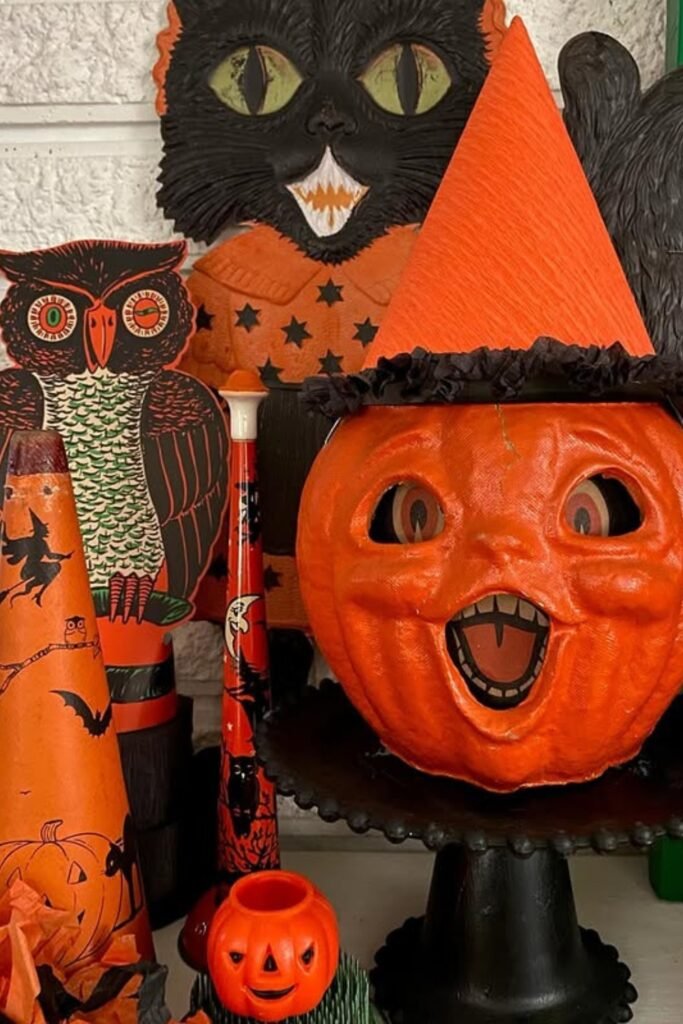
Style with Vintage Halloween Decor
Want to add some nostalgic charm to your Halloween setup? Mix in vintage-style pieces like classic owls, black cats, and cheerful jack-o’-lanterns.
Take a pumpkin with a witch hat and put it on a cake stand to create your centerpiece. Then arrange flat cutouts behind it to add layers and depth.
This arrangement works perfectly on mantels, shelves, or side tables where you can group several small decorations together.
You will instantly transform your space with that timeless Halloween feel without depending on today’s plastic decorations.
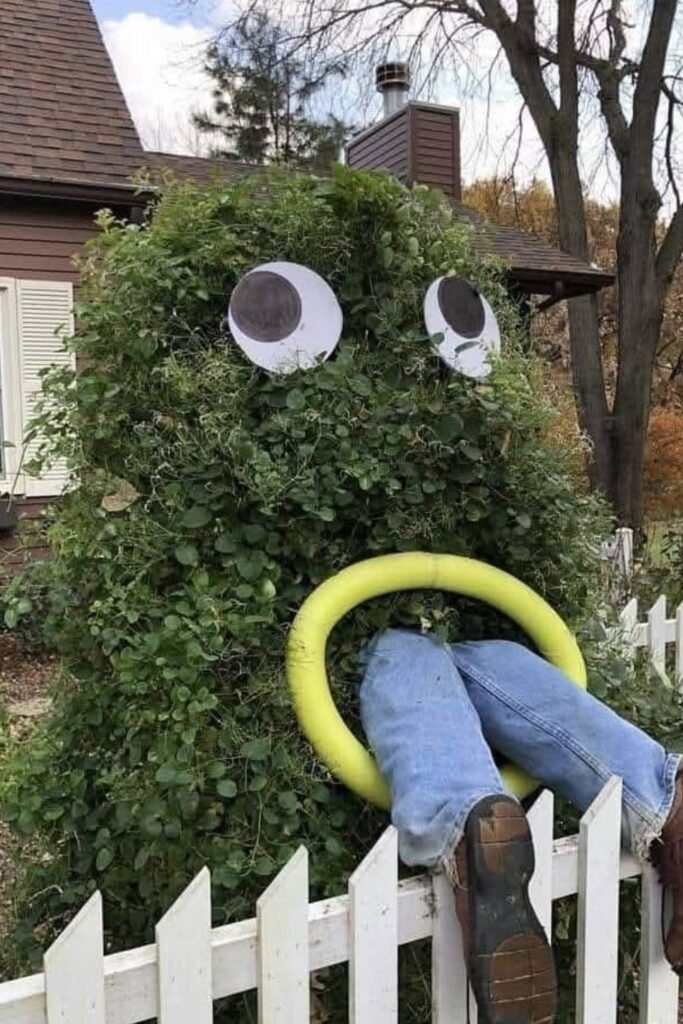
Turn a Bush into a Monster
Transform your large bush into a hungry monster that will grab everyone’s attention. Cut two big circles from cardboard or foam board and paint them to look like eyes.
Attach these eyes to the top of your shrub. Next, add a pool noodle or flexible tubing to create the monster’s mouth.
Stuff an old pair of jeans with shoes inside to make it look like your monster just devoured someone.
This decoration works best when you place it along fences or in front yards where people walking by can easily see it from the street.
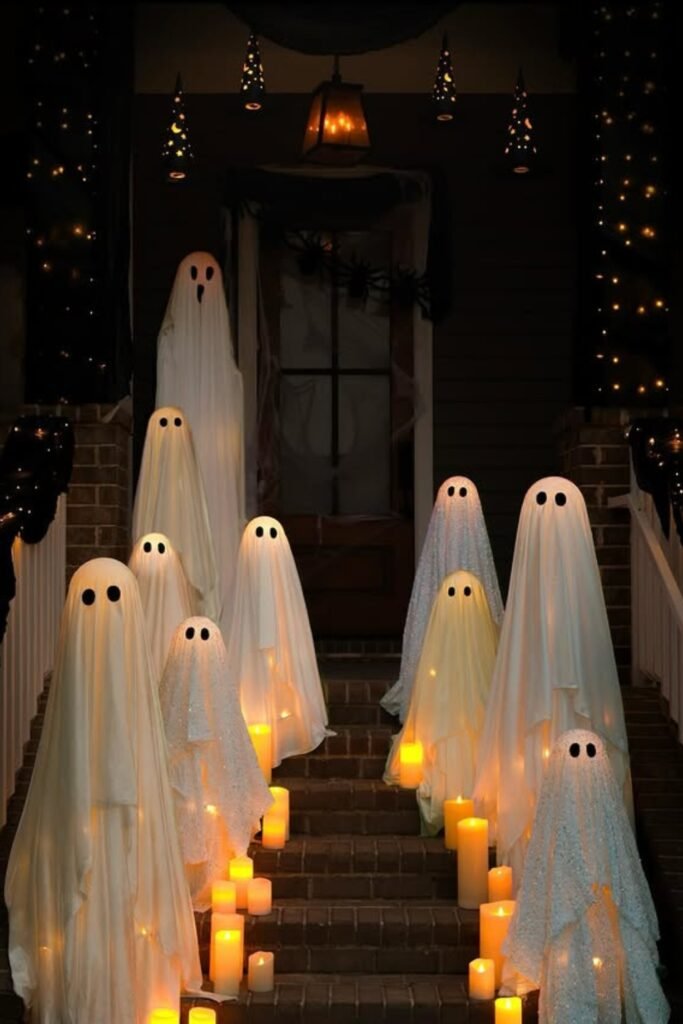
Line the Steps with Glowing Ghosts
Turn your porch into a haunted walkway by placing glowing ghost figures along your stairs. Take white sheets and drape them over foam heads or tomato cages.
Cut out black felt eyes and stick them on. Put LED candles underneath each ghost to make them glow in the dark.
Set up multiple ghosts at different heights to create a crowd of spirits. Place extra candles along the steps for a more spooky atmosphere.
This works best when you have a porch or entrance with stairs your guests will feel like they are walking right into a gathering of ghosts.
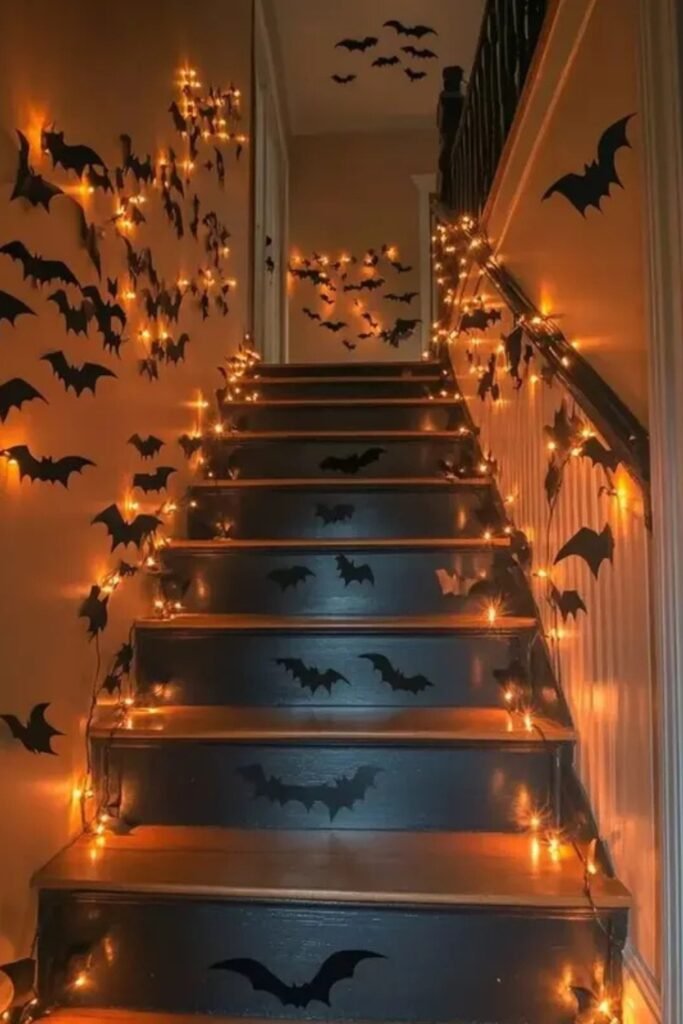
Create a Bat-Filled Stairway
Turn your staircase into a spooky passage by filling the walls with paper bats. Cut out bats from black cardstock or construction paper in different sizes.
Use painter’s tape to stick them on the wall so you can remove them easily later. String orange lights along the handrail and stair edges to make the bats pop in the darkness.
This idea works perfectly for indoor hallways or staircases; it costs very little, works great for renters, and creates an exciting surprise when guests walk up the stairs.
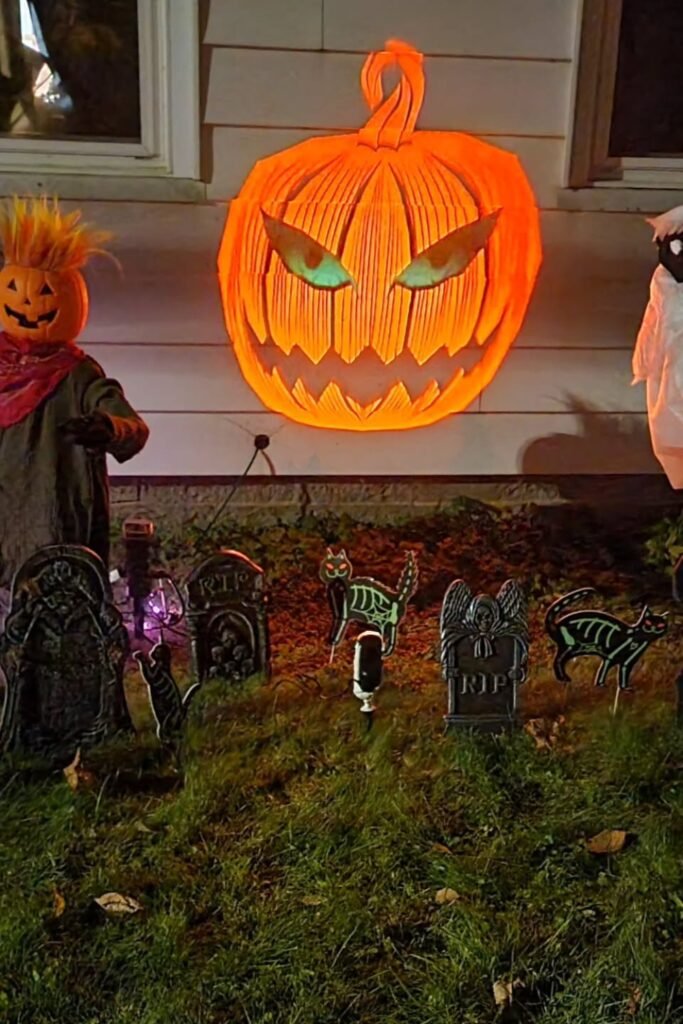
Build a DIY Graveyard Scene
Turn your front yard into a small haunted graveyard using a mix of tombstones, figures, and a bright backdrop.
You can stake foam tombstones into the ground and add props like a pumpkin-headed scarecrow or a floating ghost to create movement.
For a big effect, hang a giant, lit-up jack-o’-lantern on a wall or fence behind everything. .
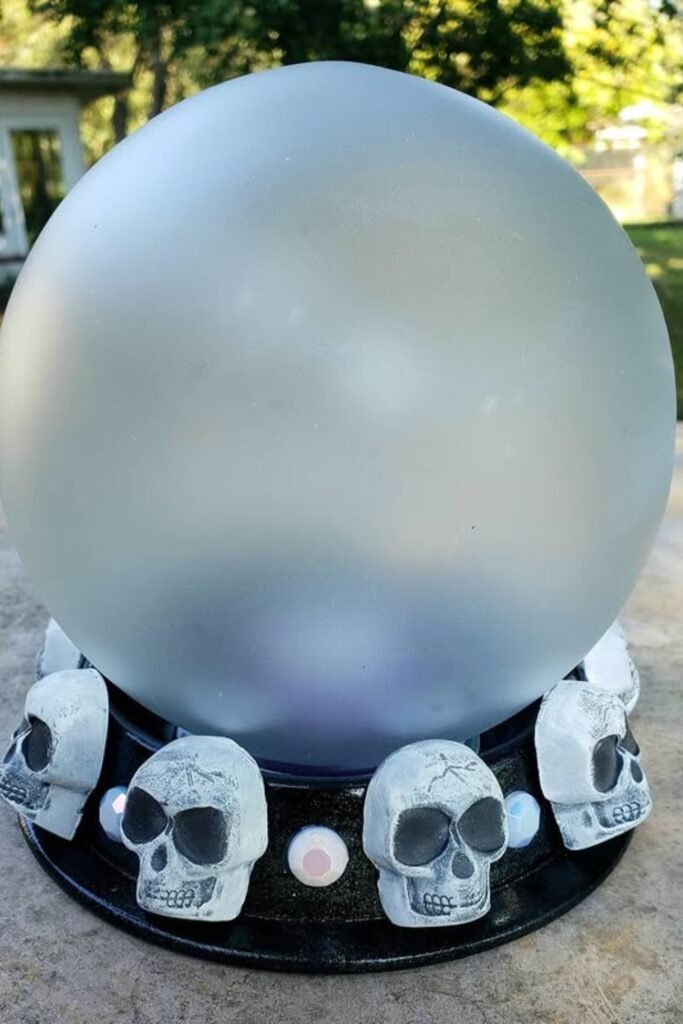
Make a DIY Crystal Ball
You can create a mystical vibe with a glowing crystal ball that looks like it came from a fortune teller’s tent.
Set a frosted glass light globe on a black base, then glue small skulls or jewels around the bottom for decoration.
To make it glow, put a battery-powered puck light or a color-changing LED inside the base.
This project is perfect for an entry table or as a centerpiece for a party. It grabs attention, is simple to make, and creates a spooky mood without costing a lot.
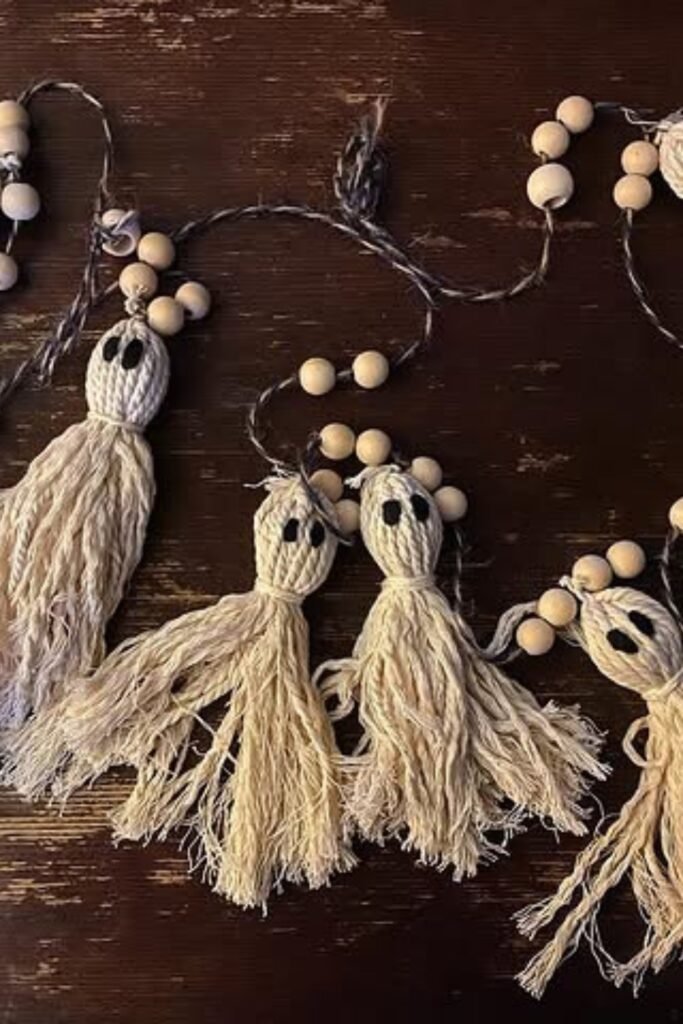
String a Ghost Garland
Add a handmade touch with a garland of tiny ghosts made from yarn or twine. Wrap the strands to create tassels, tie off the tops, and draw small black eyes to make them come alive.
Thread wooden beads between each ghost to add weight and style to your garland. Hang this across your mantel, doorway, or staircase railing.
The lightweight design works perfectly for renters and creates a fun Halloween mood without scaring young children.
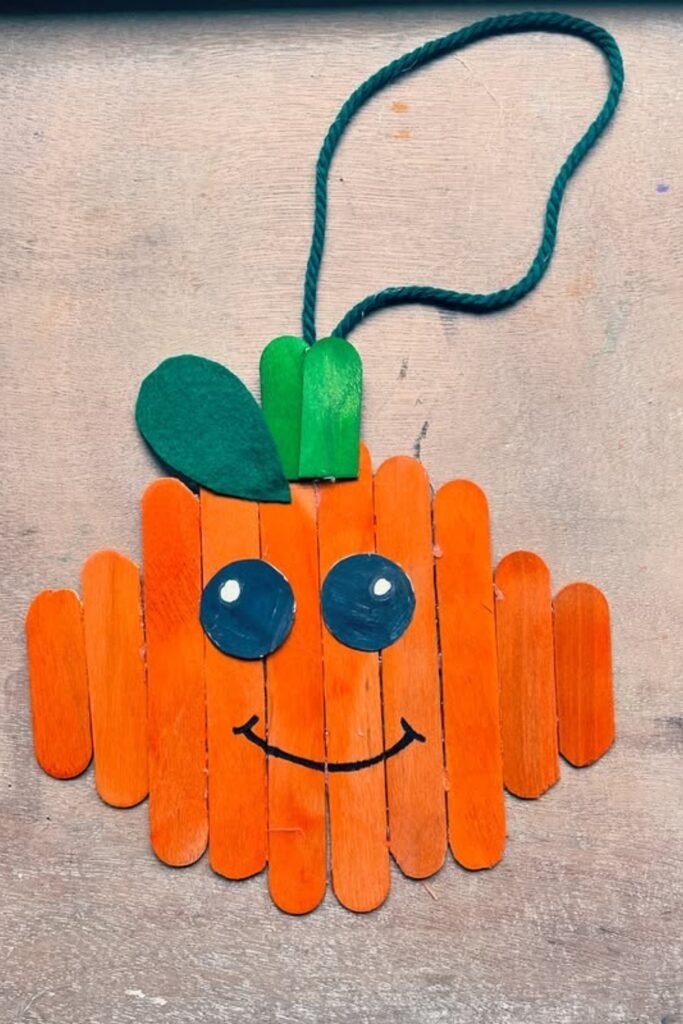
Craft a Popsicle Stick Pumpkin
This project works great for kids’ crafts or simple wall decorations.
Line up orange-painted popsicle sticks, glue them together side by side, and attach a green stem with a felt leaf at the top.
Paint on big cartoon eyes and a smile to keep it friendly rather than scary.
Glue yarn at the top so you can hang it on your wall, fridge, or classroom bulletin board. You can make this quickly on a tight budget, and kids love helping with every step.
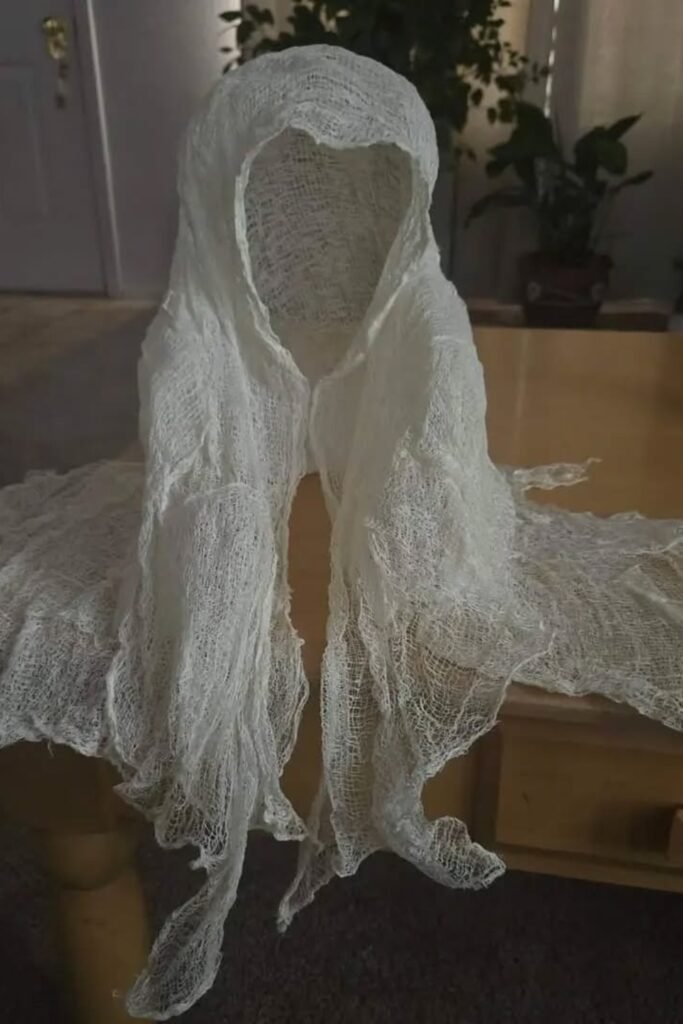
Shape a Cheesecloth Ghost
You can make a ghost that stands on its own with just cheesecloth and fabric stiffener.
Drape the cloth over a balloon or foam head that you place on a bottle, then spray it so it hardens when it dries.
Once you remove the frame, you have a hollow ghost that looks like it floats in place.
This works best on coffee tables, mantels, or porches add a small LED underneath to create an eerie nighttime glow.
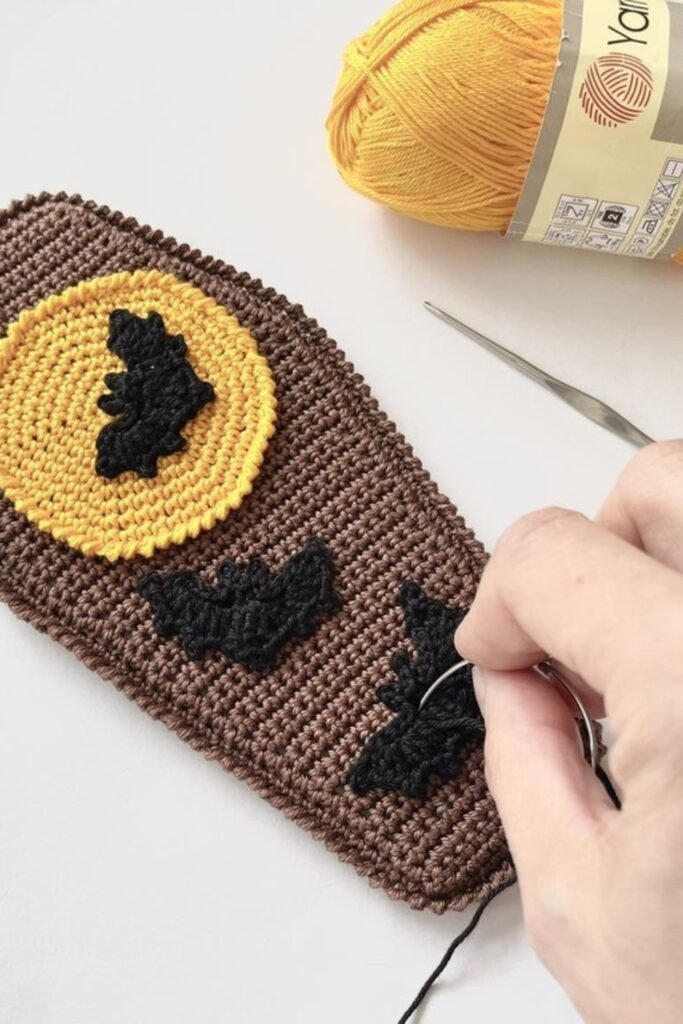
Crochet a Halloween Patch
For a handmade touch, crochet a simple patch shaped like a coffin or rectangle and add Halloween designs like bats or moons.
Use basic stitches with yarn in brown, yellow, and black to get the look, then sew or glue the pieces together.
You can turn it into a wall hanging, coaster, or even attach it to a tote bag for a seasonal touch. This works best as an indoor accent where you want something subtle yet creative.
FAQs
How can I make DIY Halloween decorations last outside in bad weather?
If you decorate outdoors, always choose strong materials like plastic pumpkins, foam boards, or sealed wood.
Spray your decorations with a clear waterproof sealer to protect them from rain, and secure lightweight props with stakes, sandbags, or zip ties so wind does not knock them over.
Battery-powered LED candles work better than real ones and keep glowing even when the weather gets damp..
What are some renter-friendly Halloween decoration ideas?
If you cannot drill or nail, focus on lightweight decorations you can hang with command hooks, string, or painter’s tape.
Paper bats on walls, ghost garlands, window clings, and door signs are all safe options for renters.
Battery-operated lights work perfectly since you do not need to run cords across the floor. Everything goes up fast and comes down without leaving damage.
You may also like to read!
- 30 DIY Beetlejuice Decoration Ideas for 2025
- 20 Pumpkin Archway DIY to Stand Out Your Halloween!
- 36 DIY Western Party Decorations for 2025

Hi, my name is Ali Mehmood! I’m a passionate writer and DIY enthusiast who loves turning creative ideas into practical, hands-on projects.
I created this website to share inspiring, budget-friendly ideas that you can do yourself – whether it’s organizing your home, crafting something unique, or creating fun projects for kids and pets.
I believe DIY isn’t just a hobby – it’s a smart way to save money, reduce waste, and enjoy the satisfaction of making things with your own hands.
I’m excited to have you as part of this growing community, and I’ll continue bringing you helpful, realistic, and fun DIY ideas you can actually use.