
This post may contain affiliate links: read full affiliate disclosure.
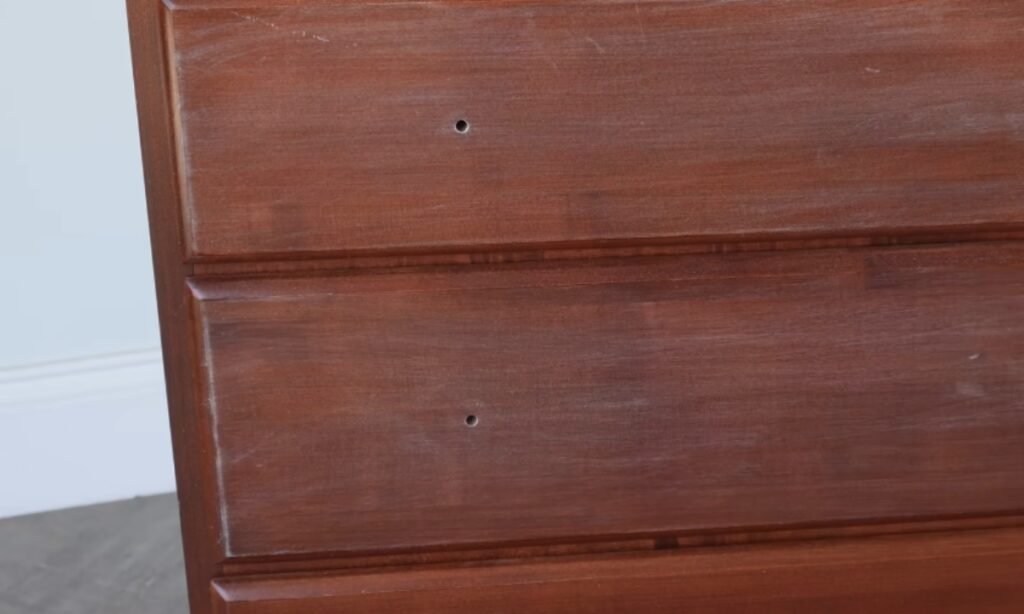
You have an old piece of furniture that is still in good shape, but it looks a little worn out. It might have scratches, faded color, or even peeling varnish.
It seems wasteful to throw it away, and buying a new one is expensive. Painting it seems like a great solution, but you might not know where to begin.
Should you sand it first? What kind of primer should you use? Why is the paint not sticking?
This article will show you how to do everything from preparing the surface to applying the final coat. By following these instructions, your old furniture will not only look great but also last for years to come.
Why Should You Paint Old Furniture Instead of Replacing It?
Buying new furniture can be expensive, and often the piece you already have is still in good shape, it just looks a little tired.
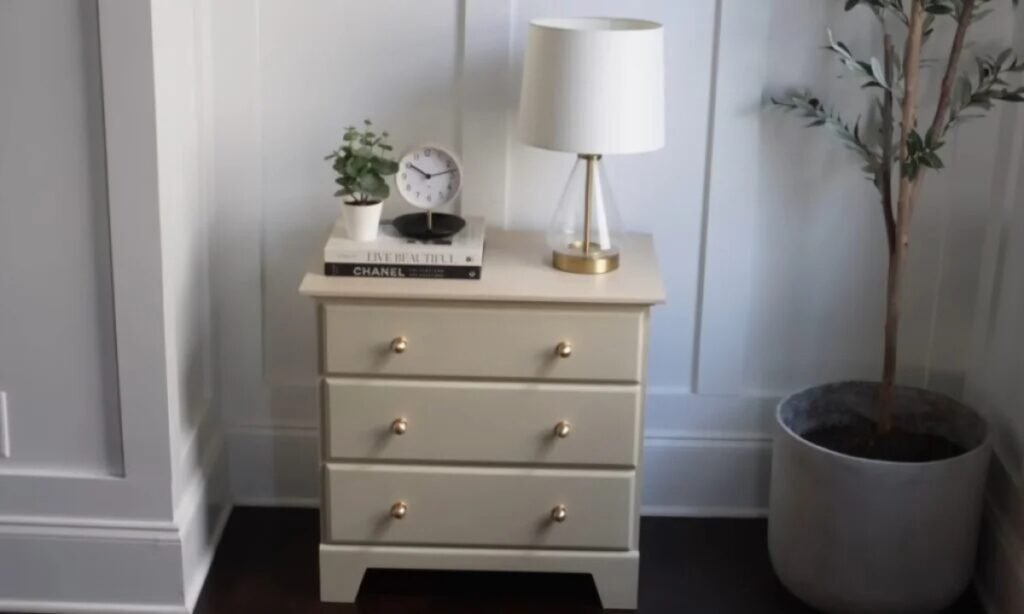
A solid wood dresser, chair, or table with scratches or fading can serve you for many more years with a fresh coat of paint.
Painting also gives you creative control: you can make it fit your current décor, experiment with new colors, or create a unique finish you cannot buy in a store.
Instead of paying a lot for something new, you can spend a little on supplies and transform what you own into an item that feels completely different.
This approach saves you money, lets you be creative, and is kinder to the planet.
Save this article for later
Step By Step Guide to Paint Old Furniture
Images are sourced from Christina Muscari YouTube Channel to help my readers visualize these steps. You can check out their channel for more inspiration and detailed guides.
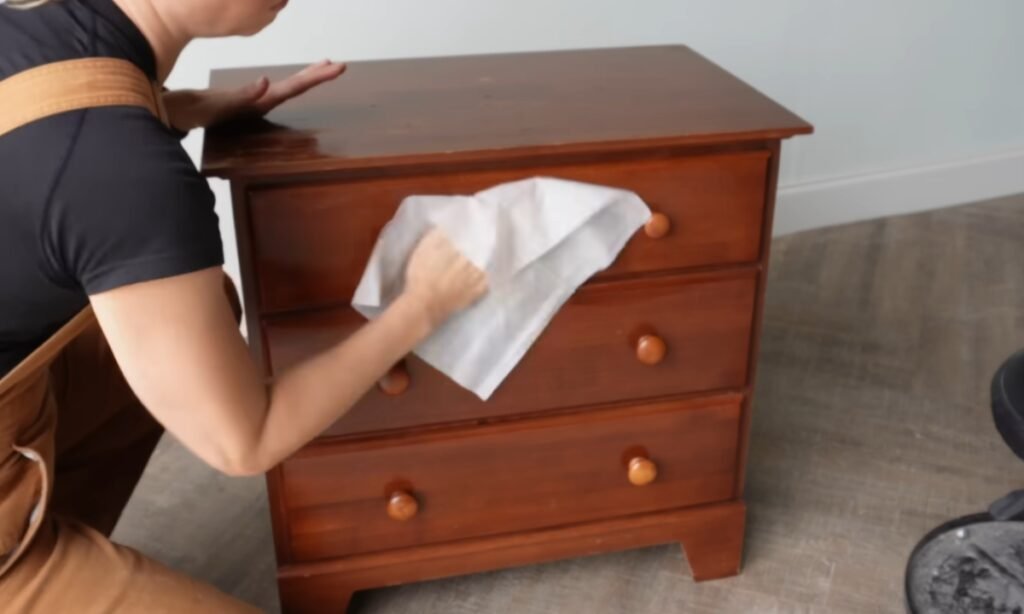
1. Clean the Furniture
First, you can give your furniture the very good cleaning. If you see any dust or grime, wipe it down with a cloth and a mild cleaner, such as Murphy’s Oil Soap mixed with water.
A clean surface helps the paint adhere correctly and makes the finish last longer.
2. Patch and Repair
Check the wood for any dents, holes, or knots. You can use wood filler to fix these spots, make sure you let it dry completely.
Taking this small step now will stop those flaws from showing through the paint later on.
3. Remove Hardware
First, remove any handles, knobs, or hinges from your furniture and put them in a safe place.
You will find it is much easier to paint when you do not have to work around the metal hardware.
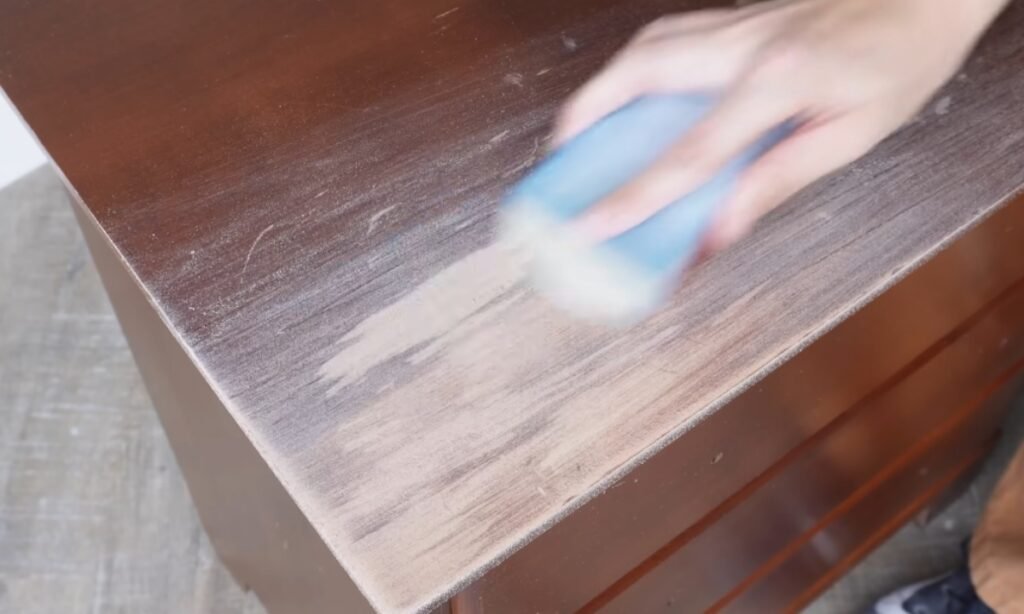
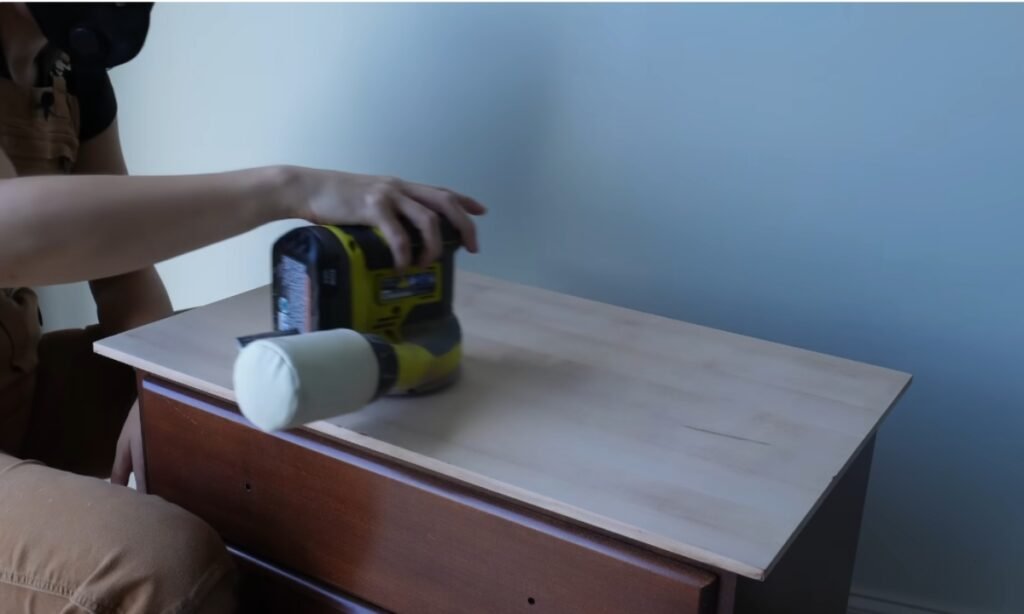
4. Sand the Surface
You can lightly sand the entire piece of furniture using a sanding sponge. Do not strip it completely, just rough it up enough so the paint sticks well.
For tight corners, use a sheet of sandpaper to get into those hard-to-reach spots.
5. Wipe Away Dust
Once you can finish sanding, you will need to remove all the dust. A tack cloth is your best option because it picks up even the smallest dust bits.
If you do not have one, a damp cloth will work too.

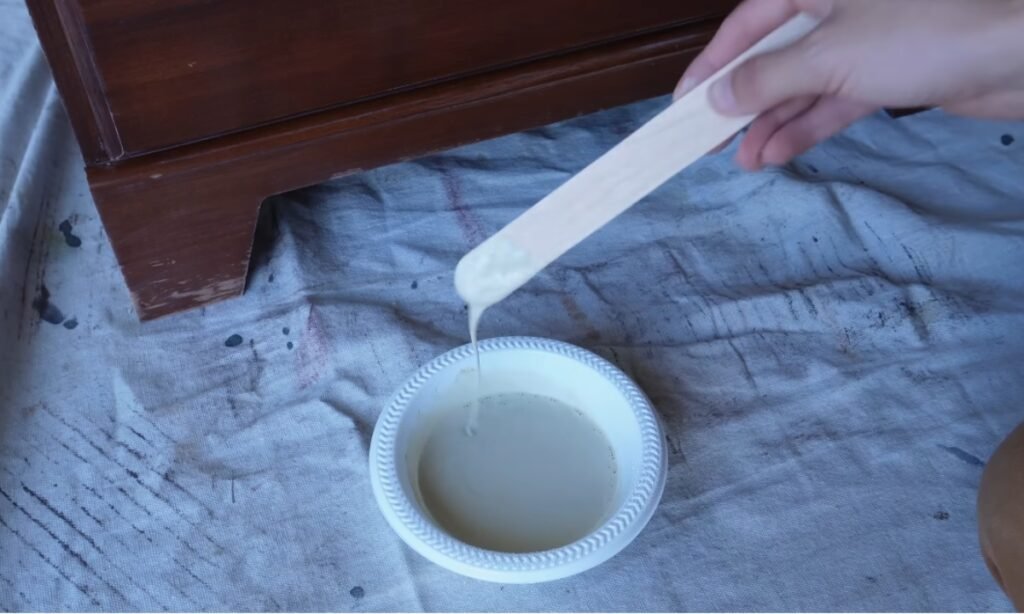
6. Apply Primer
Use a foam roller to cover large areas and an angled brush to reach corners. You can apply the thin coat of primer and let it dry completely.
The primer blocks stains and creates a smooth surface for the paint
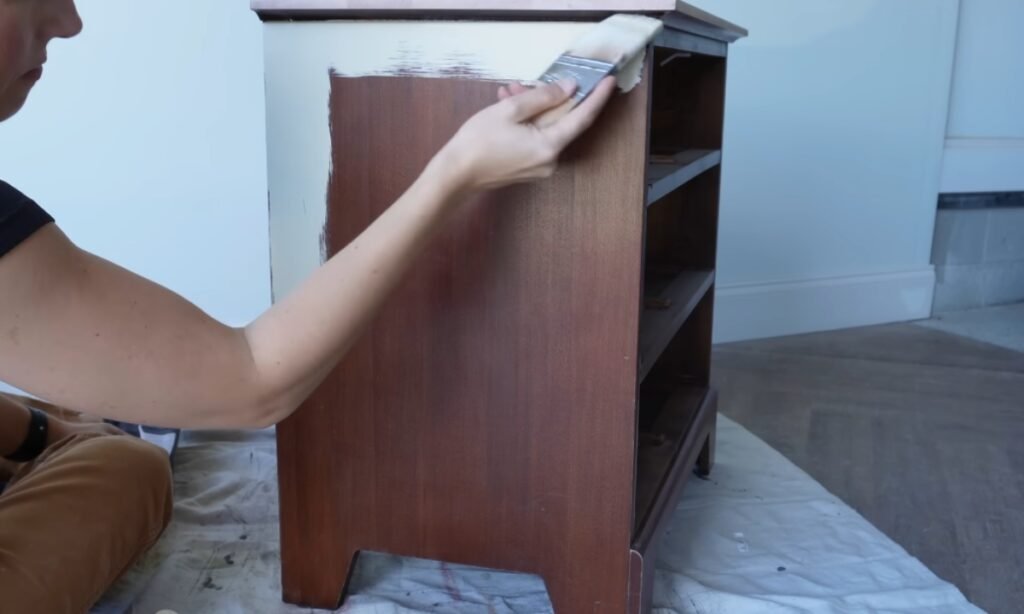
7. Paint in Thin Coats
You can roll on the thin, even layer of paint and brush into the crevices first. Do not worry if the first coat looks streaky, that is completely normal.
Apply a second coat, and if needed, a third coat, until the finish is smooth and even.
8. Protect with a Topcoat
After the paint was completely dry, you can seal it with a protective finish.
You can brush on a water-based polycrylic, or you can use a cloth to rub in paste wax.
Polish it until it shines, and then let it fully harden before you use your piece.

How Can You Get a Smooth, Professional Finish?
A smooth finish does not happen by chance, it depends on how you apply the paint. The first rule is to keep a wet edge.
This means you should not let one section dry before painting the next, or you will end up with visible lap marks.
Work on small sections and blend your strokes into the fresh paint as you go.
Next, you can lightly sand between coats using fine-grit sandpaper (around 320–400). This step can remove tiny bumps, dust, and brush marks, making each new layer smoother.
Be sure to wipe off the dust before moving on. Finally, choose the right tools. A high-quality synthetic brush is great for details, while a small foam roller works well for flat surfaces.
Both help the paint spread evenly. If you want a finish that looks like it was sprayed, you can use a sprayer. However, most people can achieve excellent results by combining a brush and roller.
What Mistakes Should You Avoid While Painting?
Your furniture paint project might fail if you miss the basic steps. If you do not clean and sand the surface, the paint cannot stick properly and will start peeling in a few weeks.
Another common error is picking the wrong primer. Different surfaces like stained wood, laminate, or old varnish need a specific primer.
If you choose incorrectly, the old finish might bleed through or the new paint will flake off.
Many people also put too much paint on their brush. This leads to thick, uneven coats that are prone to drips and chips.
Using low-quality brushes or fuzzy rollers will only make it worse, creating streaks and unwanted texture instead of a smooth finish.
Rushing the process is another pitfall. If you do not allow each coat to dry completely, the paint will remain sticky.
Even when it feels dry to the touch, remember that paint needs more time to fully cure. If you start using the furniture too soon, the finish will scratch off easily.
Conclusion
You can giving old furniture a new coat of paint is not hard, but you need to follow the right steps. First, clean the piece well.
Then, sand the surface lightly. Use a good primer, and paint with thin, even layers of a strong paint. It is important to let it dry and cure fully.
Finally, add a protective topcoat to make your hard work last. When you avoid common slip-ups and stick to this simple method, you can transform a tired item into something new and stylish for a low cost.
FAQs
Do I always need to sand old furniture before painting?
Not always. If your surface is smooth and in good condition, you can just lightly sand it with fine-grit sandpaper.
This helps the new paint stick properly. You only need to do heavy sanding if the old paint is peeling, bubbling, or has other damage.
Why does my white paint turn yellow after a few months?
Yellowing happens when you seal white paint with an oil-based topcoat or when the furniture is exposed to heat and sunlight.
To prevent this, use a water-based topcoat that does not yellow, or skip the topcoat if your paint is strong enough to hold up on its own.
You may love to read!
- How to Build a Raised Garden Bed Step By Step
- Easy Peel and Stick Wallpaper Hack That Changes Your Walls Fast
- How to Make Friendship Bracelets At Home

Hi, my name is Ali Mehmood! I’m a passionate writer and DIY enthusiast who loves turning creative ideas into practical, hands-on projects.
I created this website to share inspiring, budget-friendly ideas that you can do yourself – whether it’s organizing your home, crafting something unique, or creating fun projects for kids and pets.
I believe DIY isn’t just a hobby – it’s a smart way to save money, reduce waste, and enjoy the satisfaction of making things with your own hands.
I’m excited to have you as part of this growing community, and I’ll continue bringing you helpful, realistic, and fun DIY ideas you can actually use.


