This post may contain affiliate links: read full affiliate disclosure.
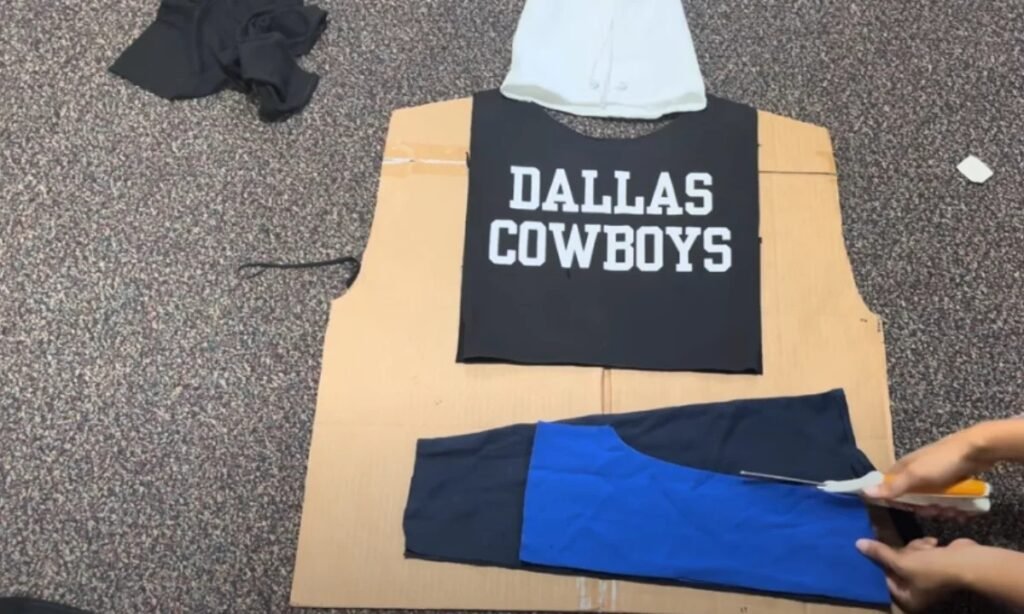
You take a pair of scissors, cut a shirt, and then you wish you hadn’t. The edges curl, the sides stretch, and what was supposed to be cool looks wrecked. That’s the true issue that no one talks about. It’s not hard to cut shirts; it’s hard to cut them well.
This article will show you a simple technique to make your own cut shirt designs at home.
You will learn where to cut, how to shape, and which fabrics work best so that your DIY designs look planned, not random.
Let’s make those old tees into something you want to wear again with some quick steps, smart tactics, and actual results.
How to DIY Cut a T-Shirt the Right Way?
Cutting a garment isn’t just about making random cuts; it’s about arranging the shape and flow. First, learn about the fabric. Cotton blends roll up nicely, whereas woven shirts could tear.
Cut along the lines you marked, and always test the stretch before you cut. Use fabric scissors, not paper scissors.
The key is to find a balance between style and comfort. For example, a neckline that looks good, sides that contour, and edges that keep clean even after washing.
With a little planning, you can turn a simple tee into a custom-fit design that seems like it came from a store.
Save this article for later!

How to Design a Simple Shirt That Stands Out?
Knowing when to stop is what simplicity means, not being dull. If you cut a shirt with purpose, it might change the whole mood of it.
A diagonal hemline, a little cut in the back, or shoulder gaps that display just the appropriate amount of detail are all good options. Instead of over-styling, pay attention to proportion and location.
The styles that are easiest to wear are the ones that look easy but are actually very well thought out. Think of it as quiet creativity: not too loud for everyday use but different enough to feel like it’s yours.
Square-Neck Crop Cut
A tidy neckline makes any shirt you create yourself look instantly better. This cropped tank has a square-neck design that frames the collarbones and gives it a sophisticated, structural look.
It’s excellent for stretchy cotton t-shirts since they keep their shape after being cut. To make it again, trace a box-shaped neckline before cutting it out. Then fold and press the sides to make them sharp.
It works great for summer outfits that are more relaxed or for wearing under open shirts.

Graphic Sweatshirt Upgrade
Iron-on vinyl or cut fabric decorations are the first step in making a simple sweatshirt look dramatic.
This DIY project employs bright shapes and fun patterns to give a plain pullover a new look without stitching. It works well on sweatshirts made of cotton or fleece since the vinyl sticks well to them.
Use a cutting machine or cut out stencils by hand, then heat them to make designs that last. It’s the perfect craft for creative, cozy weekends or one-of-a-kind gifts.

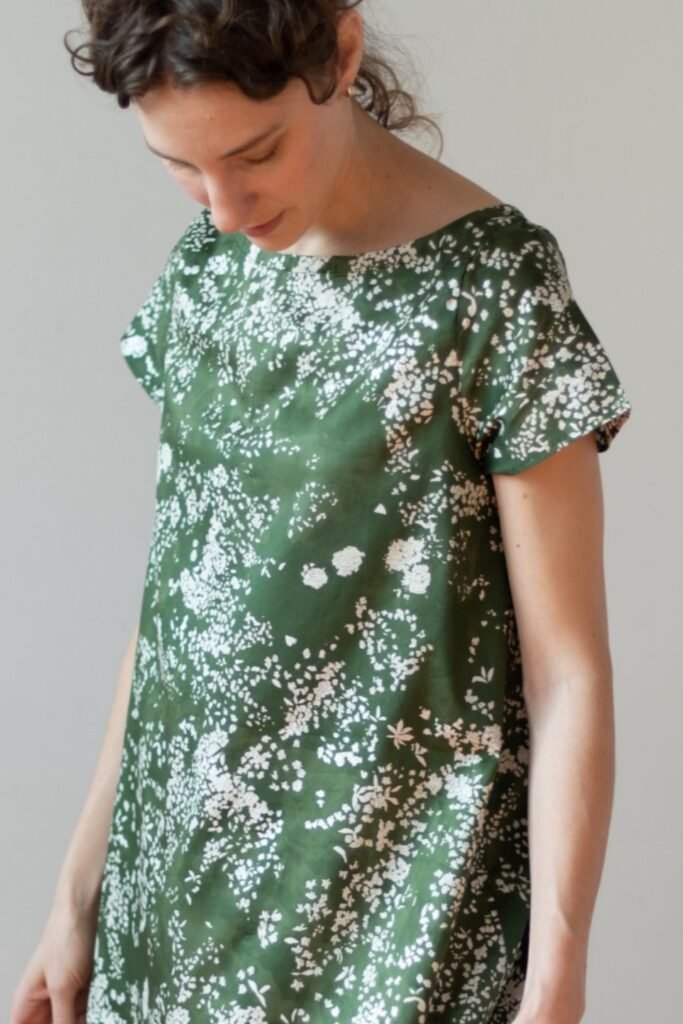
Loose Botanical Cut Tee
This DIY puts comfort first. The loose design and boat neckline make the fabric drape softly, which looks good on everyone.
For a fit that lets air flow in and out, wear an oversized shirt and cut the neckline broader. The botanical print is cute and suitable for informal brunches or art fairs.
Choose a light cotton fabric and finish the edges with a small fold or fabric glue to give it a clean, hand-made look.
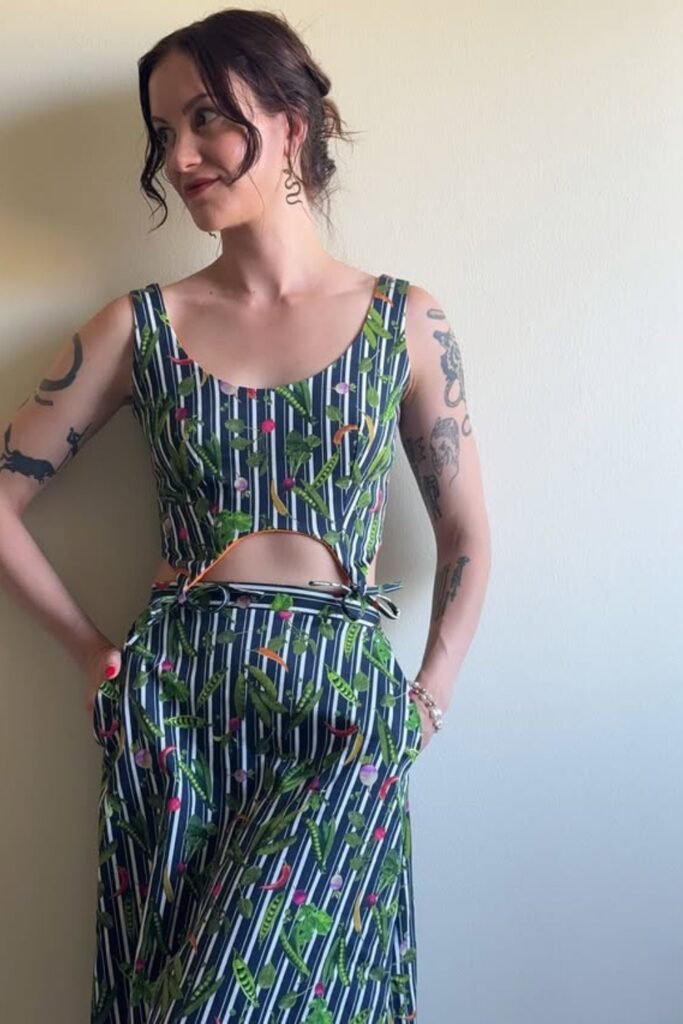
Cut-Out Waist Detail
This DIY turns a simple dress into a statement piece with a cut-out in the middle of the waist that gives it shape and edge right away.
It’s excellent for dresses with a tight bodice. Just mark the center, cut carefully, then finish the edges with bias tape or stitching.
To manage fit and style, add side ties or loops. This design is great for summer gatherings because it shows off curves while keeping the look fun and up-to-date.
Cropped Sweatshirt Cut
A quick cut may make an old sweater look brand new. This DIY has a straight front crop that hits just above the waist, which is great for supporting high-rise jeans or skirts.
Mark your cut with fabric chalk, then cut it with sharp scissors in one clear line.
If you want a rough edge look, don’t stitch it. If you want a nicer finish, fold and hem it. It’s a quick cure for the weekend that gives you form without making you uncomfortable.

Color-Block Panel DIY
This bright, big shirt is made by sewing a striped front piece onto a solid basis.
To make this look, cut the front off of an old striped tee and sew or glue it on an enormous shirt that is a different color.
The loose fit makes it easy to cover seams, which is perfect for novices. It’s a fun way to use up old tees that don’t match and make a bright, color-blocked top that seems like it was made by an artist.

Striped Long-Sleeve Crop
With a tiny front crop and cuffed sleeves, this design offers a classic striped tee a fresh twist.
It’s great for giving fitted long-sleeves that are too simple a new look. To make it again, cut the hemline slightly above the waist and fold the sleeves in half twice to give them shape.
Works best with ribbed or stretch cotton fabrics that keep their shape. Wear it with loose pants for a casual-chic look that looks put-together but comfortable.

Tied Shoulder Cut-Outs
This DIY adds a flirtatious touch to any old tee by cutting out the shoulders and tying them with little knots.
Cut circular shapes along each shoulder seam to form it, then tie the edges loosely to get that relaxed, collected effect.
It’s a simple method to make graphic tees look like they’re ready for summer. Great for days at the beach or for putting over a vivid bralette for a fun, casual look.

Matching Shirt Set DIY
Make a matching beach set out of discarded shirts or extra fabric. This outfit is great for vacation because it has a button-down top and matching shorts.
To reproduce it, use a bold printed shirt -cut and make the bottom half into shorts, retaining the remainder as an open layering piece.
Add a bright inside tee to make it stand out. It’s a unique method to reuse things that combines comfort and color perfectly for sunny getaways.

Off-Shoulder Tie-Back Tee
This one-shoulder shape and tie-back design gives a plain sports tee a sophisticated touch.
To get that loose drape, start by cutting one neckline diagonally. Then, make small slits in the lower back and tie them into a nice knot. The end result is a top that fits well and is comfortable for everyone.
It’s a great DIY for game days or laid-back weekends when you want to look sporty but still feminine.
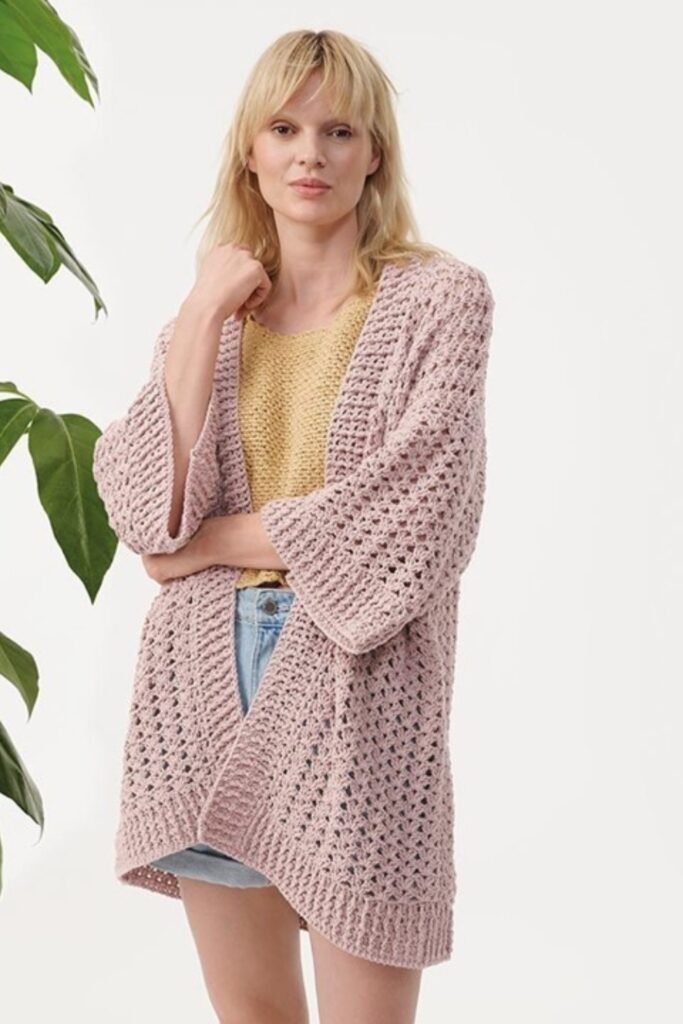
Crochet Cardigan Refashion
This cozy design is all about mixing different textures and using old knits in new ways.
If you have a big crochet blanket or a sweater with loose stitches, you may make it into a light cardigan by cutting a clean opening in the front and completing the edges with a simple stitch or bias trim.
For that easy bohemian look, wear it with denim shorts or skirts. This is a simple DIY project that looks and feels high-end and handmade. It’s perfect for spring and fall.
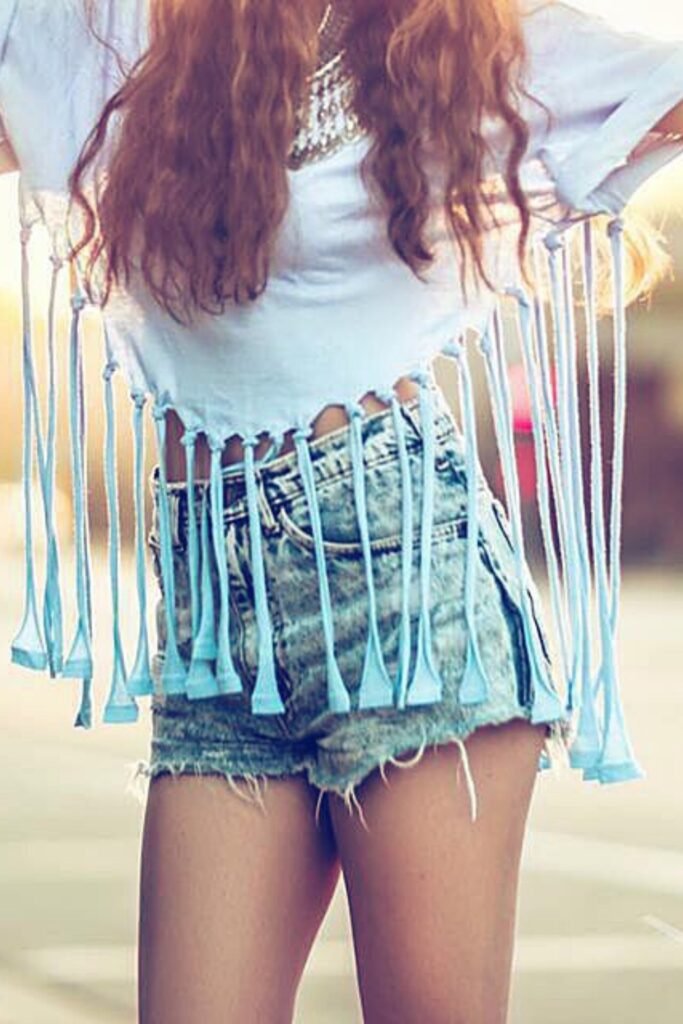
Fringe Hem Crop Tee
This DIY project is full of summer excitement. Cut your old t-shirt into a shorter length, then cut vertical pieces along the bottom to make long fringe strands.
Pull on each strip just a little bit to make the edges curl naturally. Add beads or knots to the ends for a festival-ready look.
It’s great for high-waisted shorts, beach days, or concerts. Just use a pair of scissors to make it simple, breezy, and boho.
Strappy Neckline Cut DIY
A crisscross neckline cut can make a plain tee look more stylish. This design employs thin pieces of cloth from the same shirt to make a built-in strap that goes around the collarbone.
Cut a small V shape at the neckline, then stitch or tie thin strips across it in an X shape.
It’s excellent for casual wear or group themes like bachelorette outfits, where style and comfort merge easily.

Halter Off-Shoulder Cut
This edgy DIY project gives an old band shirt a fresh look with a halter neckline and off-shoulder mix.
Cut a wide scoop around the collar, leaving a narrow strip in the middle to make the halter tie.
The end product is a nice blend of casual and bold that looks great on the shoulders. Wear it with ripped jeans for a rock-inspired, laid-back look.
Knotted Fringe Transformation
This shirt shows how rapid cuts may change a simple shirt into something new. Cut the hem into long vertical strips, then tie each pair together tightly to make a woven fringe pattern.
This is a five-minute DIY that makes simple tees look more interesting by adding movement and structure.
Works best on soft cotton clothes and looks fantastic with shorts or pants that sit high on the waist. Great for summer fun, dancing nights, or music festivals.

You may love to read!

Hi, my name is Ali Mehmood! I’m a passionate writer and DIY enthusiast who loves turning creative ideas into practical, hands-on projects.
I created this website to share inspiring, budget-friendly ideas that you can do yourself – whether it’s organizing your home, crafting something unique, or creating fun projects for kids and pets.
I believe DIY isn’t just a hobby – it’s a smart way to save money, reduce waste, and enjoy the satisfaction of making things with your own hands.
I’m excited to have you as part of this growing community, and I’ll continue bringing you helpful, realistic, and fun DIY ideas you can actually use.