
This post may contain affiliate links: read full affiliate disclosure.
Have you ever bought a hanging planter that did not fit your pot or felt too flimsy?
Or you tried following a macrame tutorial but ran out of cord halfway through and gave up in frustration.
But did you know that making your own macrame plant hanger is much simpler than it seems?
When you cut the cords to the right length and follow a few basic knots, you can avoid these problems completely.
In this article, I will take you through the process step by step so you can create a hanger that is strong, safe, and matches your style perfectly.
Let’s jump into it!
How Do You Keep Your Macrame Plant Hanger Even?
It is normal for one side of your hanger to look longer than the others, but the fix is easy.
The key is to tie your knots at the same height on each group of cords.
Then you have to pause after every few knots to check the length, and do not hesitate to slide knots up or down before tying the bottom.
Also, you should always test it with your pot in place. If it hangs evenly, you know your knots are in the right spot.
Save this article for later

What You’ll Need
- Macrame cord (about 4 mm thick)
- Wooden or metal ring
- Scissors
- Measuring tape
- Ceiling hook or wall bracket
- Optional: beads for decoration
Step By Step Guide to Make a Macrame Plant Hanger
Images are sourced from Marching North YouTube Channel to help my readers visualize these steps. You can check out their channel for more inspiration and detailed guides.
1. Thread the Cords
First, fold your cords in half and slide them through a wooden ring. Then pull the ends through so the cords are even.
Now you have to make sure the two longer cords are on the outer edges.
If you do it this way, it will give you a balanced base to start tying your knots.

2. Make a Spiral Knot Section
You have to use the two longer cords on the outside to tie half knots.
Always make sure you start from the same side, like a square knot, but without switching sides.
Now you have to keep tying in the same direction until you have made about 25 knots. This will create a twisted spiral pattern for the top of your plant hanger.

3. Tie a Wrapping Knot
Now, to secure the spiral, you can use a wrapping knot. Take a short piece of cord and form a “U” shape. Then you have to hold it against the bundle of cords.
You have to wrap the long end around the cords six times, then pass it through the loop.
Then you have to pull the short end up until it is hidden halfway under the wraps. You can trim any extra cord and tuck the ends neatly under the knot.

4. Add the First Row of Square Knots
You have to measure 12 inches down from your wrapping knot. Then you have to split the cords into groups of four and tie a square knot with each bundle.
Make sure you line up the knots evenly. You will have four knots that will form the first row.

5. Add the Second Row (Alternating Knots)
Now you have to move 3 inches below that first row. Then tie square knots with cords from neighboring groups.
This staggered row will connect the cords and start to shape the basket that will hold your plant pot.

6. Secure with a Bottom Wrapping Knot
You have to measure another 3 inches down and tie one more wrapping knot with your second short cord.
Then you have to wrap it six or seven times, tuck the end through the loop, and pull to secure it.
You can trim and hide the ends just like you did before.

7. Finish with Fringe
Cut your cords to the length you want below that bottom knot. Then you have to leave 5 – 6 inches for a great look.
You can keep the cords straight or pull them apart into soft fringe for a fuller finish.

8. Add Your Plant
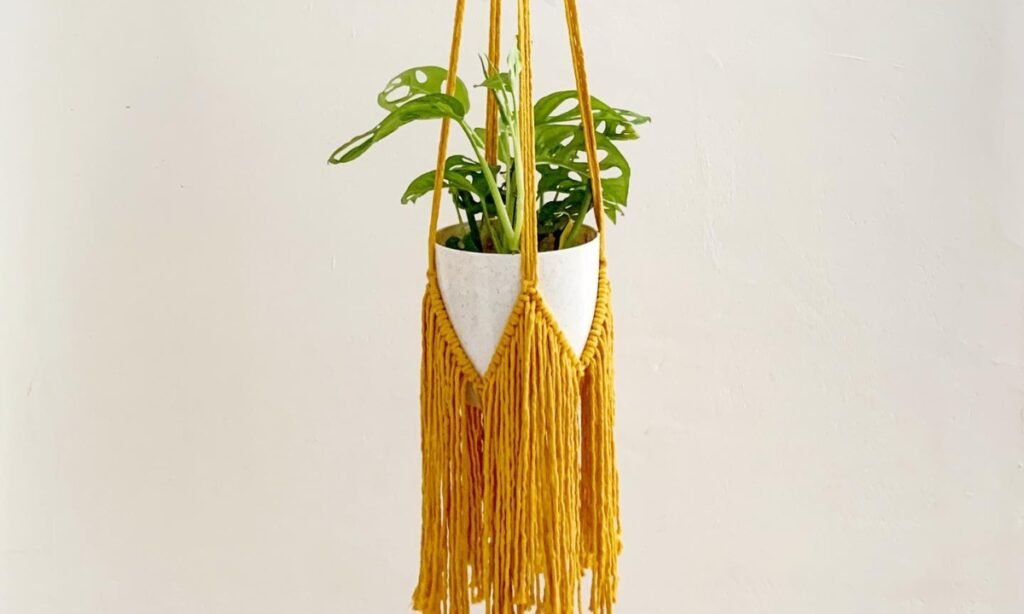
Now you can put your pot into the hanger. A 5–6-inch pot will work perfectly with this design.
Once you place it inside, you are done, your homemade macrame hanger is ready to hang!

What Should You Do If Something Goes Wrong?
Many people run out of cord, which can be frustrating, but you don’t have to start over. You can just tie a new piece with a square knot and hide the join within your design.
If your hanger looks uneven, you can adjust the knots by sliding them up or down before you finish the bottom knot.
You should always test it with the pot in place to make sure it hangs correctly.
If the knots are twisting, it usually means you only tied half of a square knot and need to retie them properly to create a straight band.
If the pot feels loose, you can add another row of knots under the widest part to secure it. For a messy tassel, you can comb it out and give it a neat trim.
Make It Your Own
Once you master the basic hanger, you can easily add your own personal touch. The easiest way is to change your cord color.
You can use two shades, for example, natural cotton with mustard or forest green, and alternate cords to make a gentle striped pattern.
You can also thread beads onto the strands before you tie your knots. Wooden beads can create a rustic, earthy feel, while glass or metal beads can give a modern look.
If you want more character in the design, you can replace one section of square knots with spiral knots.
You can create these by tying half of a square knot repeatedly, and they will produce a rope-like twist that will instantly change the style.
Do not forget the tassel at the bottom. You can leave it long for a dramatic, bohemian look, or trim it short to make the hanger appear clean and simple.
Conclusion
Making a macrame plant hanger is simple when you follow the proper steps.
With a few cords, some basic knots, and a little patience, you can create a hanger that is strong, stylish, and uniquely yours.
You do not need to be an expert to get started. You can begin with the basics, and with each project, you will see your skills improve.
So grab your cords, make your first hanger, and enjoy the satisfaction of seeing your macrame plant hanging in something you made with your own hands.
FAQs
Can I make a macrame plant hanger without a wooden ring?
Yes, you can. When you do not have a ring, you can tie all the cords together with a strong gathering knot and hang the knot directly on a hook.
The look will differ slightly, but it works just as well.
How do I stop my plant from dripping water onto the floor?
You can use a pot with a built-in saucer or place a small plastic tray inside the hanger under the pot.
You can also take the pot out, water it in the sink, and put it back once the excess water drains out.
You may also like to read!
- How to Make DIY Recessed Shelving Between Studs
- How to Make DIY Rolling Under Bed Storage
- How to Make a DIY Wire Pumpkin Wreath the Easy Way

Hi, my name is Ali Mehmood! I’m a passionate writer and DIY enthusiast who loves turning creative ideas into practical, hands-on projects.
I created this website to share inspiring, budget-friendly ideas that you can do yourself – whether it’s organizing your home, crafting something unique, or creating fun projects for kids and pets.
I believe DIY isn’t just a hobby – it’s a smart way to save money, reduce waste, and enjoy the satisfaction of making things with your own hands.
I’m excited to have you as part of this growing community, and I’ll continue bringing you helpful, realistic, and fun DIY ideas you can actually use.


