This post may contain affiliate links: read full affiliate disclosure.
A plain light switch cover is easy to ignore until you finish decorating a room and suddenly notice how much that little white plastic plate stands out.
Maybe it clashes with your wallpaper, looks too basic against a painted wall, or simply feels like a missed opportunity to add personality.
In this article, you’ll find creative inspirations you can adapt to your own style, along with practical tips for choosing materials, keeping edges neat, and creating a finished cover.
Ice Cream Drip
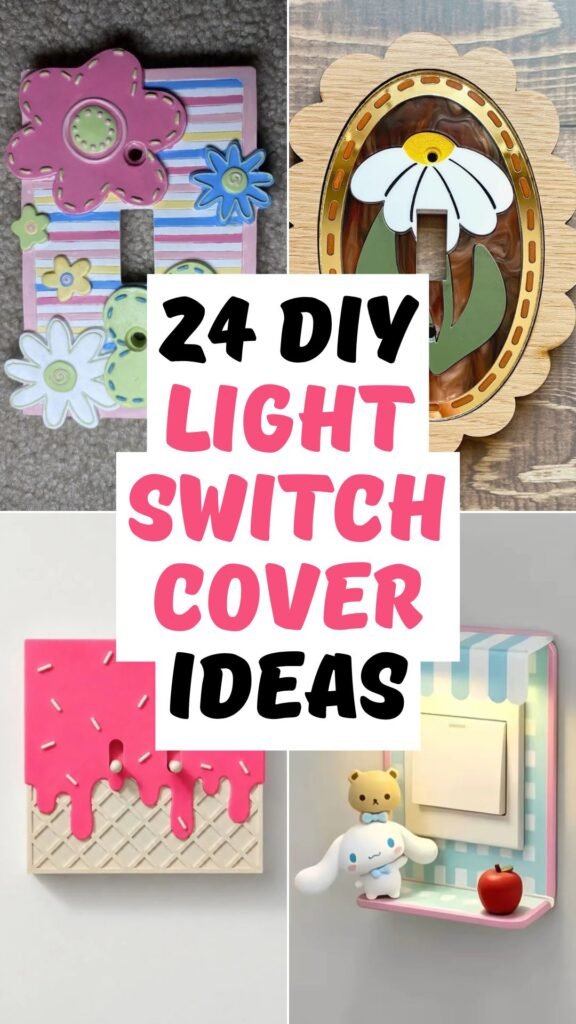
Turn an ordinary switch plate into a playful dessert detail by building a waffle texture and adding a bright dripping topping.
Keep raised decorations away from moving switches, while small sprinkle details can add personality without making the finished cover feel overly busy.
Choose two contrasting colors for the cone and frosting so the design stays recognizable even when viewed quickly from across the room.
Layered Flowers
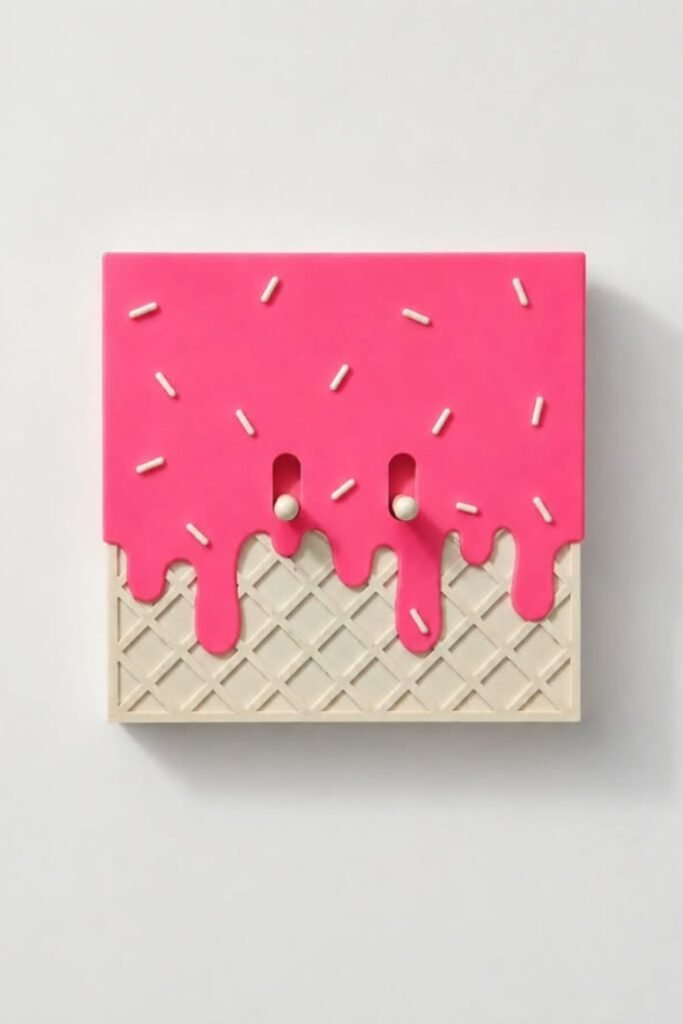
Give a basic cover more dimension by layering oversized flower shapes over a striped background instead of relying on flat decoration alone.
Mixing different flower sizes keeps the arrangement playful, while leaving generous space around the switch opening makes everyday use much easier.
Try lightweight clay or thin wooden cutouts for the flowers, then paint tiny stitched details around their edges for extra handmade character.
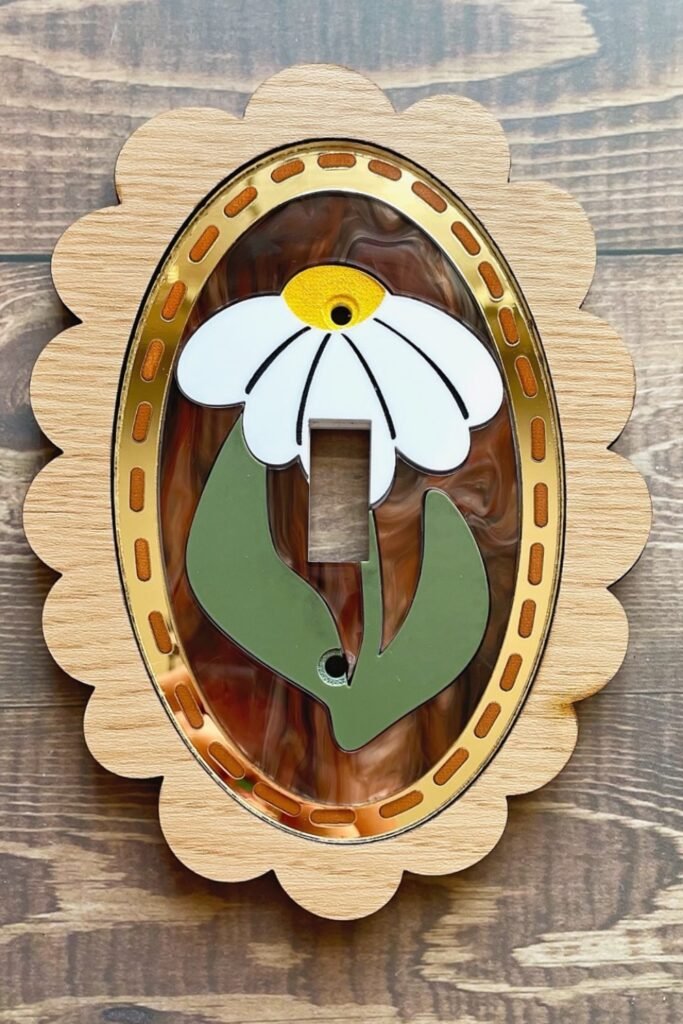
Retro Daisy Frame
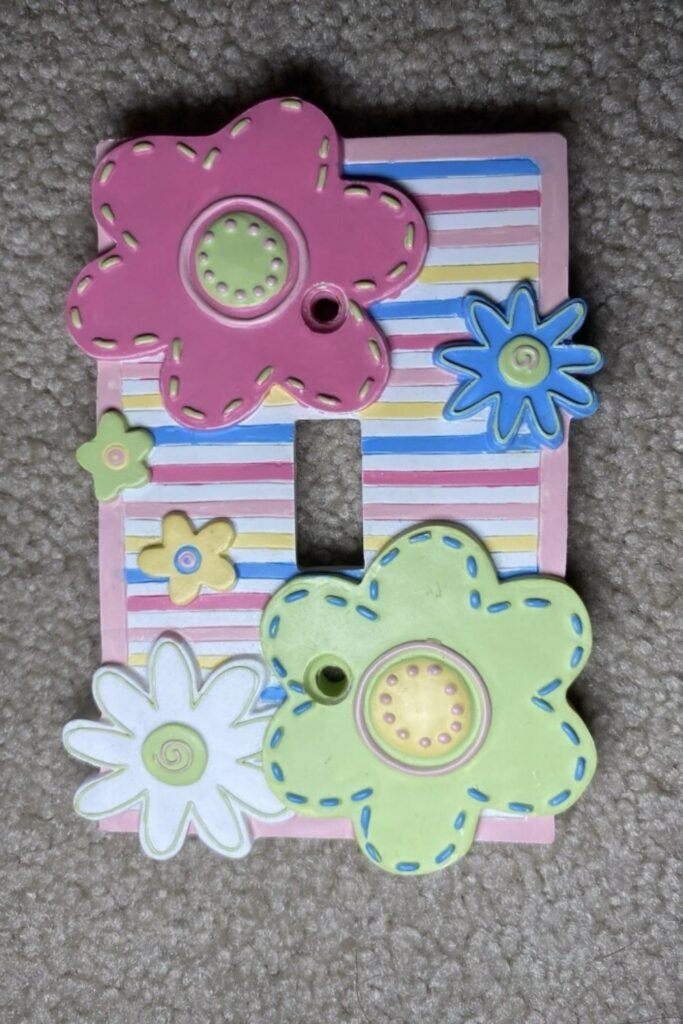
For something more decorative, build the switch opening into a larger floral composition using layered wood, acrylic pieces, or sturdy craft materials.
An oval center paired with scalloped wooden edges creates that charming retro feel, especially when earthy brown, green, and cream shades meet.
Rather than covering every surface with detail, let one oversized daisy become the focal point and use contrasting textures around it carefully.
Mini Shopfront
Why stop at decorating the plate when you can frame the entire switch like a tiny storefront with an awning and shelf?
Use lightweight pieces for the projecting details, keeping miniature decorations beside the switch rather than anywhere they could interfere with pressing it.
Pastel stripes and tiny characters make this especially fun for bedrooms, but simplifying the accessories can create a cleaner grown-up version too.

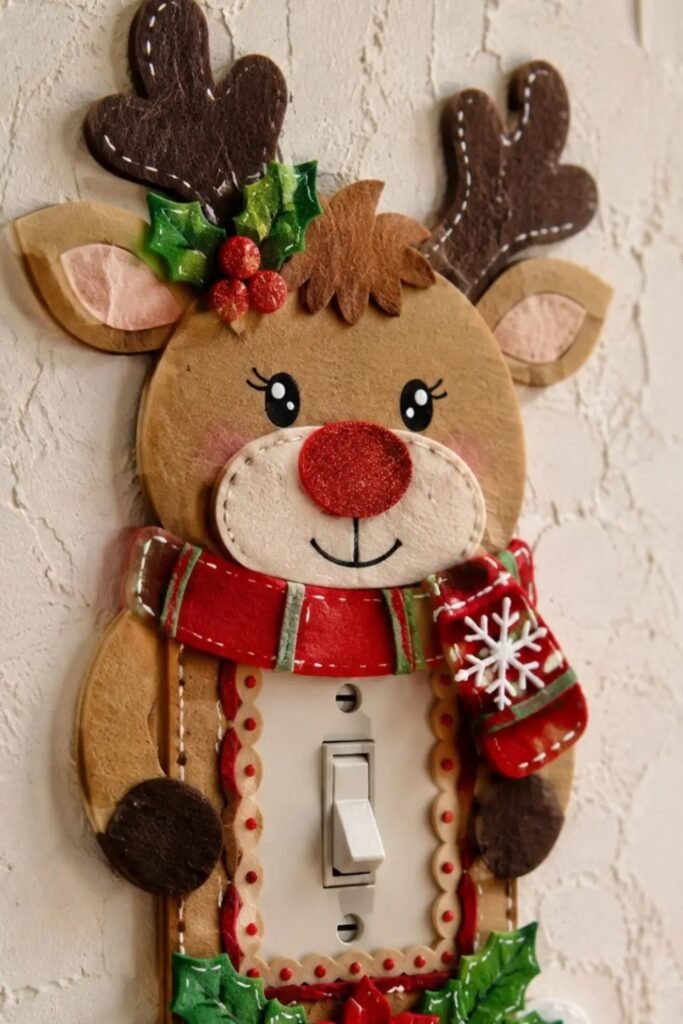
Christmas Reindeer
Seasonal decorating can reach the smallest details by framing your switch with a cheerful reindeer made from layered felt or foam.
Build the character around the existing plate, leaving the toggle completely exposed while scarves, antlers, holly, and stitched accents add festive personality.
Because this design works best temporarily, attach the decorative outer pieces removably so you can easily return to your regular cover afterward.
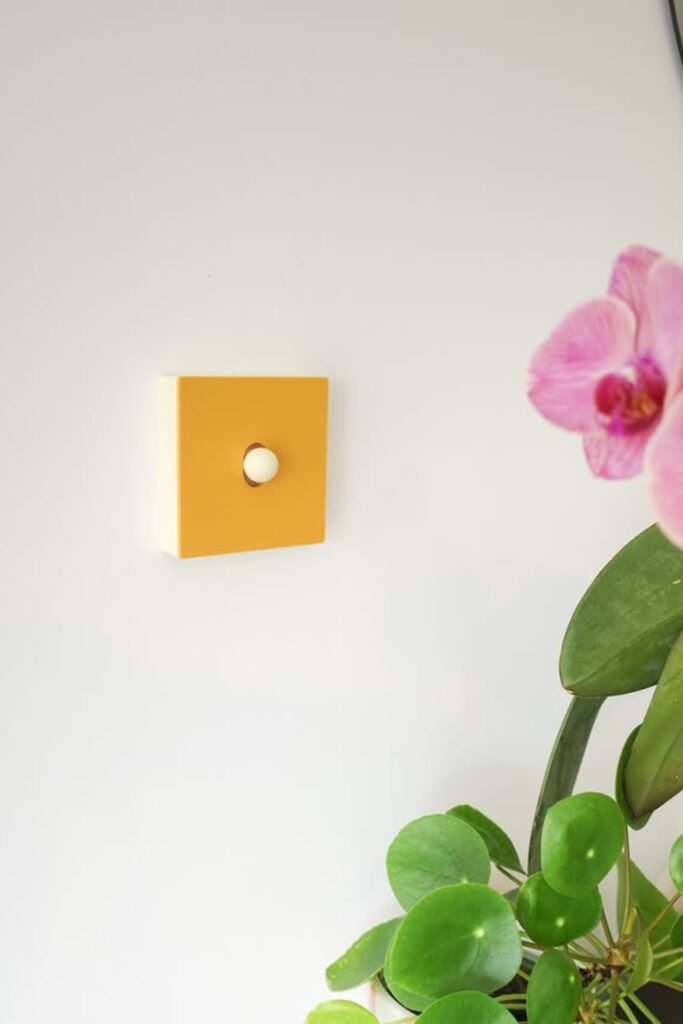
Bold Color Block
Sometimes one confident color does more than elaborate decoration, especially when your room already has plants, artwork, or other colorful accents nearby.
Choose a saturated shade that repeats elsewhere in the space, then keep the plate shape simple so the color becomes the feature.
A smooth painted finish works beautifully here, but proper surface preparation helps your chosen color stay crisp despite frequent everyday handling afterward.
Tiny Street Scene
Turn the area surrounding a large rocker switch into miniature wall art by building a simple wooden house frame around it.
Extending a narrow shelf beside the switch gives you room for tiny figures or scenery without crowding the part you actually touch.
For extra atmosphere, add a small battery-powered decorative lamp nearby, keeping its lighting completely separate from the household switch and electrical wiring.

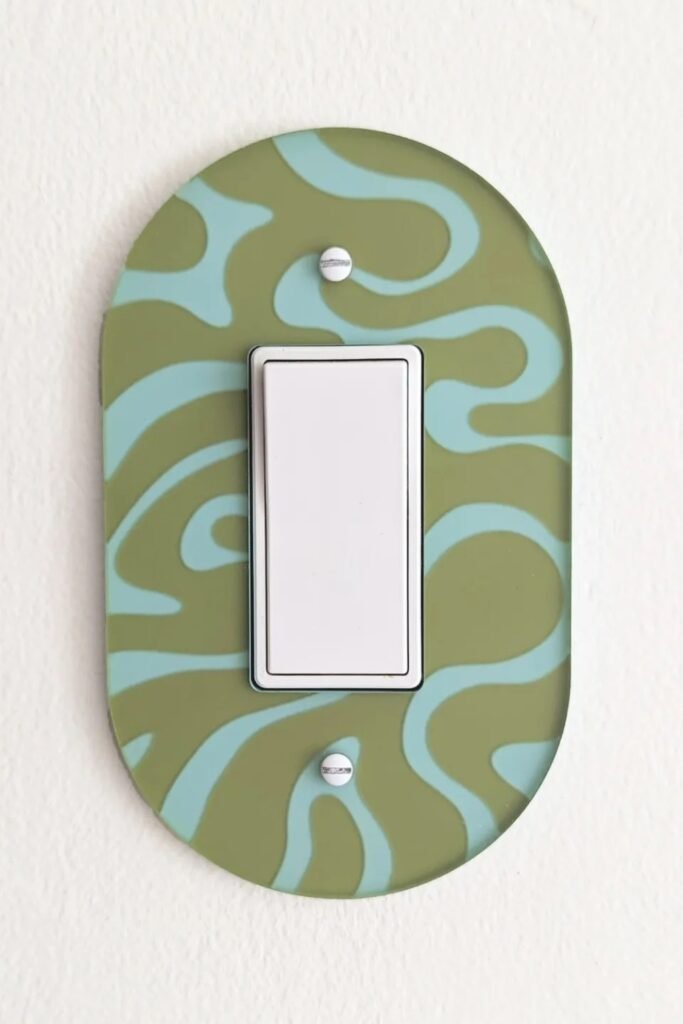
Wavy Retro Pattern
If plain plates feel too predictable, an oversized rounded cover gives you enough surface to experiment with a flowing two-color pattern.
Freehand irregular curves instead of measuring perfect lines; those slightly unpredictable shapes are exactly what gives this retro treatment its relaxed character.
Stick with two coordinated shades so the pattern stays interesting without overwhelming the switch, especially against a simple neutral wall behind it.
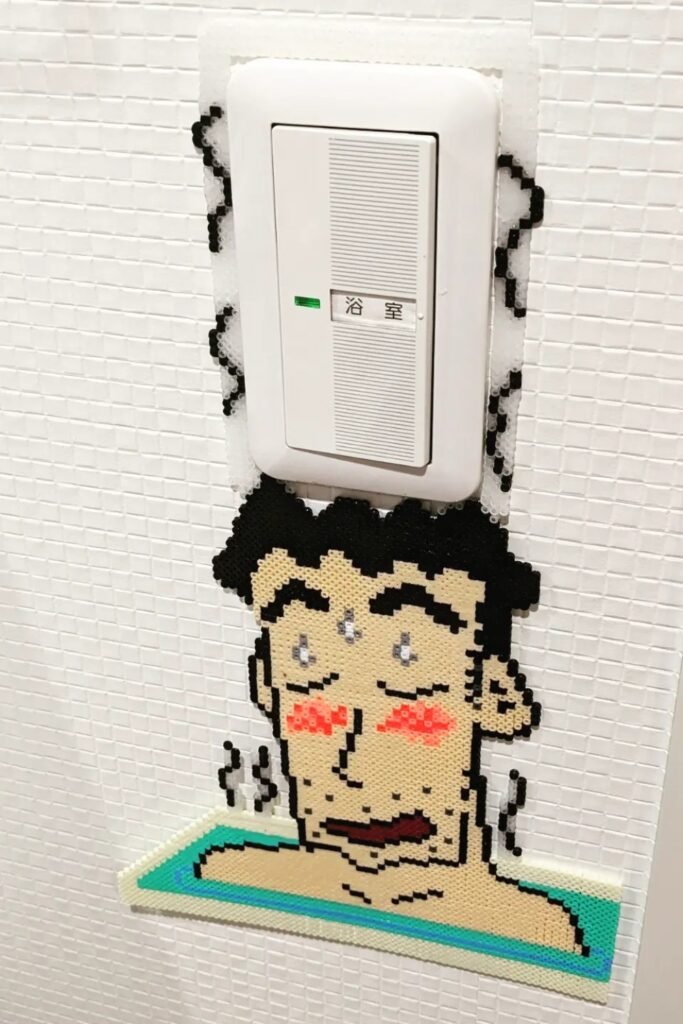
Pixel Portrait
Make the switch part of the artwork by building a pixel-style character around it with fuse beads arranged on a simple grid.
Planning your pattern on graph paper first makes detailed faces much easier, especially when several colors need to line up cleanly.
Leave a comfortable border around the actual plate so your handmade character adds personality without making switches or screws difficult to reach.
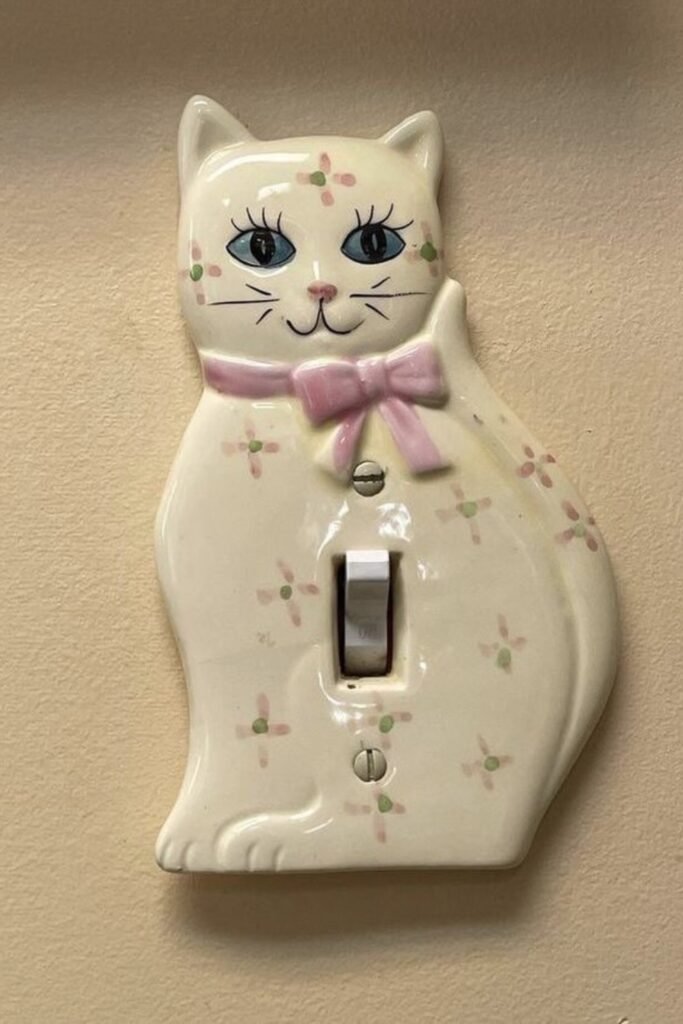
Ceramic Cat
A sculpted animal cover can make an everyday switch feel like a tiny collectible, especially if you enjoy vintage ceramic decorations.
Shape the cat around the switch opening, then use painted flowers, facial details, and a raised bow to give it character.
Keep the center relatively flat and reserve deeper sculpting for outer areas, so fingers can reach the toggle comfortably during everyday use.
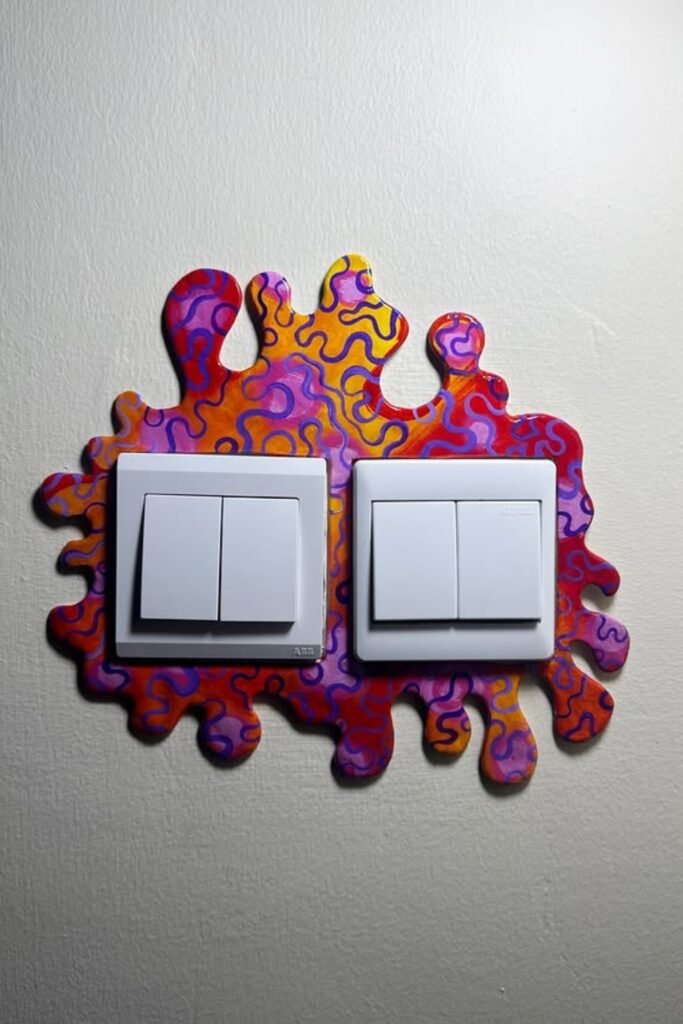
Abstract Splash
Instead of forcing decoration into a rectangle, cut an irregular splash-shaped backing that turns multiple switches into one playful wall feature.
Paint overlapping squiggles across the entire surface using a limited palette, letting loose curves connect different sections without needing perfect symmetry.
This approach works especially well for grouped switches because one oversized backing visually unifies mismatched plates while still keeping every control accessible.
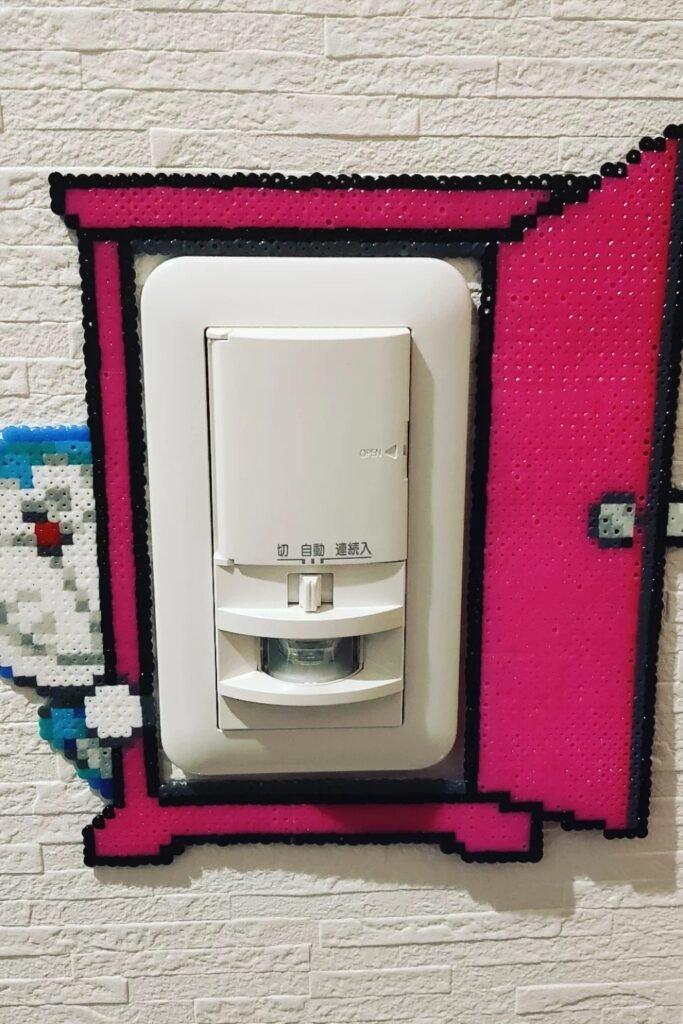
Secret Door
Have fun disguising a bulky switch panel by surrounding it with a pixel-style doorway that makes the fixture feel deliberately incorporated.
Fuse beads are ideal for creating crisp blocky outlines, and a bright door color gives the surrounding craft an instantly recognizable theme.
Build decorative sections beside the plate rather than across its controls, making sure sensors, buttons, and covers can still operate without obstruction.
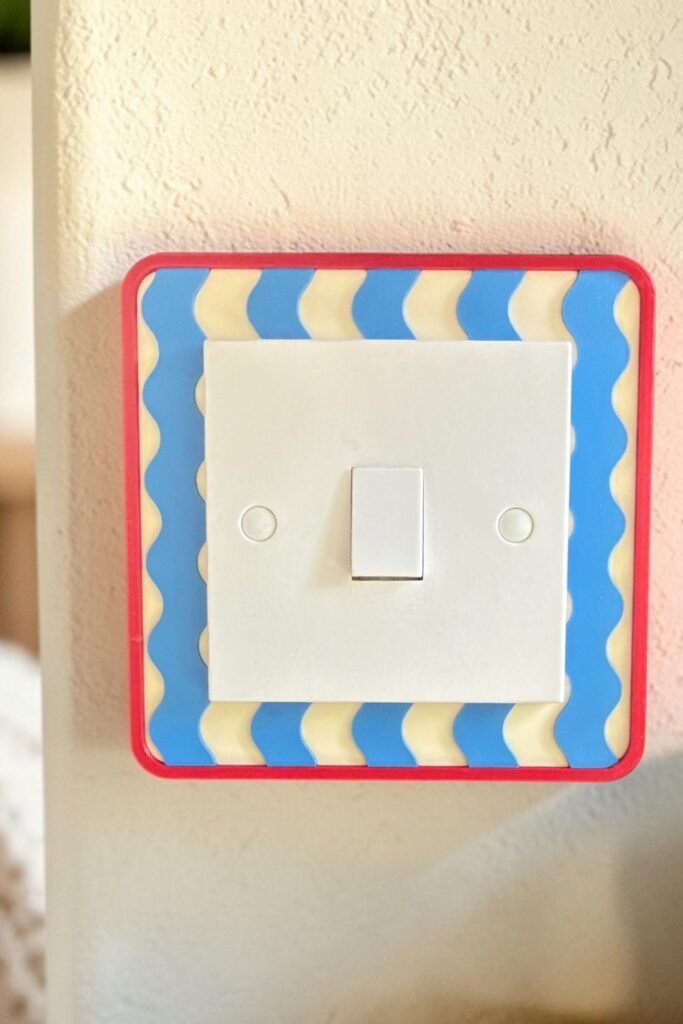
Wavy Border
You can leave the original switch untouched and add personality around it with a colorful frame featuring repeating waves and bold edges.
Using three contrasting shades keeps this simple pattern lively, while repeating the same curve creates rhythm without requiring complicated painting skills.
Make the frame slightly wider than the plate so it reads as intentional wall décor rather than an awkward extension of the switch.
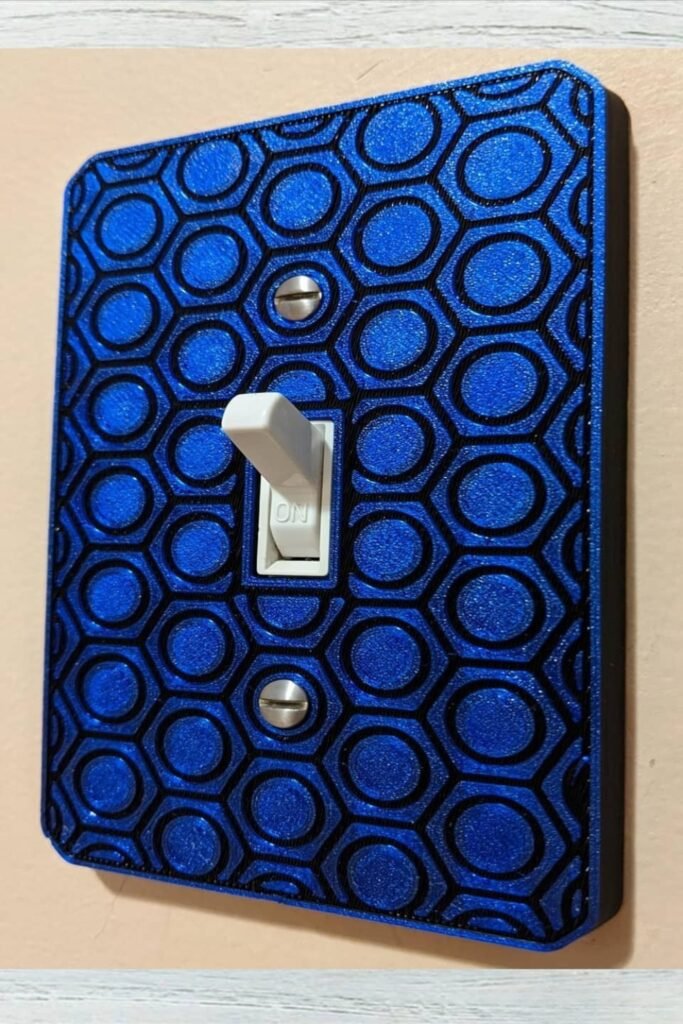
Geometric Texture
For a more modern finish, use repeating geometric shapes to create texture across the entire plate instead of relying on multiple colors.
A raised honeycomb pattern catches light naturally, while one deep color keeps all that surface detail from becoming visually overwhelming or distracting.
If you recreate this with a textured overlay, check that screw openings remain clear and the material sits securely around the toggle.
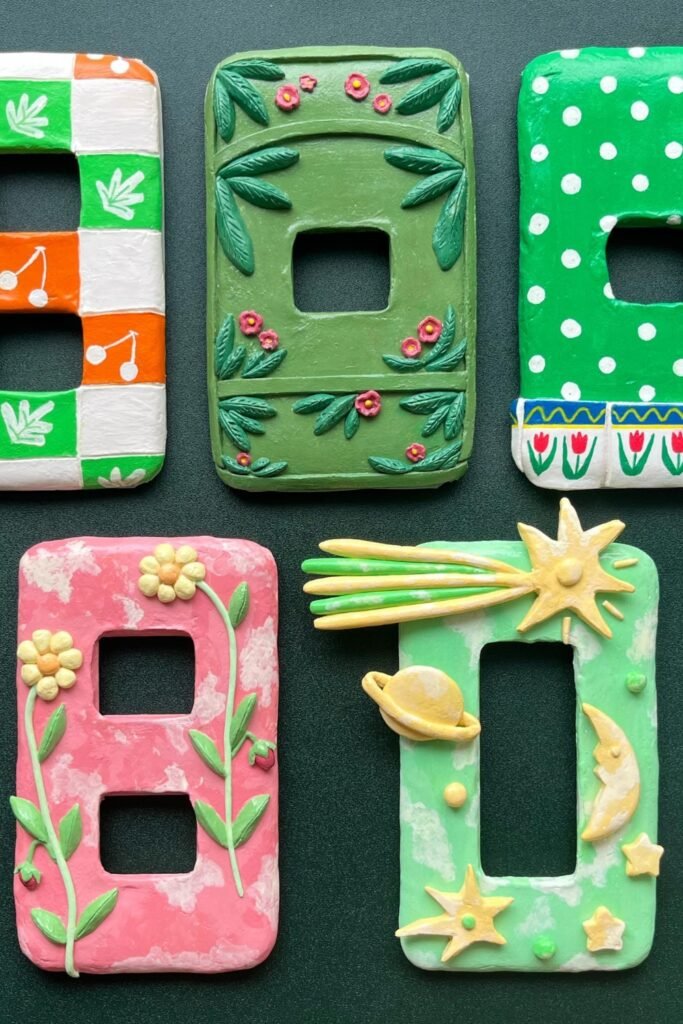
Clay Cover Art
Air-dry or polymer clay opens up endless possibilities because you can sculpt tiny flowers, leaves, stars, fruit, or patterns before painting them.
Rather than copying one design, choose a small theme for each plate and repeat two or three details for a cohesive finish.
Keep raised clay accents concentrated around outer areas, then seal the painted surface appropriately so frequent handling does not quickly wear it down.
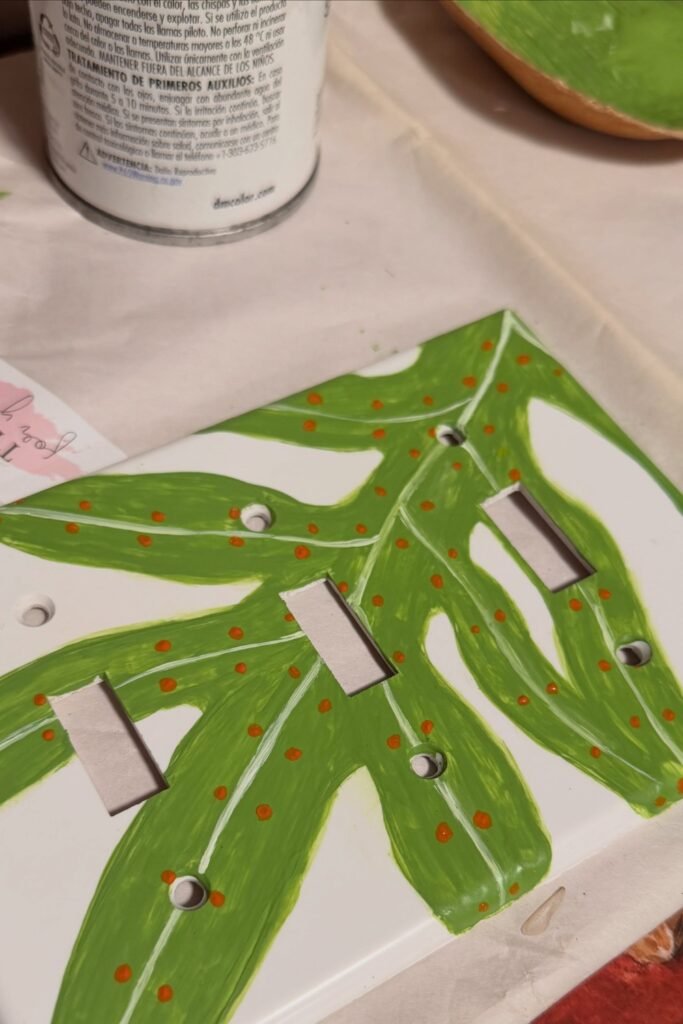
Painted Botanicals
A wide multi-switch plate gives you enough room to treat the entire surface like a miniature canvas instead of separate controls.
Sketch oversized leaves lightly first, then fill them with loose brushstrokes and tiny contrasting dots for an easy hand-painted botanical effect.
Let some white background remain visible between leaves; that breathing room keeps a large painted design fresh rather than making it feel crowded.
Color Pop
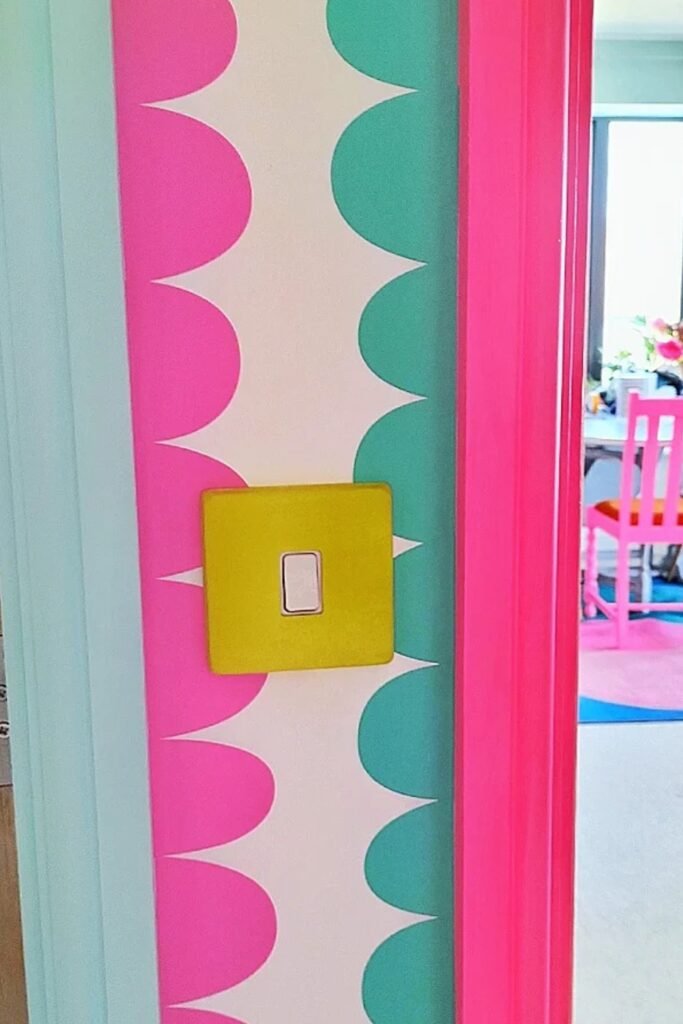
When the wall already carries a bold pattern, a solid switch plate can become the perfect pause between all those competing shapes.
Pull one unexpected accent color from nearby décor rather than matching the wallpaper exactly, giving the switch its own deliberate visual moment.
This trick needs almost no pattern work, making it ideal when you want a quick transformation that still feels thoughtfully coordinated and polished.
Gothic Stone
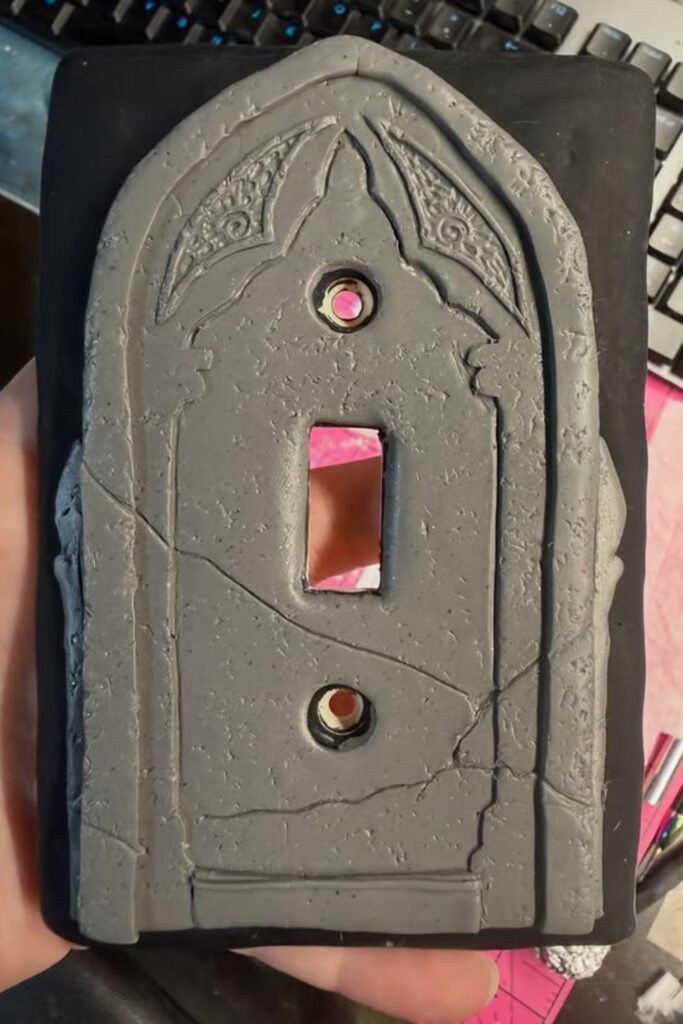
For a moodier room, sculpt the cover like an aged stone doorway using clay, texture tools, and deliberately imperfect carved details.
Press cracks, borders, and architectural lines into the surface before painting, then layer gray tones lightly to emphasize depth without excessive decoration.
A tall arched silhouette makes the switch feel almost hidden inside the design, while clear openings keep screws and the toggle easy to access.
Vintage Label
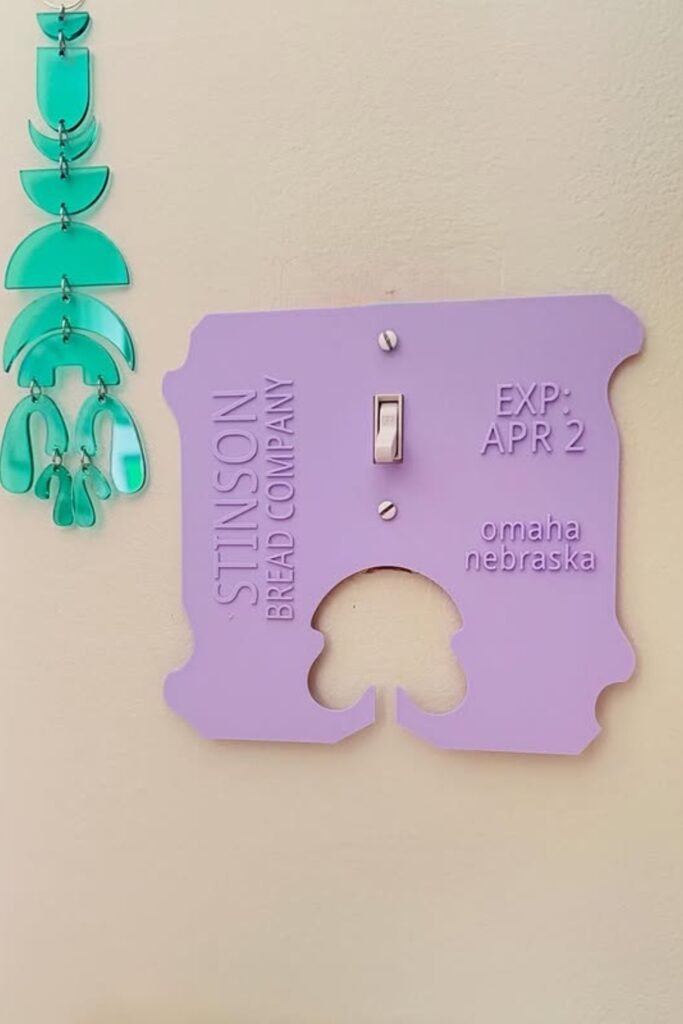
Give your switch cover a story by shaping it like an oversized vintage product label instead of sticking with the usual rectangle.
Raised lettering, clipped corners, and a soft retro color can create the effect, especially when the typography references something personal or playful.
Keep embossed details shallow near the toggle, saving deeper cutouts and decorative shapes for lower areas where hands will not constantly brush them.
Broken China Mosaic
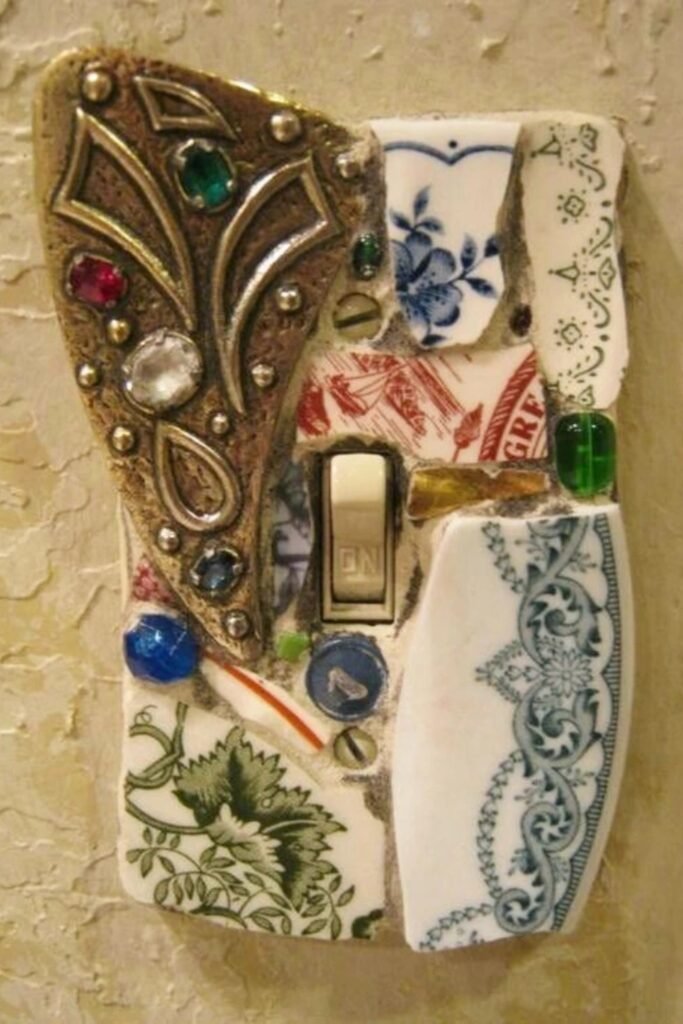
Save beautiful fragments from chipped plates and turn them into a mosaic cover where mismatched patterns become part of the charm.
Combine patterned china with beads, small gems, or metal findings, arranging larger fragments first and filling awkward gaps with smaller decorative pieces.
Smooth every sharp edge and secure pieces carefully, because a switch gets touched often and protruding ceramic should never create a rough surface.
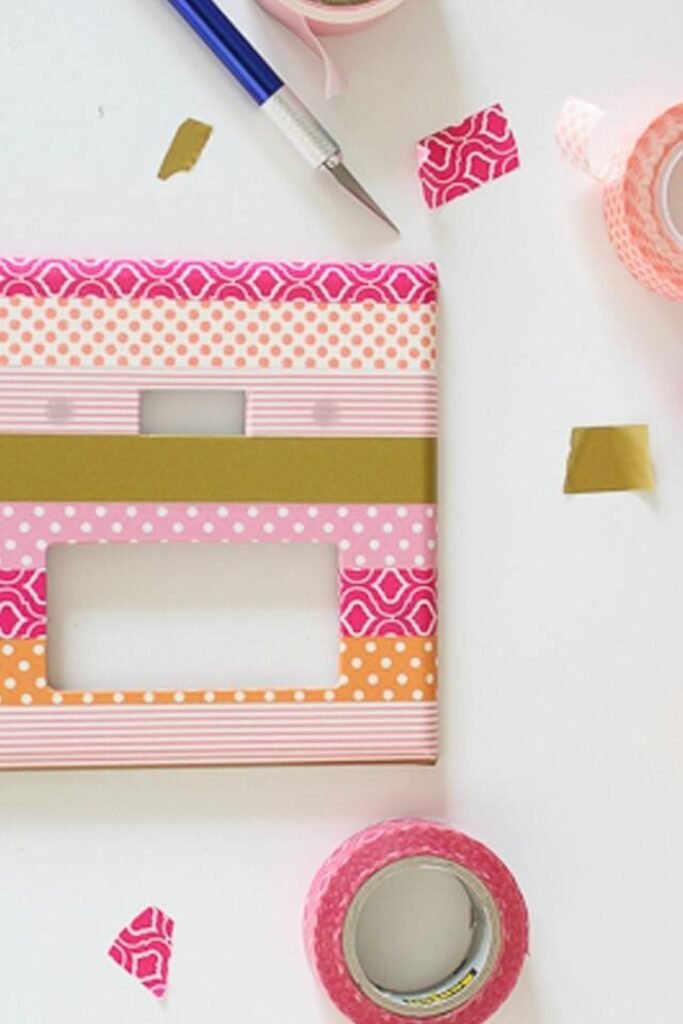
Washi Tape Stripes
If painting feels too permanent, layer strips of patterned washi tape across the plate for an easy design you can change later.
Mix stripes, dots, metallics, and geometric prints within one color family, then trim every opening carefully with a sharp craft knife.
Press the tape firmly around edges and corners, adding a clear protective finish if you want the pattern to handle frequent touching.
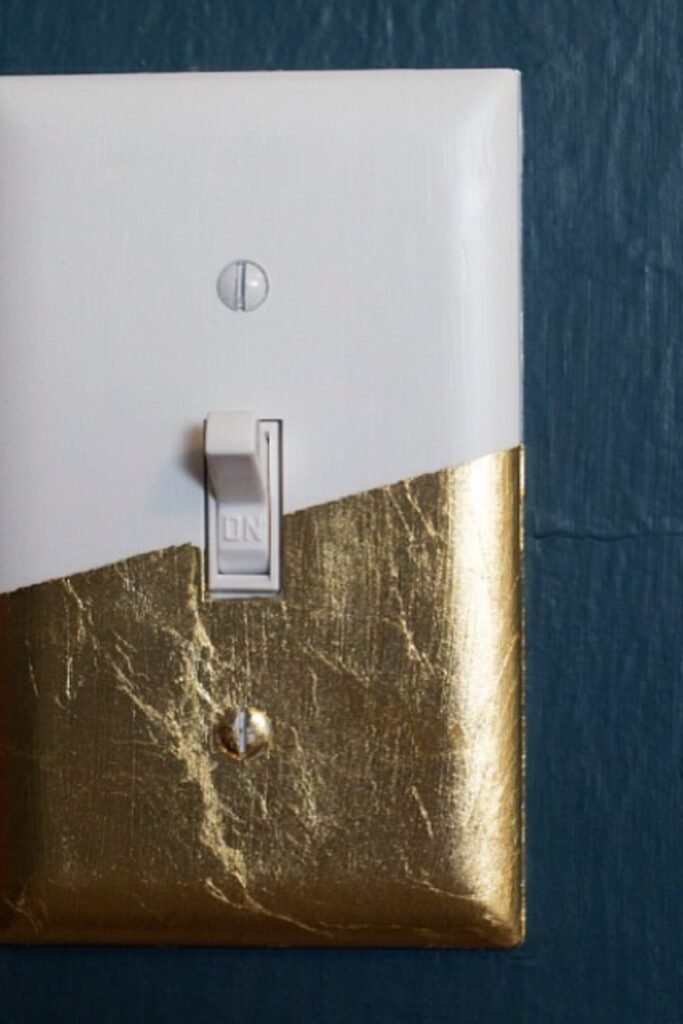
Gold Leaf Dip
A little metallic detail can completely change a basic white cover, especially when you apply gold leaf across only one section.
Create an angled boundary with painter’s tape, apply adhesive below it, then press delicate leaf pieces down for that imperfect reflective texture.
Leaving part of the original plate exposed keeps the result sophisticated, while the uneven metallic surface adds character without needing detailed artwork.
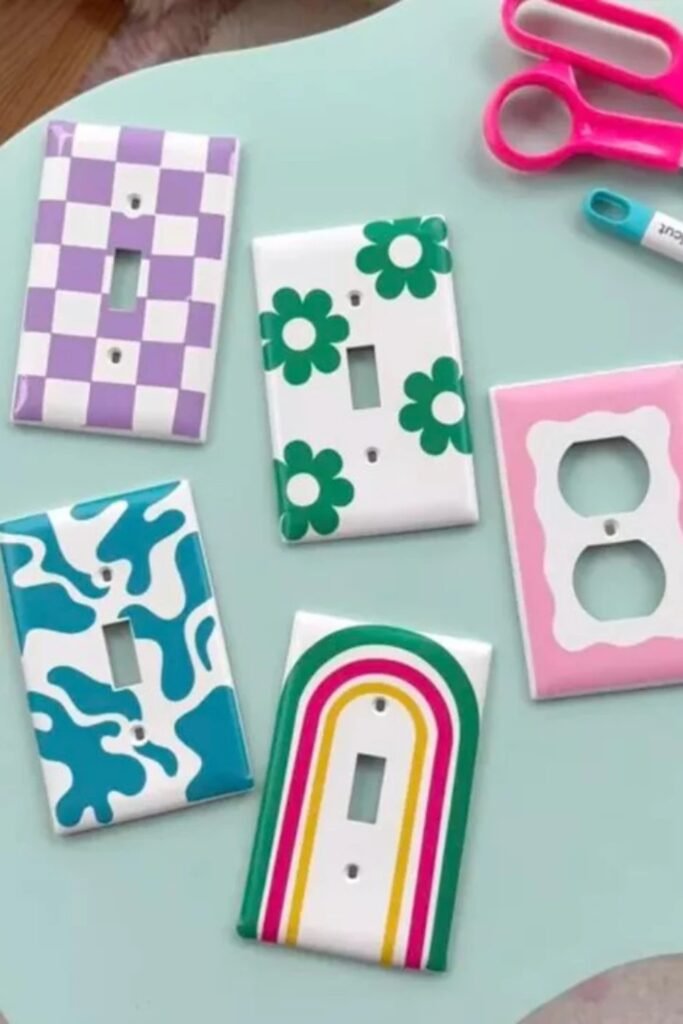
Mixed Pattern Covers
When several switches need updating, treat each cover as a different mini artwork while repeating colors to keep everything visually connected.
Try checkerboards, oversized flowers, wavy shapes, arches, or scalloped borders, choosing simple motifs that remain recognizable on such small surfaces.
Paint or cut each pattern before reinstalling the covers, which makes clean edges and precise openings much easier to achieve without mess.
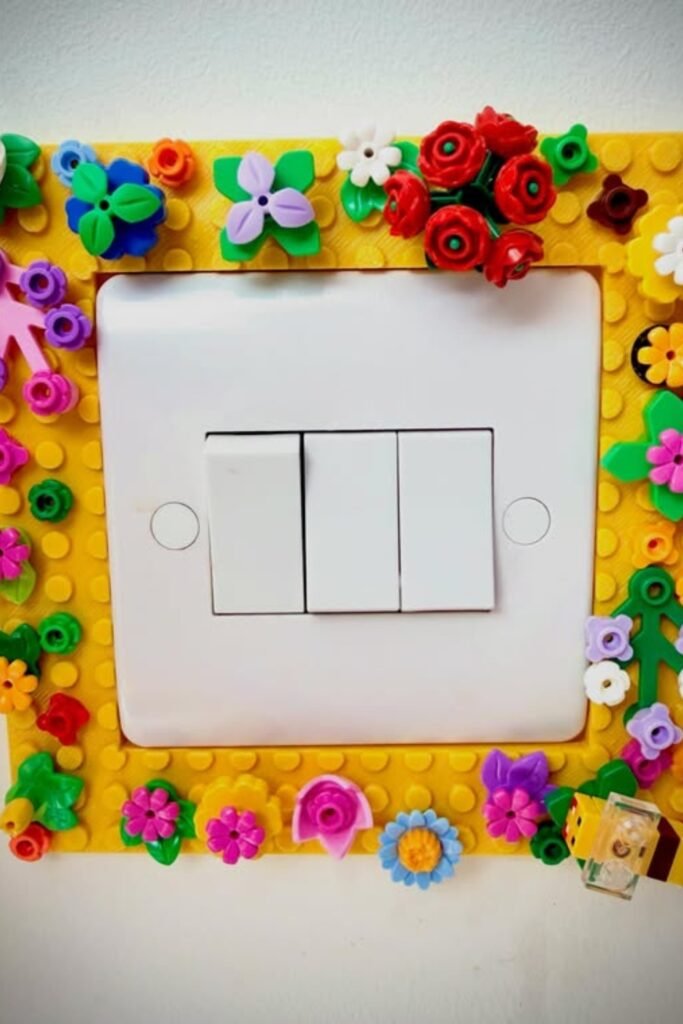
Building Block Garden
Turn spare building bricks into a cheerful frame by creating a flat base around the switch and decorating it with tiny flowers.
Use different flower shapes and heights around the outer border, but leave the center spacious so every switch remains comfortable to press.
Because the pieces can be rearranged, this idea is perfect when you enjoy changing colors, seasonal details, or little characters over time.
FAQs
Can You Decorate a Light Switch Cover Without Replacing It?
Yes. You can update an existing cover with paint, washi tape, wallpaper, fabric, decoupage, or lightweight decorative pieces.
Remove the faceplate before crafting so you can work neatly and keep materials away from electrical components.
If you rent, decorating an inexpensive replacement plate is usually smarter because you can reinstall the original before moving.
How Do You Make a DIY Light Switch Cover Last Longer?
Choose materials suitable for the plate, trim openings carefully, and keep bulky decorations away from switches and screws.
Painted, paper-covered, or decoupaged designs may also benefit from an appropriate clear protective finish, especially since light switches are touched frequently.

Hi, my name is Ali Mehmood! I’m a passionate writer and DIY enthusiast who loves turning creative ideas into practical, hands-on projects.
I created this website to share inspiring, budget-friendly ideas that you can do yourself – whether it’s organizing your home, crafting something unique, or creating fun projects for kids and pets.
I believe DIY isn’t just a hobby – it’s a smart way to save money, reduce waste, and enjoy the satisfaction of making things with your own hands.
I’m excited to have you as part of this growing community, and I’ll continue bringing you helpful, realistic, and fun DIY ideas you can actually use.