
This post may contain affiliate links: read full affiliate disclosure.
Did you try to make a cork board but ended up with edges that peeled, insufficient glue, or a frame that was bent? You aren’t the only one. Most DIY cork boards don’t work because they utilize the wrong materials, don’t stick together well, or aren’t mounted correctly.
This post will show you how to easily create a cork board at home.
Here, you’ll find out what the correct thickness of cork is, what adhesives work, how to keep bubbles from forming, and smart ways to hang your board securely. You’ll also get creative ideas for how to make it look nice.
Save this article for later!
How to Make a Cork Board at Home?
Start with the basics: use cork sheets or tiles that are ¼ inch thick to hold the pins securely. Put them on plywood or MDF to keep them from bending.
Water-based contact cement is a good choice for adhesion. Just sprinkle it on both surfaces and allow it get sticky before pushing them together.
Choose how to mount it after framing it for strength and style: Lightweight boards can be held up with Command strips, but heavy ones need wall anchors or a French cleat.
To keep bubbles from forming, keep pressure on the surface while it dries. This will keep your DIY cork board flat and useful.
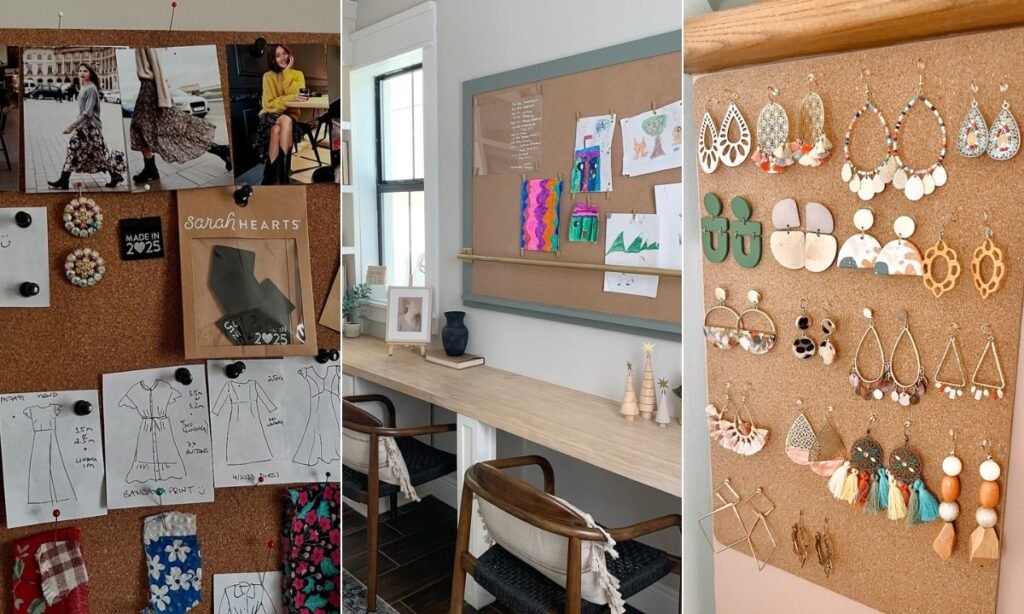
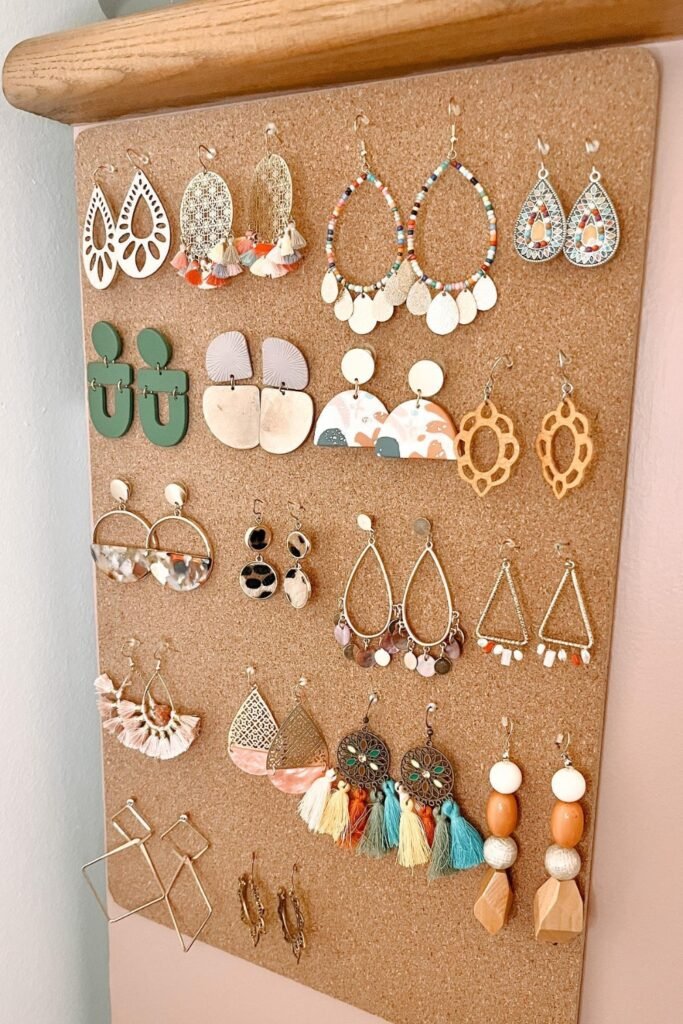
Cork Board Jewelry Display
Adding little hooks for earrings to a standard cork board can make it an attractive jewelry organizer.
This arrangement makes it easy to see every pair, untangle them, and grasp them when you need to. You can mount it in a closet to hide things or on a bedroom wall as useful decor.
To make it again, screw in cup hooks that are uniformly spaced, sort earrings by style or color, and use the cork board as both art and storage.
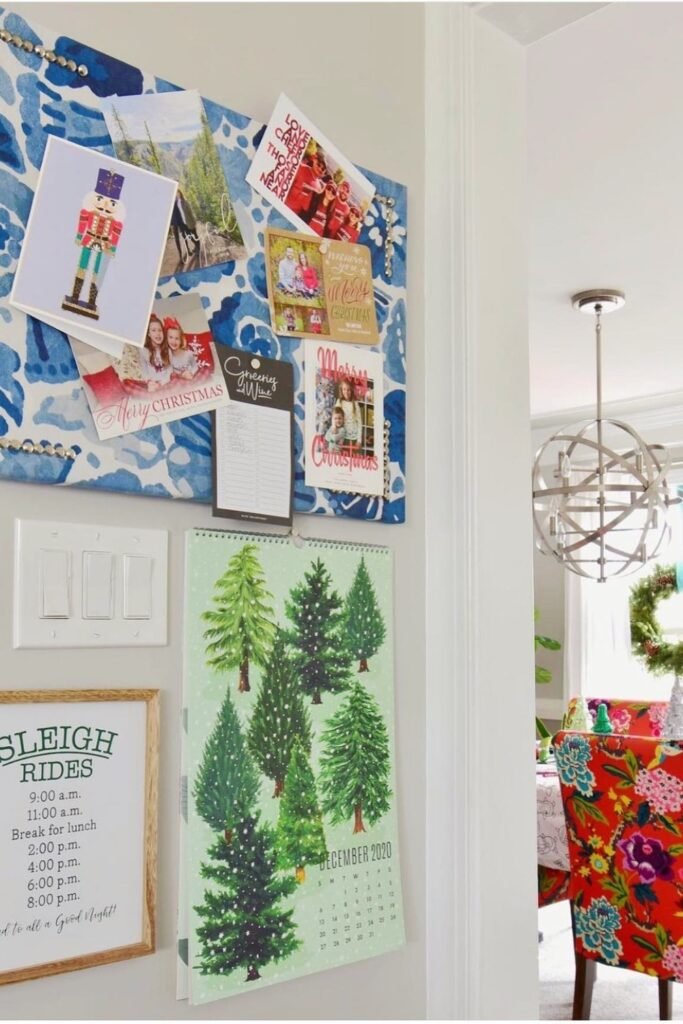
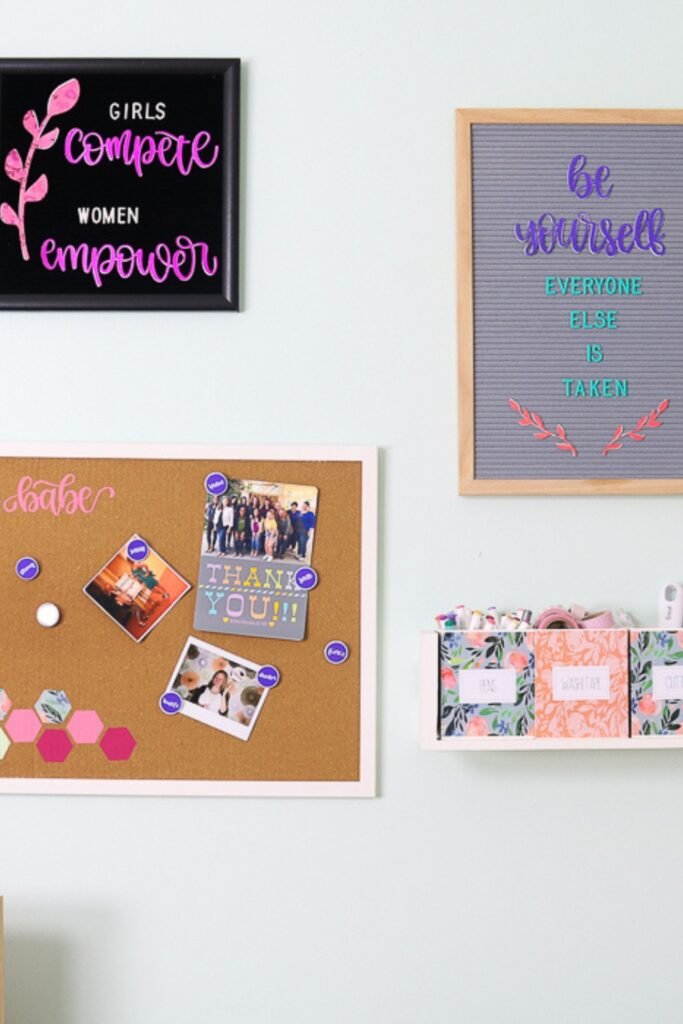
Fabric-Covered Cork Board
Wrap your cork board in fabric that complements the style of your room to make it look nicer.
In this case, a bright blue print gives the space character right away while still being a place to put cards, notes, or reminders.
To make a new one, cut a piece of fabric that is a little bigger than your board, wrap it tightly around the edges, and fasten it at the back using staples or hot glue. Use nailhead trim to give your project a polished, one-of-a-kind look.
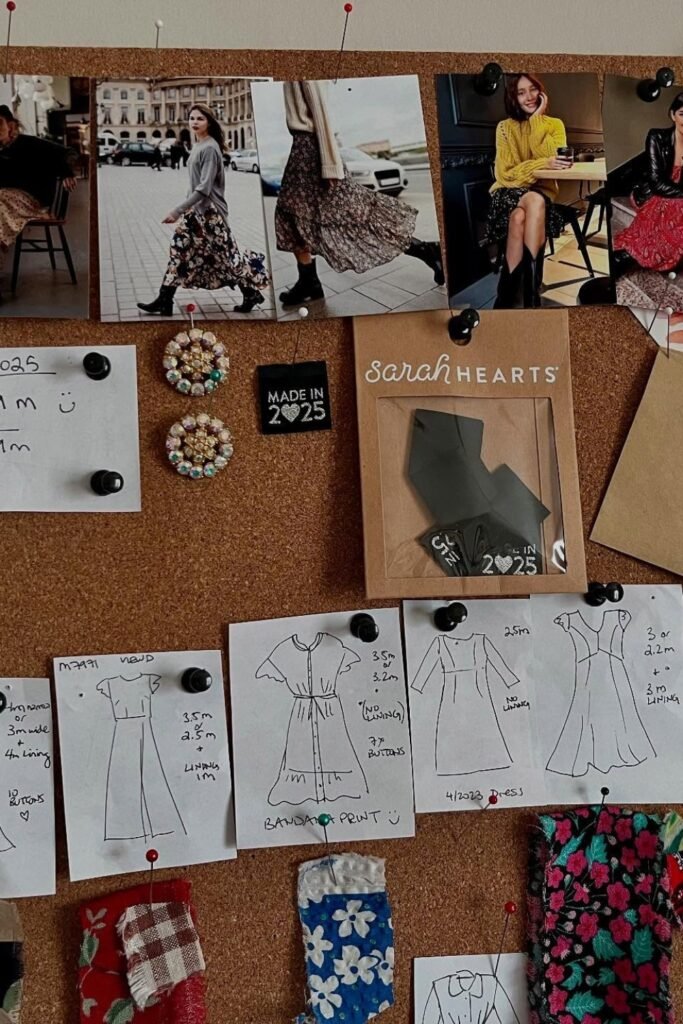
Sewing Project Planner Board
Put all of your sketches, fabric samples, and inspiration photographs on your cork board to make it a creative space.
This system makes it easy to see ensembles, keep track of dimensions, and organize designs without losing ideas in notebooks. To make a new board, cut it into sections: patterns at the bottom, references at the top, and notes on the side.
Use clips or push pins to hold swatches so you can easily change them as your projects change.
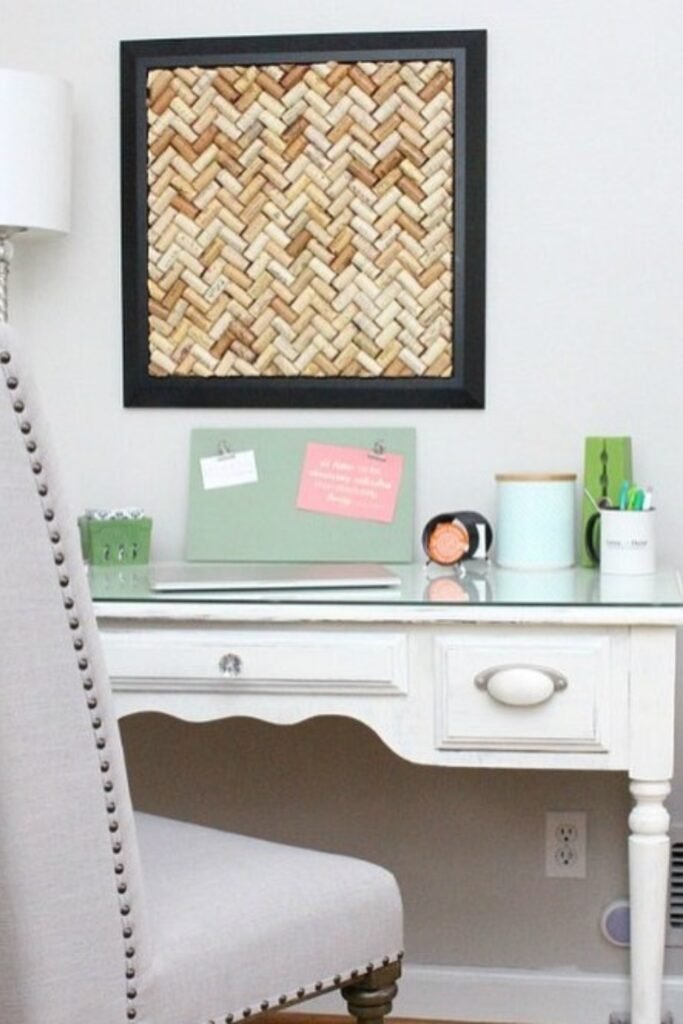
Wine Cork Mosaic Board
Put extra wine corks in a frame in a herringbone pattern to make a textured cork board.
This design is both functional and artistic, giving your wall a modern yet rustic look. To make it again, cut the corks in half lengthwise, glue them tightly in the pattern you want onto a solid background, then frame it for a clean look.
Great for above a desk when you need flair and space for pins..
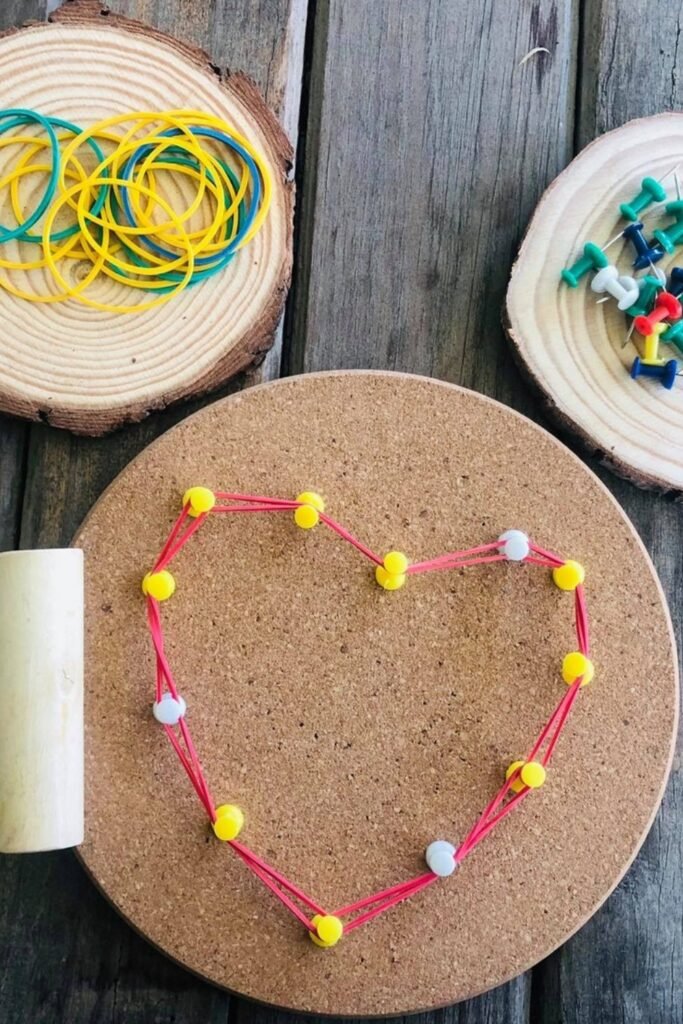
Cork Board String Art
You can make fun string art out of a simple cork circle by drawing shapes with push pins and connecting them with colorful rubber bands.
This heart design is great for kids’ rooms, craft corners, or as a fun project to do on the weekend.
To make a pattern, draw a simple form, put push pins along the edge, and then stretch bands between the pins. Change the colors or forms whenever you want to make something new.
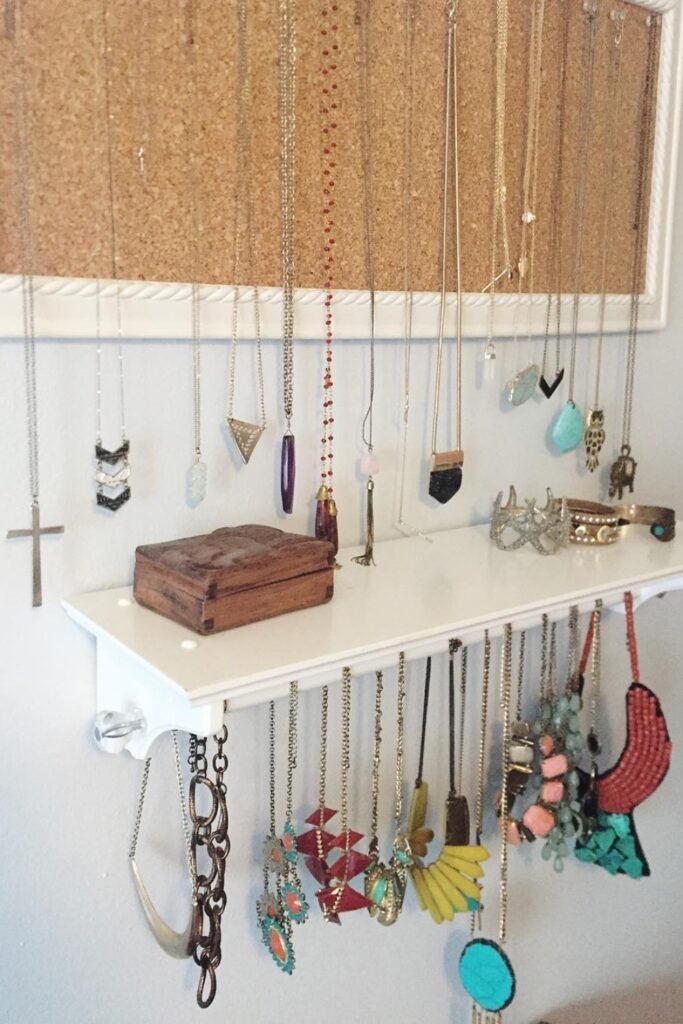
Necklace Organizer Cork Board
A cork board is a great place to hang your necklaces so they don’t become tangled. Put little pins across the top so that chains can fall neatly. A shelf underneath can keep bracelets, rings, or boxes.
To make a cork board look as it did before, frame it, hang it above a floating shelf, and space the pins evenly.
This design works great in bedrooms or closets where you want to see your jewelry and be able to retrieve it easily.
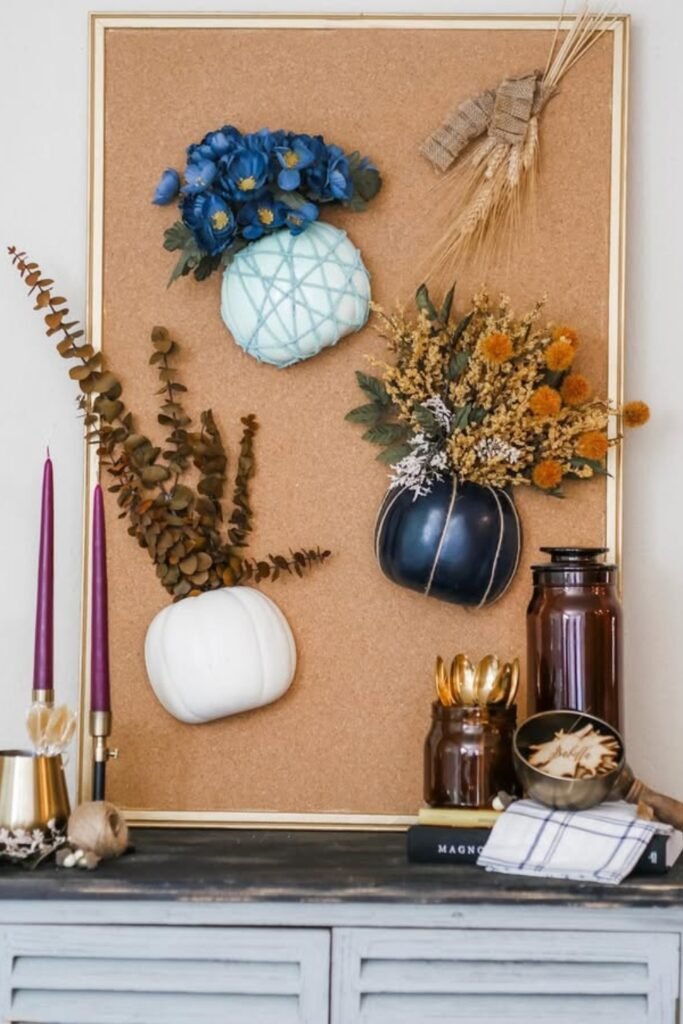
Seasonal Cork Board Display
You may make your cork board a seasonal centerpiece by putting lightweight decorations like fake pumpkins, dried wheat, or flower stems to it.
This arrangement offers texture and holiday cheer without taking up room on the table.
To make it again, get a simple cork board frame, use push pins or hot glue to hold things in place for a short time, and change the decorations with each season.
Great for hallways or living areas when you want to make rapid, attractive changes.
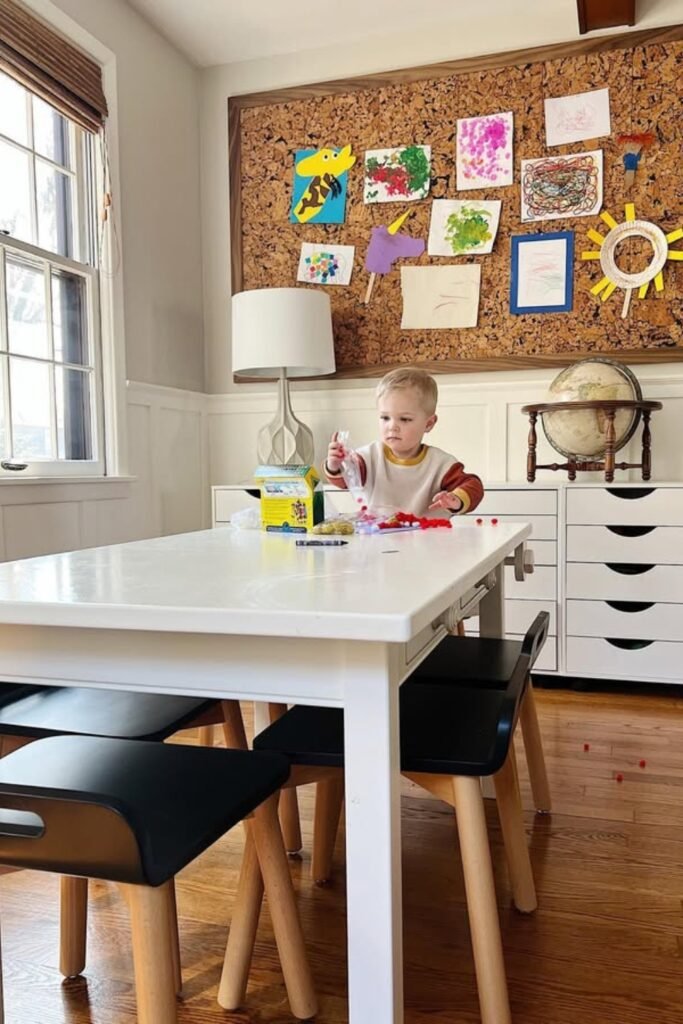
Kids’ Art Display Board
You can use a cork board to show off your kids’ drawings, schoolwork, or other creative work. This keeps their work from being lost on the fridge and makes it feel like it matters.
To make a recreation area, frame a big cork board, hang it at eye level, and use clips or push pins to hold things up.
For a polished look, add a decorative trim or bar at the bottom. It works great in playrooms, family spaces, or study places.
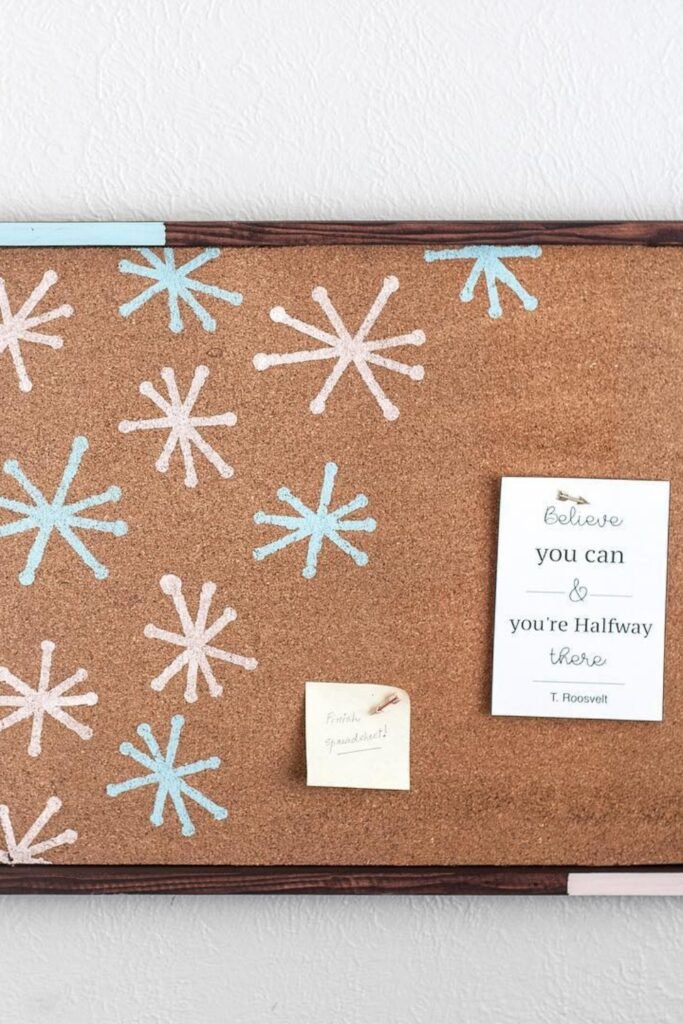
Painted Pattern Cork Board
You may make your cork board more interesting by stenciling basic designs right onto it. Pastel starbursts turn a plain board into a fun piece of wall art that can also be used as a pinboard.
To make a copy, use painter’s tape or stencils to put on light coats of acrylic paint and let it dry before adding notes or pictures.
Pick colors that go with your room to get an appearance that is both useful and appealing.
Giant Cork Wall for Kids
Make a full-size cork wall where students can show off their art and crafts all in one spot. This arrangement makes people feel good about themselves and keeps the house neat.
To reproduce, frame a large cork sheet or many tiles and hang them securely on a wall.
Little hands will have an easier time adding and swapping drawings if you use colored pins or clips. Great for playrooms, craft nooks, or dining rooms that also serve as creative spaces.
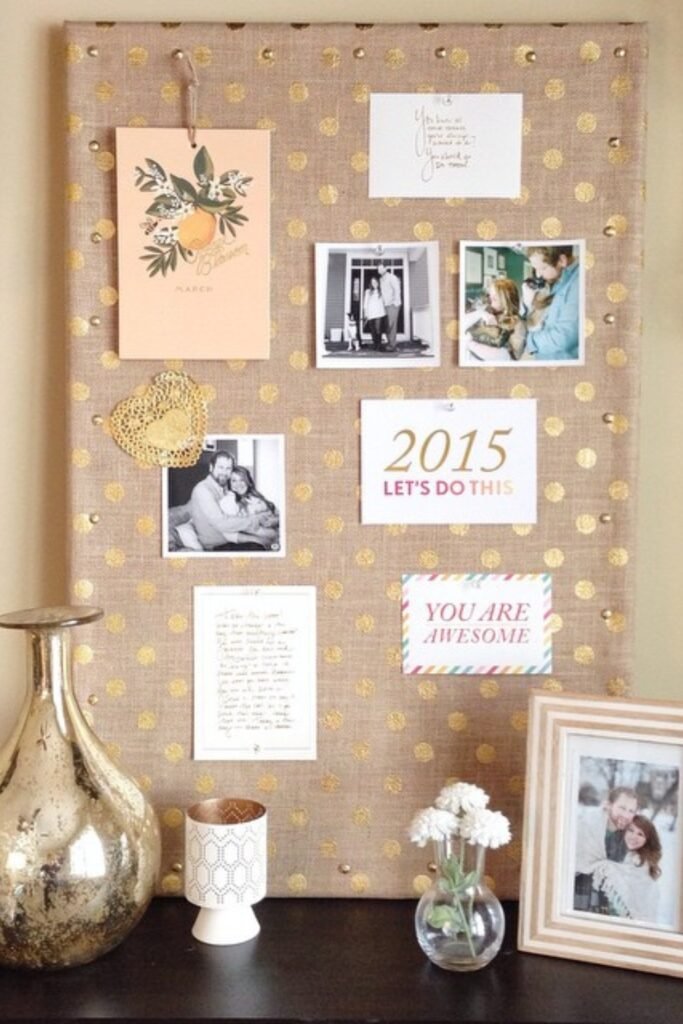
Fabric-Covered Cork with Gold Accents
Wrap a cork board in cloth and add metal accents to make it look stylish. This design employs burlap-like cloth with gold polka dots to make a simple board look like fancy wall art.
To make it again, wrap fabric around the board and hold it in place at the back. For highlights, use a patterned fabric or stencil metallic paint.
Great for putting up notes, pictures, or ideas in bedrooms, hallways, or home offices.
Hexagon Pattern Cork Board
Use colored paper hexagon cutouts to give your cork board a trendy look. The honeycomb pattern gives the space structure and flair while giving room for notes or pictures.
To make it again, draw hexagons on scrapbook paper, cut them out, then glue or pin them neatly in one corner of the board.
This is great for workplaces, study areas, or creative workstations when you want something that looks well and works well.
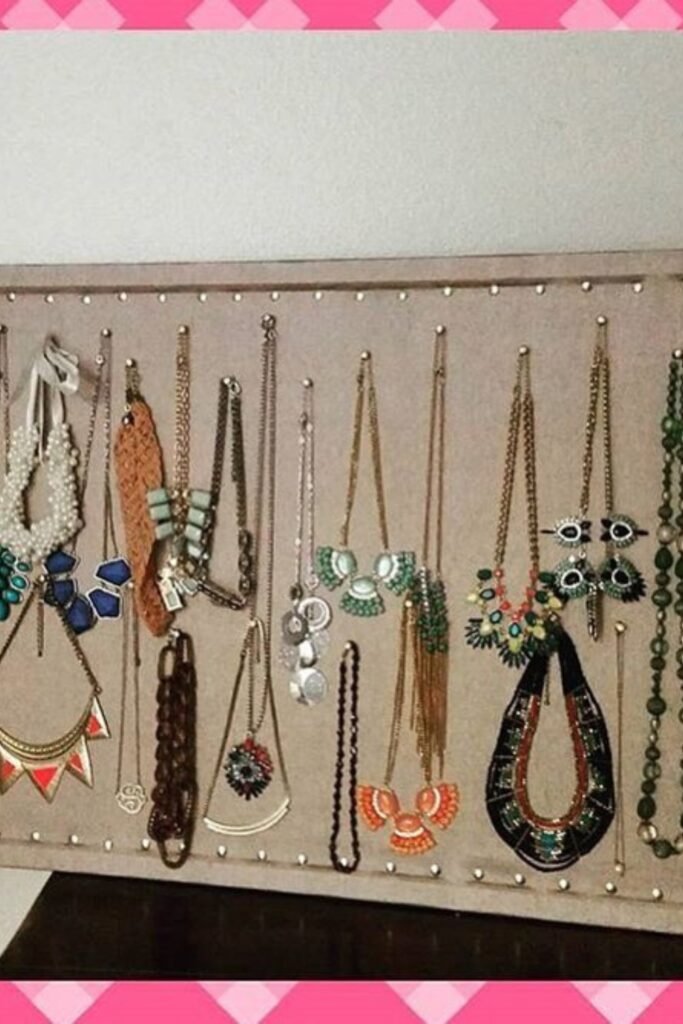
Statement Necklace Display Board
Use a cork board to make a special jewelry wall where you can show off your bright necklaces.
This design has properly spaced pins that keep each item straight and clear to see, which makes it easier to choose the right accessory.
For a soft background, cover a cork board with fabric. For a polished look, add decorative studs along the edges and space hooks or pins in tidy rows. Great for closets or areas around the sink.
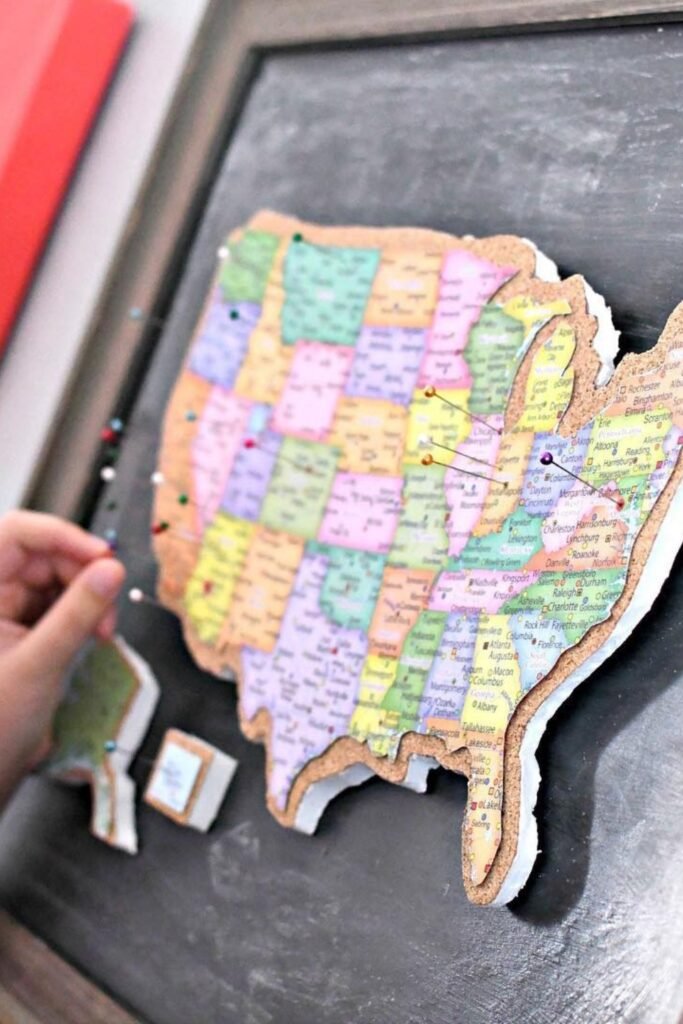
Cork Board Travel Map
Cut a cork board into the shape of a map and use it to keep track of your travels.
Each pin indicates a place you’ve been or a place you’d like to go, making it both pretty and useful.
To make a copy, print off a map, trace it onto cork, cut it out carefully with a craft knife, and attach it to a backing board. Great for kids’ rooms or family areas where you want to spark their sense of adventure.
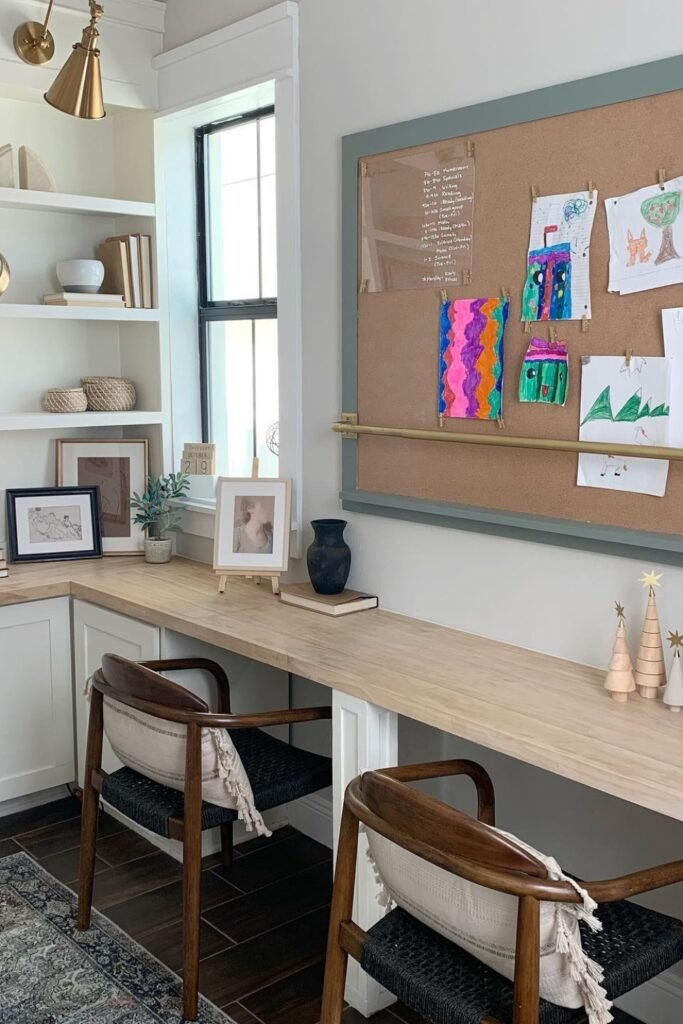
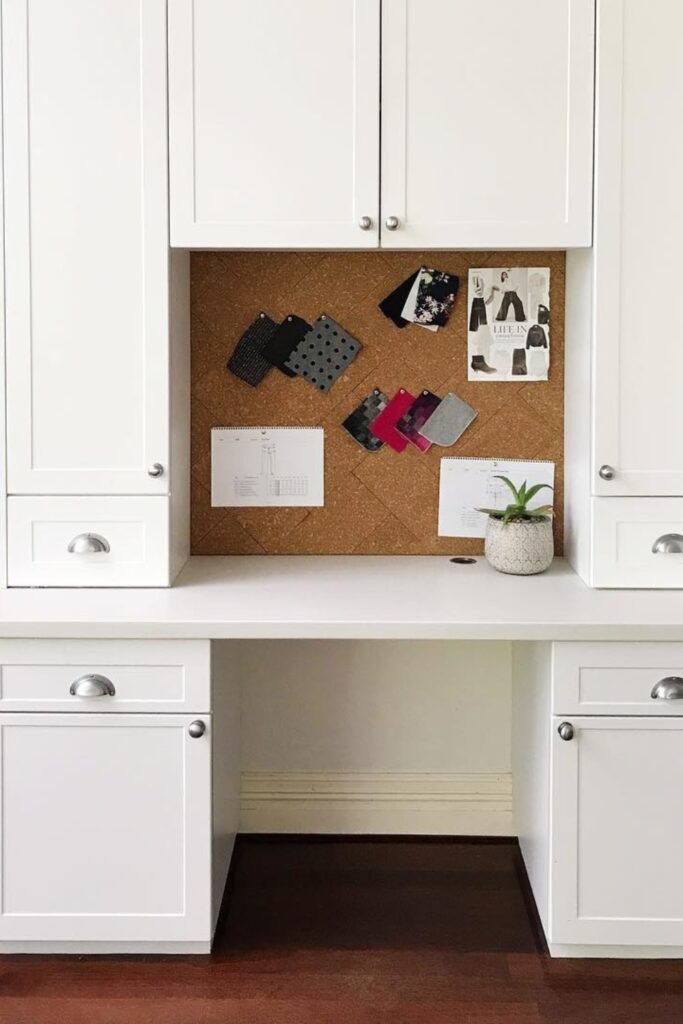
Built-In Desk Cork Board
Adding a cork board straight into a built-in desk nook can make your office more useful. This arrangement puts samples, notes, or reminders in front of you without making the desk look messy.
To recreate, measure the back wall of your cabinet space, cut cork tiles to suit, and place them in a clean pattern.
This is a smart technique to make the most of small workplace areas while having inspiration close at hand.
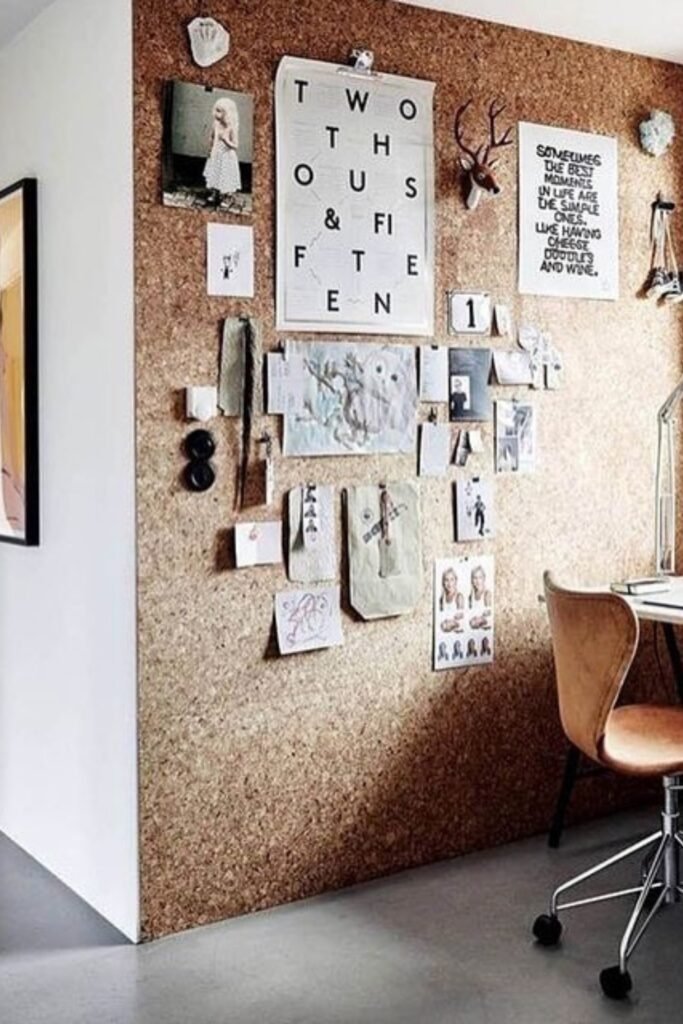
Full Cork Wall Workspace
Make a whole wall into a big cork board to make your home office seem good and work well. You can pin as many calendars, notes, mood boards, or inspiration photographs as you want with this configuration.
To make it look like it did before, cover a wall piece with cork tiles or big sheets and be sure to glue them down evenly so they don’t bubble.
It’s great for creative studios or people who work from home and need to keep things organized and get ideas at the same time.
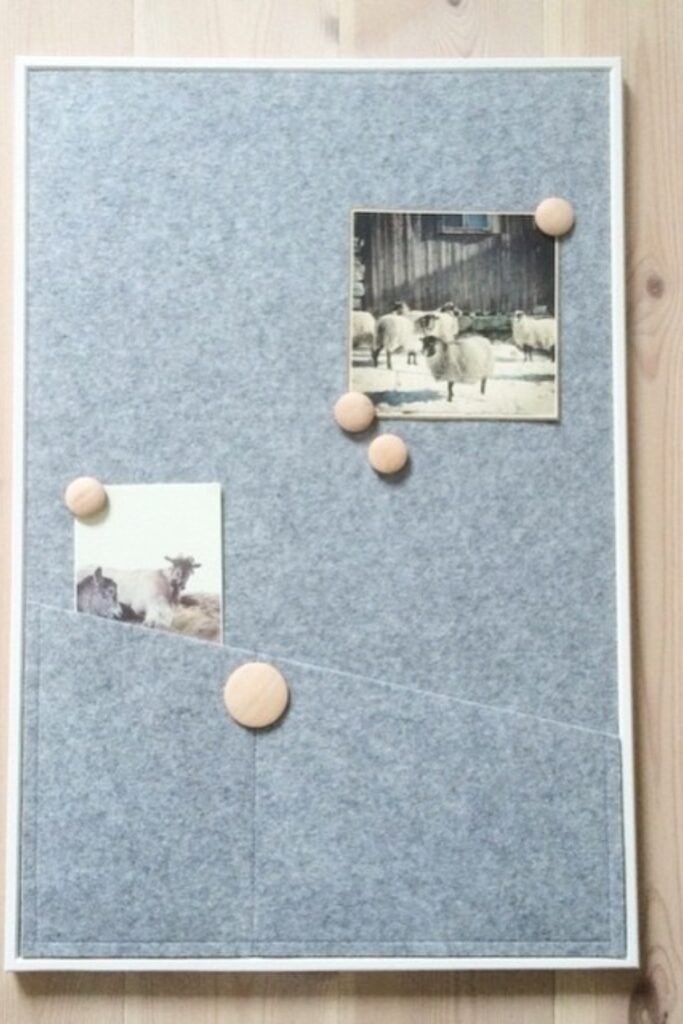
Minimalist Felt Cork Board
Instead of natural cork, choose a trendy felt-covered board that goes well with clean interiors. The felt surface makes the design softer, but it still works great with push pins or clips.
To make it again, stretch felt cloth over a cork base, fasten it at the back, and use muted colors like gray for a simple look.
Great for Scandinavian-style houses, home offices, or compact locations where you want to keep things neat without making them look cluttered.
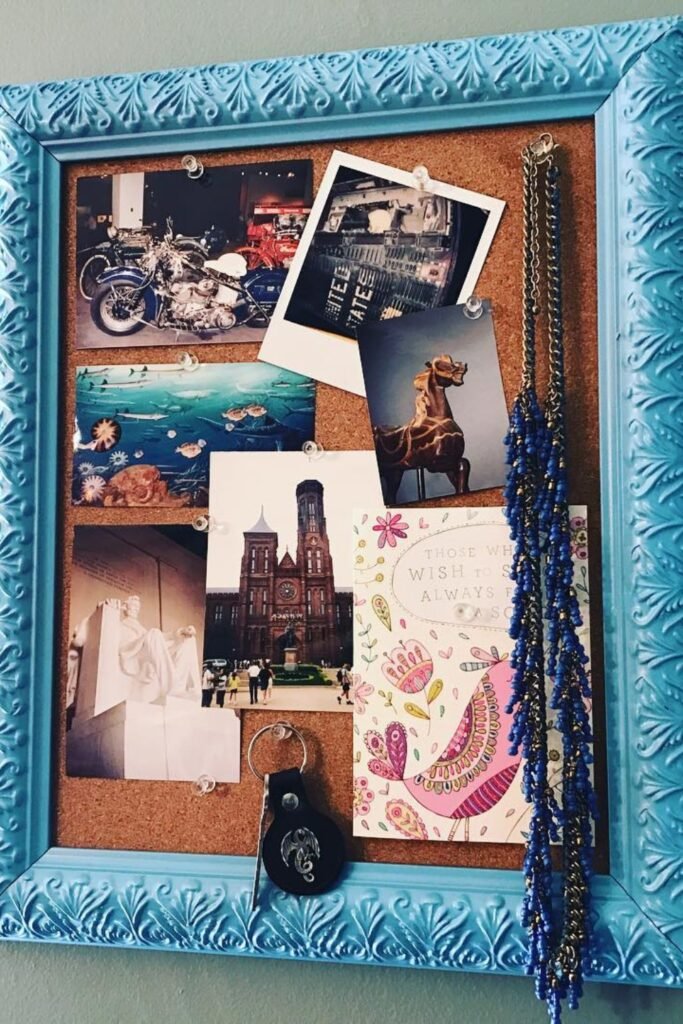
Framed Cork Board with Pop Color
A dramatic painted frame may make a plain cork board look better. A turquoise frame makes commonplace notes, pictures, and jewelry into a fun wall decoration.
To make an old picture frame new again, paint it a bright color and put a cork insert inside.
It works great in bedrooms, hallways, or dorm rooms when you want a piece that looks good and has a lot of storage space.
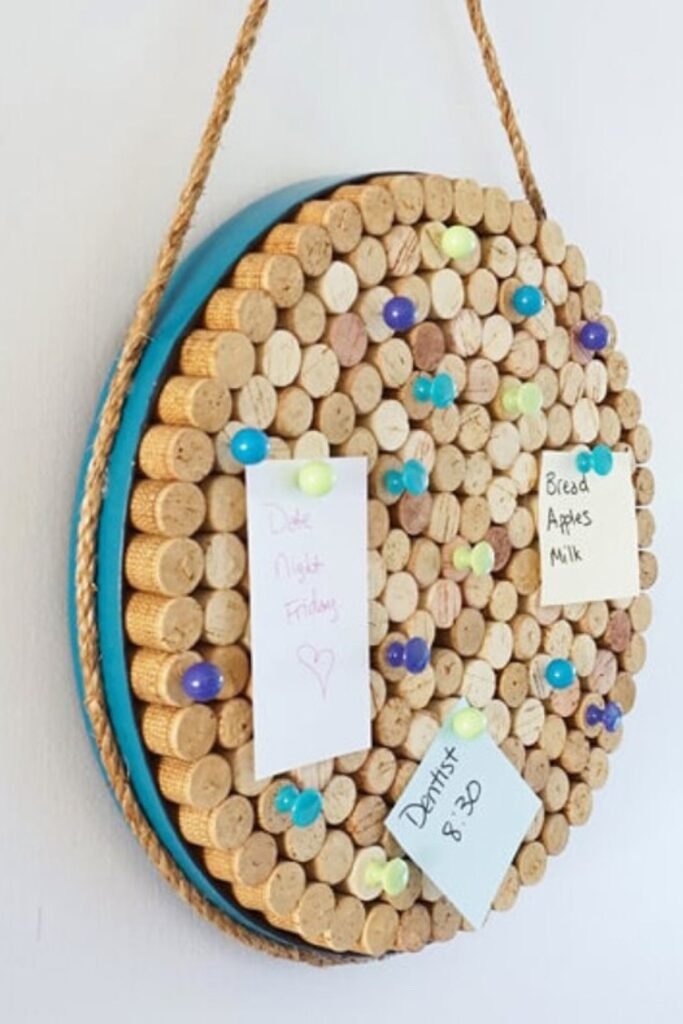
Round Wine Cork Board
Make a beautiful spherical cork board out of old wine corks that you can hang on the wall. This design has a round base covered in tightly packed corks and is framed with rope to give it a rustic look.
To make it again, cut a round piece of wood, glue corks vertically across the top, and then add a rope border and hanger.
Use bright push pins to make notes stand out. Great for kitchens, entryways, or casual areas where style and utility come together.
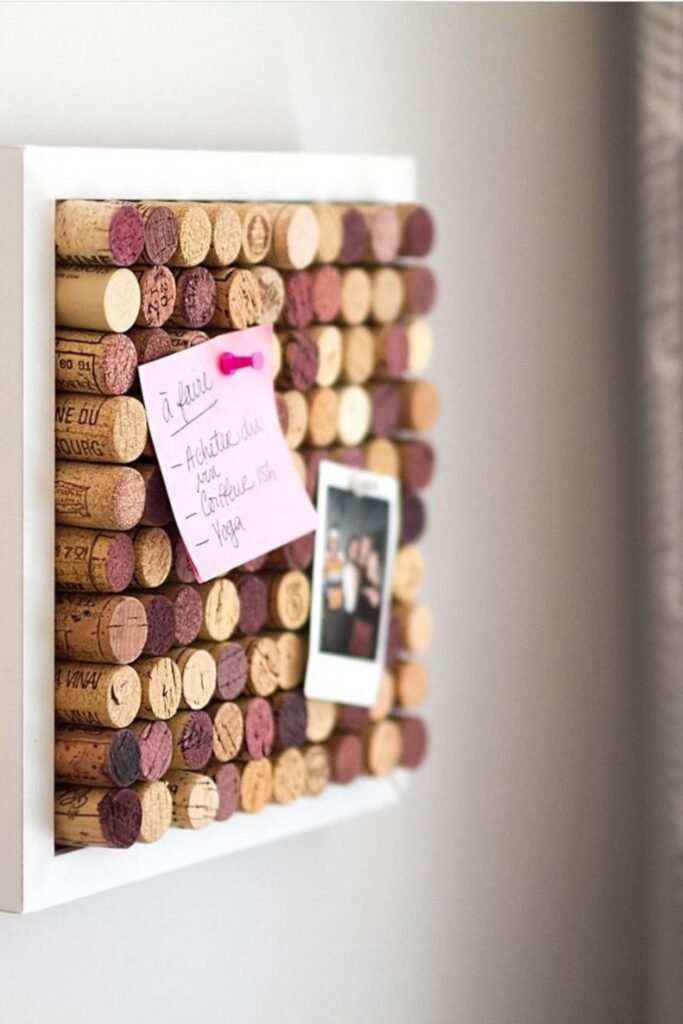
Framed Wine Cork Board
Put wine corks in a frame so that they are all lined up horizontally. This will make a neat, organized cork board that also shows off the natural colors of the corks.
This pattern makes all the pins stand out and gives your wall a warm, textured appeal. To make it again, cut the corks to the same length, glue them side by side onto a strong base, then frame the item for a nice finish.
Both as decoration and a place to write notes, this is great for kitchens, home offices, and entryways.
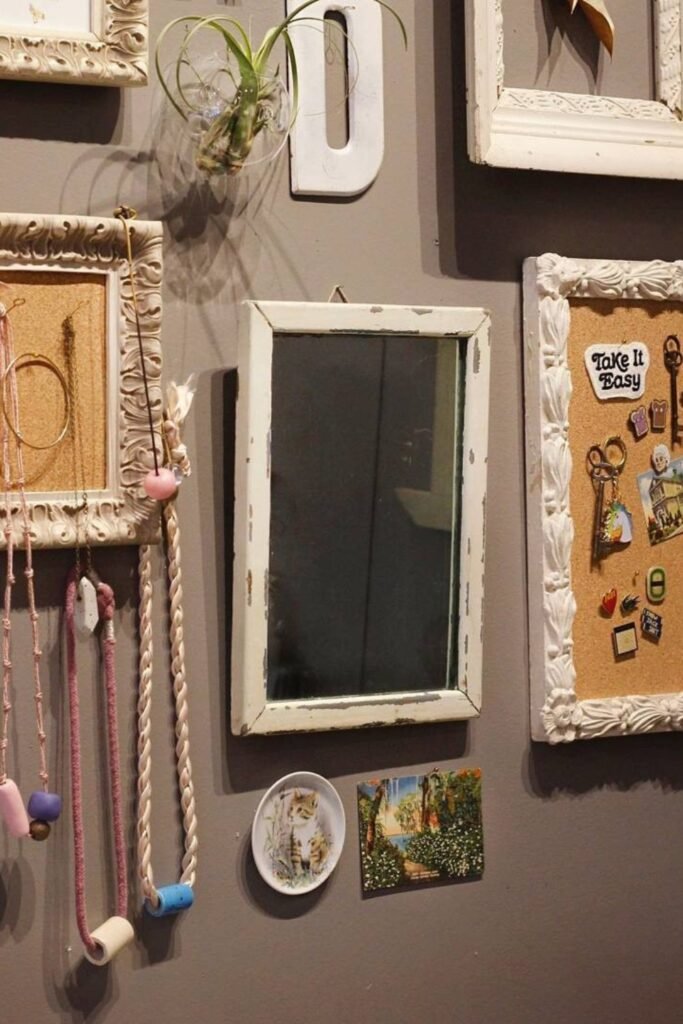
Vintage Frame Cork Boards
You may repurpose fancy old frames into small cork boards for keys, jewels, or treasures.
This arrangement combines useful storage with visual beauty, especially when hung on a gallery wall. To make it look like it did before, take the glass out of old frames, put cork sheets inside, and hang them all together.
Great for hallways or creative spaces where you want to make organization look like art.
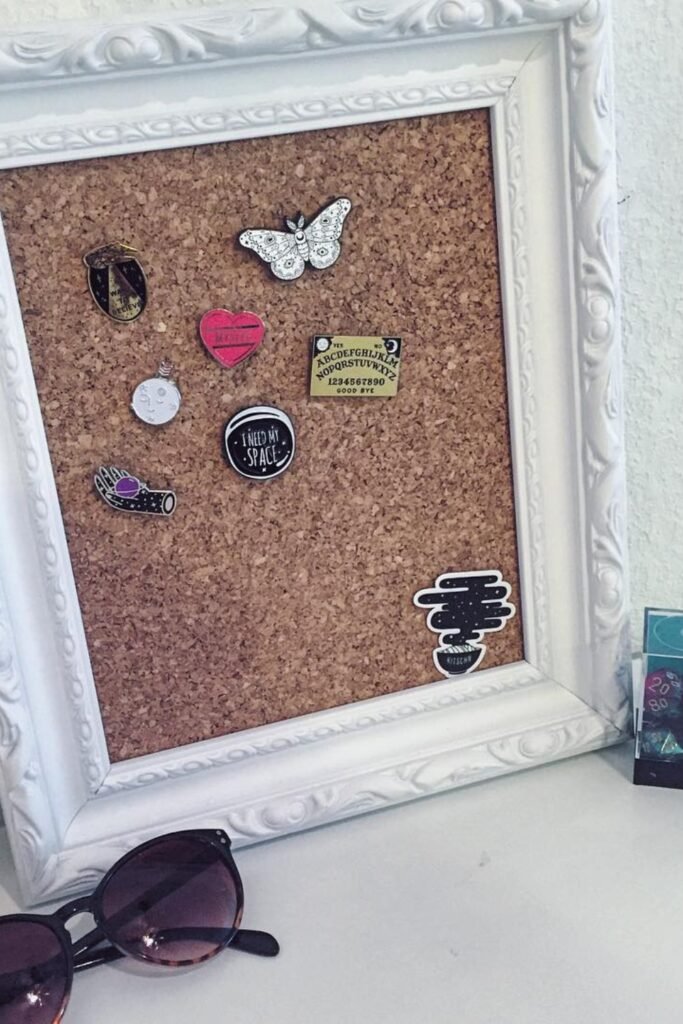
Cork Board Pin Collector
A cork board can be framed to show off enamel pins or badges.
The cork backing makes it easy to move things around in your collection when you get new things, and the beautiful frame keeps it looking good.
To make it again, put cork in a thrifted frame, paint the frame to give it a new look, and place it near your desk or dresser. A simple way to turn valuables into art for the wall.
You may love to read!

Hi, my name is Ali Mehmood! I’m a passionate writer and DIY enthusiast who loves turning creative ideas into practical, hands-on projects.
I created this website to share inspiring, budget-friendly ideas that you can do yourself – whether it’s organizing your home, crafting something unique, or creating fun projects for kids and pets.
I believe DIY isn’t just a hobby – it’s a smart way to save money, reduce waste, and enjoy the satisfaction of making things with your own hands.
I’m excited to have you as part of this growing community, and I’ll continue bringing you helpful, realistic, and fun DIY ideas you can actually use.


