
This post may contain affiliate links: read full affiliate disclosure.
A lot of people try to build a gravel pathway and end up with a sinking, weedy, uneven strip that never looks right.
The real issue isn’t the gravel—it’s the missing details no one explains: how your soil behaves after rain, how deep the base should be and which gravel stays stable.
Most DIYers only realize these things after the path starts shifting, washing out, or collecting mud.
But once you understand these factors, a gravel pathway becomes one of the easiest and most rewarding projects you can do.
It can look clean, drain naturally, handle constant foot traffic, and stay low-maintenance all year.
This guide gives you the clarity most tutorials skip, so you can build a solid, long-lasting path that fits your yard, your climate, and your budget.
Save this article for later!
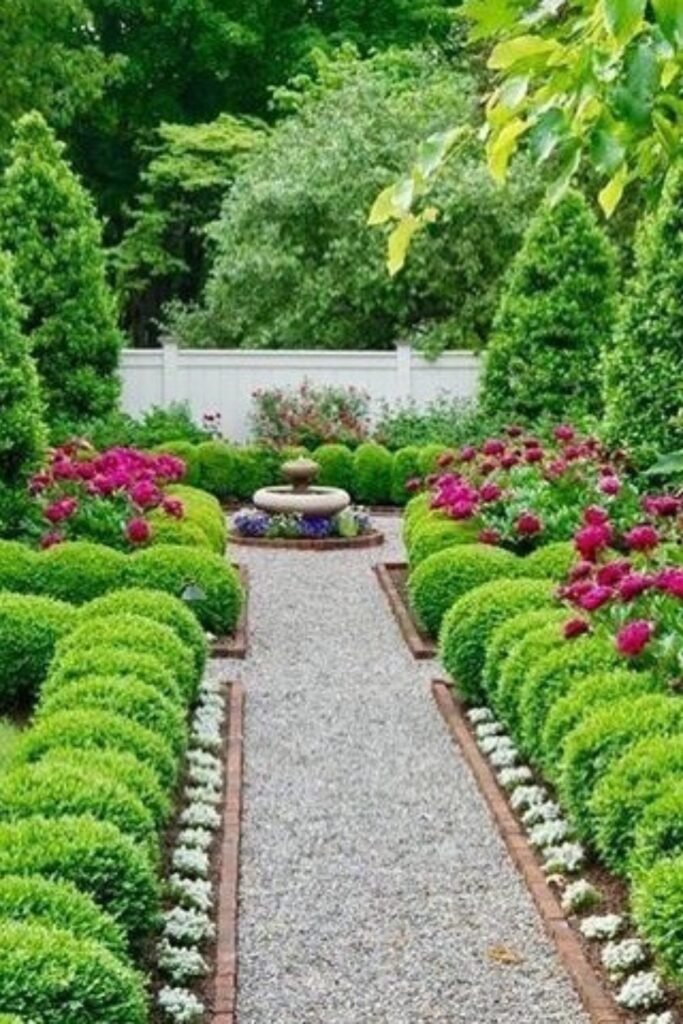
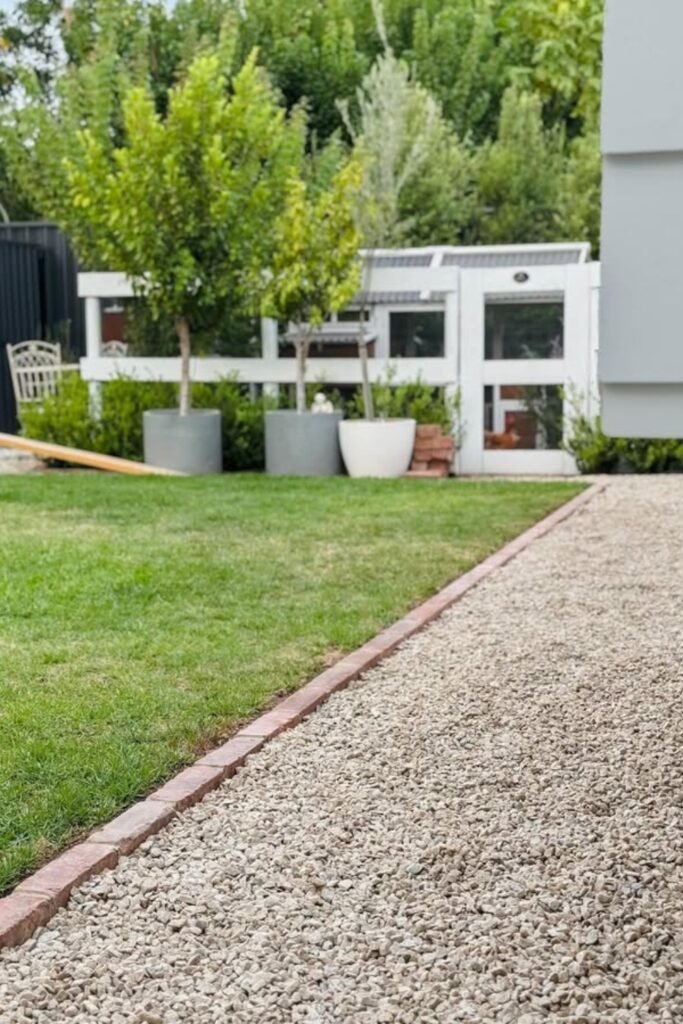
Garden Edging Precision
Bringing crisp order to a formal garden works beautifully when a gravel path sits between shaped hedges supported by narrow brick edging.
This setup suits entry gardens or backyard walkways where you want structure and symmetry without heavy construction or difficult installation work.
Recreate it by outlining your route with bricks, leveling compacted gravel inside, then trimming surrounding plants to echo the clean visual rhythm.
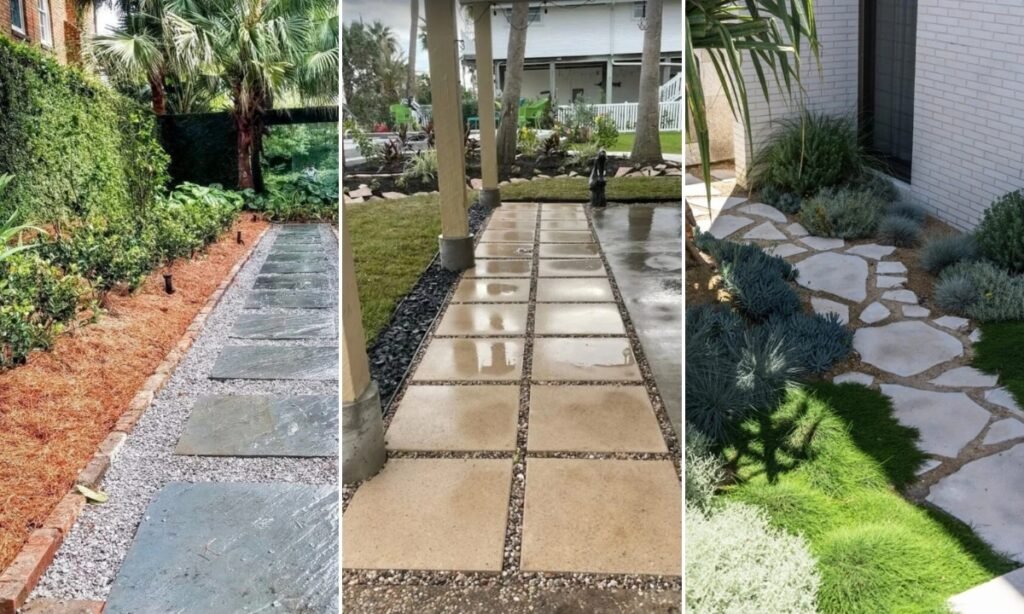
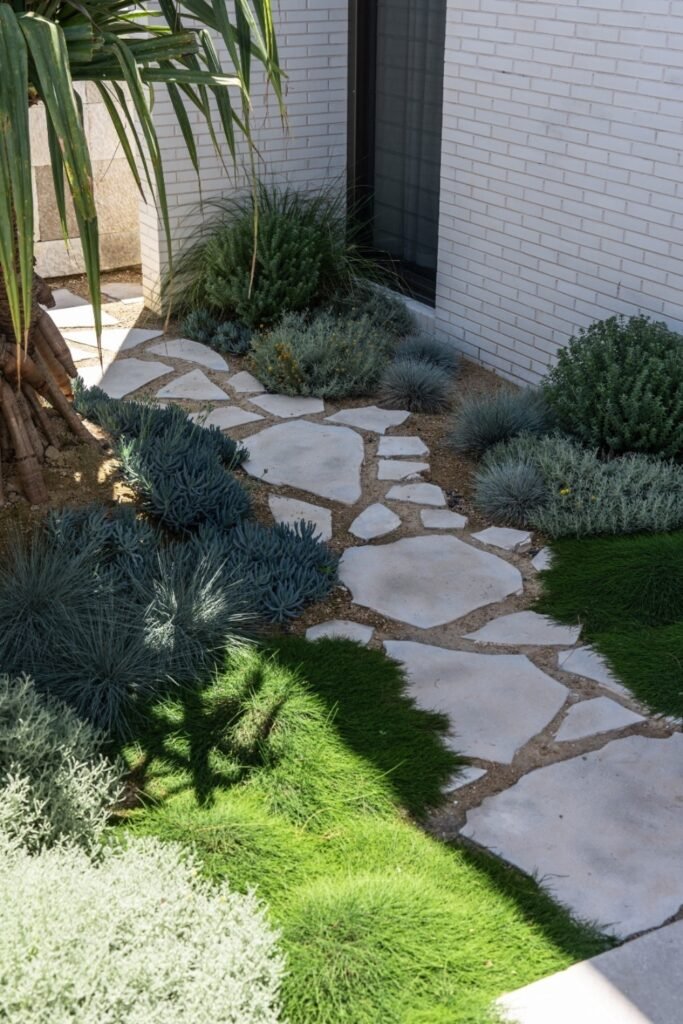
Broken-Stone Natural Route
Letting irregular stone pieces guide movement feels right in drought-tolerant gardens because each gap allows soil and low plants to breathe.
This design excels beside modern homes where you want a relaxed path that still looks intentional without rigid lines or traditional edging.
Build it by spacing stones comfortably for walking, brushing gravel into open joints, and mixing varied textures around the pathway for natural balance.
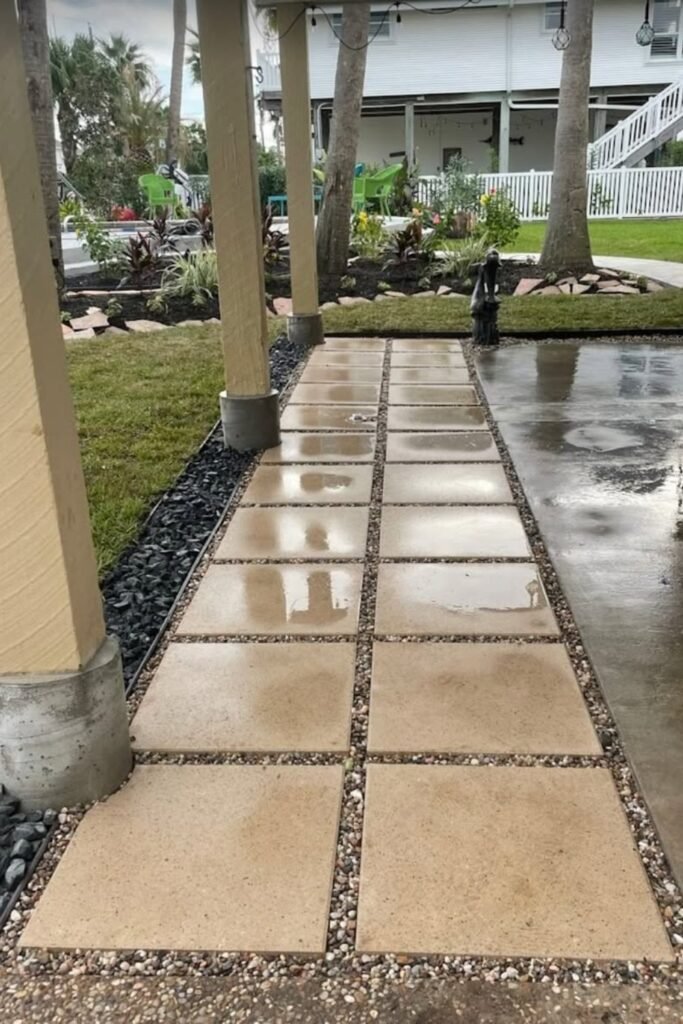
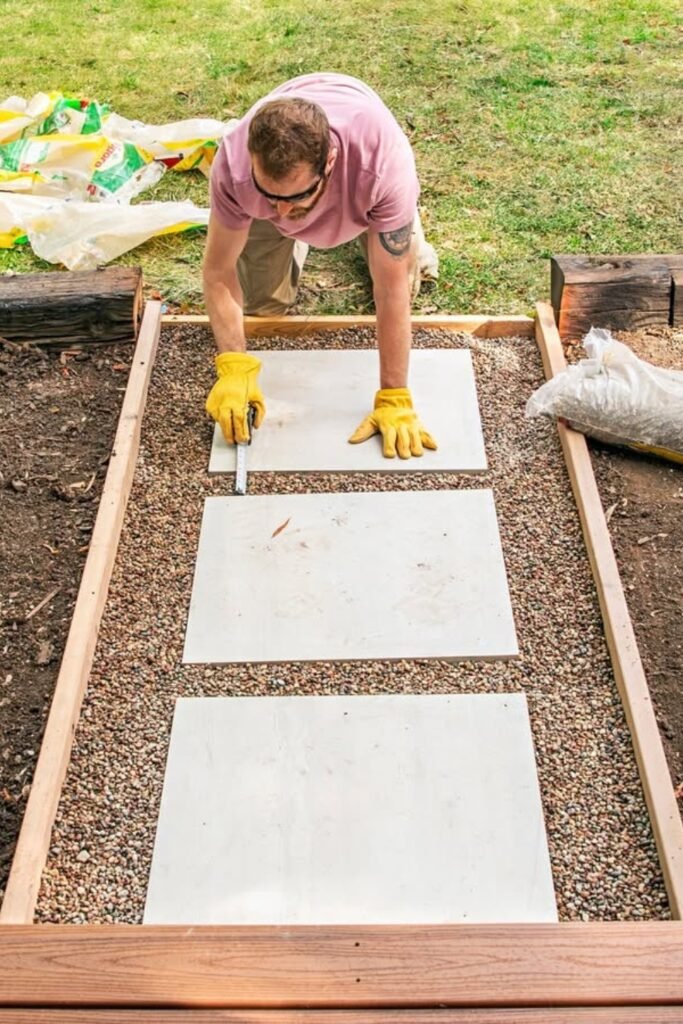
Grid-Set Paver Layout
Spacing large pavers inside a gravel bed delivers a modern walkway that stays stable due to a boxed frame keeping materials contained.
Use this approach in side yards or utility strips where you want clean stepping zones supported by inexpensive gravel that drains efficiently.
Recreate it by securing straight timber borders, compacting a strong base, leveling each paver carefully, then filling remaining areas with small decorative gravel.
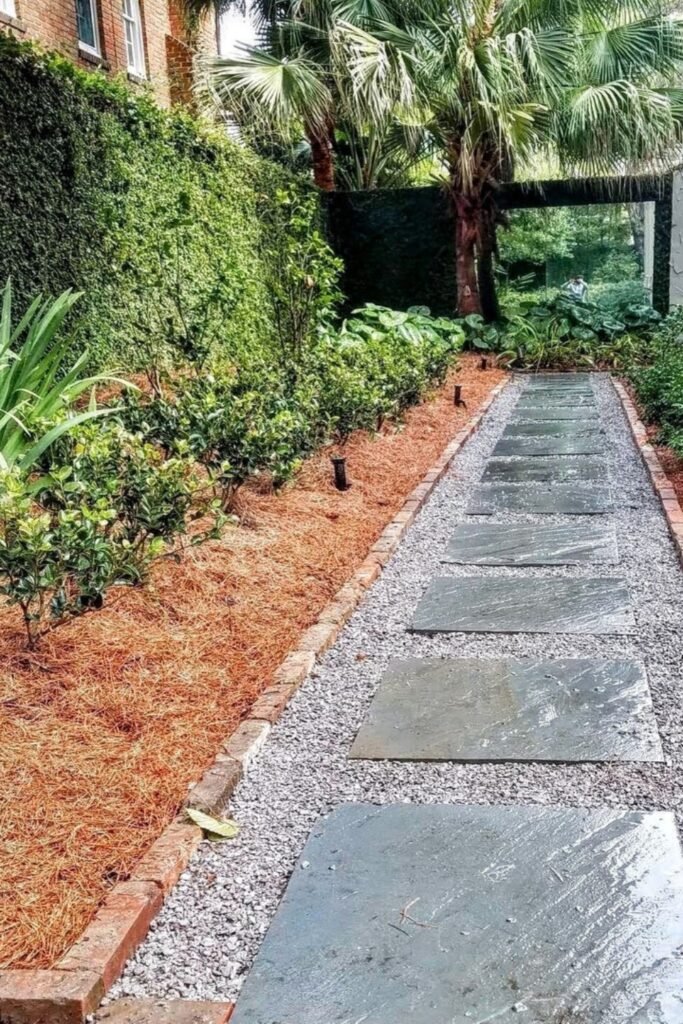
Brick-Framed Slate Walk
Framing slate slabs with rustic bricks creates a durable route that stays neat because the edging prevents gravel from scattering outward.
This look suits shaded corridors or narrow garden passages needing a tidy path that works with dense plantings or layered greenery beside it.
Rebuild it by digging a channel for bricks, setting stones on a compacted base, then sweeping fine gravel between everything for tight finishing.
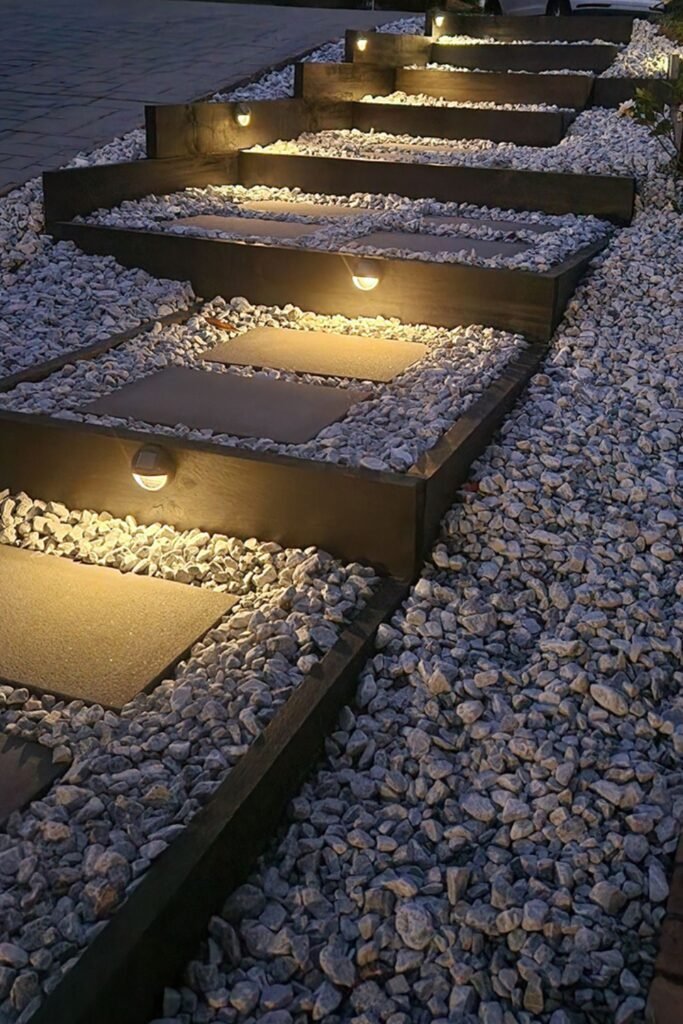
Illuminated Step Path
Using built-in lights along a raised gravel path elevates nighttime safety since each paver becomes visible without harsh overhead fixtures.
This idea fits sloped yards or entry areas requiring gentle stepped movement supported by edging that holds gravel securely on each tier.
Achieve it by anchoring riser boards, placing pavers firmly on compacted beds, spreading gravel evenly, then adding warm solar lights for practical guidance.
Brick-Defined Side Path
Keeping a side-yard walkway clean becomes easier when compact gravel sits inside a shallow brick border preventing movement onto adjoining lawn space.
This method works perfectly beside sheds, gardens, or pet enclosures where frequent foot traffic demands drainage and dependable ground stability year-round.
Recreate it by marking a straight route, installing brick edging tightly, layering compacted gravel, then maintaining the border line for a sharp finished look.
Curved Brick Border Flow
Curving a pathway with brick edges creates gentle movement that feels welcoming and works beautifully beside porches or shaded garden entries.
Place small pavers inside those curves for a guided walking line that remains stable because the outer brick border locks everything securely.
Recreate this by shaping your route first, setting bricks firmly, then filling the interior with compact pavers supported by a solid gravel base.
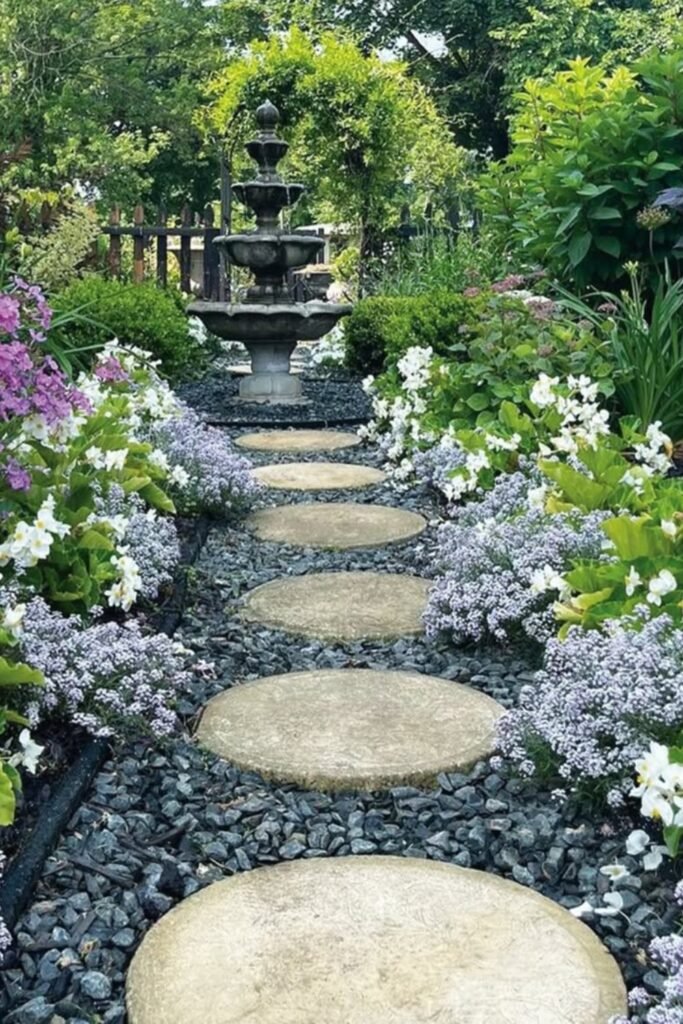
Round-Stepping Garden Route
Using circular pavers over dark gravel brings soft rhythm to narrow garden spaces where blooming plants naturally frame each stepping point beautifully.
This works well in cottage gardens needing a simple path that stays visible without overwhelming delicate flowers planted closely along the edges.
Build it by leveling each round slab individually, keeping stride-friendly spacing, then sweeping gravel between pieces to anchor everything cleanly in place.
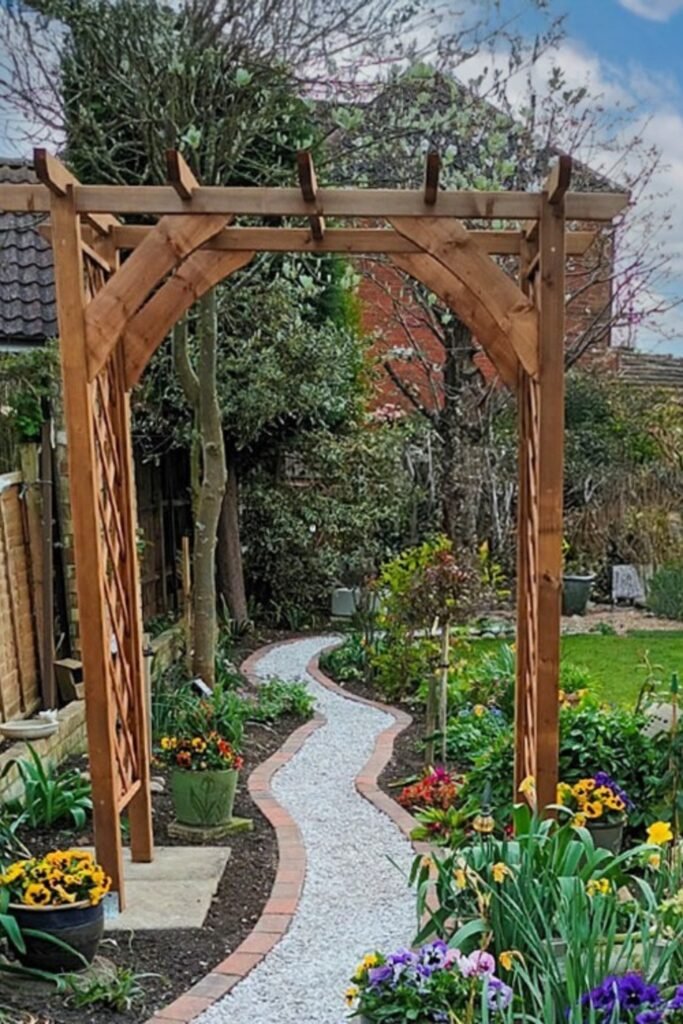
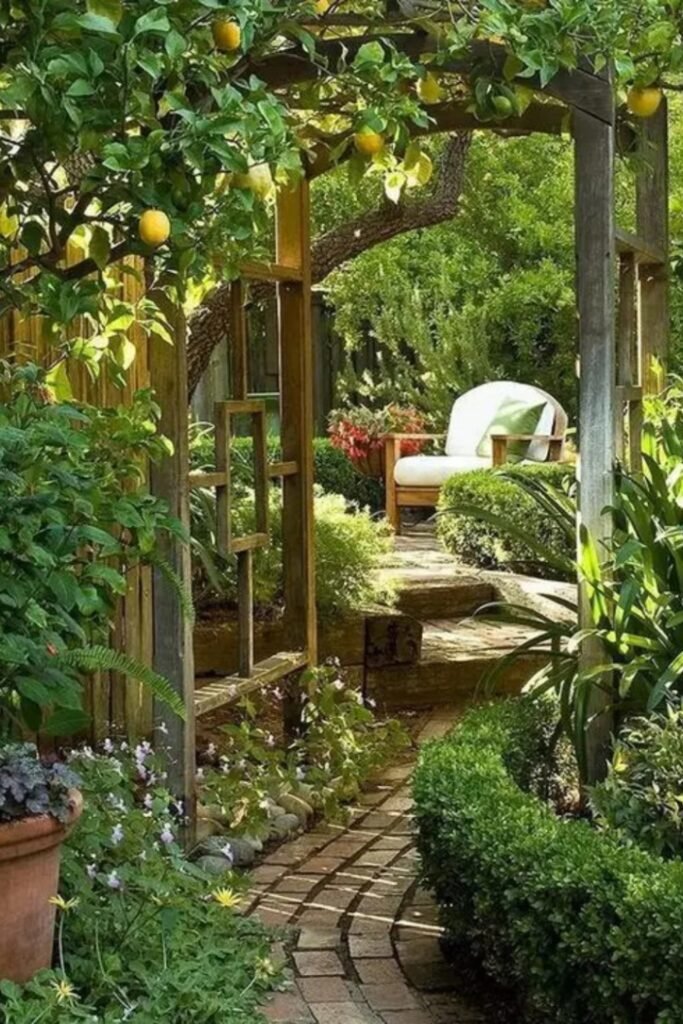
Arbor-Framed Gravel Walk
Passing beneath a wooden arbor feels intentional when a slim gravel path bends slightly and uses brick edging to stay perfectly defined.
This layout suits long gardens that need structure without losing their relaxed planting style filled with seasonal color and layered greenery throughout.
Recreate it by setting the arbor first, shaping a gentle curve, installing brick borders tightly, then covering the center route with compacted gravel.
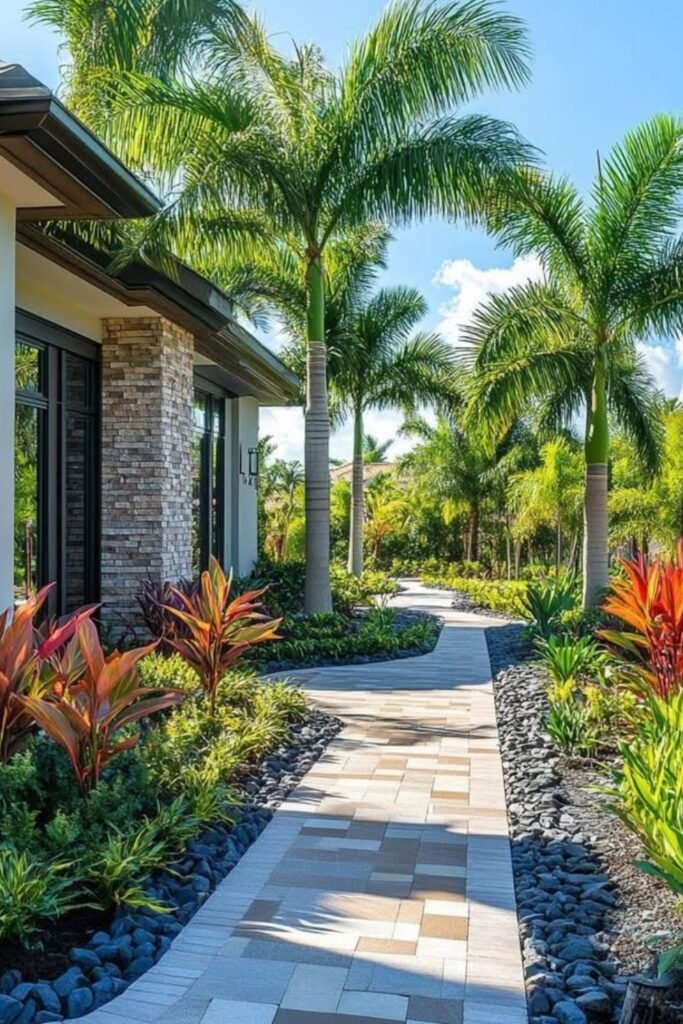
Tropical Edge Contrast
Pairing warm-toned pavers with dark gravel edging produces a strong contrast ideal for tropical landscapes where bold foliage already sets dramatic energy.
This design suits front walkways because the tidy border guides visitors while allowing rainwater to drain naturally through permeable gravel sections.
Build it by laying patterned pavers on a firm base, defining curves with metal edging, then filling borders generously with uniformly sized dark gravel.
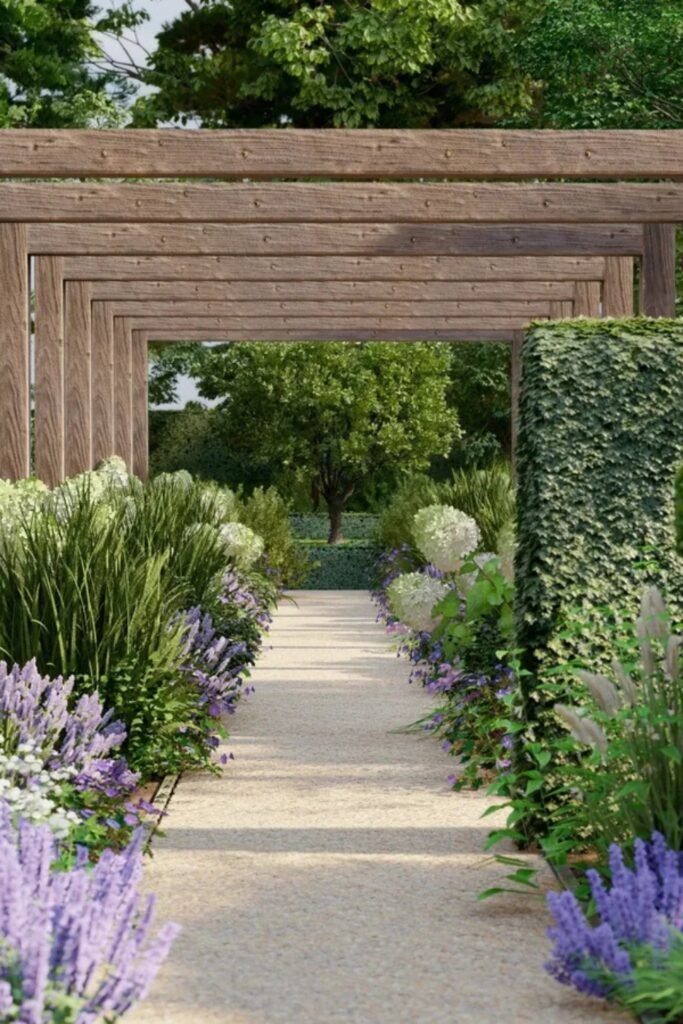
Repeated Timber Frame Path
Layering rectangular timber frames creates a tunnel-like rhythm that instantly elevates simple gravel paths running through structured or semi-formal gardens effortlessly.
This approach works best in wide outdoor corridors requiring height without heavy construction, giving the pathway presence while still feeling naturally integrated.
Recreate it by spacing frames evenly, anchoring posts firmly, installing straight edging, then compacting light-colored gravel that brightens the shaded walking zone.
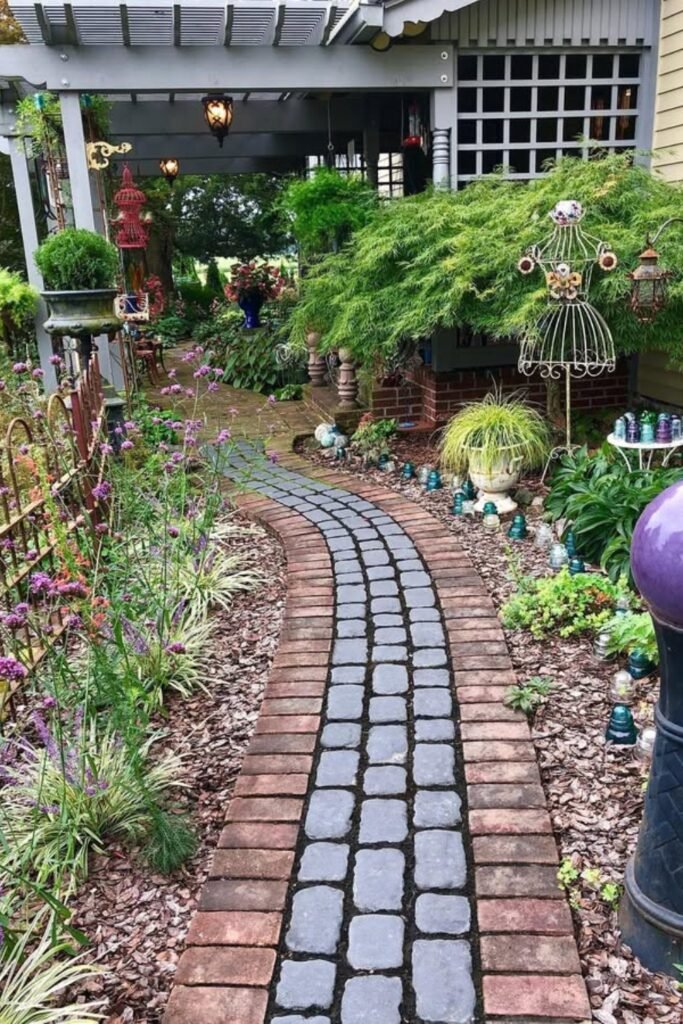
Brick Curve Through Greenery
A narrow brick path weaving through dense plants feels immersive and intimate, fitting perfectly in shaded corners needing gentle guidance without visual heaviness.
This style thrives near seating nooks because the curve draws movement softly toward the resting area while keeping foot traffic off surrounding beds.
Rebuild it by tracing a flexible route, setting bricks on compact sand, brushing fine gravel between joints, then letting mature plantings soften the pathway edges.
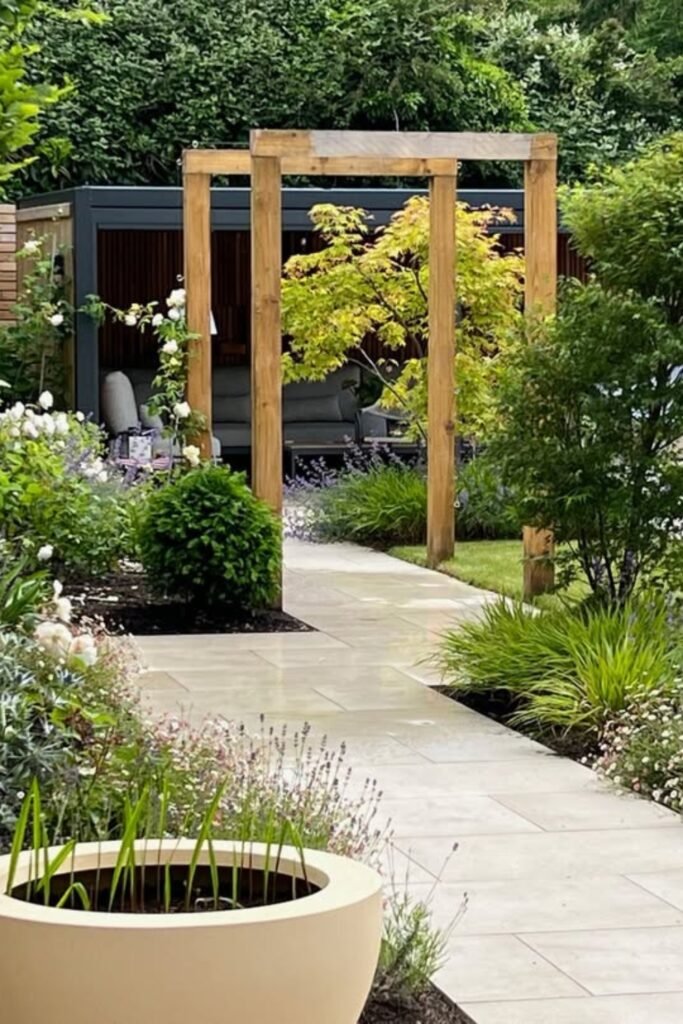
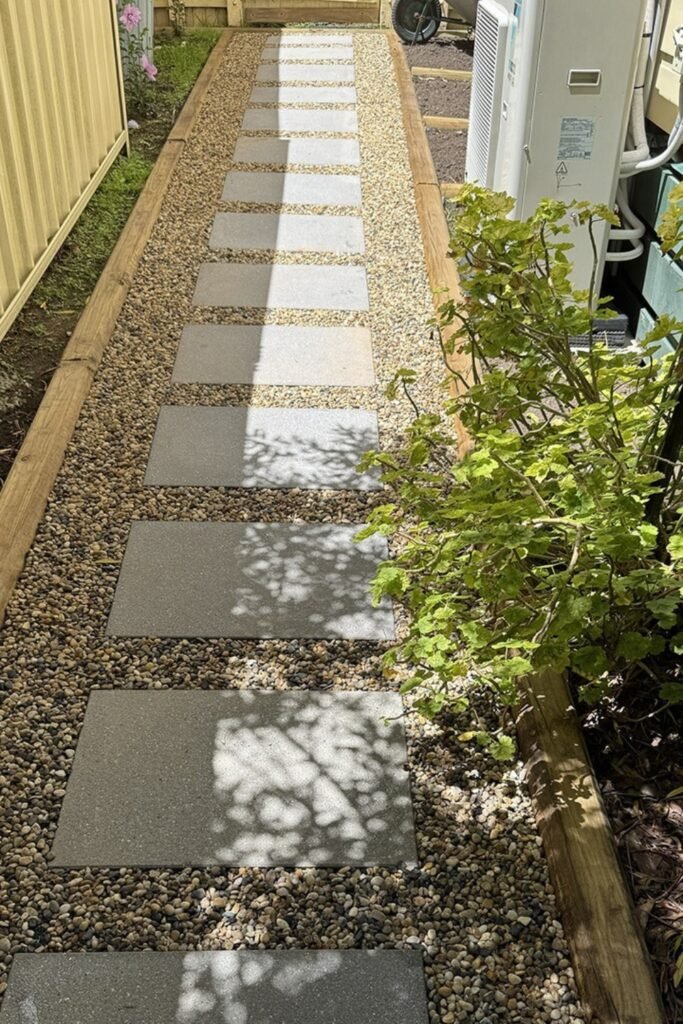
Timber Frames for Modern Flow
Framing a paved walkway with simple timber posts adds height and structure, making narrow garden routes feel intentional without heavy design work.
This approach suits contemporary backyards where you want a clean transition between planted borders and a smooth, easy-to-maintain walking surface.
Recreate it by anchoring posts securely, choosing large pavers for stability, then trimming plants to enhance the walkway’s straight architectural lines.
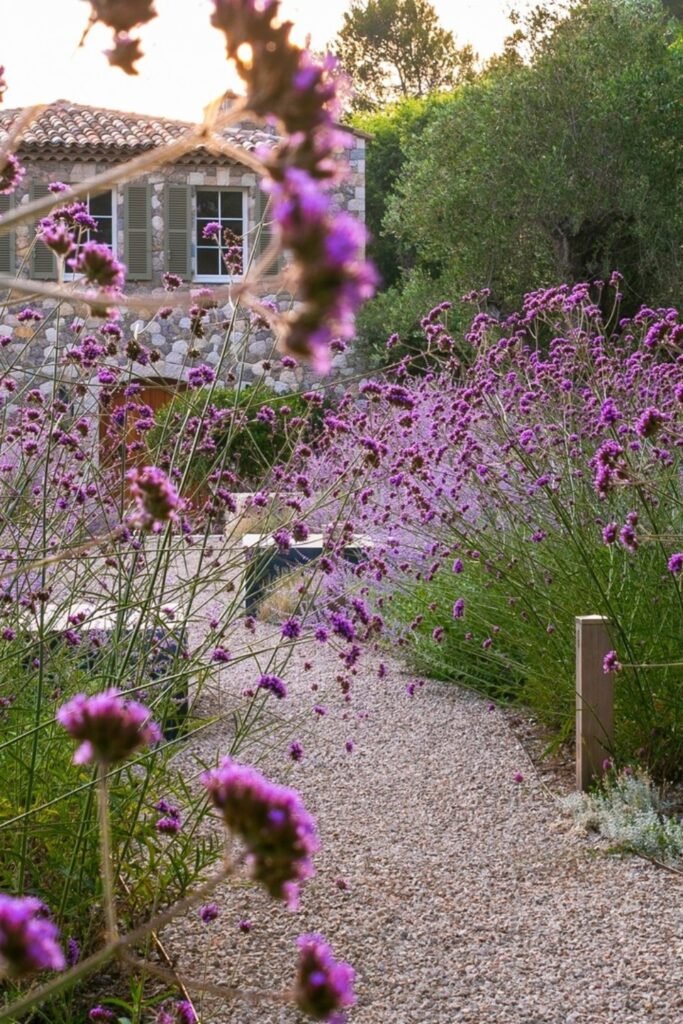
Soft Meadow Curve
Letting gravel wind through tall flowering plants creates a relaxed country-garden feel that works beautifully around cottages or nature-inspired outdoor retreats.
This style thrives where you want gentle movement without strict edges, allowing plants to spill naturally while still guiding foot traffic comfortably.
Build it by shaping a loose curve, spreading compacted gravel, then choosing drought-tolerant blooms that frame the pathway without overwhelming its walking width.
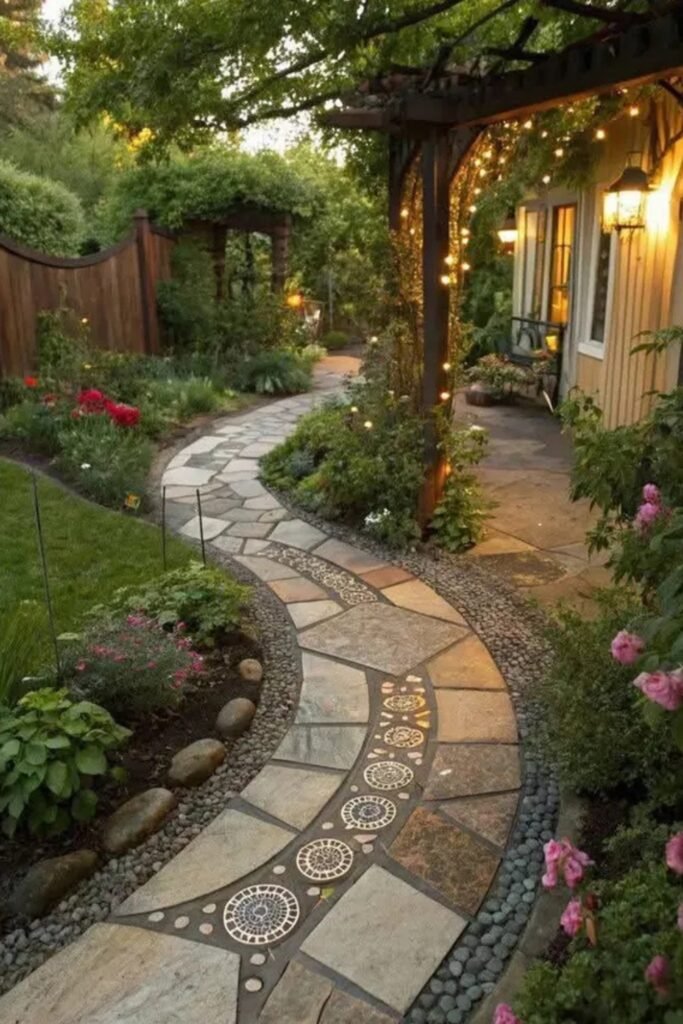
Mosaic-Accented Stone Path
Introducing mosaic insets along a curving stone walkway adds artistic detail that transforms a simple route into something visually rich and truly memorable.
This design fits gardens where evening lighting and layered plantings create a cozy atmosphere, letting decorative stone patterns stand out beautifully.
Recreate it by spacing stones gradually, embedding mosaic rounds securely in mortar, then topping exposed gaps with gravel for reliable long-term support.
Lit Entry Paver Walk
Creating a straight paver walkway with embedded lighting gives a grand entrance effect ideal for formal landscapes or front-yard approaches needing clear nighttime visibility.
This setup performs well where symmetry matters because each light highlights the spacing, drawing attention toward gates or architectural focal points effortlessly.
Build it by leveling oversized pavers, installing low-voltage lights along borders, then filling narrow joints with fine gravel that stays stable under frequent use.
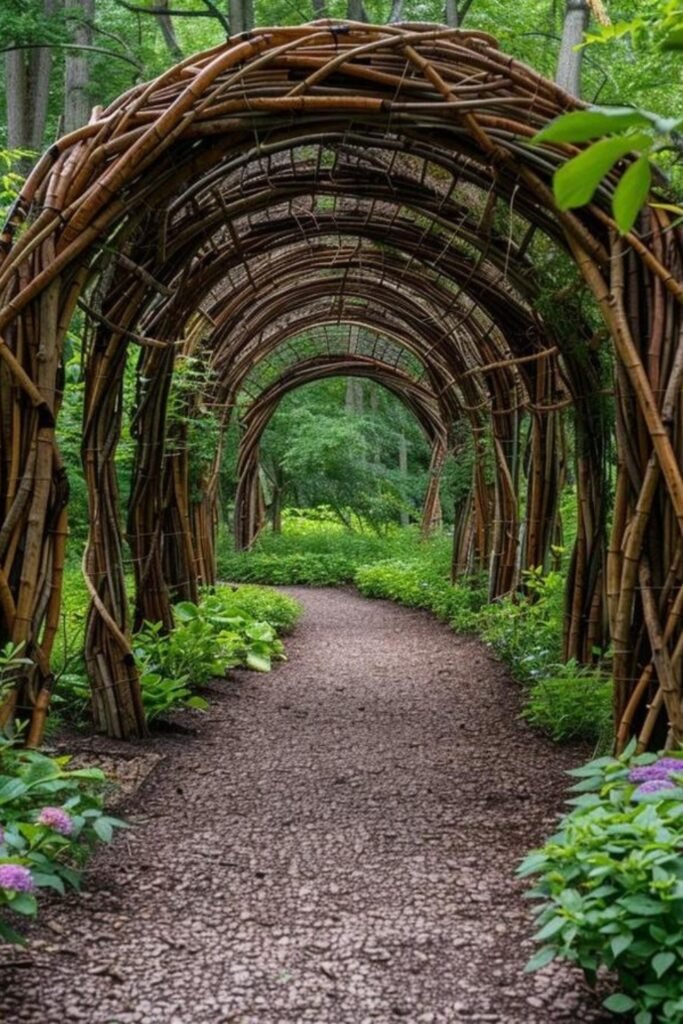
Woven-Arch Woodland Path
Using woven branches to form repeating arches turns a simple gravel trail into an immersive woodland experience perfect for shaded gardens needing soft structure.
This idea works best in natural settings where organic textures blend easily with understory plants, creating a whimsical passageway that feels peaceful and grounded.
Recreate it by bending branches around sturdy frames, securing intersections tightly, then laying compact gravel beneath to maintain a reliable walking route year-round.
Lantern-Guided Curve
Spacing lanterns along a curved paver path adds warm guidance at night, making this design ideal for spacious lawns or landscaped entertaining areas.
This approach thrives where soft lighting enhances garden shapes, helping guests move comfortably while still enjoying the surrounding greenery after sunset.
Construct it by shaping a wide curve, placing pavers with consistent gaps, installing lanterns securely, then filling exposed edges with gravel for drainage.

Hi, my name is Ali Mehmood! I’m a passionate writer and DIY enthusiast who loves turning creative ideas into practical, hands-on projects.
I created this website to share inspiring, budget-friendly ideas that you can do yourself – whether it’s organizing your home, crafting something unique, or creating fun projects for kids and pets.
I believe DIY isn’t just a hobby – it’s a smart way to save money, reduce waste, and enjoy the satisfaction of making things with your own hands.
I’m excited to have you as part of this growing community, and I’ll continue bringing you helpful, realistic, and fun DIY ideas you can actually use.


