
This post may contain affiliate links: read full affiliate disclosure.
Hair bows are cute, but keeping them organized is a struggle once the collection starts growing.
They end up scattered in drawers, tangled in clips, or lost when you need them most. A DIY bow holder solves this problem without spending much or buying bulky organizers.
In this article, you’ll find 24 creative DIY bow holder ideas that help you store, display, and access hair bows easily.
Each idea is simple, practical, and designed to fit different spaces, styles, and collection sizes.
Why Use a DIY Bow Holder?
A DIY bow holder keeps hair bows organized, visible, and easy to grab without wasting drawer or counter space.
Instead of bows getting crushed or lost, a dedicated holder lets you store them neatly by size, color, or style.
Making your own also allows you to customize the look to match the room, use materials you already have, and adjust the size as the collection grows.
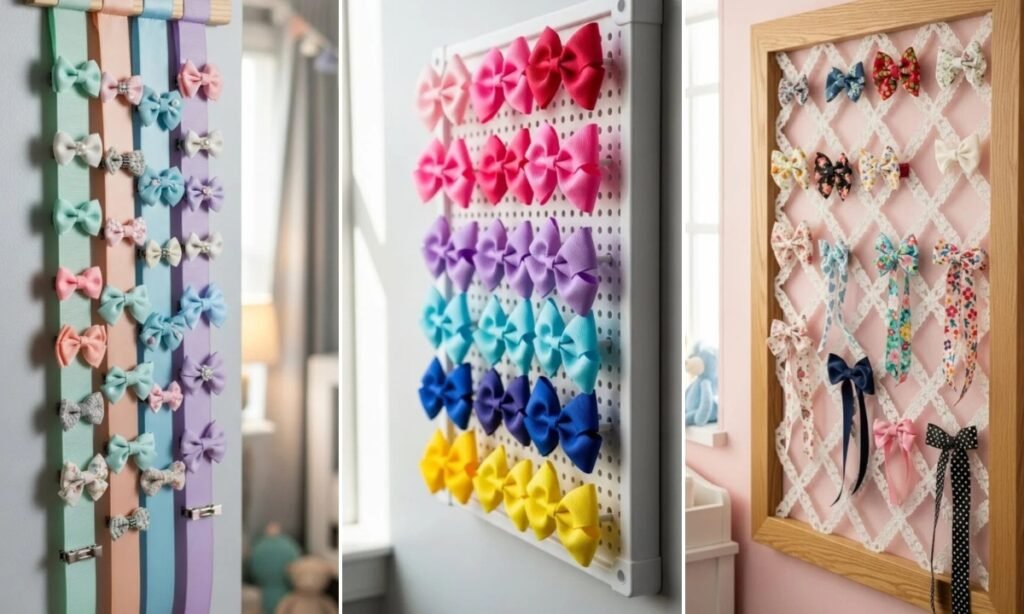
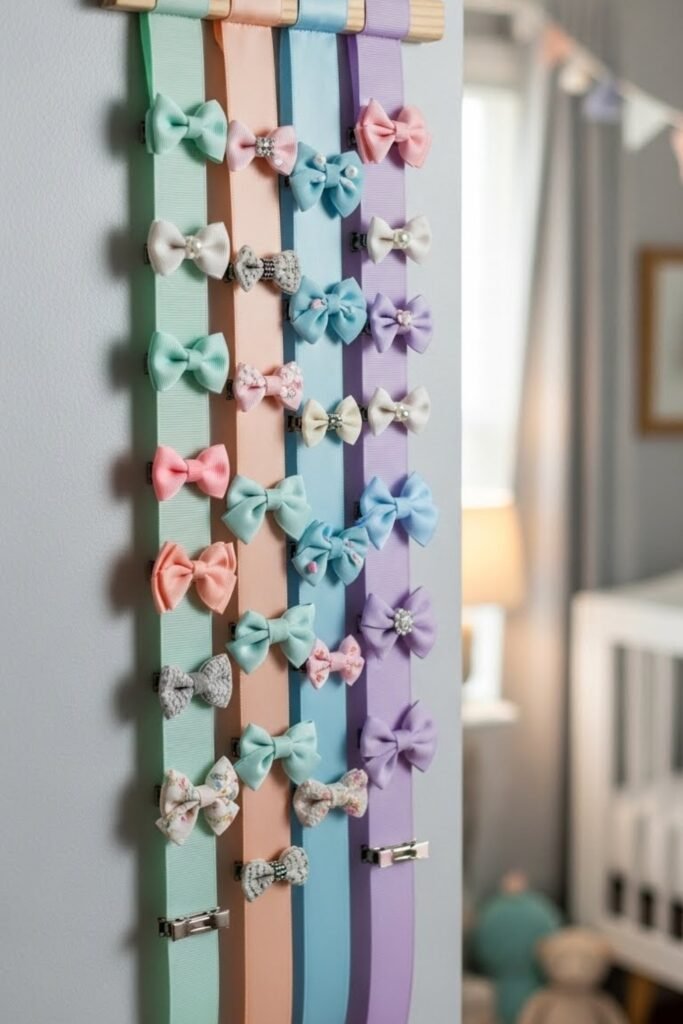
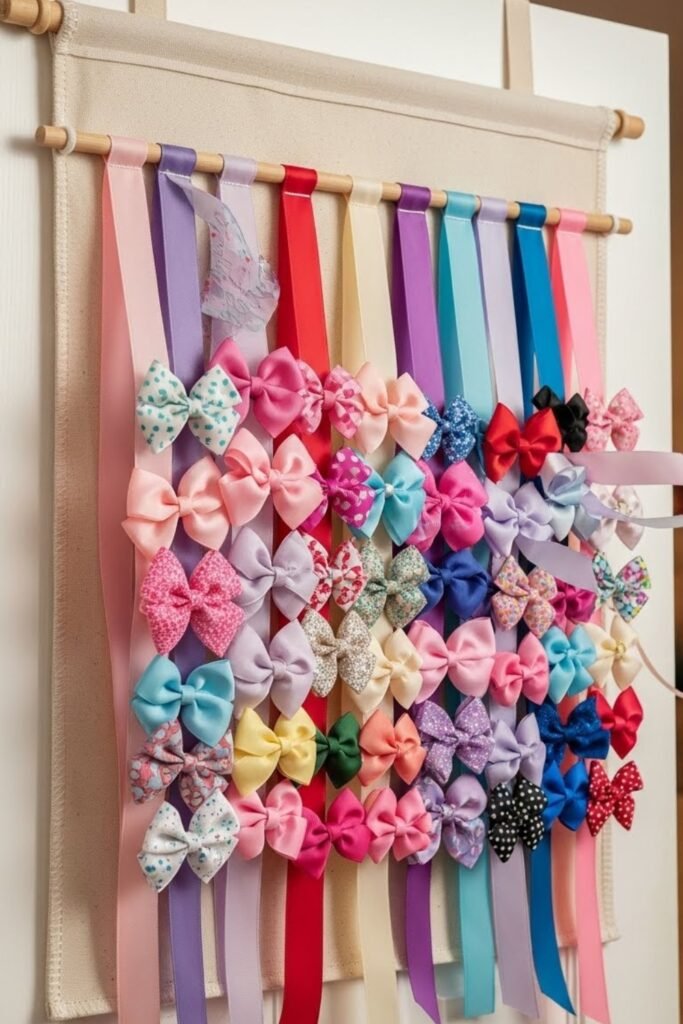
Ribbon Strip
Turn a wide ribbon into a simple vertical bow holder by attaching it to a wall or inside a closet door. Clip or slide hair bows directly onto the ribbon loops.
This works best for small to medium bows and keeps everything visible without taking much space. It’s a quick, no-tools option that also looks soft and decorative.
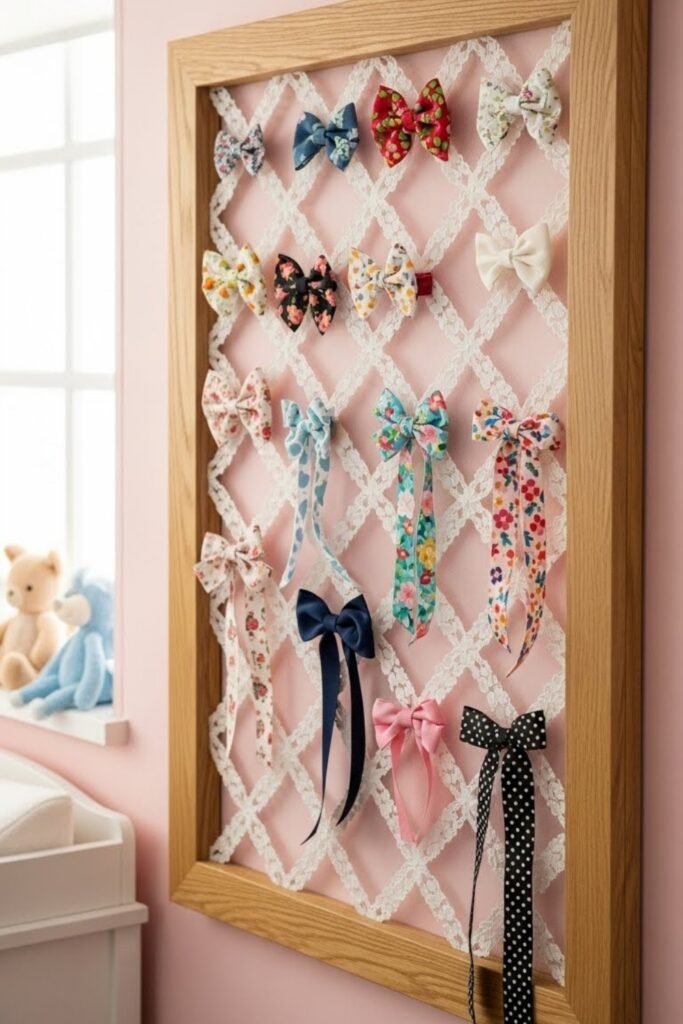
Lace Board
Stretch lace fabric across a wooden board or frame and secure it tightly from the back. The open lace pattern makes it easy to slide bows in and out without clips.
This idea works great for nurseries or girls’ rooms because it doubles as wall décor while keeping bows neatly arranged and easy to grab.
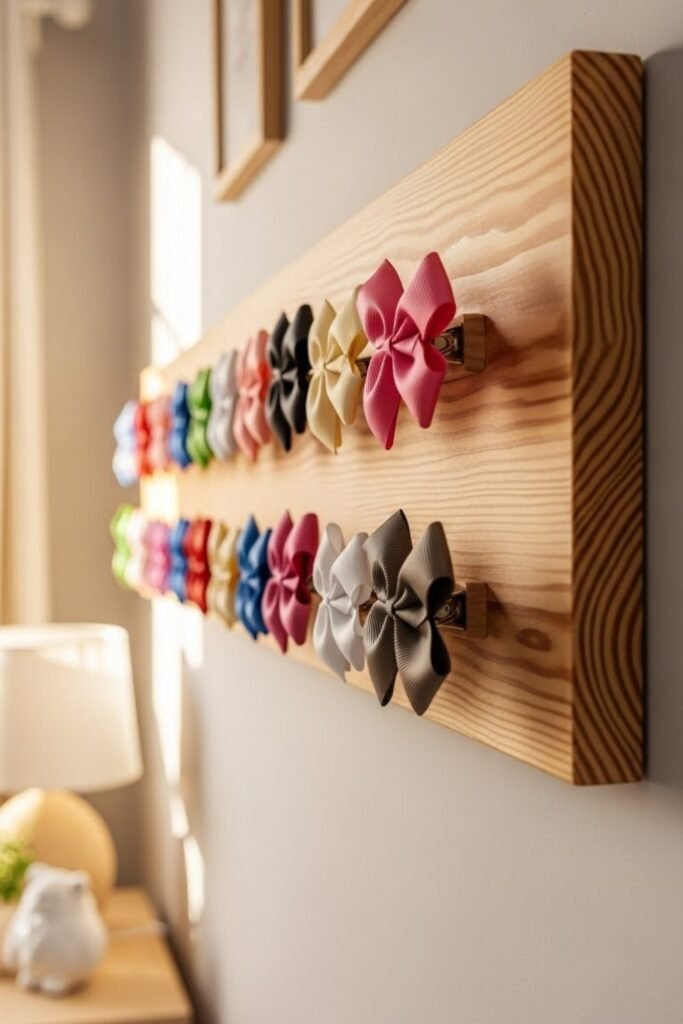
Dowel Rack
Mount a wooden dowel horizontally on the wall using simple brackets or hooks. Hang bows by their clips directly onto the dowel.
This setup is sturdy and works well for larger bow collections. You can paint or stain the dowel to match the room, making it both functional and clean-looking.
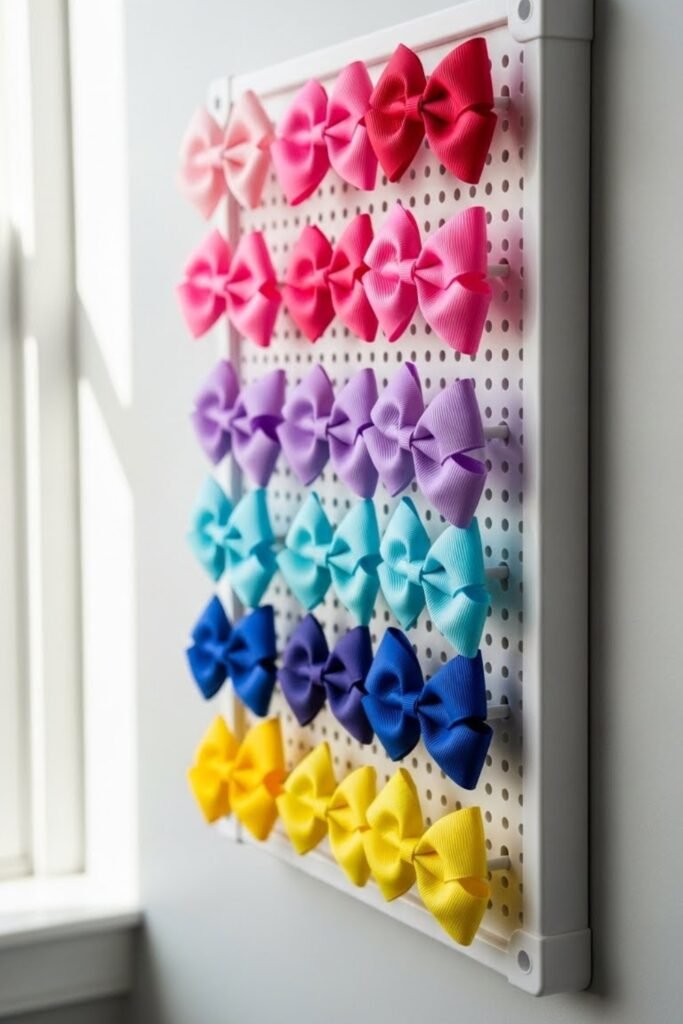
Pegboard Wall
Use a small pegboard panel and add hooks or pegs spaced evenly apart. Each hook can hold multiple bows, making this ideal for growing collections.
Pegboards are easy to customize and rearrange, so you can adjust spacing as needed. This option works especially well in playrooms or shared bedrooms.
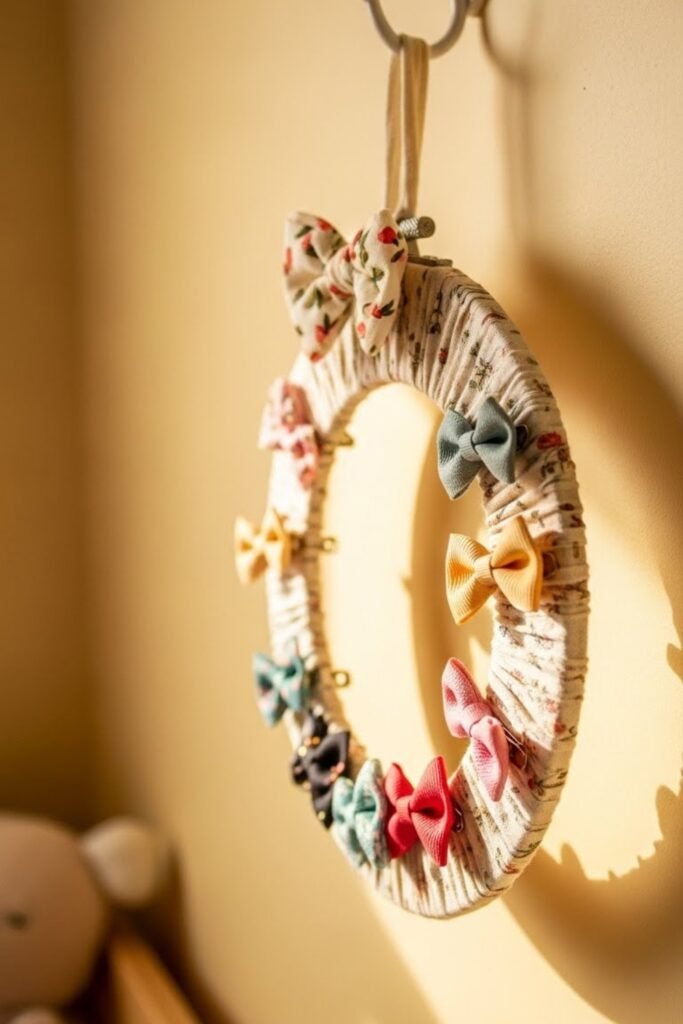
Hoop Holder
Wrap an embroidery hoop with ribbon or fabric, then hang it on the wall using a nail or hook. Clip bows around the inner ring so they hang neatly in a circle.
This idea works well for decorative bows and adds a soft, handmade touch to bedrooms or nurseries without taking up much wall space.
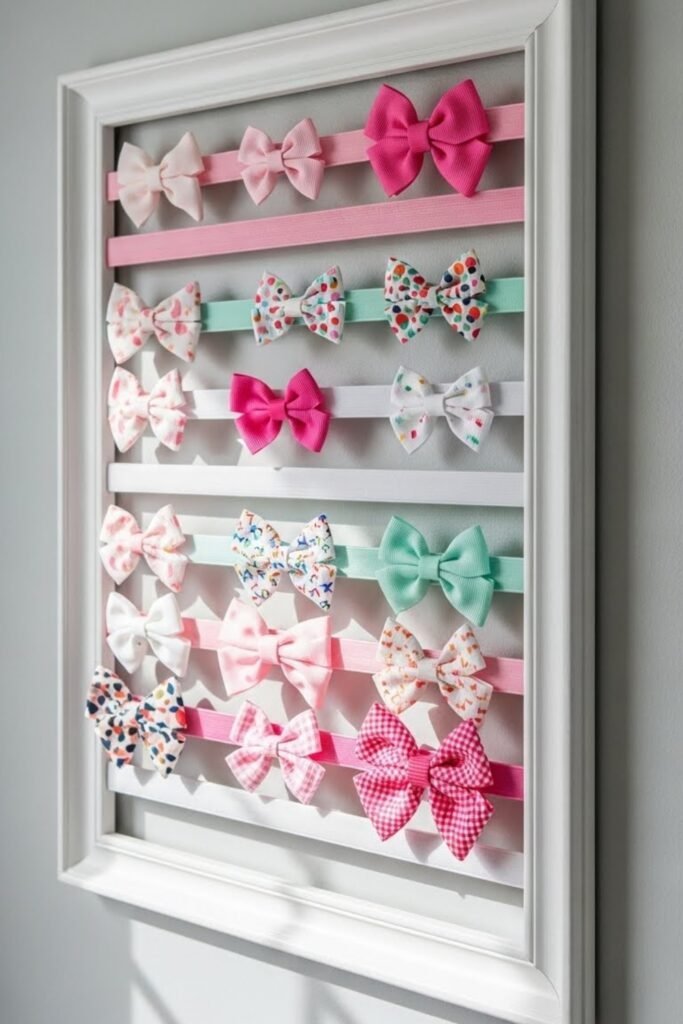
Fabric Frame
Use an old picture frame and staple fabric or elastic bands across the back. Slide hair bows between the bands to keep them secure and visible.
This works best for medium-size collections and looks like wall art when finished. Choose fabric colors that match the room for a polished look.
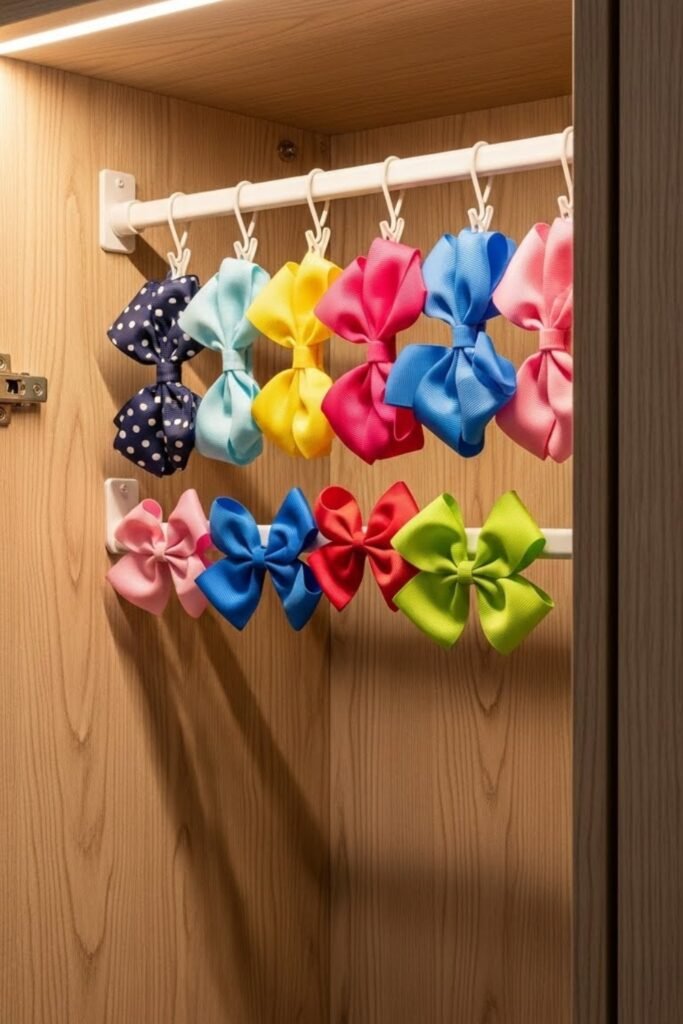
Curtain Rod
Install a short curtain rod on the wall or inside a closet. Hang bows directly onto the rod using their clips.
This setup is strong enough for larger bows and easy to expand by adding another rod underneath. It’s a clean, practical option for kids with growing bow collections.

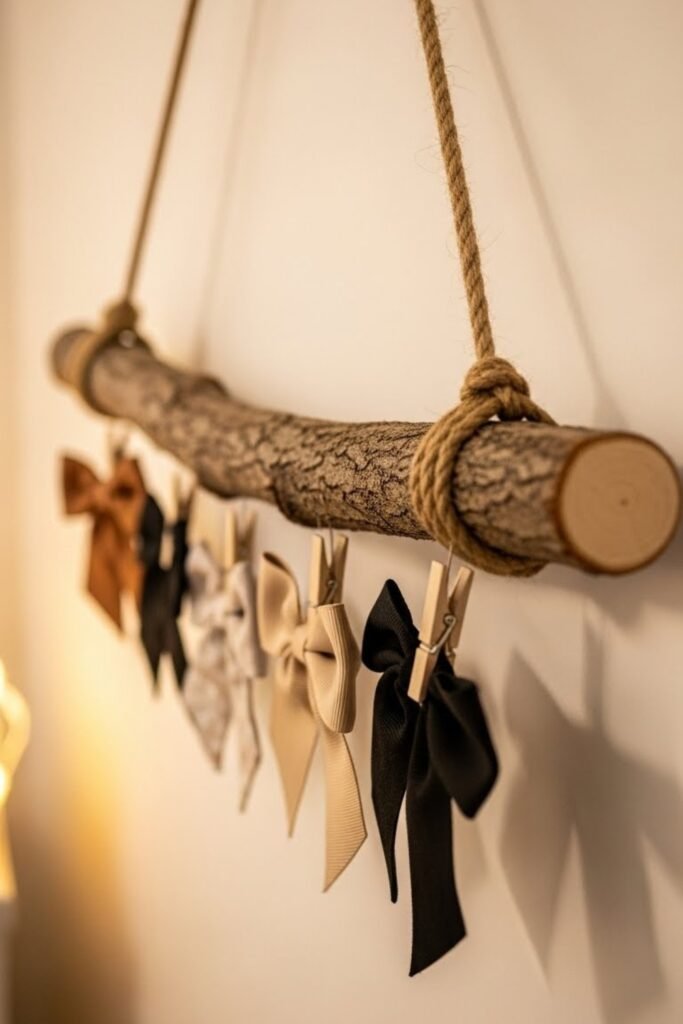
Branch Hanger
Attach a smooth, painted branch to the wall using brackets or rope. Clip bows along the branch for a natural, playful display.
This idea works great in boho or rustic-style rooms and turns bow storage into décor. Make sure the branch is sealed and sanded to avoid snags.
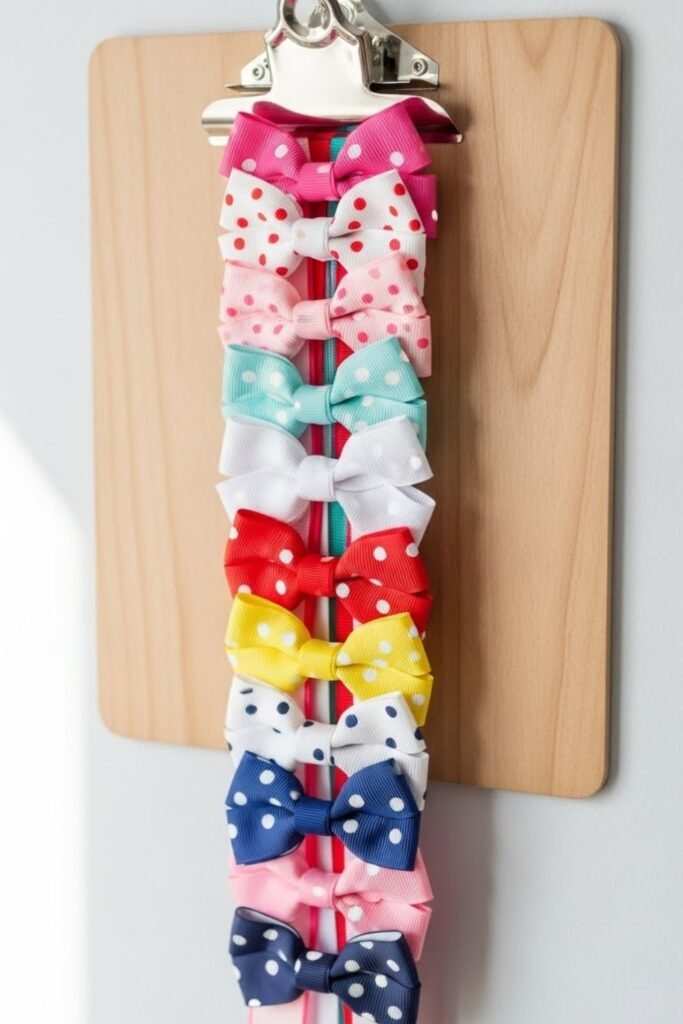
Clipboard Board
Attach a clipboard to the wall or place it on a shelf. Clip hair bows directly under the metal clip so they hang down neatly.
This idea is perfect for rotating seasonal bows and makes swapping styles quick and easy. It’s also a great option for desks, dressers, or small wall spaces.
Cork Board
Mount a cork board and use push pins or small clips to hold bows in place. This works best for lightweight bows and lets you arrange them in rows or patterns.
It’s an easy, flexible option that grows with the collection and works well in craft rooms or kids’ bedrooms.

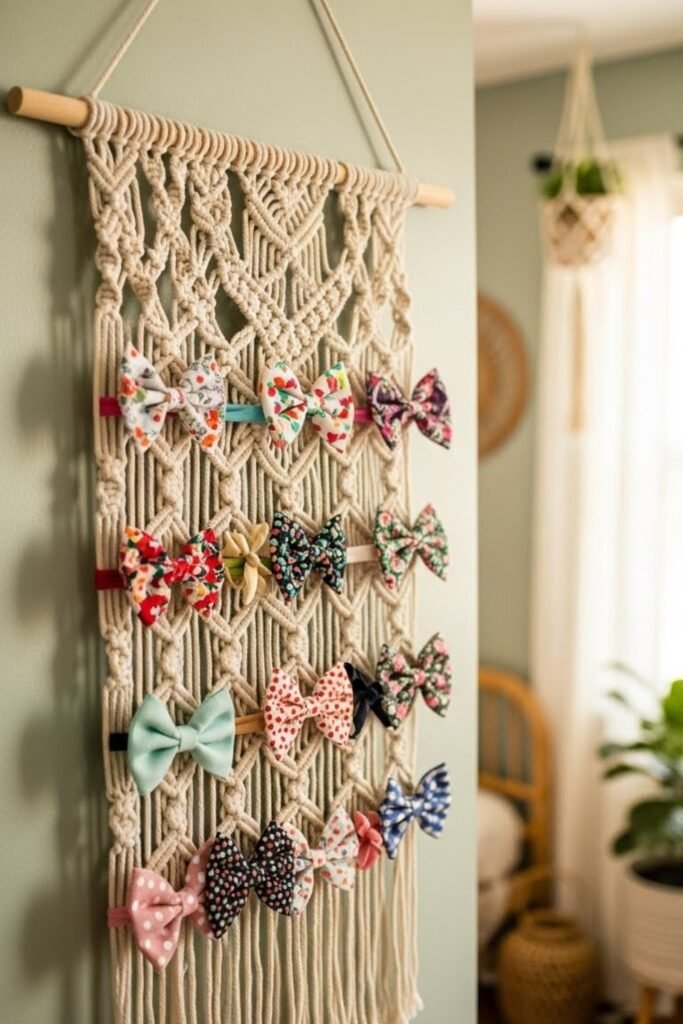
Macrame Hanger
Create or buy a simple macrame wall hanger and use the woven cords to slide bows through. This design adds texture while keeping bows organized and visible.
It fits beautifully in boho or neutral rooms and works well for soft fabric bows without metal clips.
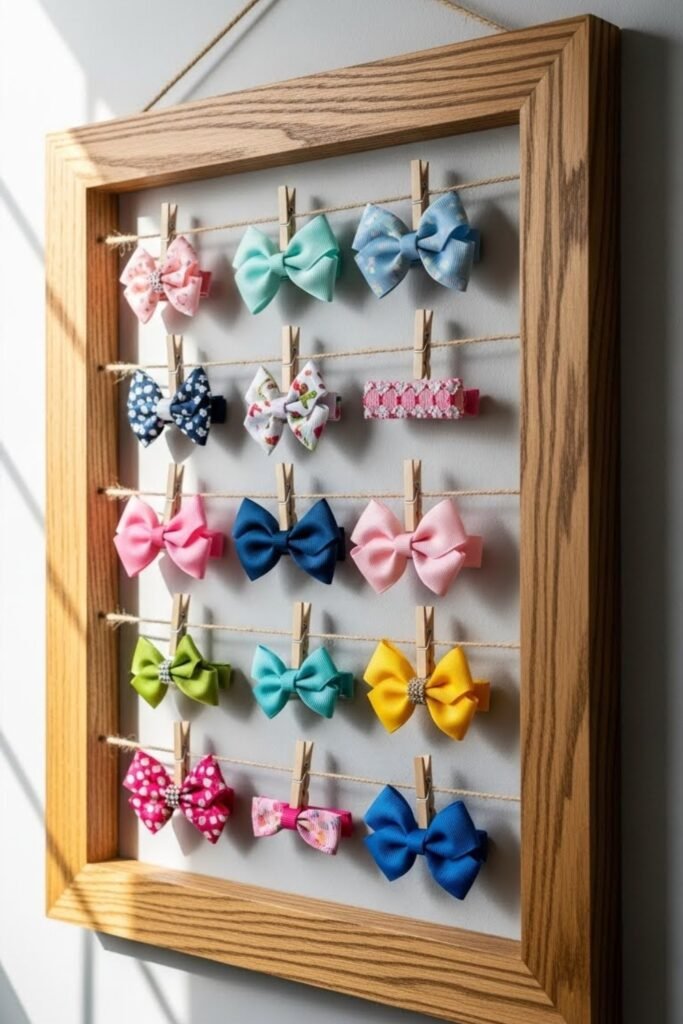
Frame Clips
Use a wooden frame and attach mini clothespins across the inside using string or wire. Clip each bow onto a pin for easy access and neat spacing.
This method keeps bows separated, making it ideal for larger collections. It also doubles as decorative wall art.
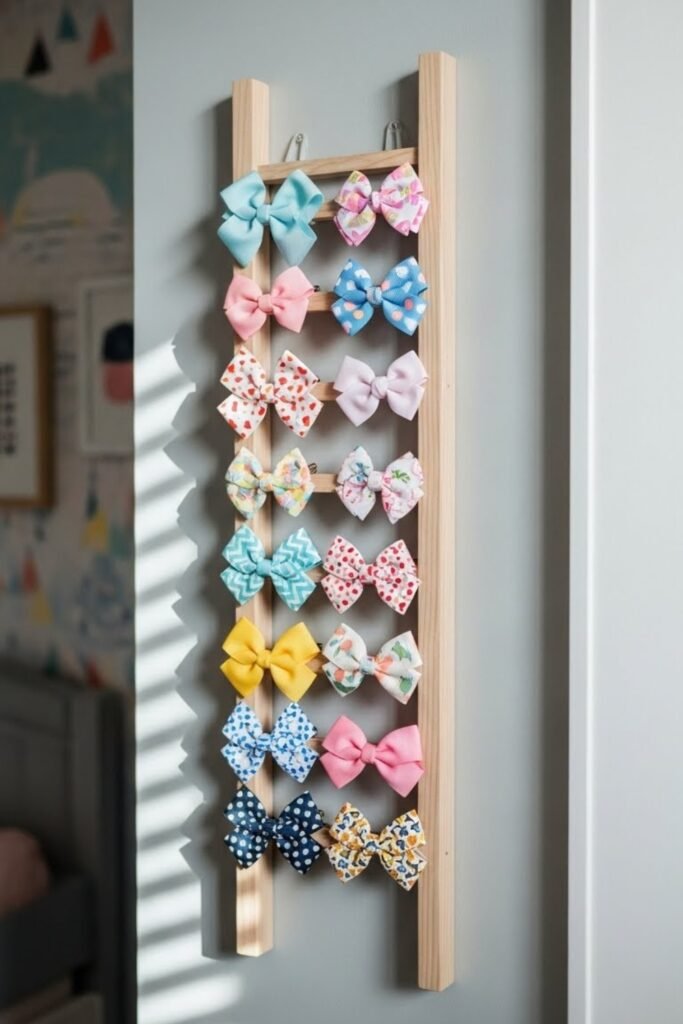
Ladder Rail
Mount a small decorative ladder or towel ladder on the wall. Use each rung to clip and hang hair bows neatly.
This idea works well for larger collections and makes it easy to sort bows by size or color. It’s a great vertical storage option that also adds visual interest to the room.
Door Hanger
Use an over-the-door hook or hanger and attach ribbons or strings to it. Clip bows onto the hanging strands so they stay organized and visible.
This option is perfect for small bedrooms since it doesn’t take up wall space and can be removed easily when needed.
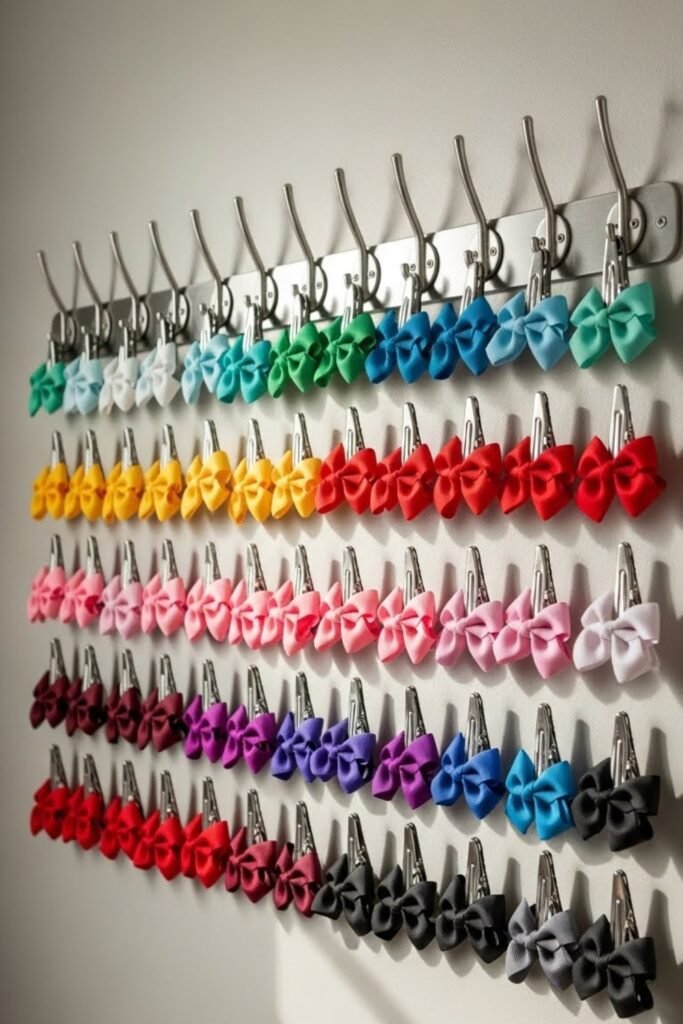
Hook Row
Install a simple row of wall hooks at kid-friendly height. Hang bows directly by their clips or attach small rings for easier hanging.
This setup keeps everyday bows within reach and encourages kids to put accessories away themselves. It’s practical, simple, and easy to customize.
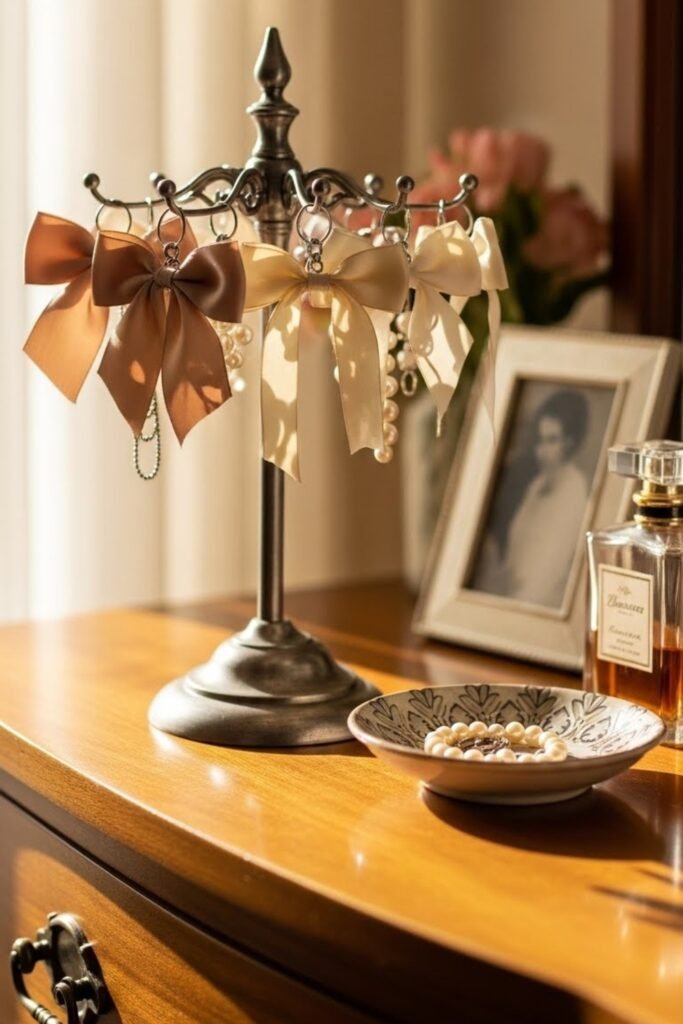
Jewelry Stand
Repurpose a standing jewelry holder with multiple bars or branches. Hang bows where earrings would normally go.
This works especially well for frequent-use bows and looks neat on dressers or vanities. It’s a no-install option that’s easy to move or rearrange.
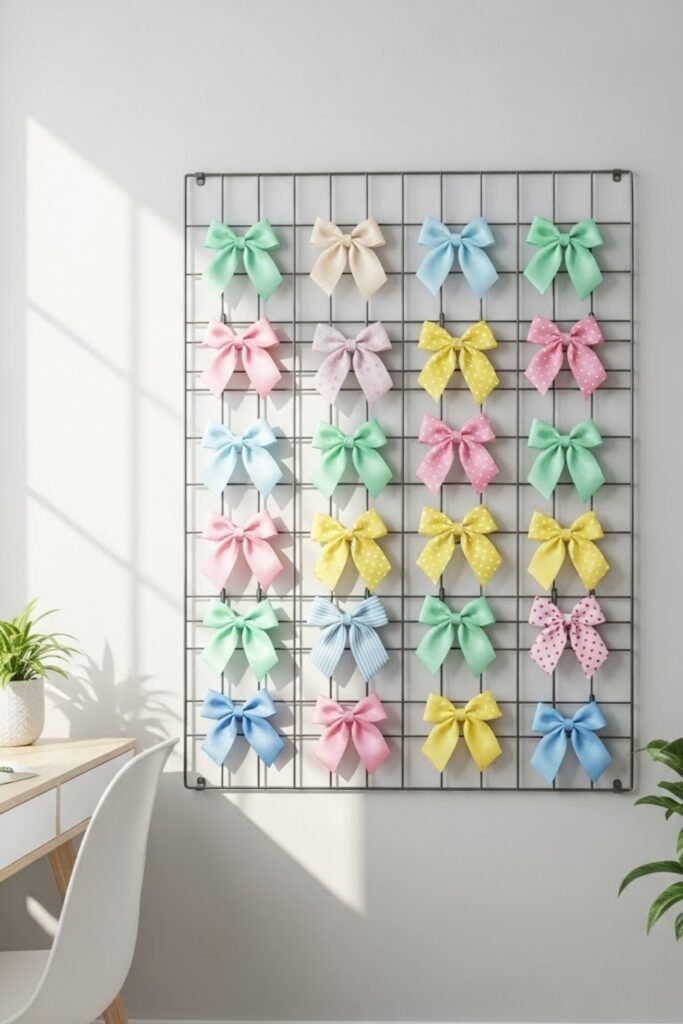
Wire Grid
Mount a small wire grid panel on the wall and use clips or hooks to hang bows. This setup keeps bows evenly spaced and easy to see.
It works well for medium to large collections and allows you to rearrange layouts anytime. Great for craft rooms, closets, or shared bedrooms.
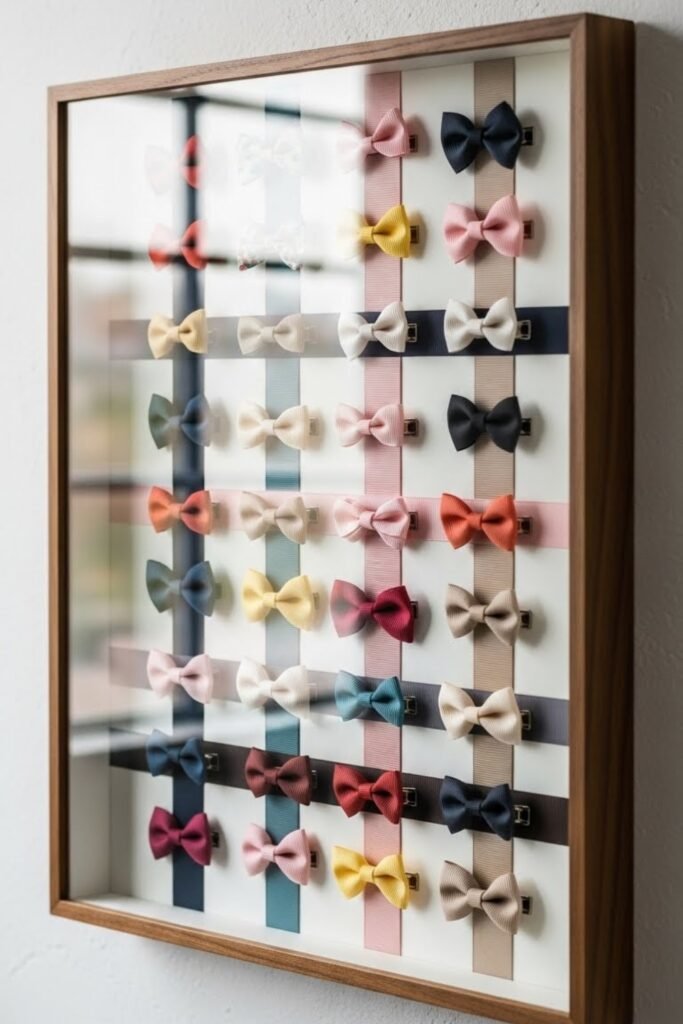
Shadow Box
Use a shallow shadow box frame and add ribbon rows or thin rods inside. Clip bows neatly so they stay contained and dust-free.
This idea works best for special or rarely used bows and gives a clean, display-style look that feels more organized than open storage.
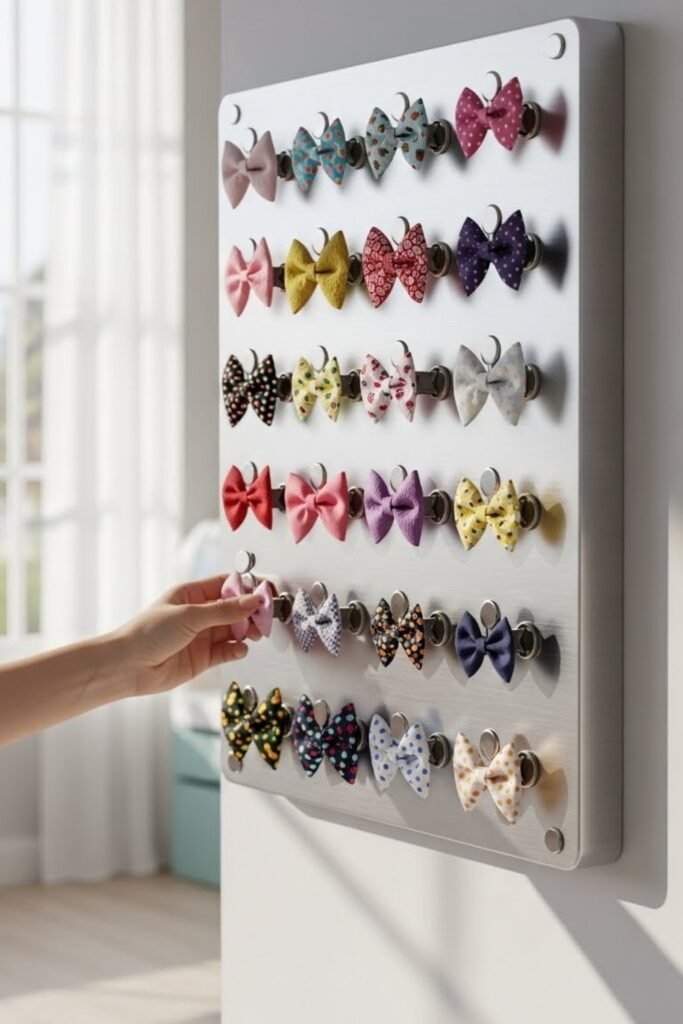
Magnetic Board
Attach a magnetic board to the wall and use small magnetic clips to hold bows. This is a fun, modern option that allows quick changes and rearranging.
It works best for lightweight bows and adds a playful, interactive element to storage.
Tension Rod
Install a small tension rod inside a closet, cabinet, or shelf space. Clip bows directly onto the rod using their clips.
This option is renter-friendly and perfect for hidden storage while still keeping bows organized and accessible.
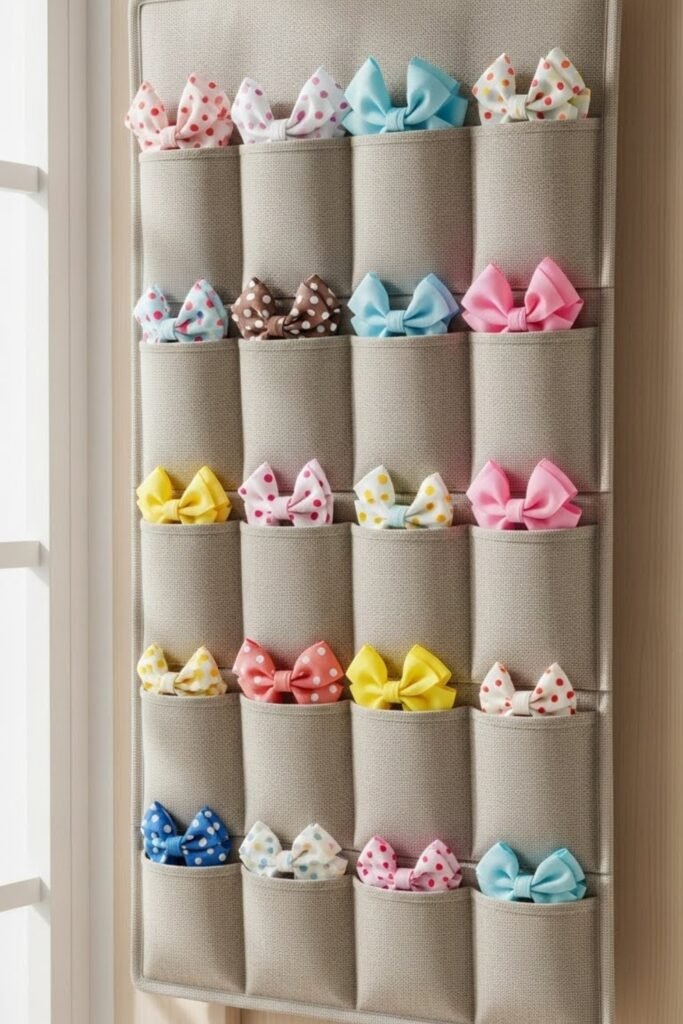
Pocket Organizer
Use a fabric pocket organizer and slide bows into each pocket. This works best for small to medium bows and keeps them separated and easy to find.
Hang it behind a door or inside a closet for space-saving storage. It’s a soft, kid-friendly option that keeps bows from getting tangled.
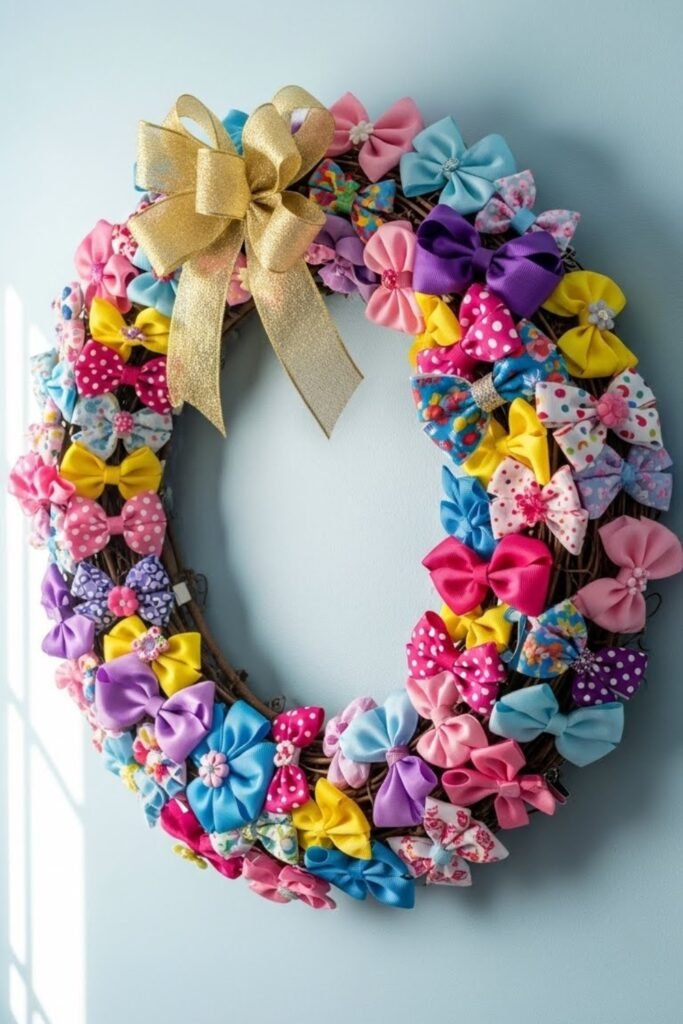
Bow Wreath
Create a wreath using a foam or wire base and clip bows all around it. Hang the wreath on the wall or door for a decorative storage solution.
This idea is perfect for showcasing favorite bows while adding a playful accent to the room.
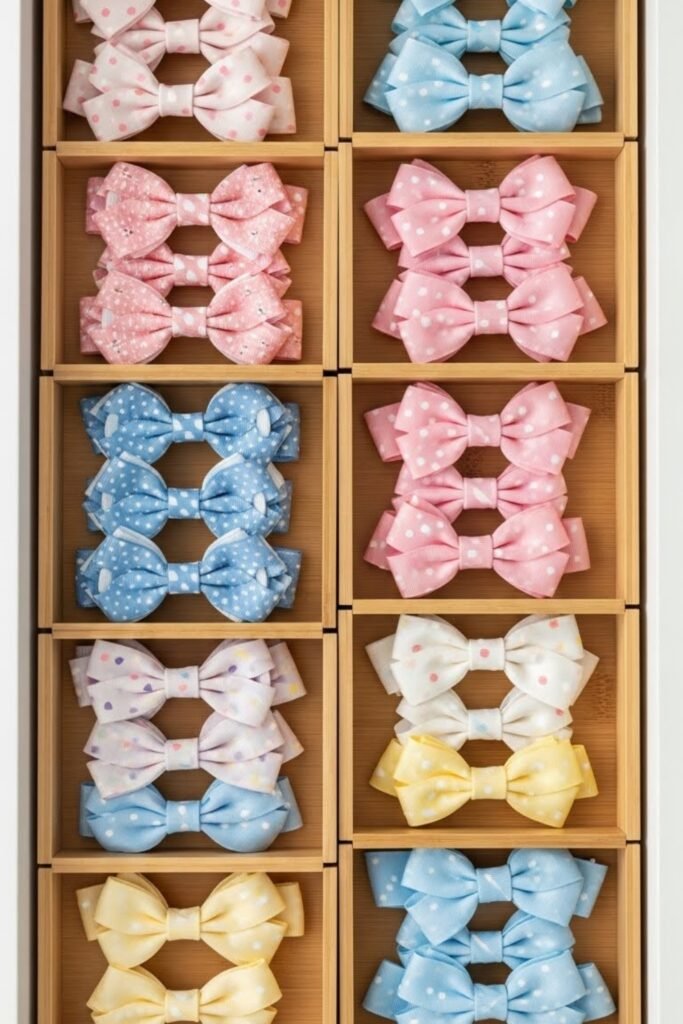
Drawer Divider
Place adjustable drawer dividers inside a dresser drawer and line bows up neatly by size or color.
This keeps bows hidden but organized and works well for minimal spaces. It’s a great solution for parents who prefer clutter-free surfaces.
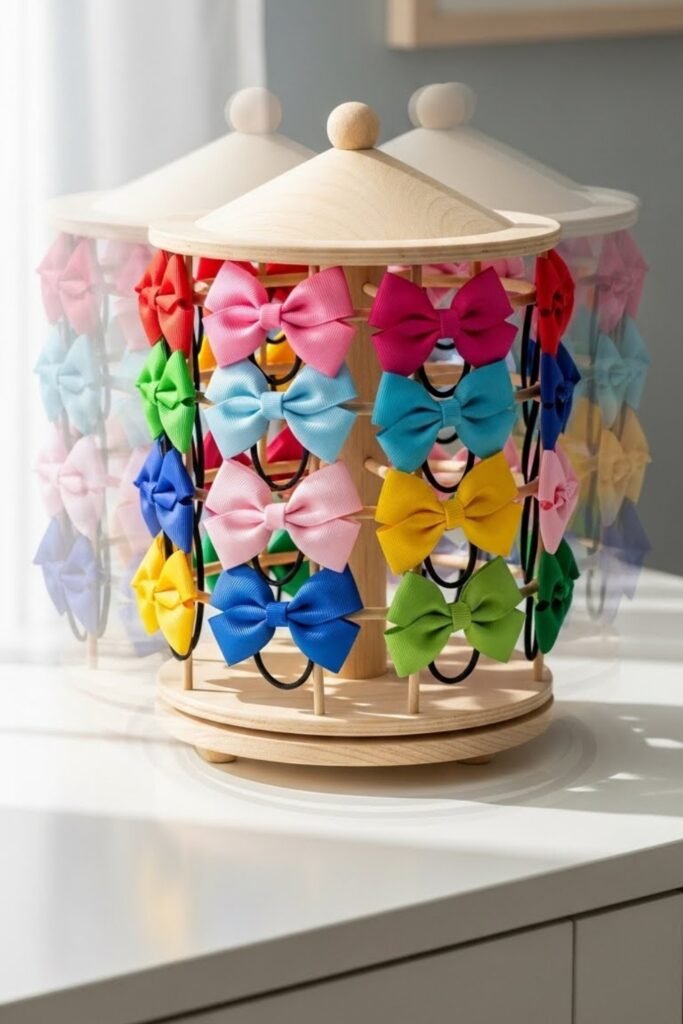
Carousel Stand
Use a rotating jewelry or accessory stand and hang bows around it. The spinning design makes it easy to browse and pick styles quickly.
This works well on dressers or shelves and is ideal for kids who like to choose their own accessories.

Hi, my name is Ali Mehmood! I’m a passionate writer and DIY enthusiast who loves turning creative ideas into practical, hands-on projects.
I created this website to share inspiring, budget-friendly ideas that you can do yourself – whether it’s organizing your home, crafting something unique, or creating fun projects for kids and pets.
I believe DIY isn’t just a hobby – it’s a smart way to save money, reduce waste, and enjoy the satisfaction of making things with your own hands.
I’m excited to have you as part of this growing community, and I’ll continue bringing you helpful, realistic, and fun DIY ideas you can actually use.


