
This post may contain affiliate links: read full affiliate disclosure.
If you’ve ever tried creating a DIY photo wall collage and ended up staring at uneven spacing, crooked lines, or walls full of tiny mistakes, you’re not alone.
Photos feel randomly placed, the wall starts looking messy instead of meaningful, and suddenly you’re worried about peeling paint, wasted frames, or holes you can’t undo.
Most people don’t struggle because they lack creativity — they struggle because no one shows them how to plan a photo wall properly before hanging anything.
It’s about understanding layout, spacing, wall size, and the right hanging method for your space. When those pieces are missing, even beautiful photos can look chaotic.
In this article, you’ll learn how to plan a DIY photo wall collage step by step so it looks intentional, balanced, and personal without damaging your walls.
WHAT IS A DIY Photo Wall Collage?
A DIY photo wall collage is a way to display multiple photos together on a wall using a planned layout instead of a single framed picture.
Instead of hanging one large frame, you combine several photos, prints, or memories to create a single visual story.
The goal isn’t just to fill empty wall space, but to make the wall feel intentional, balanced, and personal.
What makes it “DIY” is that you control everything — the layout, spacing, photo sizes, hanging method, and overall style.
A photo wall collage can be made with framed prints, unframed photos, posters, or even mixed media, depending on your space and budget.
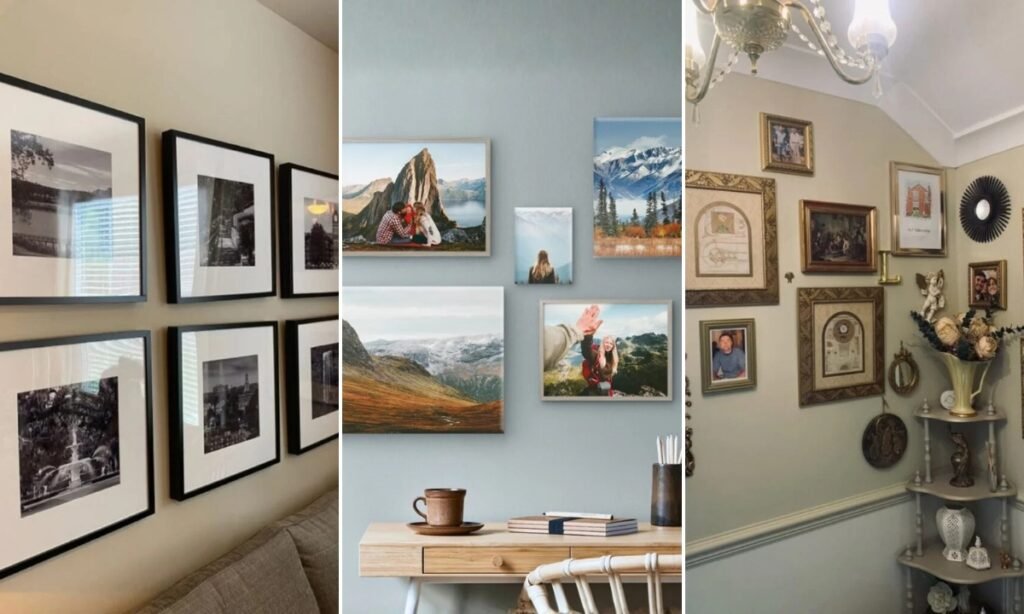
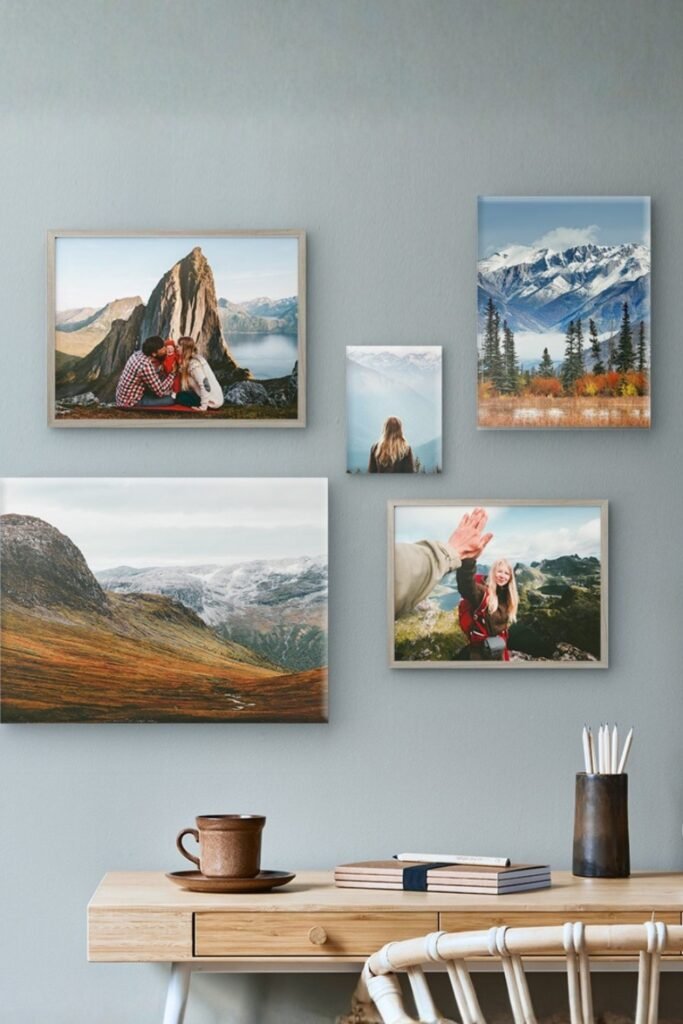
Desk-Focused Cluster
Use mixed frame sizes above a work desk to create movement without cluttering the wall or overwhelming daily focus.
Start by anchoring one large landscape photo, then build outward using medium prints while keeping two-inch spacing consistent.
This DIY layout works best in home offices or study corners where visual interest matters but symmetry feels unnecessary.
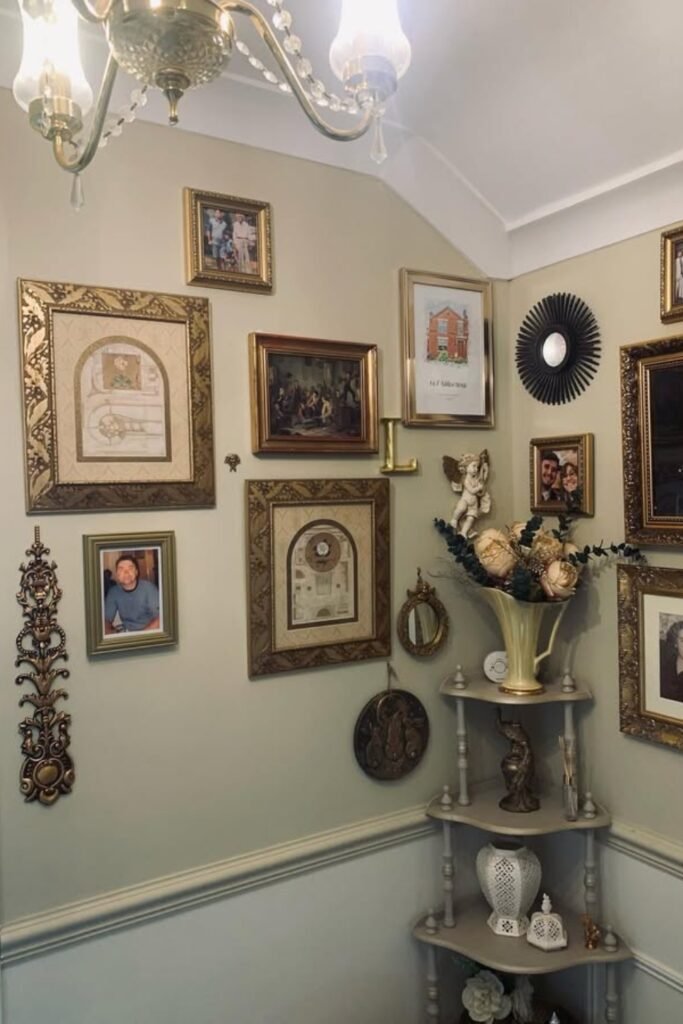
Vintage Corner Gallery
Corners feel intentional when ornate frames wrap both walls, turning an awkward angle into a collected, story-driven display.
Begin with heavier frames at eye level, then layer smaller pieces upward to balance visual weight naturally.
This DIY collage suits hallways or reading nooks where character matters more than clean, modern uniformity.
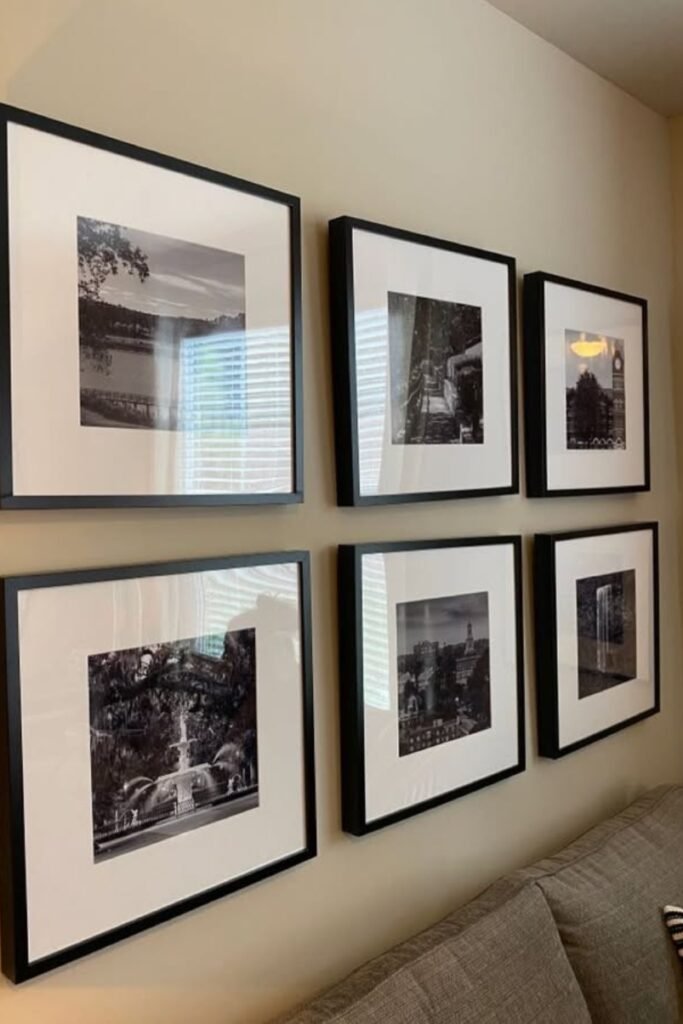
Clean Grid Precision
A strict grid immediately calms busy rooms by giving photos equal importance and predictable spacing throughout the wall.
Measure and mark alignment lines first, then hang identical frames row by row to avoid drifting mistakes.
This DIY approach fits living rooms or sofas walls where order, balance, and simplicity support relaxed everyday living.
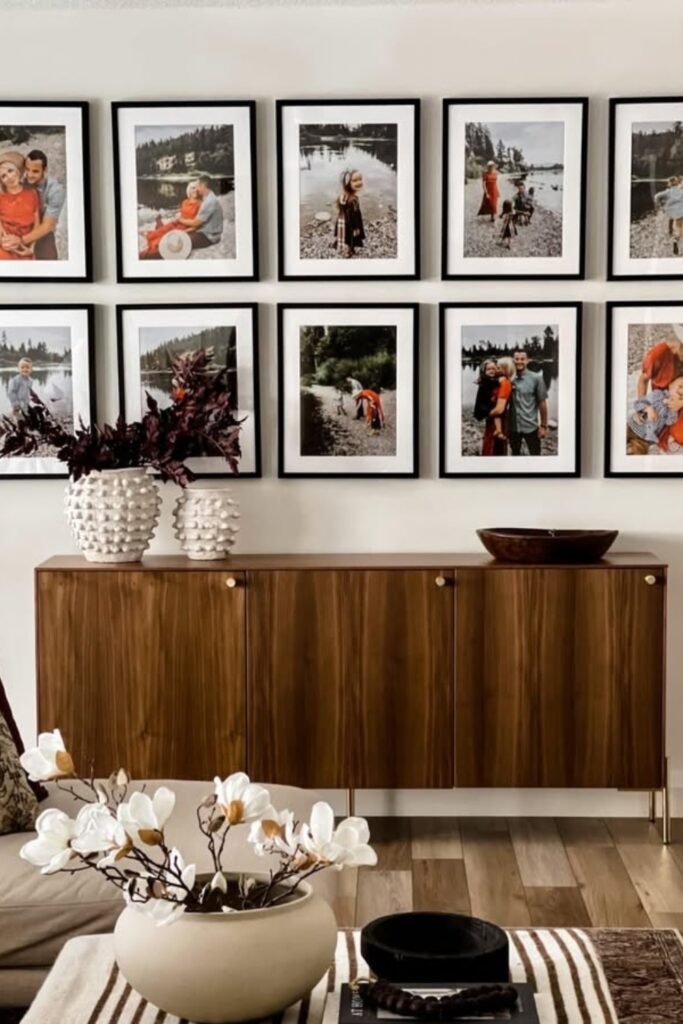
Linear Family Timeline
Running photos in a straight horizontal line creates a visual timeline that feels organized yet emotionally personal.
Keep frame sizes identical and align centers, letting the photo content provide variation instead of layout changes.
This DIY idea works well above sideboards or consoles where furniture naturally grounds the entire composition.
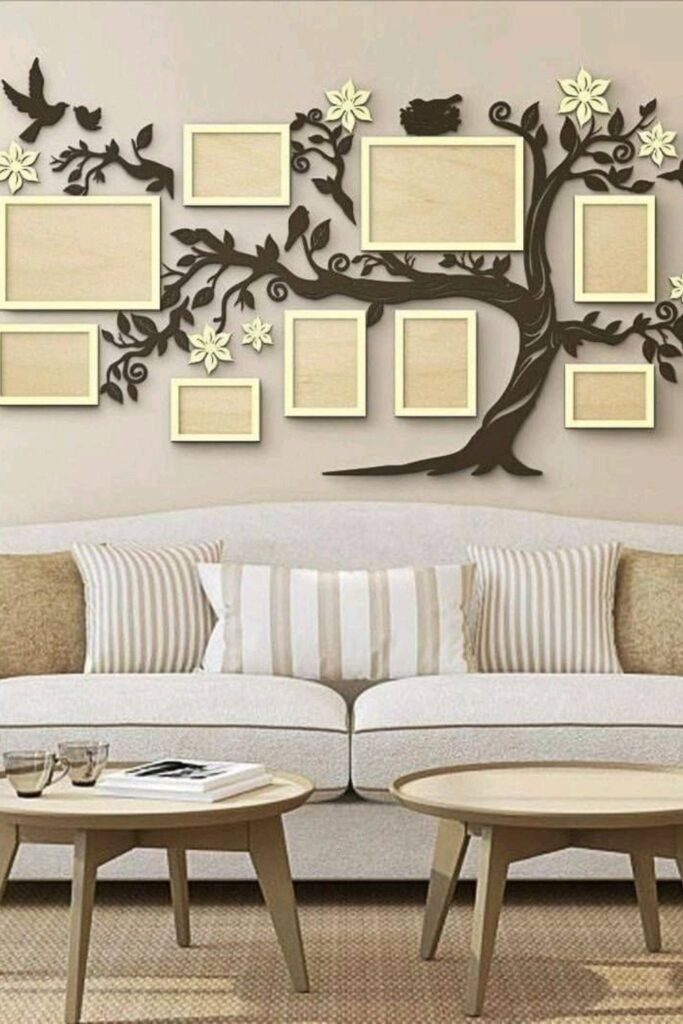
Tree-Inspired Story Wall
A decorative tree base transforms individual frames into one connected narrative instead of scattered, unrelated moments.
Install the wall element first, then position lightweight frames along branches using removable hanging strips carefully.
These DIY style suits feature walls in living rooms where storytelling feels intentional, playful, and visually memorable.
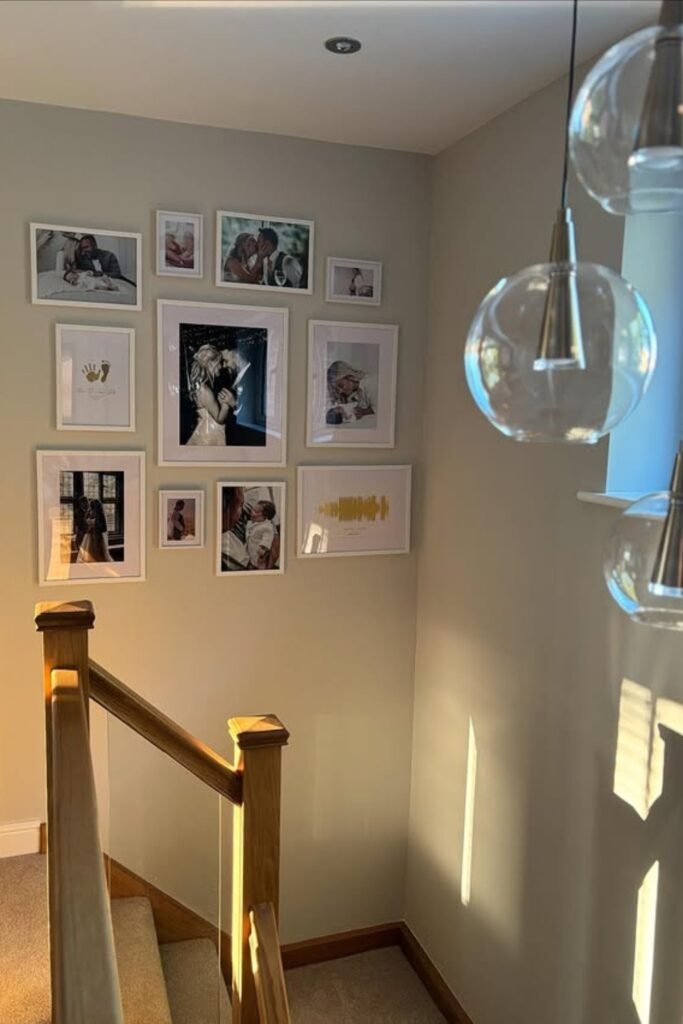
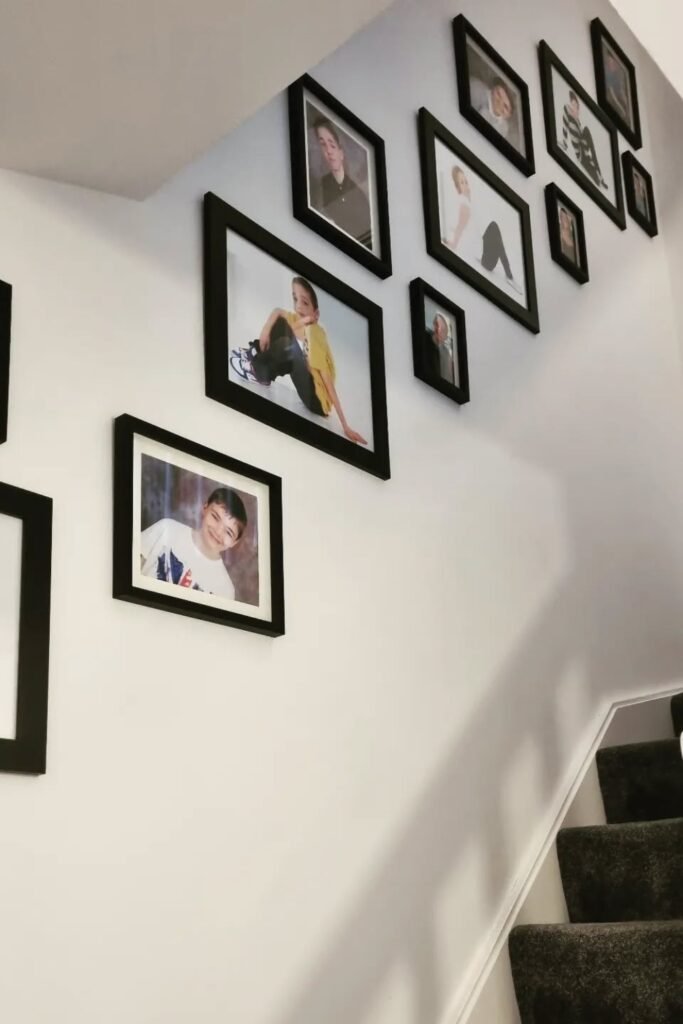
Staircase Flow Layout
Staircase walls benefit from clustered frames that follow movement upward rather than forcing strict horizontal alignment.
Start near the handrail with larger photos, then gradually reduce sizes as the wall rises naturally.
This DIY solution works best in stairwells where empty vertical space feels intimidating without guided visual flow.
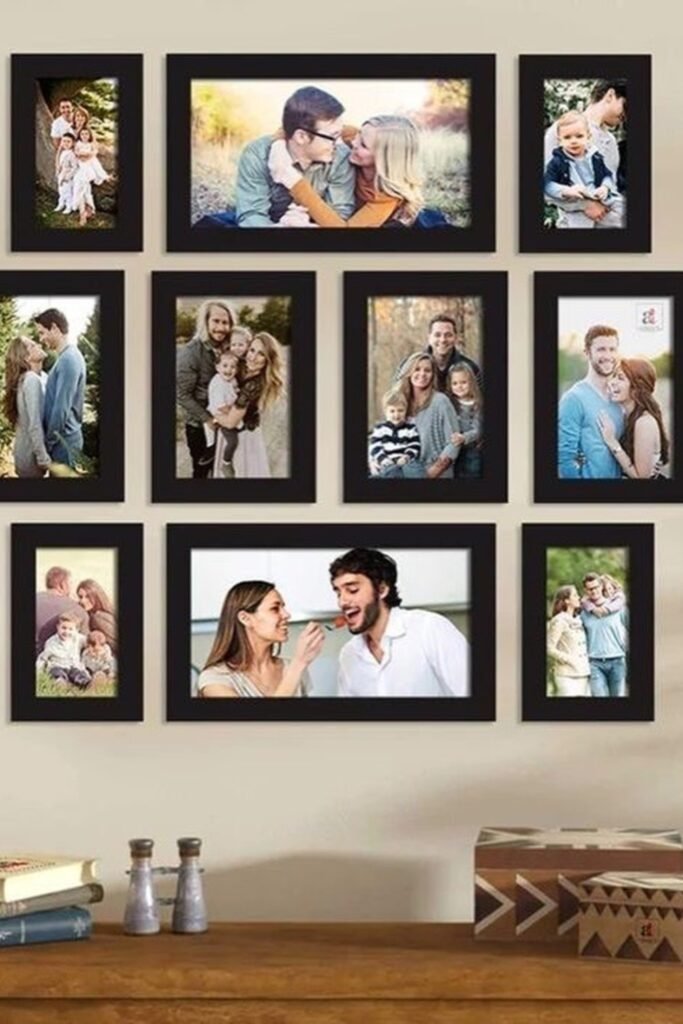
Balanced Statement Grid
Combining varied photo orientations inside identical frames keeps the wall structured while allowing emotional variety
Lay everything on the floor first, adjusting sequence until faces and moments feel evenly distributed.
This DIY collage fits dining or entry walls where symmetry supports first impressions without feeling overly formal.
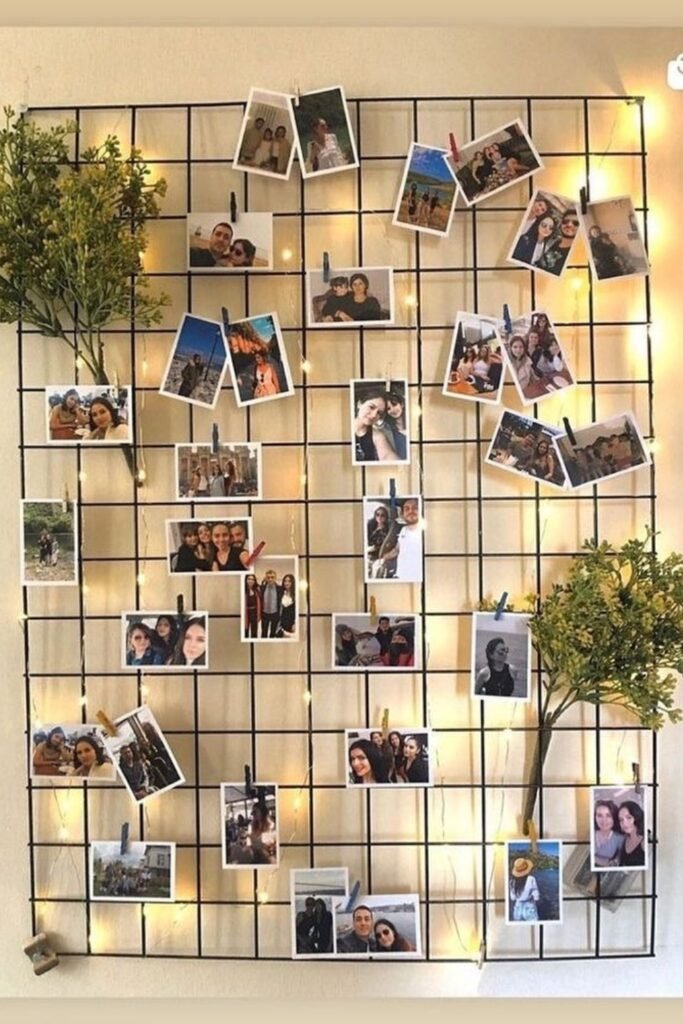
Wire Grid Memory Wall
When wall damage feels risky, a wire grid turns photo hanging into a flexible system without committing to fixed placements.
Attach the grid using anchors or removable hooks, then clip photos loosely to allow easy swapping anytime.
This DIY works beautifully in bedrooms or rentals where layouts change often and permanence feels stressful.
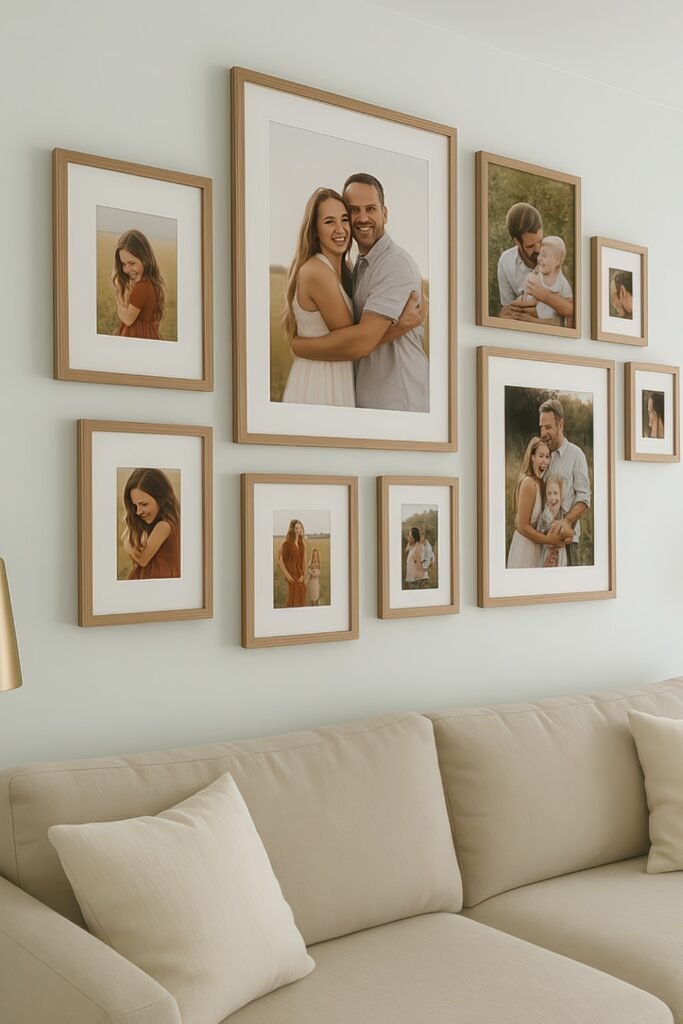
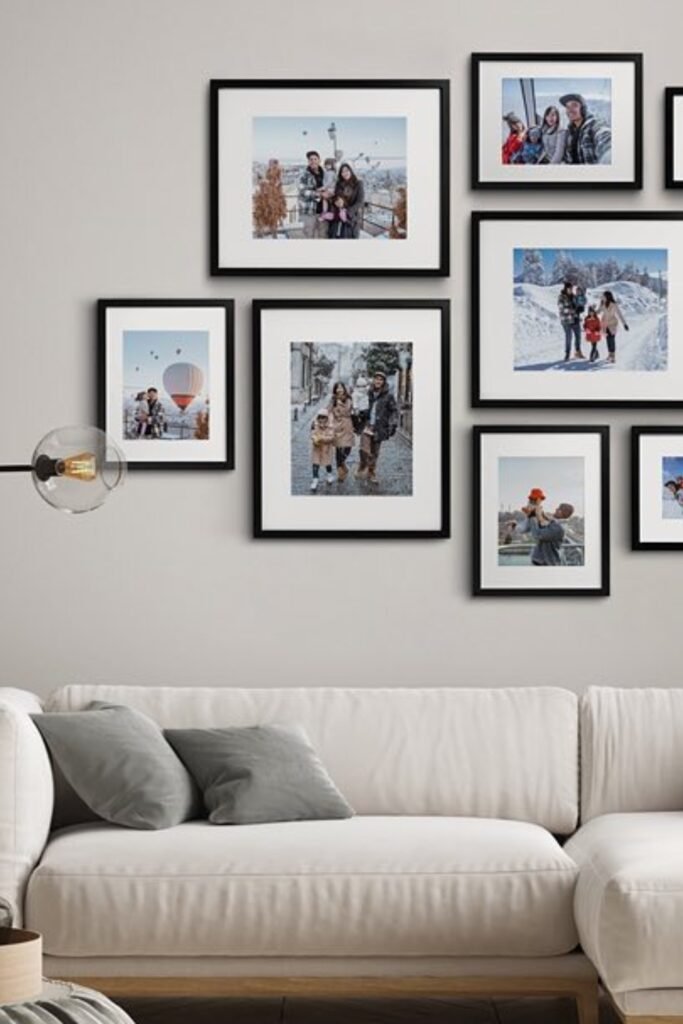
Centerpiece Anchor Gallery
Everything feels calmer once one large photo anchors the wall and smaller frames support it naturally.
Hang the central frame first at eye level, then space surrounding pieces evenly using painter’s tape guides.
This DIY layout suits sofa walls where balance matters and emotional focus should land immediately.
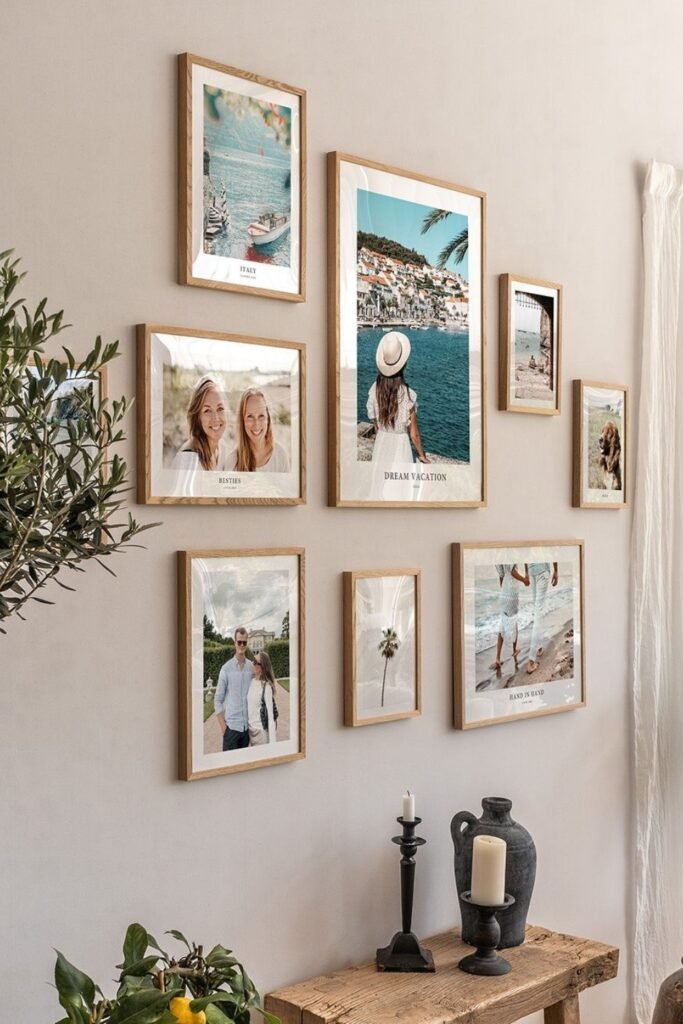
Travel Story Cluster
Vacation memories feel intentional when grouped loosely rather than forced into strict symmetry or grids.
Mix portrait and landscape frames, spacing them visually by subject flow instead of ruler-perfect alignment.
This DIY approach works best in casual living spaces where storytelling matters more than perfect order.
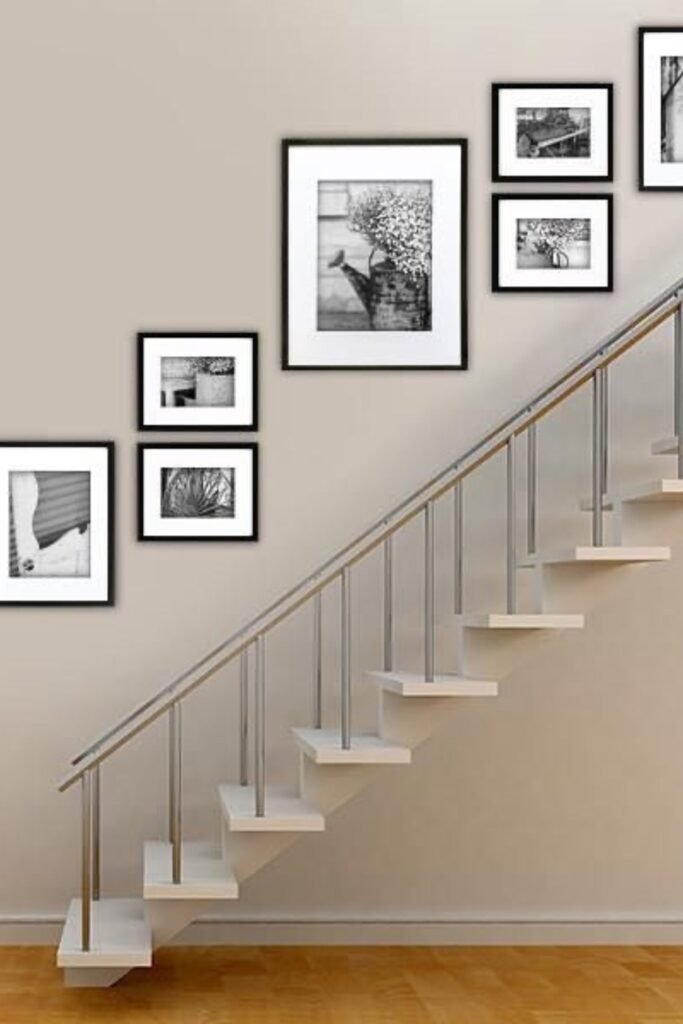
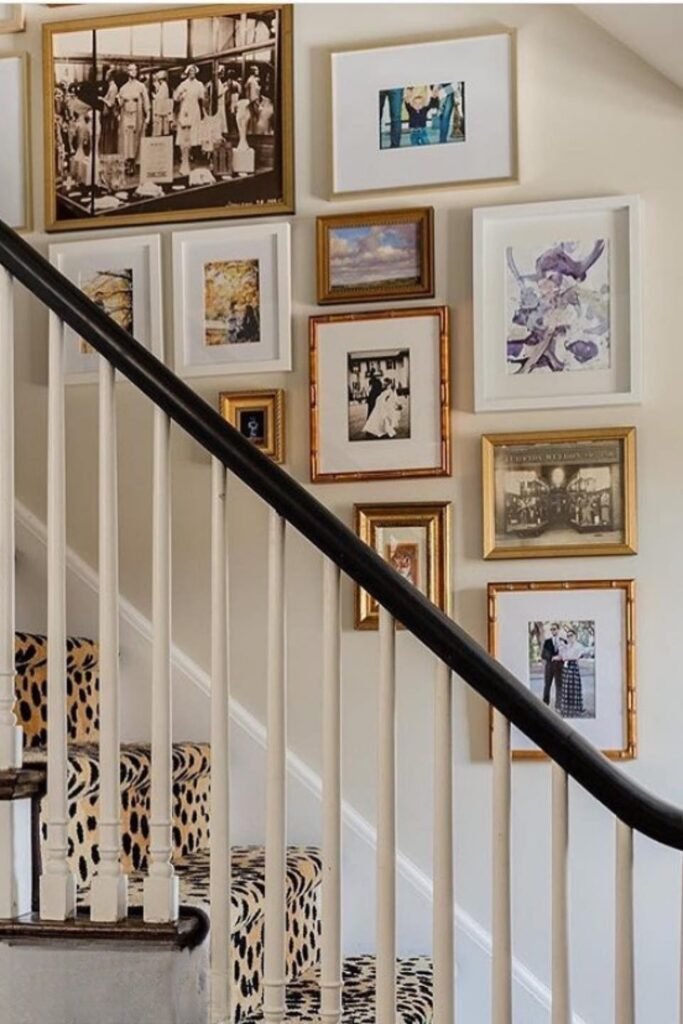
Staircase Portrait Climb
Following the stair angle prevents photos from feeling randomly scattered across tall, awkward walls.
Begin with the lowest frame near the first step, then rise gradually keeping consistent vertical spacing.
This DIY setup fits family homes where staircases offer unused space begging for visual connection.
Minimal Stair Grid
Clean black frames create structure while allowing movement across stair walls without visual overload.
Keep frame spacing identical and follow the stair slope closely to maintain rhythm throughout.
This DIY solution works best in modern homes where simplicity supports architectural lines.
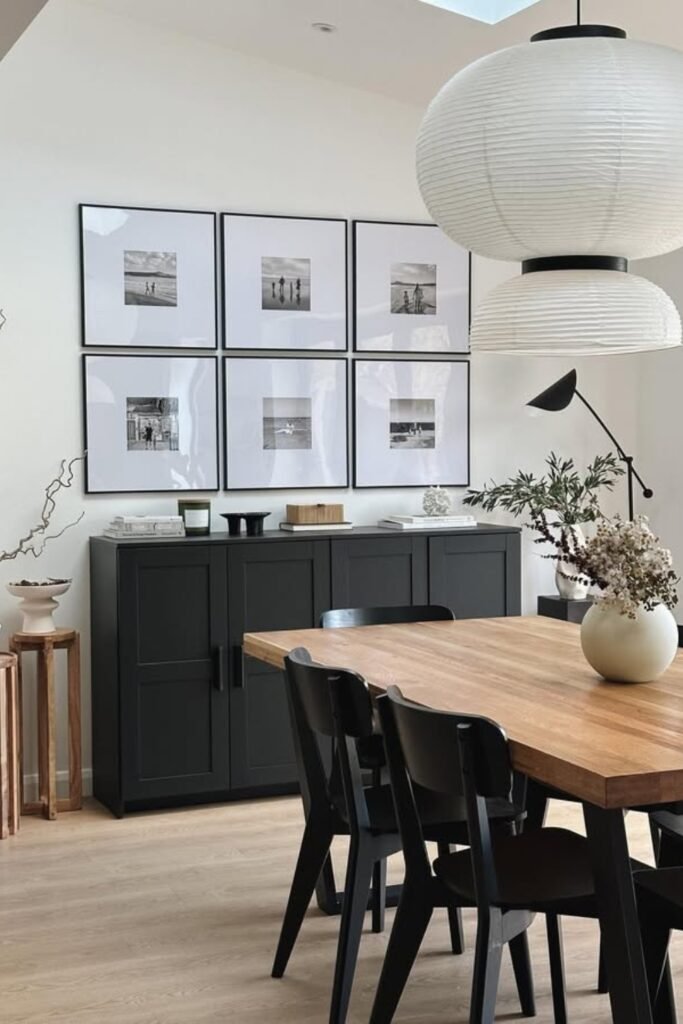
Dining Room Order Grid
Uniform frames instantly ground dining spaces, preventing photos from competing with furniture and lighting.
Measure a rectangular boundary first, then fill rows evenly to maintain calm visual balance.
This DIY grid suits dining rooms where repetition feels intentional and conversation stays uninterrupted.
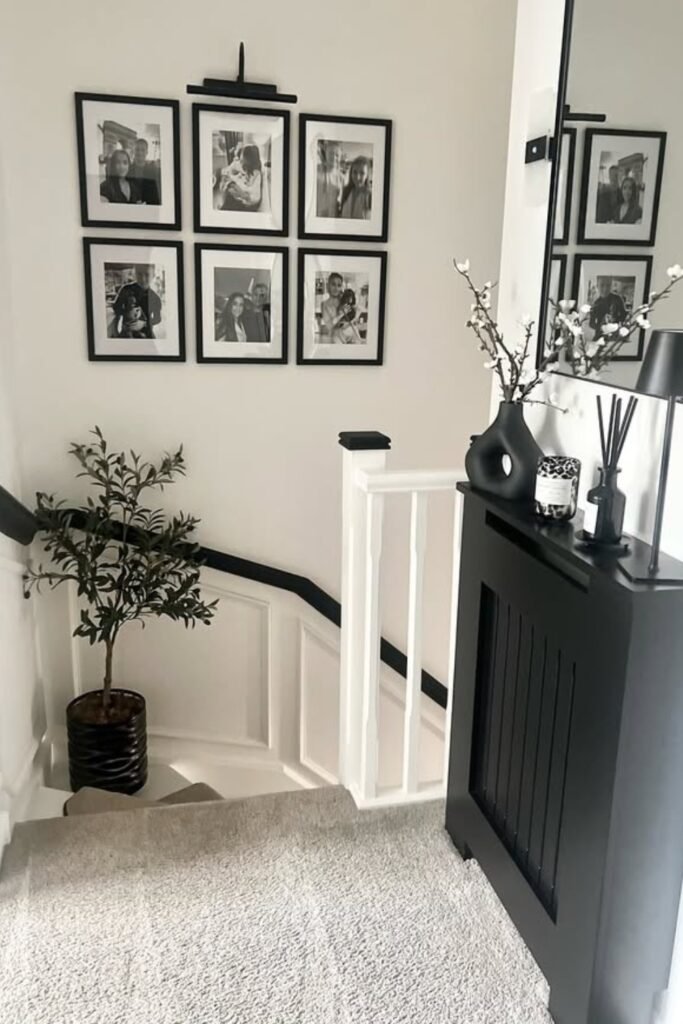
Compact Landing Gallery
Small landings feel styled when frames stay tightly grouped rather than spreading across walls.
Arrange frames in a square formation, keeping outer edges aligned for a controlled look.
This DIY idea fits upstairs landings where limited wall space still deserves thoughtful personalization
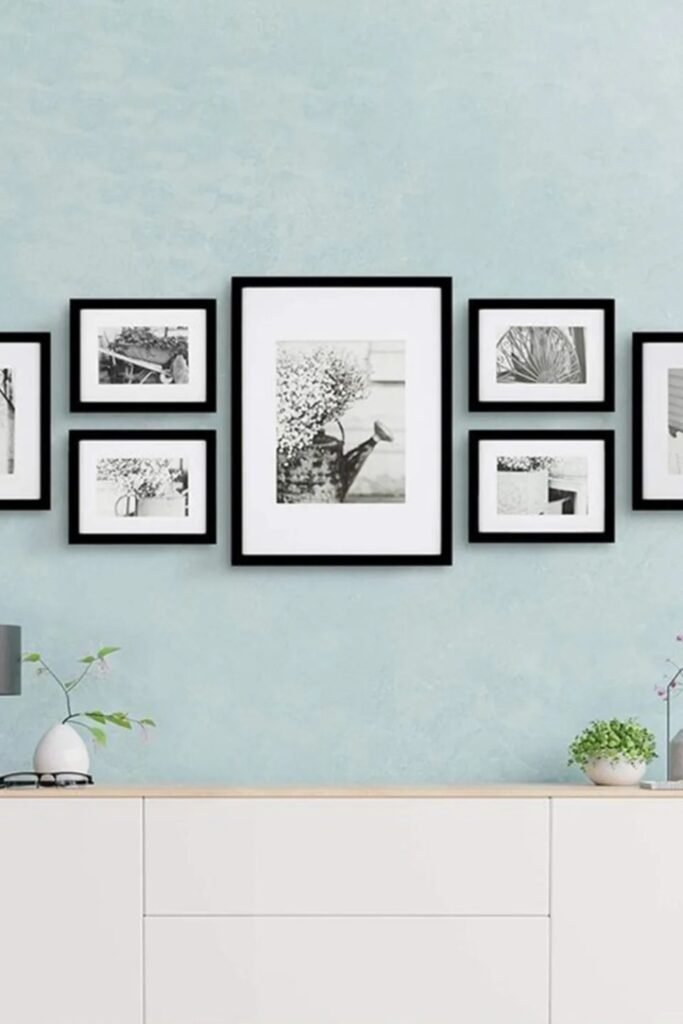
Linear Balance Row
Symmetry instantly calms wide walls when frames stretch horizontally instead of climbing vertically across open space.
Start with a central oversized frame, then mirror smaller pieces outward using equal spacing for visual stability.
This DIY suits sideboards or credenzas where furniture width naturally defines the collage boundaries.
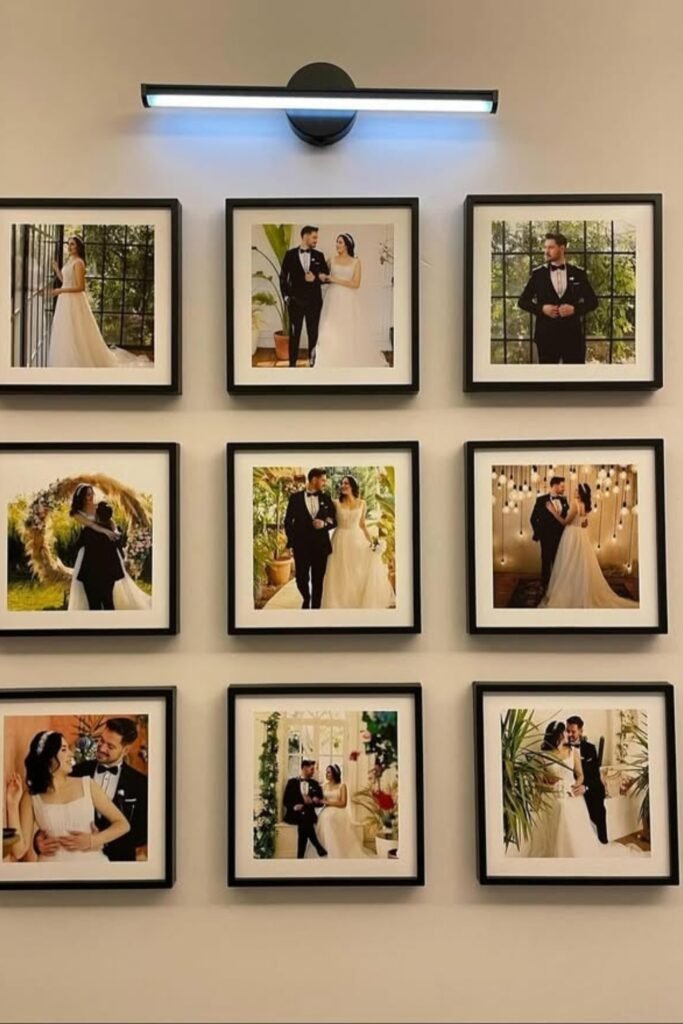
Wedding Memory Grid
Formal moments deserve structure, and a clean grid prevents emotional photos from feeling chaotic or overwhelming.
Measure a square layout, hang identical frames evenly, and let consistent margins create gallery-like elegance.
This DIY works best in dining rooms or hallways where polished storytelling feels intentional.
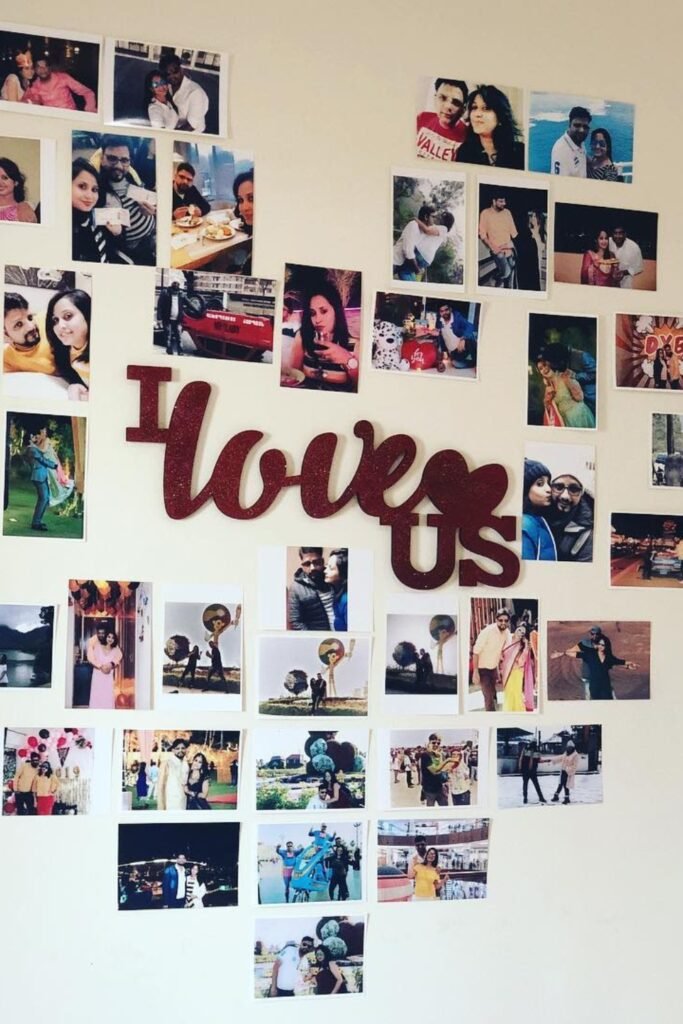
Heart-Shaped Love Wall
Personal stories feel stronger when photos form a recognizable shape rather than floating randomly across walls.
Sketch the heart outline lightly first, then fill inward using small prints and removable adhesive strips.
This DIY fits bedrooms or celebration corners where emotion matters more than perfect alignment.
Casual Living Cluster
Relaxed spaces benefit from loose groupings that feel collected over time instead of tightly planned arrangements.
Mix frame sizes freely, keeping visual balance by distributing colors and faces evenly across the cluster.
This DIY works well above sofas where comfort and personality matter more than symmetry.
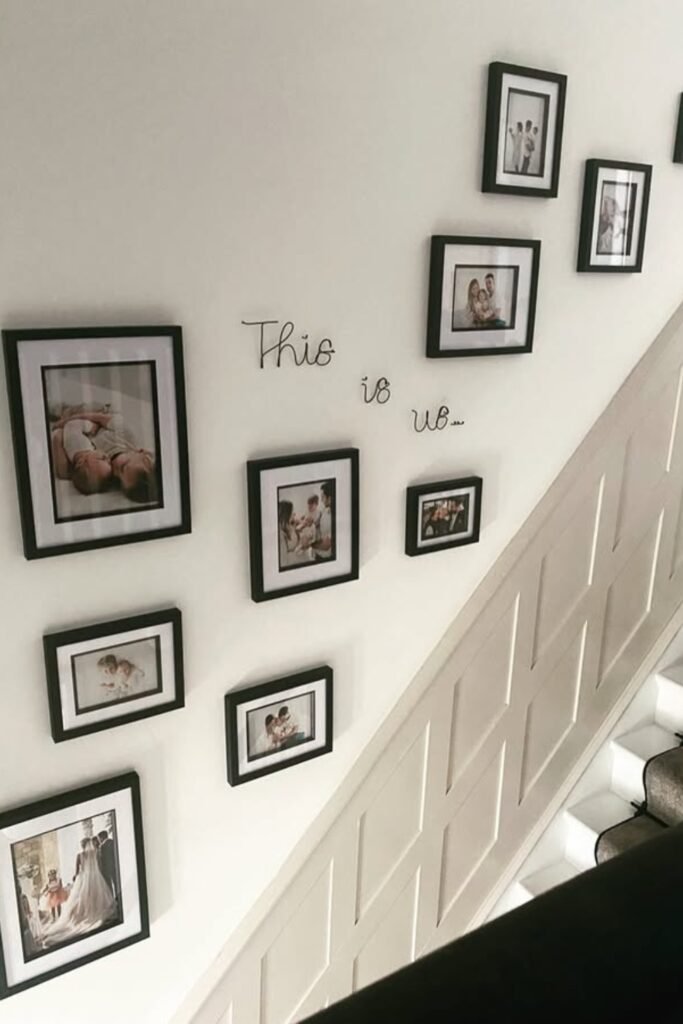
Stair Message Gallery
Words paired with photos guide movement and turn stair walls into meaningful storytelling paths.
Anchor the phrase first, then build frames around it following the stair angle naturally upward.
This DIY suits family homes where transitions between floors deserve emotional connection.
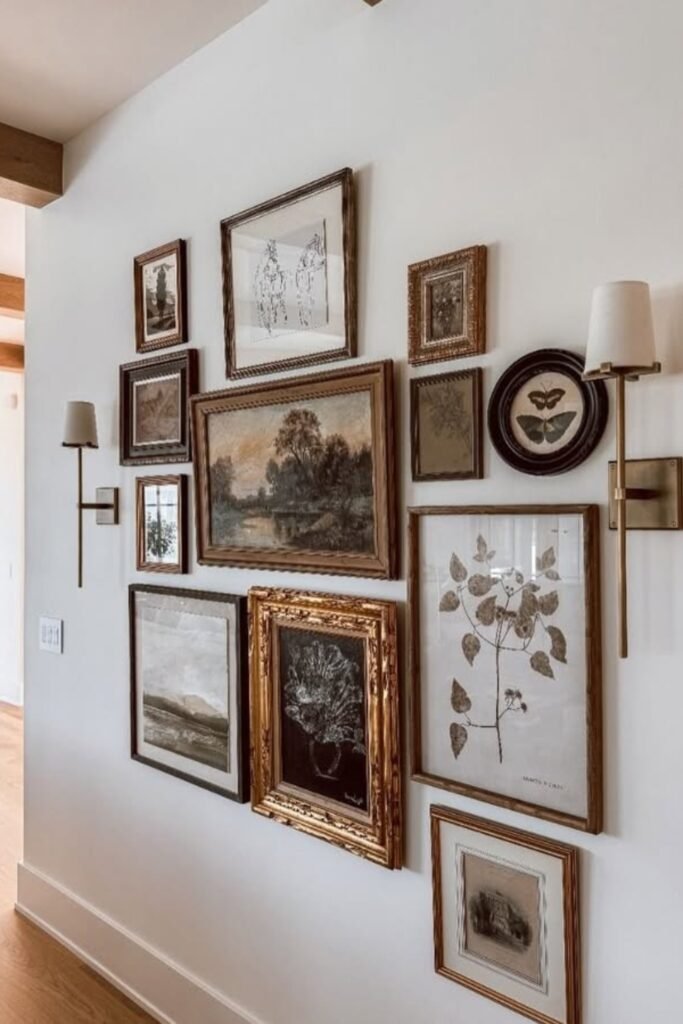
Vintage Art Mix
Older-style frames thrive when variety feels curated instead of accidental across a single wall.
Start with the heaviest frame as your anchor, then layer lighter pieces around it intuitively.
This DIY fits entryways or corridors where character sets the tone immediately.
Sloped Stair Collection
Slanted walls demand layouts that respect architecture rather than fighting vertical alignment rules.
Follow the stair rise with staggered frames, maintaining equal gaps to preserve rhythm.
This DIY works best in staircases where blank walls feel intimidating without visual guidance.

Hi, my name is Ali Mehmood! I’m a passionate writer and DIY enthusiast who loves turning creative ideas into practical, hands-on projects.
I created this website to share inspiring, budget-friendly ideas that you can do yourself – whether it’s organizing your home, crafting something unique, or creating fun projects for kids and pets.
I believe DIY isn’t just a hobby – it’s a smart way to save money, reduce waste, and enjoy the satisfaction of making things with your own hands.
I’m excited to have you as part of this growing community, and I’ll continue bringing you helpful, realistic, and fun DIY ideas you can actually use.


