
This post may contain affiliate links: read full affiliate disclosure.
A cluttered tool area slows you down faster than any dull blade. When your drill hides behind paint cans,
Your screwdriver sits in a random drawer, and every project starts with ten minutes of searching, frustration builds quickly.
Small garages and tight workspaces make the mess feel even worse, and cheap pegboards often collapse under heavy tools.
Many DIYers reach a point where they know they need a proper wall organizer but don’t know which system to choose, how much space they truly need, or where to begin without making costly mistakes.
You’ll learn how to design a wall that fits your tools, matches your space, supports real weight, and finally brings order to your workshop.
Save this article for later!
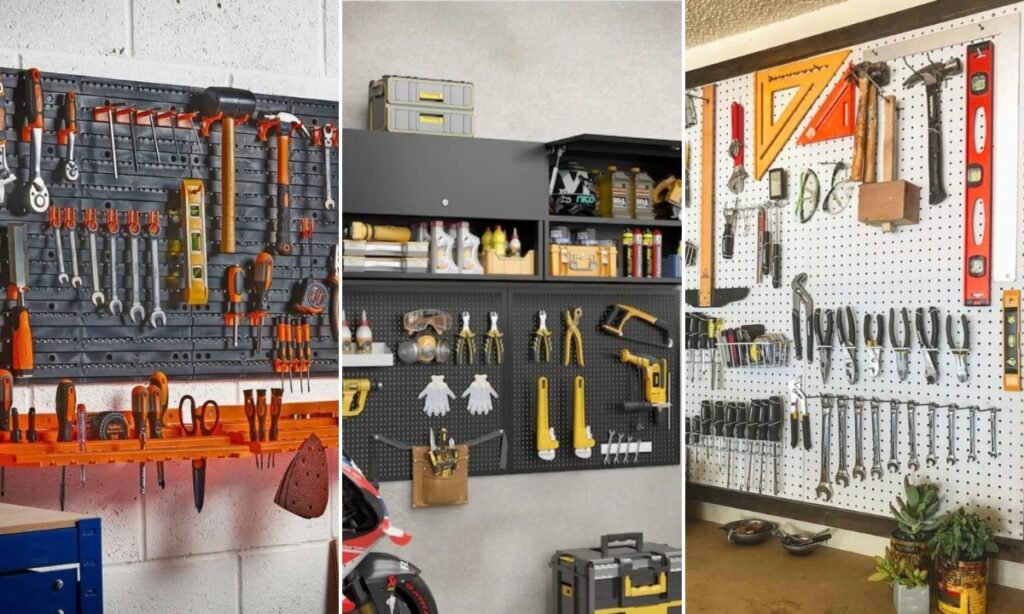
Pegboard Precision Setup
Start by turning a simple framed pegboard into a highly functional wall that keeps pliers, squares, hammers, and cutters clearly visible.
Use deep hooks for heavier hand tools and shallow hooks for lighter pieces, spacing everything evenly to avoid crowded or confusing sections.
This layout works best above a compact workbench where quick tool switching matters, helping you recreate dependable organization using affordable hardware.
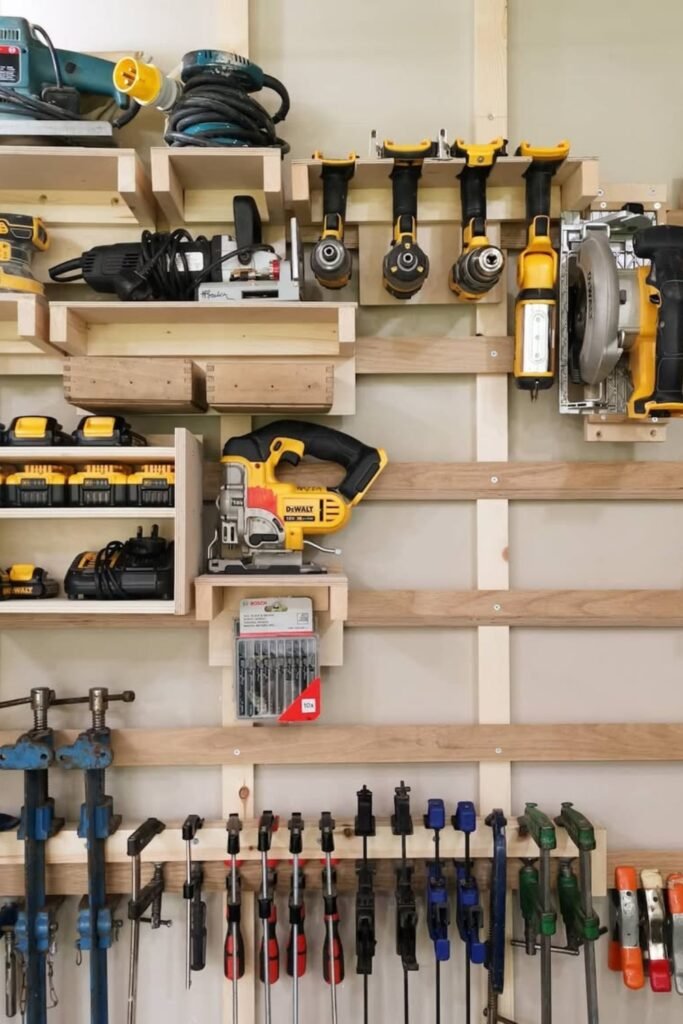
Layered Cleat Storage
A French-cleat wall like this gives every power tool a stable position, letting drill racks, battery shelves, and clamp holders slide effortlessly.
Build staggered cleats from scrap wood to support boxes, chargers, and bulky sanders, keeping the entire wall flexible when your collection changes.
This design suits small workshops needing adjustable structure, and you can recreate it by cutting identical cleats and mounting them across studs.
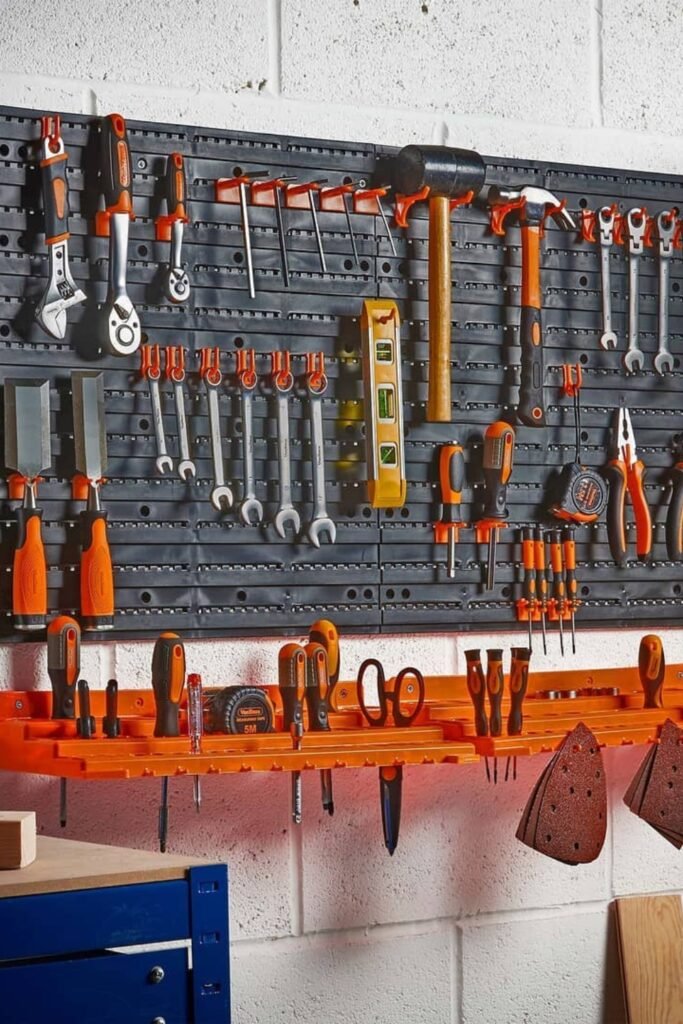
Compact Tool Grid
A modular plastic panel organizes wrenches, pliers, screwdrivers, and levels neatly, using interchangeable hooks that snap firmly without slipping unexpectedly.
Position lighter tools across the top rows and heavier handles lower for better balance, allowing your wall to stay tidy under constant daily use.
Recreate this setup in garages with limited wall space, securing several connected panels to expand storage without building complex wooden structures.
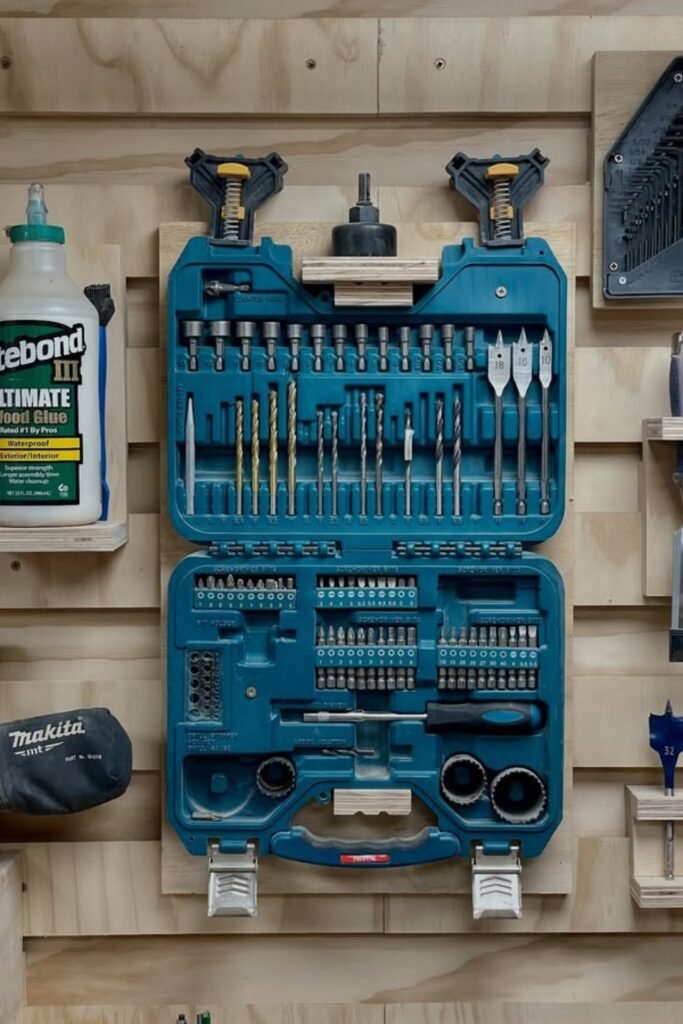
Bit Case Docking
Mounting a drill-bit case directly onto a cleat wall keeps every bit organized, using two lower catches and a centered top bracket for stability.
Add small shelves beside it to hold glue bottles and necessary accessories, creating a small workstation zone dedicated entirely to drilling tasks.
This layout works well near your drill-charging shelf, and you can recreate it easily using scrap strips sized precisely for the plastic case.
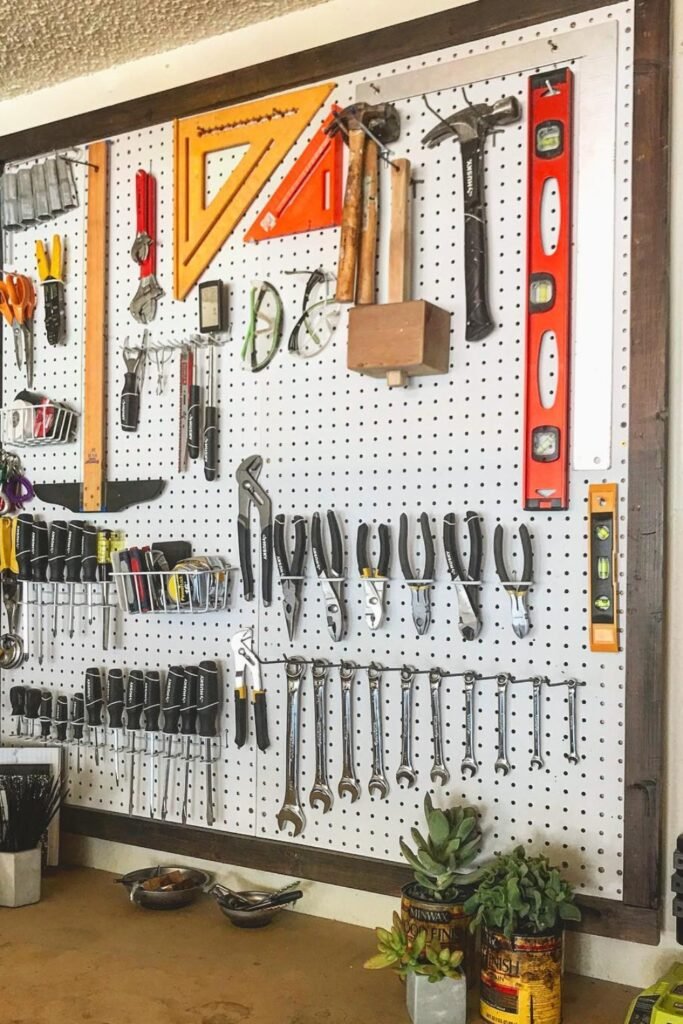
Clean Pegboard Lineup
A black pegboard with evenly spaced hooks organizes wrenches, scrapers, screwdrivers, and pliers cleanly, making every tool reachable with minimal searching.
Use matching bins along the bottom row for hardware and fasteners, reinforcing the wall by securing each panel tightly into solid wooden studs.
This works best in garages needing simple visual order, allowing you to recreate reliable storage quickly using affordable hooks and durable pegboard panels.

Full Cleat Workstation
A full-width cleat wall like this balances heavy tools, clamps, drivers, and chargers while leaving the central bench open for practical everyday projects.
Add cleats across the entire height to support shelves, holders, and sliding tool mounts, giving every workstation essentially its own adjustable position.
Recreate this setup in any garage needing vertical efficiency, building holders from scrap pieces shaped around your tools for strong personalized storage.
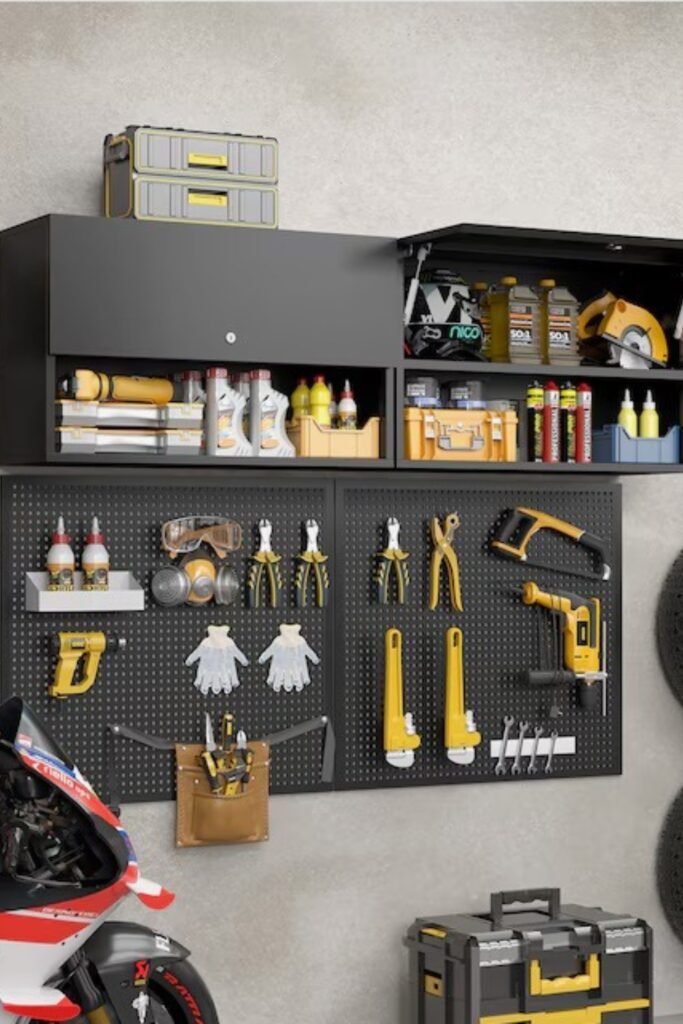
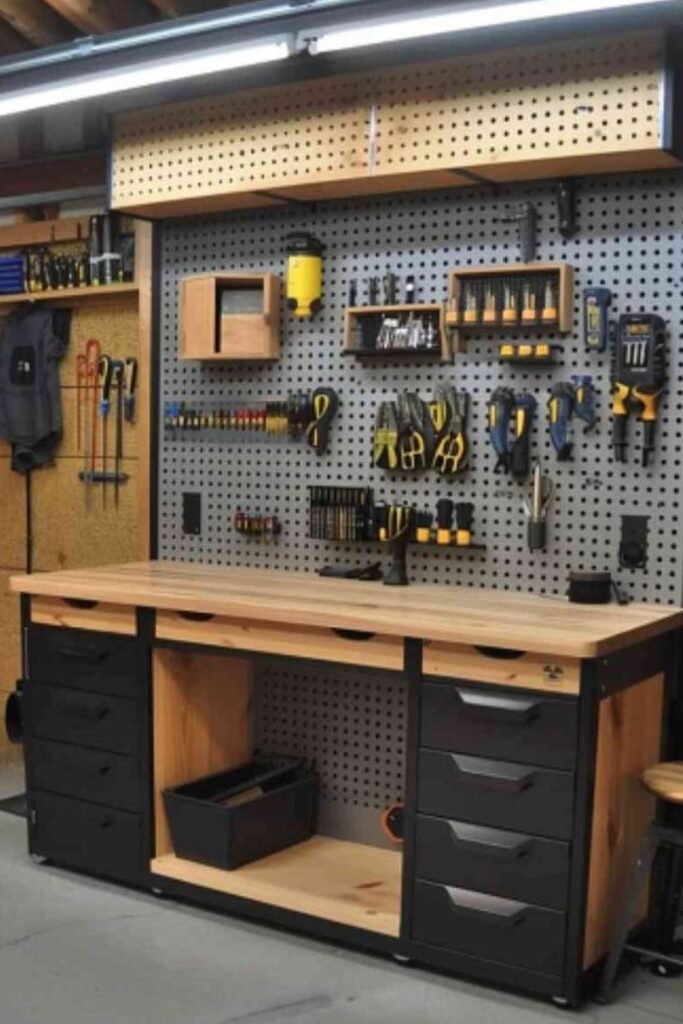
Dual-Zone Wall Storage
Blending cabinets with pegboard gives you a protected zone for chemicals and power tools while keeping daily hand tools instantly reachable below.
Use steel hooks and molded holders for pliers, saws, drills, and gloves, spacing everything evenly to prevent awkward overlap during frequent garage work.
Recreate this layout in busy workshops needing fast access and safe storage, mounting cabinets securely and aligning pegboard panels across eye-level height.
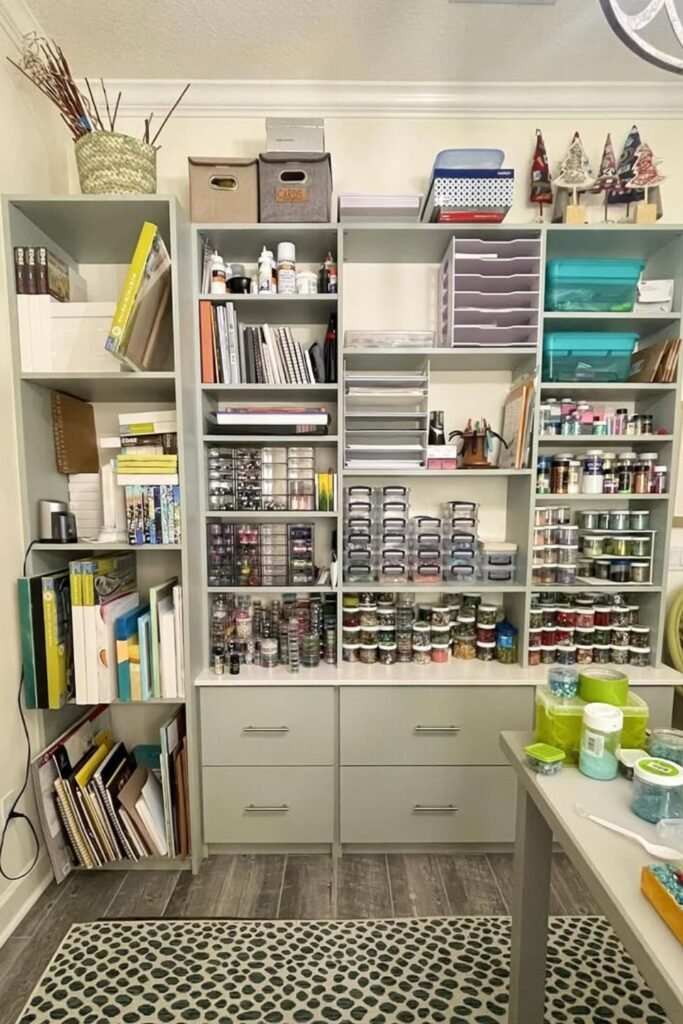
Craft Wall Control
This shelving grid turns every craft supply into a sorted section, keeping paints, glitters, brushes, tools, and paper trays visible during project planning.
Balance deeper shelves for canvases withSmall drawers for beads and jars, organizing each column by material type to simplify cleanup after long sessions.
Recreate this system in compact studios needing clear categories, building adjustable cubbies and drawers from plywood sized intentionally for your crafting essentials.
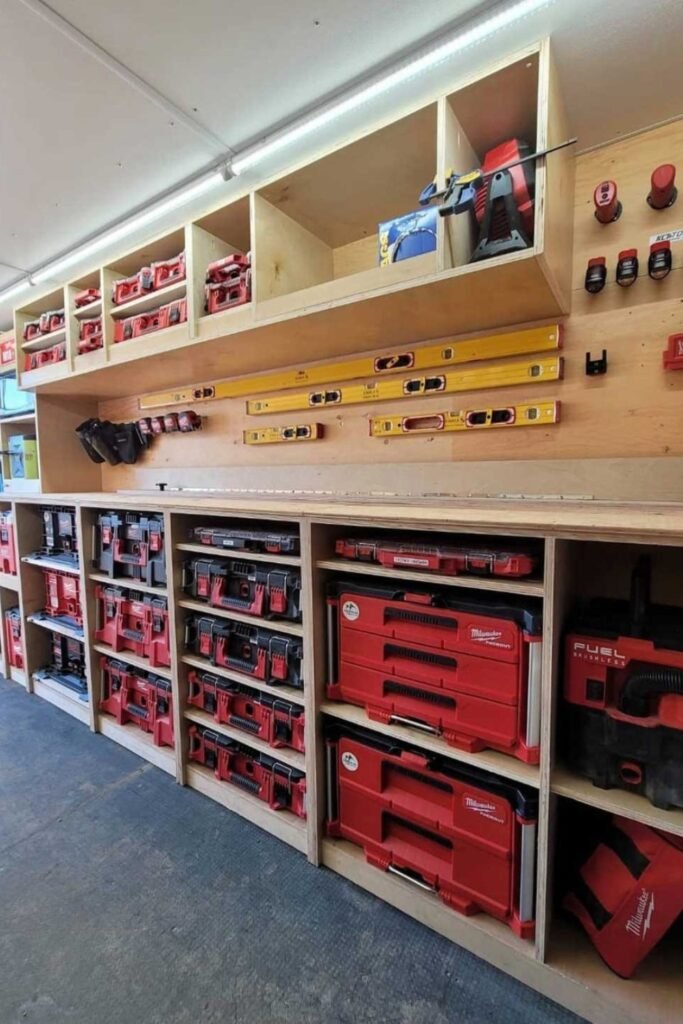
Level-Ready Tool Bay
Dedicated shelves for cases and measuring tools help you build a working wall that protects Milwaukee boxes while displaying every essential level cleanly.
Install long horizontal strips to hold levels across their length, placing chargers, radios, and accessories above to reduce clutter on crowded workstation benches.
Recreate this arrangement in trailers or mobile shops, cutting matching cubbies that secure tool boxes firmly during transport without limiting quick daily access.
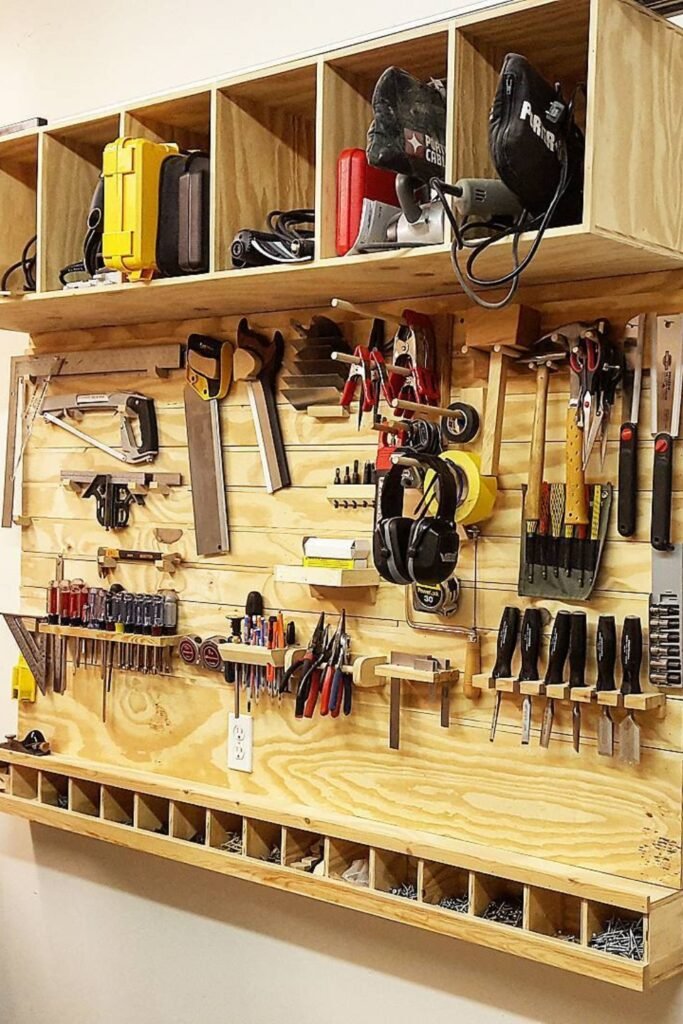
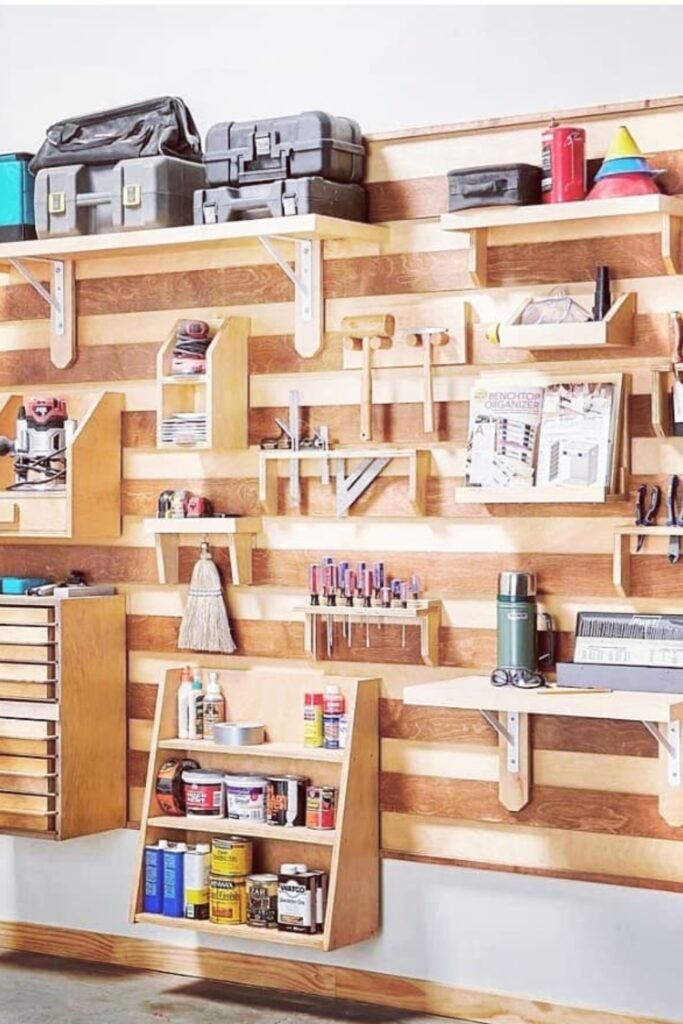
Multi-Row Wood Rack
This plywood wall uses slotted rows to position saws, chisels, clamps, and drivers neatly, giving every tool its own anchored position for safer use.
Add upper cubbies for power tools and deeper bottom pockets for screws, keeping fasteners contained without spilling whenever you grab heavier workshop pieces.
Recreate this design in small garages needing flexibility, adjusting slot spacing with simple jigsaw cuts to match the tools you rely on most.
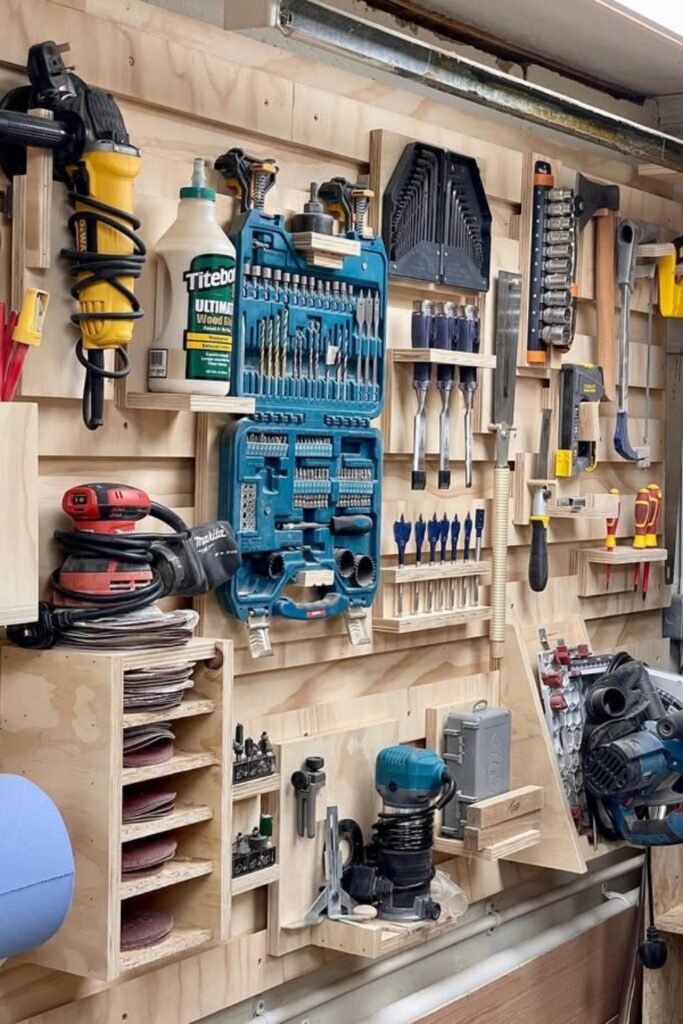
Full-Scale Cleat Panel
Layered cleats make this wall extremely adaptable, letting routers, sanders, drill kits, glue bottles, and magnetic racks shift easily as your workflow evolves.
Position sanding shelves near the bottom to handle weight, placing bit sets centrally so each driver attachment stays visible during quick drilling tasks.
Recreate this layout using identical cleats cut from plywood, installing them evenly across studs to maintain strength while supporting multiple bulky power tools.
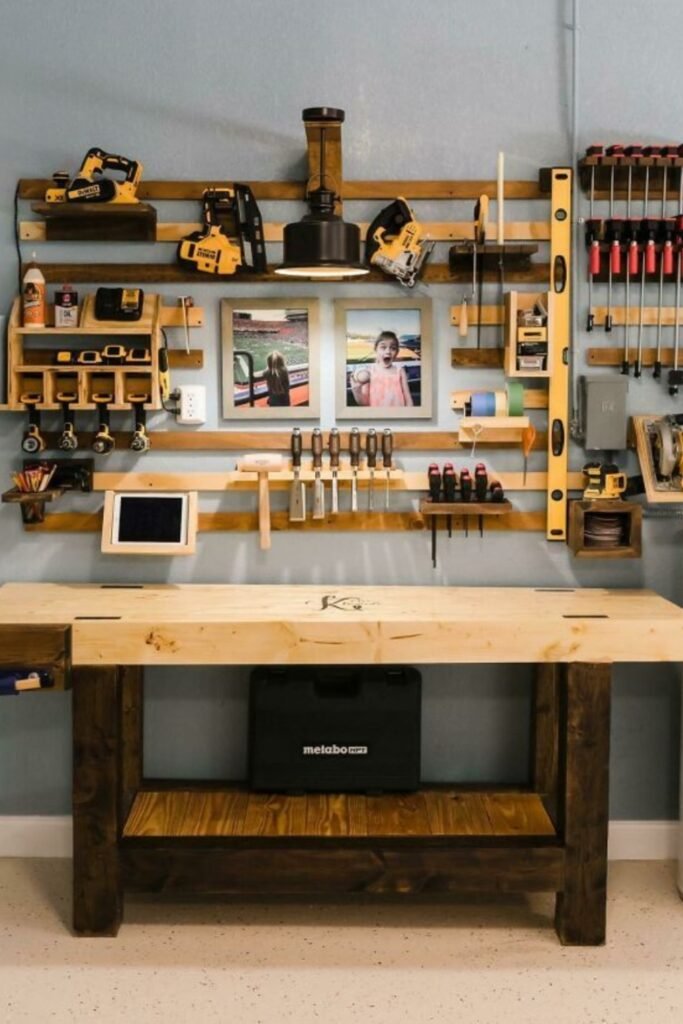
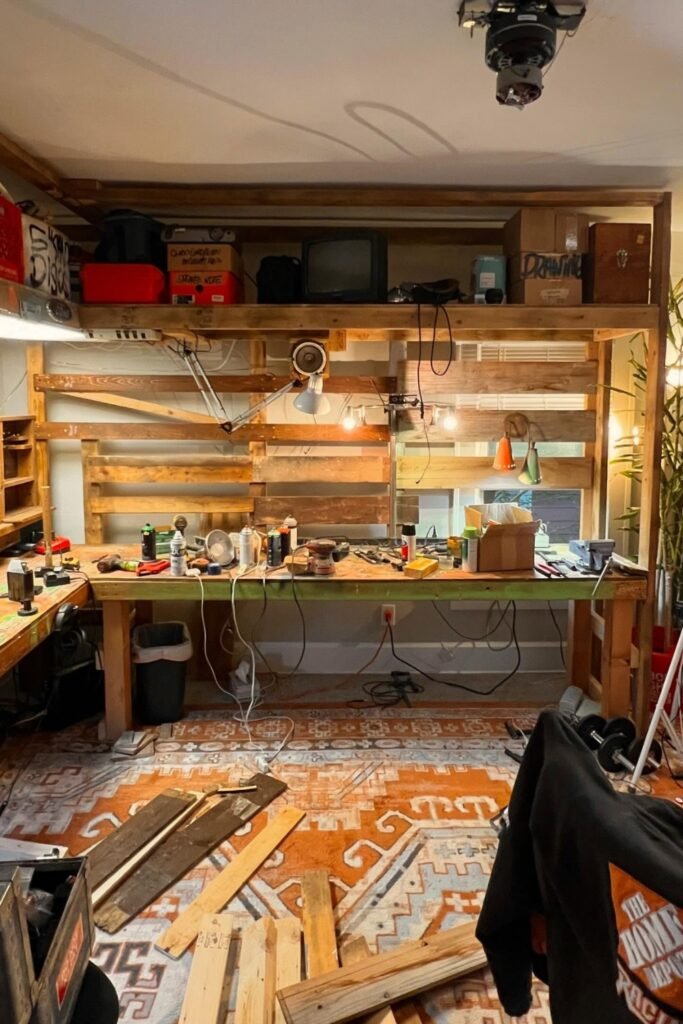
Reclaimed Workshop Wall
Scrap timber frames create a rustic workstation that holds lamps, shelves, organizers, and tool trays while keeping the workspace grounded with warm character.
Use staggered boards to mount hooks, lights, and small storage crates, allowing your tools and materials to stay reachable during messy experimental projects.
Recreate this setup in creative studios needing flexibility, fastening reclaimed boards securely then adding mount points wherever your unique workflow requires stable access.
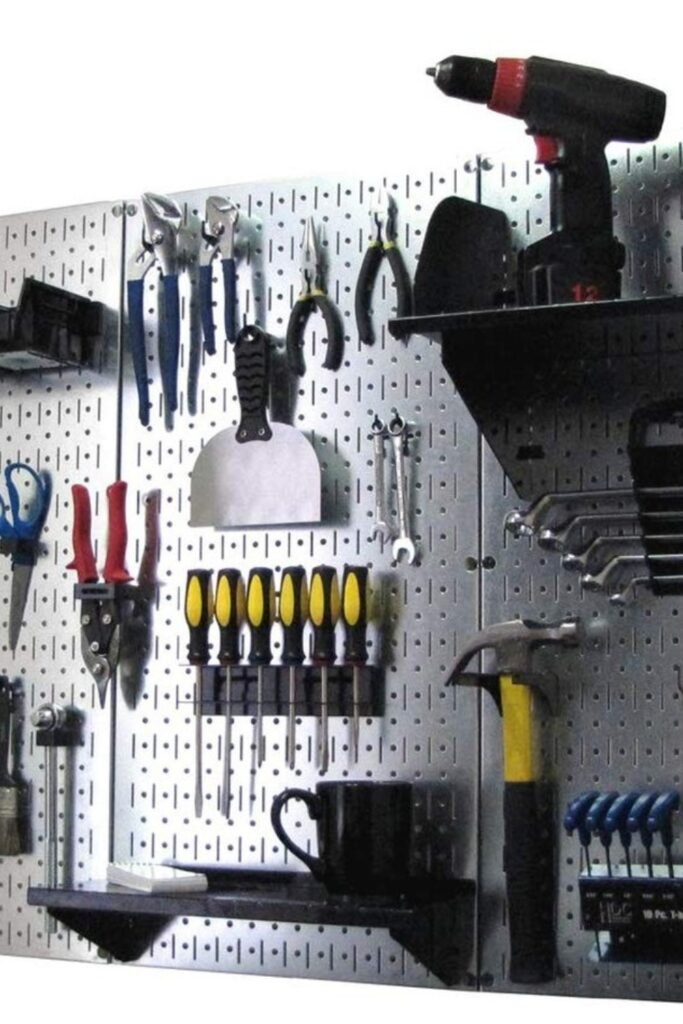
Metal Pegboard Setup
A metal pegboard like this helps you arrange pliers, screwdrivers, wrenches, and drills while keeping every commonly used tool visible.
Use reinforced shelves for heavier items such as cordless drills and batteries, securing brackets tightly to maintain dependable long-term stability.
Recreate this wall in compact workshops needing strong organization by choosing metal panels that resist sagging and support handled equipment.
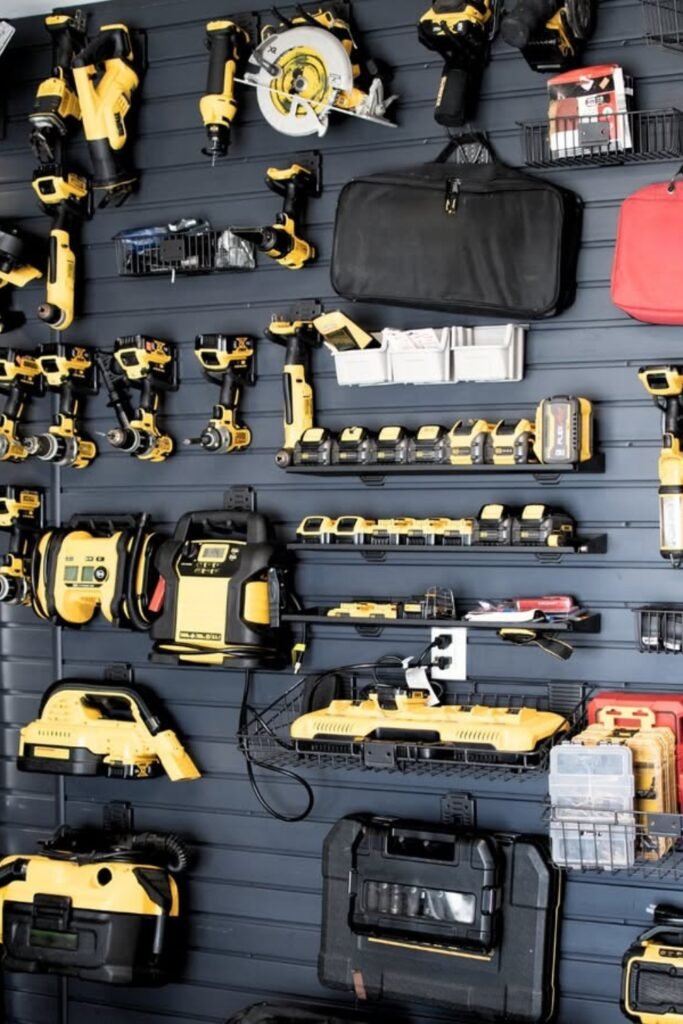
Slatwall Power Hub
A slatwall system lets your power tools hang securely, giving drills, saws, sanders, and lights clear placement without clutter appearing.
Add wire baskets for chargers, bits, and specialty accessories, making it easier to reach everything during projects requiring quick access.
Recreate this build on any garage wall using strong slat panels rated for heavy loads, ensuring safe support for equipment.
Striped Cleat Wall
Striped cleats create a modular wall that positions shelves, bins, holders, and hand tools neatly, helping every project start organized.
Balance upper shelves for toolboxes with lower trays for screws, arranging brackets evenly so important gear stays easy to grab.
Recreate this design by cutting angled cleats, mounting them across studs, then crafting holders sized accurately for your used tool
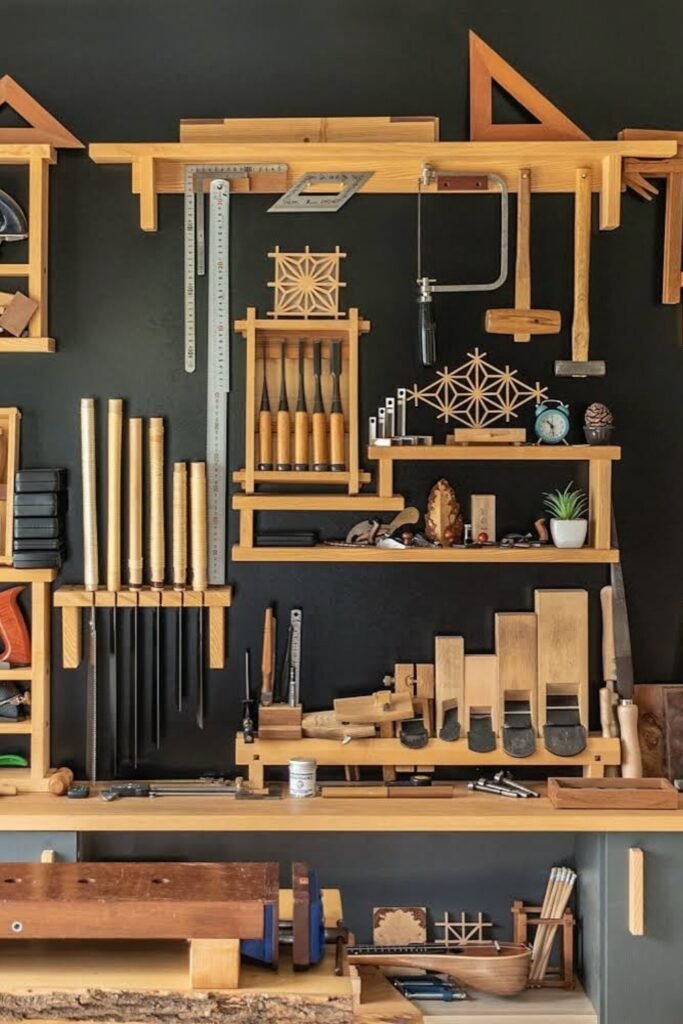
Precision Woodworking Wall
This woodworking wall highlights chisels, planes, squares, and delicate shaping tools, giving each piece stable spacing suitable for refined craftsmanship.
Use custom wooden frames sized for every tool group, allowing longer items to rest safely while smaller pieces stay arranged.
Recreate this look in dedicated carving spaces using quality hardwood scraps, shaping holders carefully to preserve tool edges effectively.
Pegboard Workbench Wall
A tall pegboard behind the bench helps you separate drivers, clamps, snips, and bits, keeping everything reachable during woodworking sessions.
Mix wooden shelves with purpose-made holders, placing heavier pieces lower while giving drills and glue bottles eye-level placement for use.
Recreate this functional wall by fastening pegboard securely, adding custom shelves, and arranging tools based on tasks you perform frequent
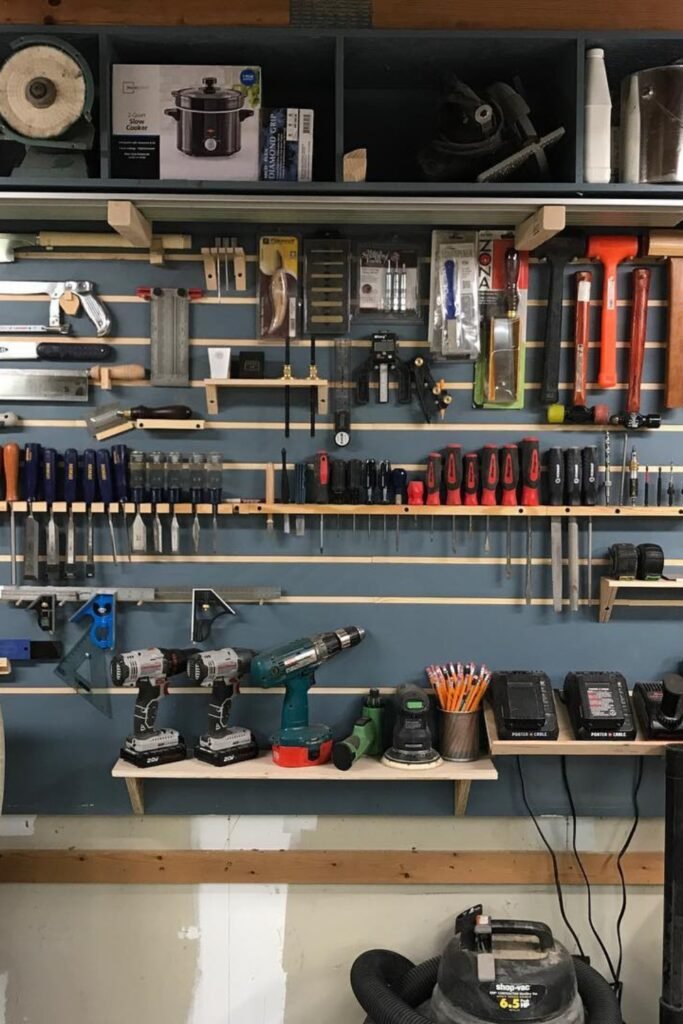
Wide Cleat Layout
A broad cleat wall distributes chisels, drills, clamps, saws, and squares evenly, giving every essential tool dependable placement across space.
Combine narrow ledges for marking tools with wider brackets supporting heavier gear, keeping everything stable without overloading individual cleats unnecessarily.
Recreate this method in workshops needing adaptable systems by cutting identical cleats, mounting them consistently, and designing holders that match workflow.

Hi, my name is Ali Mehmood! I’m a passionate writer and DIY enthusiast who loves turning creative ideas into practical, hands-on projects.
I created this website to share inspiring, budget-friendly ideas that you can do yourself – whether it’s organizing your home, crafting something unique, or creating fun projects for kids and pets.
I believe DIY isn’t just a hobby – it’s a smart way to save money, reduce waste, and enjoy the satisfaction of making things with your own hands.
I’m excited to have you as part of this growing community, and I’ll continue bringing you helpful, realistic, and fun DIY ideas you can actually use.


