This post may contain affiliate links: read full affiliate disclosure.
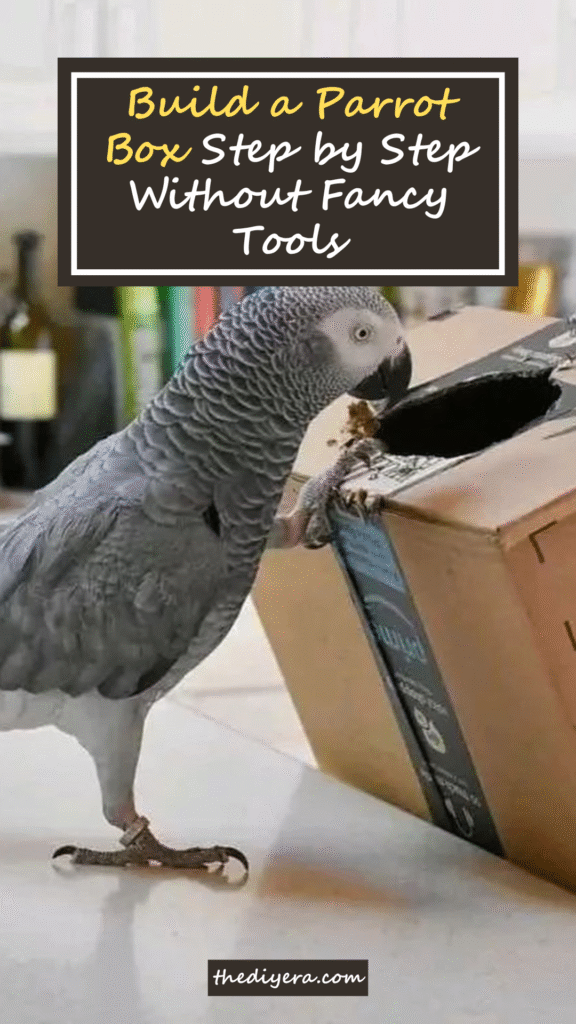
If you have a parrot, you know they are curious, active, and always looking for something to chew or a spot to hide.
The problem is, without the right box, they might end up destroying your furniture, getting bored, or even showing signs of stress.
Instead of spending money on unsafe boxes, you can make one yourself using safe materials and a few basic tools.
In this article, I will show you every step so your parrot gets a box that is safe, fun, and actually works.
Let’s jump into it!
Why Do Parrots Need a Box?
Parrots have a natural instinct to nest. In the wild, they find hollow trees or other safe places to rest and raise their families.
This instinct stays with them even when they are a pet in your home. If your parrot does not have a nesting box, it might start chewing on your furniture, hiding in dangerous places, or acting stressed.
A box provides your parrot with a sense of safety, a private space, and a proper object to chew on.
It also helps prevent boredom, as parrots enjoy using their beaks and exploring new things. A good nesting box will help your parrot feel more secure, stay healthy, and be less destructive.
Save this article for later
Step By Step Guide to Make a Parrot Box
Images are sourced from Craft Village YouTube Channel to help my readers visualize these steps. You can check out their channel for more inspiration and detailed guides.
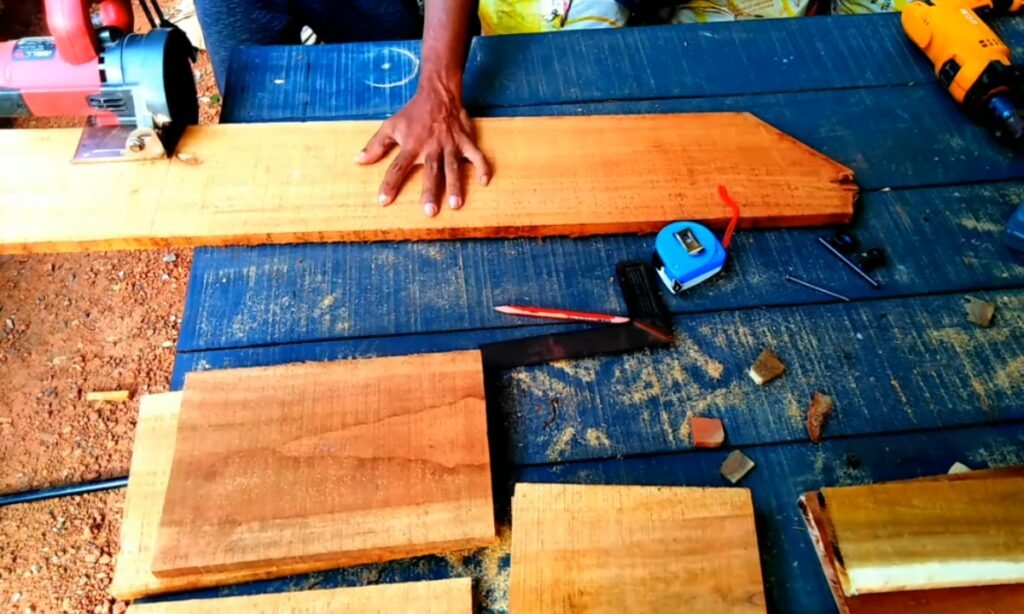
1. Measure and cut panels
First, mark your plywood pieces for the front, back, two sides, the base, and the lid.
Then, use a saw to cut them cleanly so the edges will line up perfectly.
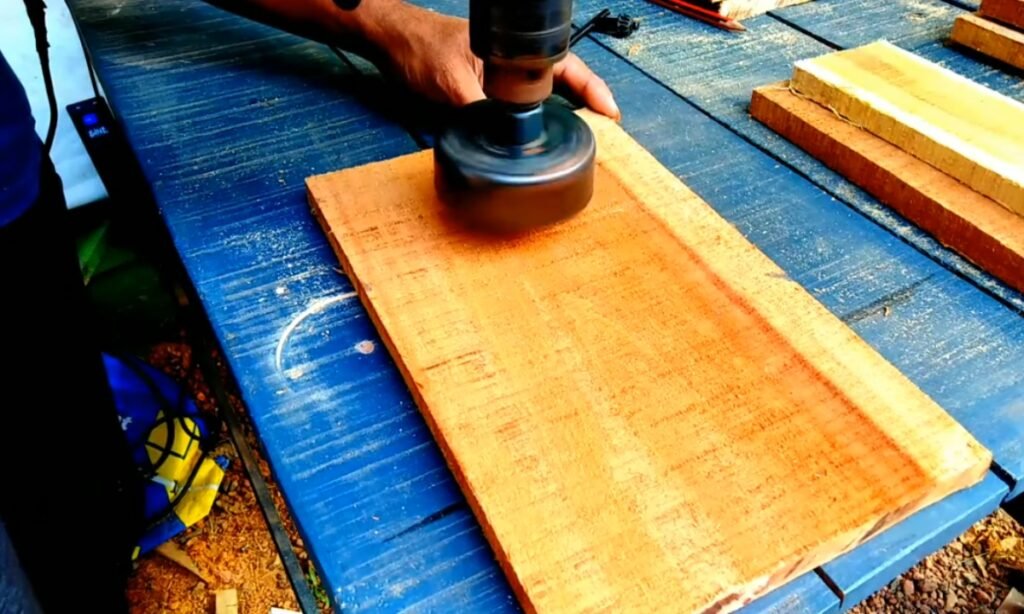
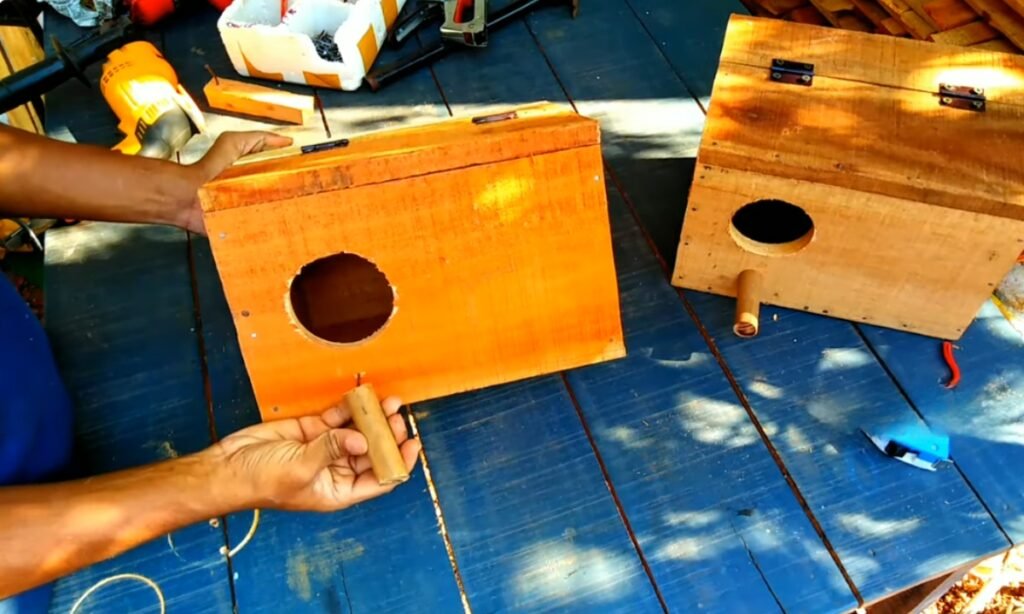
2. Mark and drill entrance hole
On the front panel, go about one-third of the way down and cut a round hole using a hole saw.
Smooth out the edges with sandpaper to make sure your parrot stays safe and does not get hurt.
3. Make vents and drains
You can drill the few small holes high on the sides for airflow.
You should also add a few holes in the floor to let water drain out and keep the box dry.
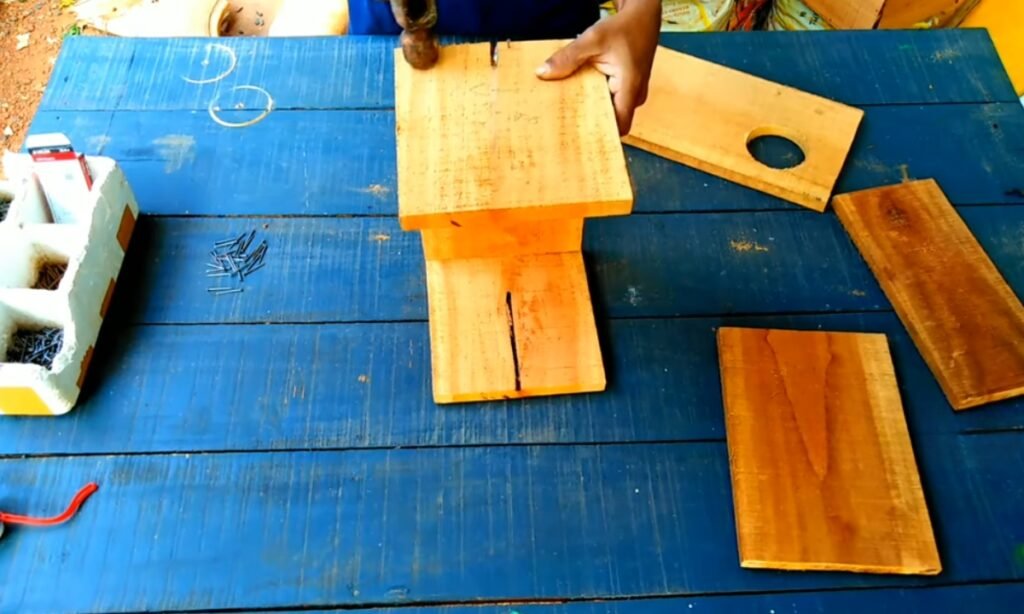
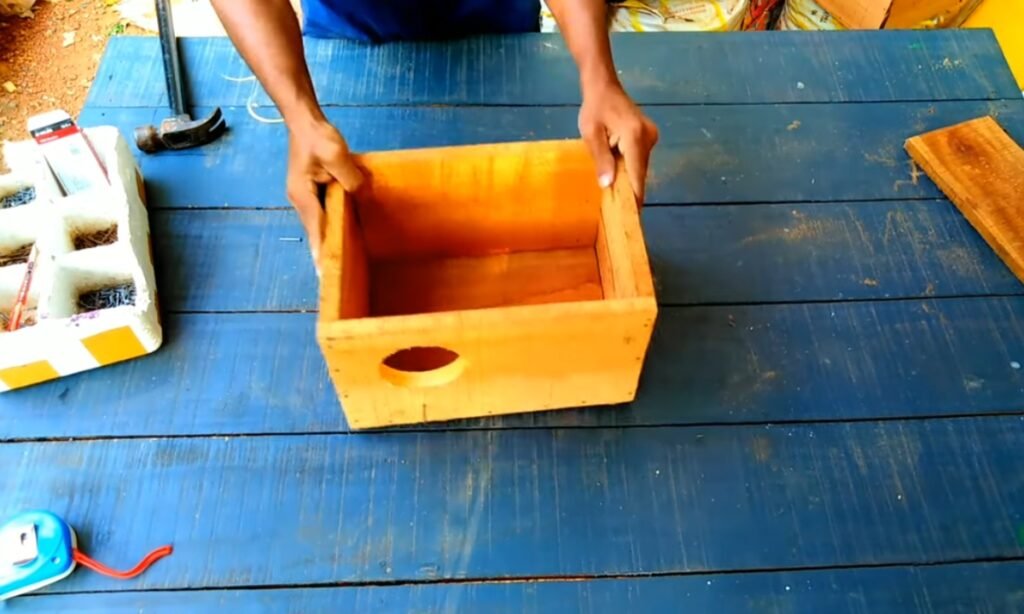
4. Assemble the box
First, glue and screw the sides to the back panel. After that, attach the base and the front piece.
You should make sure all the parts fit together tightly and are perfectly square. This will make the box strong and durable.
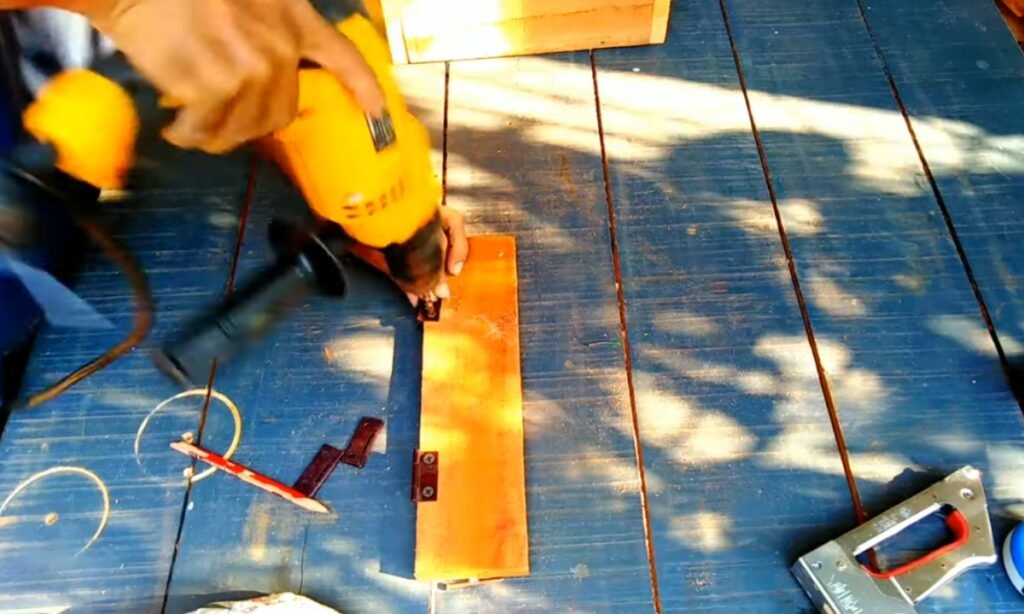
5. Attach the hinged lid
Next, you will use two small hinges to connect the lid to the back of the box.
This allows you to open it easily for cleaning. To keep the lid securely closed, add a simple latch to the front.
6. Smooth and prepare inside
Sand down any rough areas inside the box. Then, add a layer of safe wood shavings.
You should never use cedar or scented shavings; plain pine is the best choice.
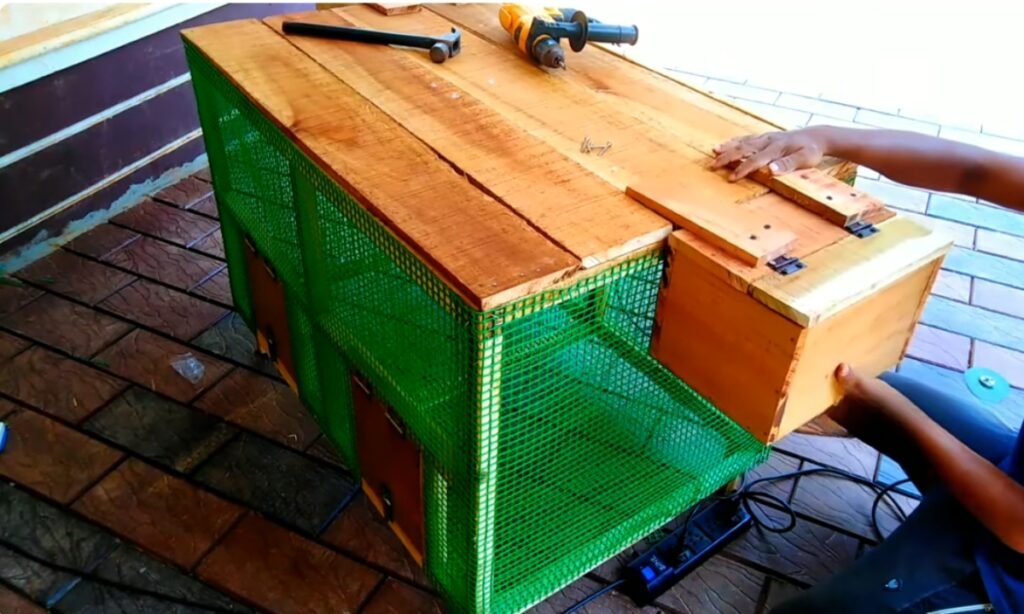
7. Mount the box securely
Attach the box to a solid wall or stand. Tilt it slightly forward to help any water drain out.
Make sure it is stable, secure, and easy for your parrots to access.
How to Clean and Maintain the Box?
A parrot box can become messy quickly, so cleaning it is as important as building it correctly.
You should check inside the box at least once a week for any droppings, leftover food, or wet bedding. Take out the dirty shavings and put in fresh, untreated wood chips or paper.
Once every month, you should take the box apart if you can and scrub it with warm water. Avoid using strong cleaners because they can leave behind fumes.
Let the box dry all the way before you put it back together. While you are cleaning, look for any sharp edges, loose screws, or spots that have been chewed on.
Taking care of the box regularly will keep it safe, clean-smelling, and comfortable for your bird.
Common Mistakes to Avoid
Many parrot owners rush to build a box and end up making mistakes that can harm their bird. One big mistake is choosing the wrong materials.
Treated wood, chemically treated cardboard, or MDF can make your parrot sick. Another common error is forgetting to add ventilation holes.
Without proper airflow, the box can become damp and stuffy. Some people also cut the entrance hole too big or too small, which makes the box unsafe or uncomfortable for the bird.
Avoid using wire mesh inside the box because it can hurt your parrot’s feet and beak. Lastly, do not skip regular cleaning.
A dirty box attracts bacteria and stresses your bird. By avoiding these mistakes, you can keep your parrot safe and happy.
Conclusion
Building a box for your parrot is not hard, but you do need to be careful. A good box gives your parrot a safe spot to rest and chew, making it feel secure.
A bad one can lead to stress, health problems, or even injury. When you choose safe materials, add good airflow, and keep the box clean, you create something your bird will actually use.
You should first decide if you want a nesting box or a play box, because they have different uses.
FAQs
Can I use cardboard for a parrot box?
Cardboard can work for quick playtime, but you should not use it as a long-term home. Many shipping boxes contain chemicals and will fall apart easily after your parrot chews on them.
If you are looking for something that is both safe and will last, you should choose untreated wood, such as pine or plywood.
You can save cardboard for shredding games when you are watching, but do not use it for a permanent parrot box.
How often should I replace the parrot box?
Often long a wooden box lasts really depends on your parrot’s chewing habits. Some birds might leave their box in great shape for months, but others can tear it apart in just a few weeks.
You should check the box every week. If you see splintered wood, sharp edges, or if the box feels wobbly, it is time to replace it.
A new, solid box is always a safer choice than trying to fix an old one.
You may also love to read!
- 30 DIY Cat Hammock Ideas for 2025
- How to Build a Cat Scratching Post – Step By Step
- How to Build a Simple Dog House – Ultimate Guide

Hi, my name is Ali Mehmood! I’m a passionate writer and DIY enthusiast who loves turning creative ideas into practical, hands-on projects.
I created this website to share inspiring, budget-friendly ideas that you can do yourself – whether it’s organizing your home, crafting something unique, or creating fun projects for kids and pets.
I believe DIY isn’t just a hobby – it’s a smart way to save money, reduce waste, and enjoy the satisfaction of making things with your own hands.
I’m excited to have you as part of this growing community, and I’ll continue bringing you helpful, realistic, and fun DIY ideas you can actually use.