

This post may contain affiliate links: read full affiliate disclosure.
You sit down to make a friendship bracelet, but soon the strings start to twist, your knots look uneven, or you realize the strands are too short.
Does this sound familiar? Do not worry-you are not the only one. Many people face these issues when they first try making bracelets.
The good news is that it is much easier than it seems once you learn a few simple tips.
In this guide, I will take you through the basics, help you avoid common mistakes, and give you clear, step-by-step instructions to create bracelets that look neat, fit well, and last long.
Why Friendship Bracelets Are Worth Making?
Friendship bracelets are more than just threads that are tied together – they hold meaning. When you make a bracelet for someone, it shows your time, effort, and thoughtfulness.
That is why these little bands have been loved for generations, from schoolyards to camps to late-night crafts.
They are affordable, colorful, and easy to make your own, which makes them fun for kids and adults alike.
But here is the truth: many beginners quit because their bracelets curl, the knots look messy, or the pattern does not turn out right.
The good news is, these problems are easy to fix. Once you learn the basics, making bracelets becomes simple and even relaxing.
Best of all, you create something one-of-a-kind that celebrates your bond with a friend.
Save this article for later

Step-by-Step: Your Simple Bead Bracelet
Images are sourced from Jelly Record. YouTube Channel to help my readers visualize these steps. You can check out their channel for more inspiration and detailed guides.
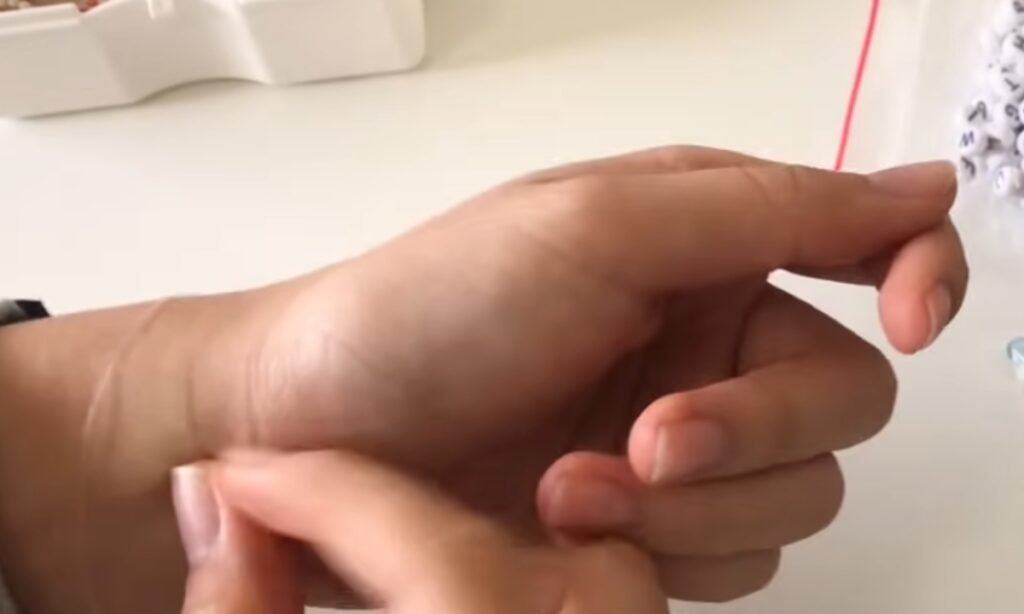
1. Cut Your String
First, measure your string. Wrap it loosely around your wrist one time. Double that measurement so you have enough to work with.
It is a good idea to add a little extra, because running out of string mid-project is frustrating.
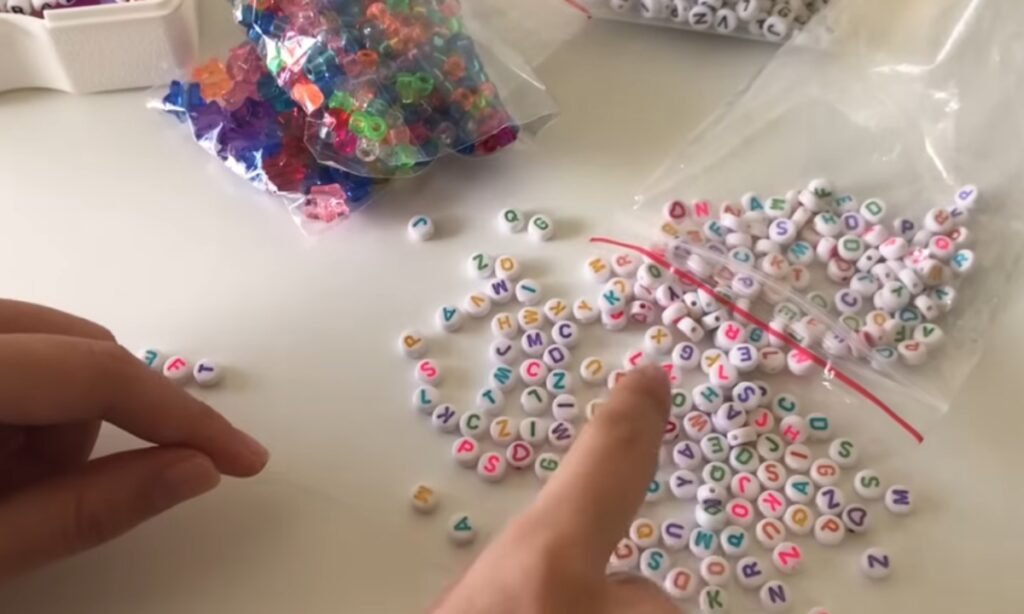
2. Choose Your Beads
Next, pick out the beads you plan to use. Arrange them in order to see how the colors and letters will look together.
This helps you finalize your pattern before you begin threading.
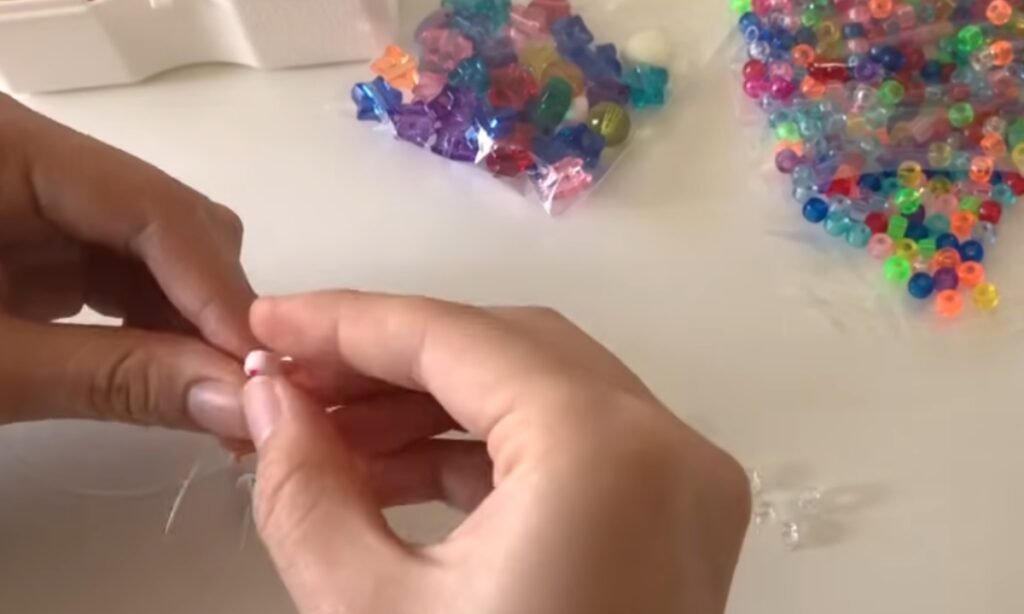
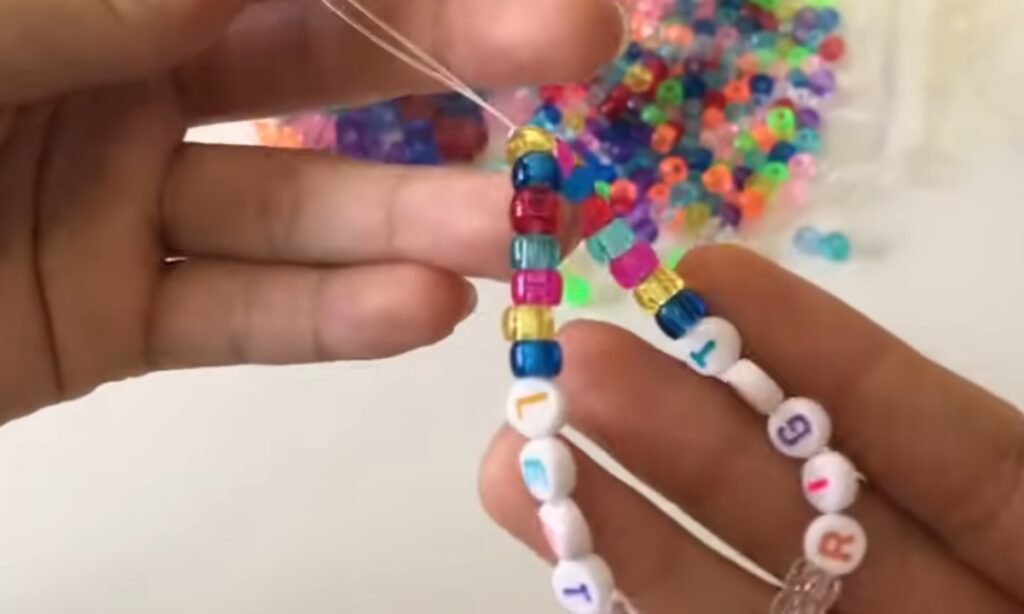
3. Thread the Beads
Take your string and slide the beads on one at a time. Keep pushing them down toward the end of the string so they stay secure.
This is where you will see your bracelet design come to life. life.
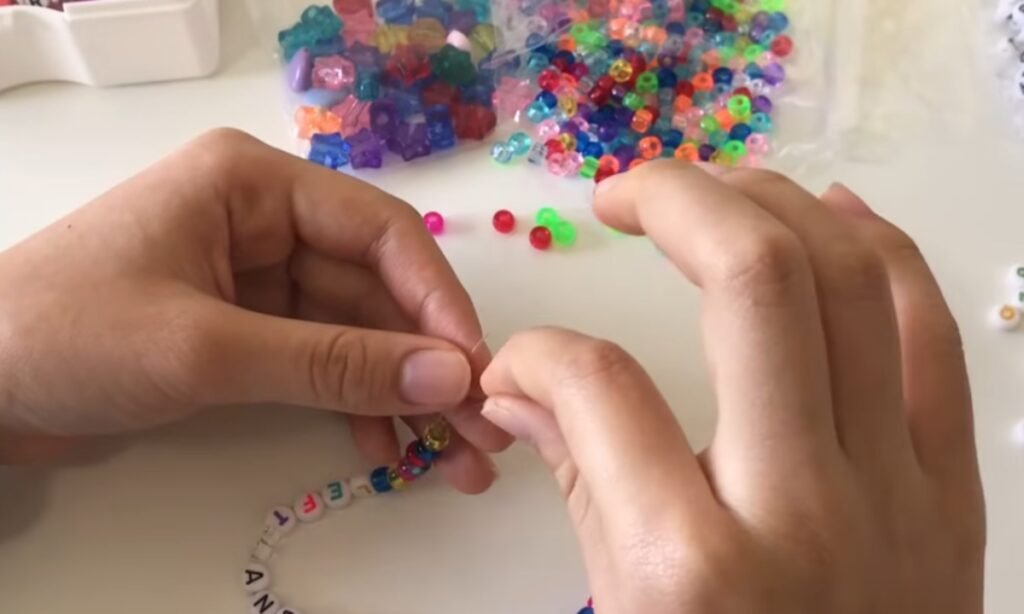
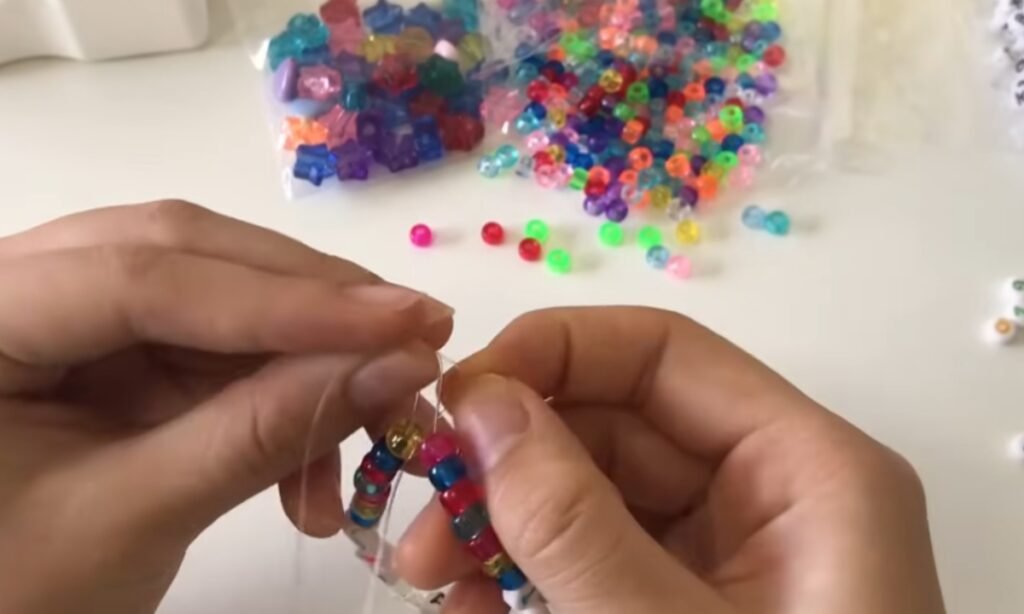
4. Double Back Through the Beads
Once you have added all the beads you want, guide the string back through them a second time.
This will secure the bracelet and keep the beads packed tightly so they will not move around.
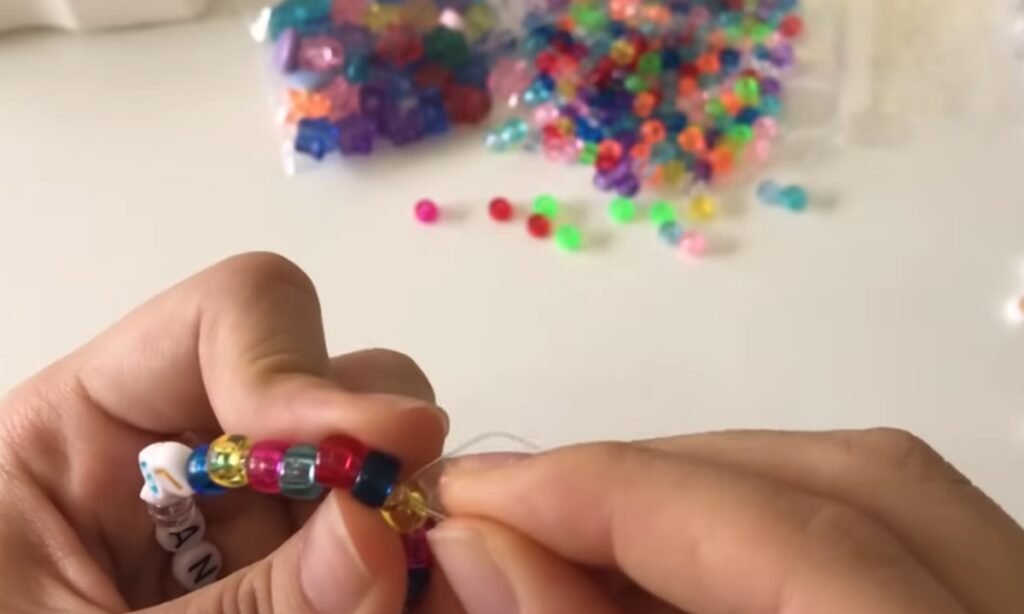
5. Adjust and Tighten
Take both ends of the string and pull gently to make everything even. Check that the beads are in a straight line and the bracelet fits well on your wrist.
6. Tie Secure Knots
Next, tie the two ends together. Loop one string under the other and pull tight to form a solid knot.
Do this two more times to be sure it will not come apart. The knots will be hidden by the beads.
7. Weave in the Loose Ends
For some extra security, you should thread each loose end back through two or three beads before you cut it.
This will hide the string and prevent the bracelet from coming apart.
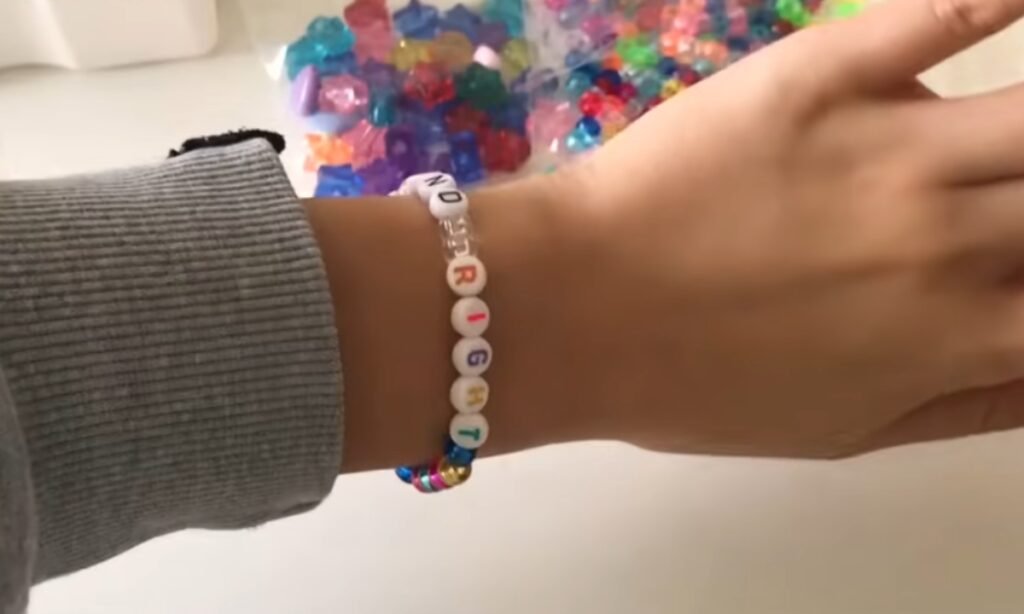
8. Trim and Finish
Now, cut off the extra string. Leave a very small piece so the knot does not slip out.
Gently stretch the bracelet as you tuck in the final ends. You are all done. Slide it onto your wrist and enjoy your new friendship bracelet.
Tips to Make It Look Better
If your bracelet looks messy, it is probably because of a few small things you can fix right away.
First, focus on tension. Pull each knot tight, but do not pull too hard-too much force will make the bracelet curl, while loose knots will look uneven.
Second, pick colors that contrast so your pattern stands out. Light and dark combinations work best if you want the design to pop.
You can also add some extra beads and charms to the strands before tying them, which gives the bracelet a more polished and personal touch.
Here is a pro tip: trim any fuzzy ends neatly when you are finished, so the bracelet looks clean and tidy.
These small changes can turn a bracelet from “just okay” into something you will be proud to give to someone.
Conclusion
Making friendship bracelets is more about the meaning behind them than getting them perfect. Each knot you tie is a little bit of effort that builds into something special.
Sure, your first one might be a bit curly or uneven, but you will get better, quicker, and more creative with practice.
The real reward is not in perfect designs, but in the happiness of creating something with your own hands and giving it to someone you care about.
So, pick up some thread, begin tying knots, and remember that your bracelets will look better the more you practice.
FAQs
How long does it take to make a friendship bracelet?
The time it takes really depends on the pattern and how fast you work. Once you learn the knots, a simple candy stripe pattern usually takes about 30 to 45 minutes.
More complex designs, like chevrons or patterns with letters, could take a few hours. The great thing is that you can always set it down and continue later from where you stopped.
What is the best thread to use for friendship bracelets?
Embroidery floss is the best choice. It is smooth, available in tons of colors, and makes knotting easy.
You can also choose perle cotton for a thicker and shinier bracelet. While you can use regular yarn or string if you have nothing else, they will not create the same clean look or last as long as embroidery floss.
You may also like to read!
- How to Build a DIY Compost Bin
- How to Make Outdoor Candles at Home
- How to Make a Macrame Plant Hanger

Hi, my name is Ali Mehmood! I’m a passionate writer and DIY enthusiast who loves turning creative ideas into practical, hands-on projects.
I created this website to share inspiring, budget-friendly ideas that you can do yourself – whether it’s organizing your home, crafting something unique, or creating fun projects for kids and pets.
I believe DIY isn’t just a hobby – it’s a smart way to save money, reduce waste, and enjoy the satisfaction of making things with your own hands.
I’m excited to have you as part of this growing community, and I’ll continue bringing you helpful, realistic, and fun DIY ideas you can actually use.


