This post may contain affiliate links: read full affiliate disclosure.
Making a fabric banner sounds simple until you start wondering which fabric to use, how to attach the pieces.
You might have leftover fabric sitting around, but turning it into something worth hanging on your wall can feel confusing.
With a few fabric scraps, some string, and a little creativity, you can create banners for your home, parties, or seasonal decorations.
In this article, you’ll find creative fabric banner ideas, along with practical tips to help you choose a design and make it yourself.
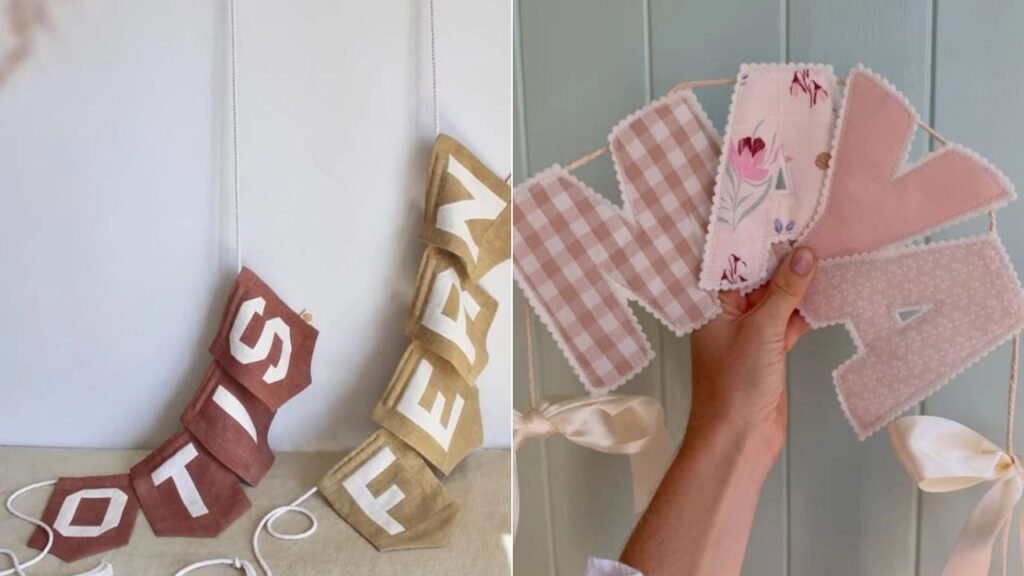
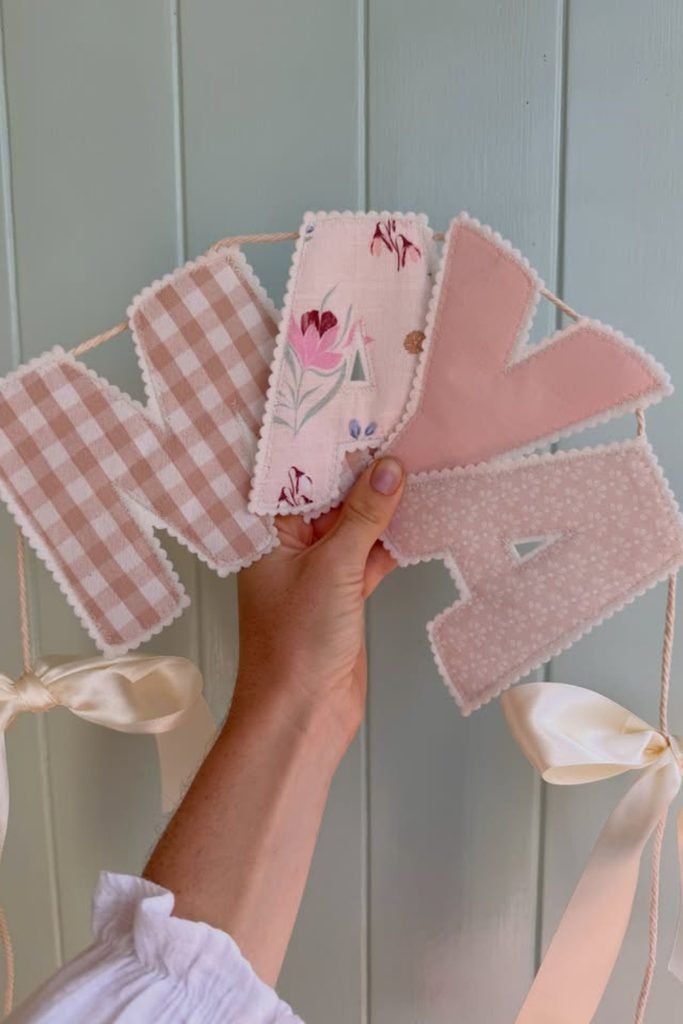
Pink Name Banner
Give a nursery or birthday corner a personal touch by cutting large fabric letters from pink gingham and floral cotton.
Add soft backing behind each letter, then finish the edges with scalloped trim before attaching them to twisted cotton cord.
Tie satin bows at both ends for a delicate finish that makes the handmade name banner feel extra special.
Whimsical Fabric Garland
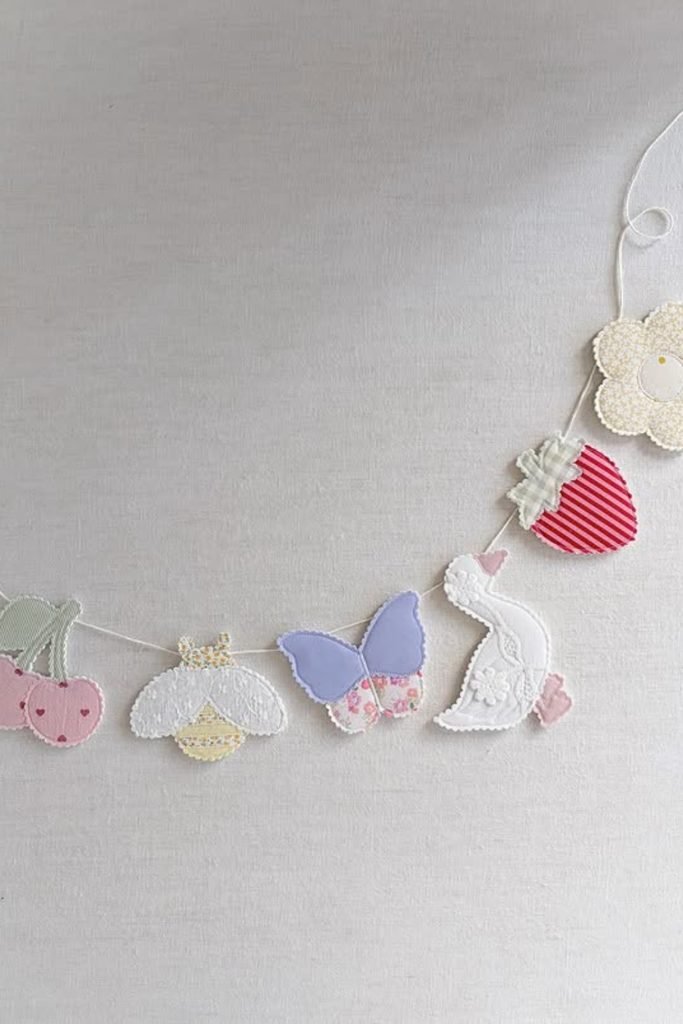
Mixing different fabric shapes can make a simple garland more playful, especially when you use cherries, butterflies, and flowers.
Cut each shape from patterned cotton, add a soft backing, and stitch around the edges for a neat finish.
Space the decorations along thin white string, leaving enough room between them so each little design stands out clearly.
Patchwork Letter Banner
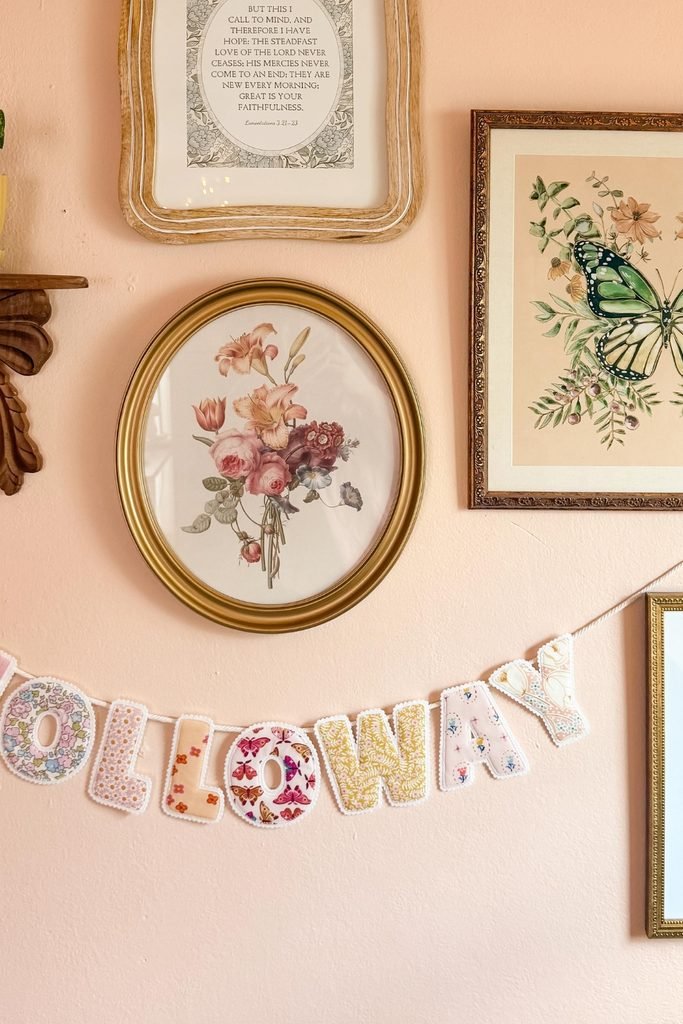
Instead of buying matching fabric, gather small floral scraps in different prints to create a colorful handmade letter banner.
Cut letters from your chosen fabrics, add contrasting backing, and sew decorative trim around each edge for extra texture.
Hang the finished banner beneath framed artwork, where the mixed patterns can complement a cozy, vintage inspired gallery wall.
Linen Letter Flags
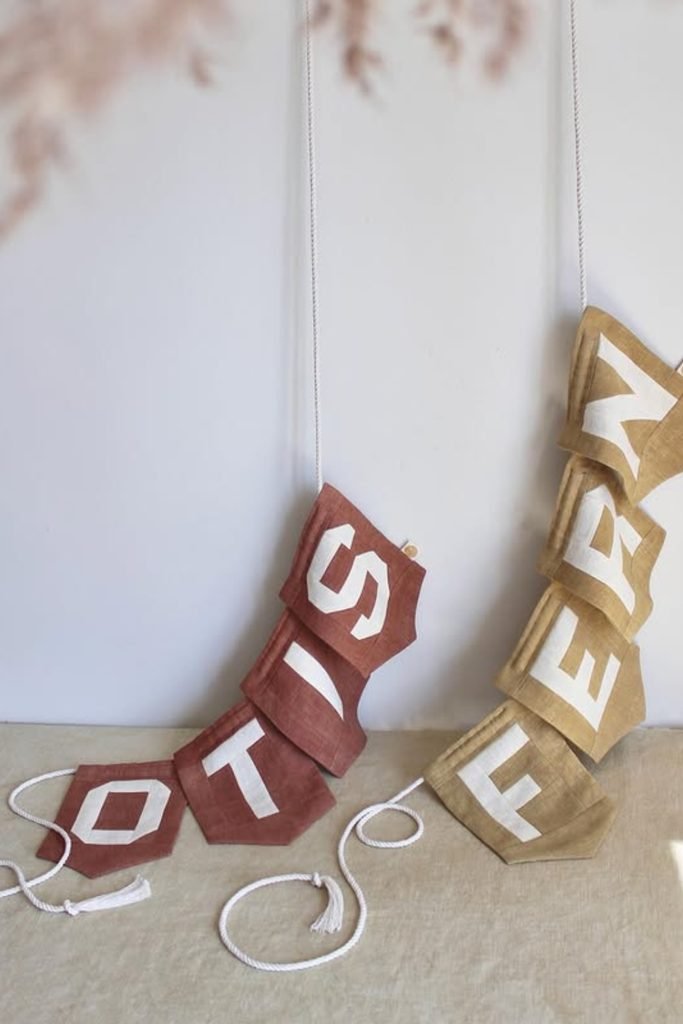
For a more structured fabric banner, try individual linen pennants with pointed bottoms and bold white letters across their centers.
Cut matching flag shapes from earthy colored linen, then attach painted or appliqué letters before folding the top edges.
Thread cotton rope through the folded openings, allowing each pennant to hang separately for easy spacing and rearranging later.
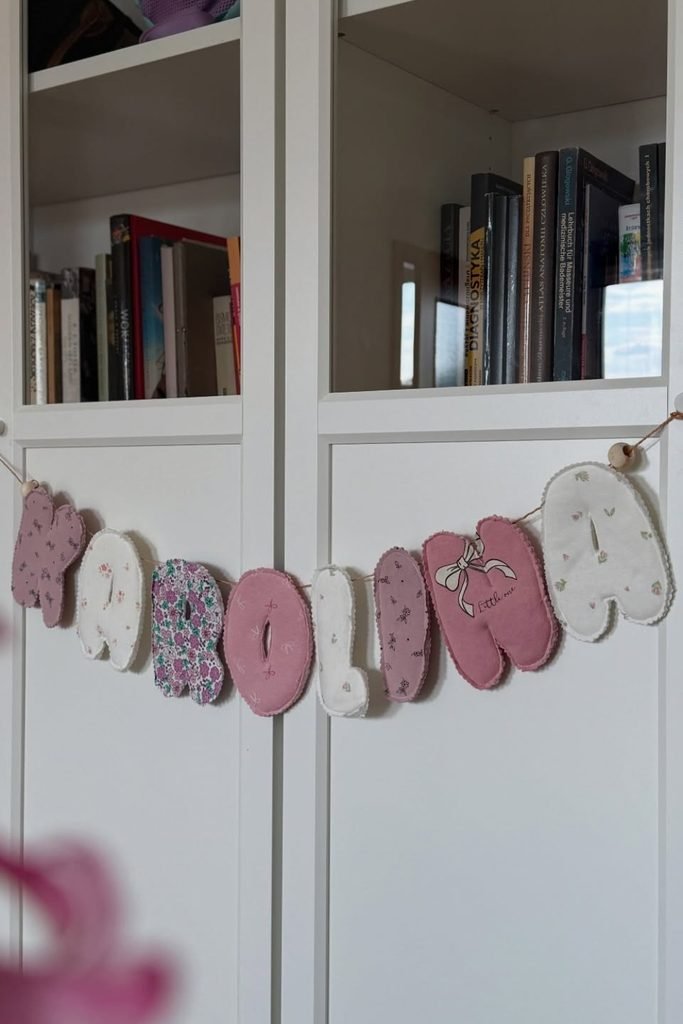
Padded Name Garland
Soft padded letters can turn an ordinary cupboard into a personalized display without taking up valuable shelf space.
Choose dusty pink, cream, and floral cotton, then sew matching letter shapes together with a little stuffing inside.
Attach each letter to thin twine, using existing cabinet knobs as temporary anchors instead of drilling into furniture.
Teddy Bear Pennants
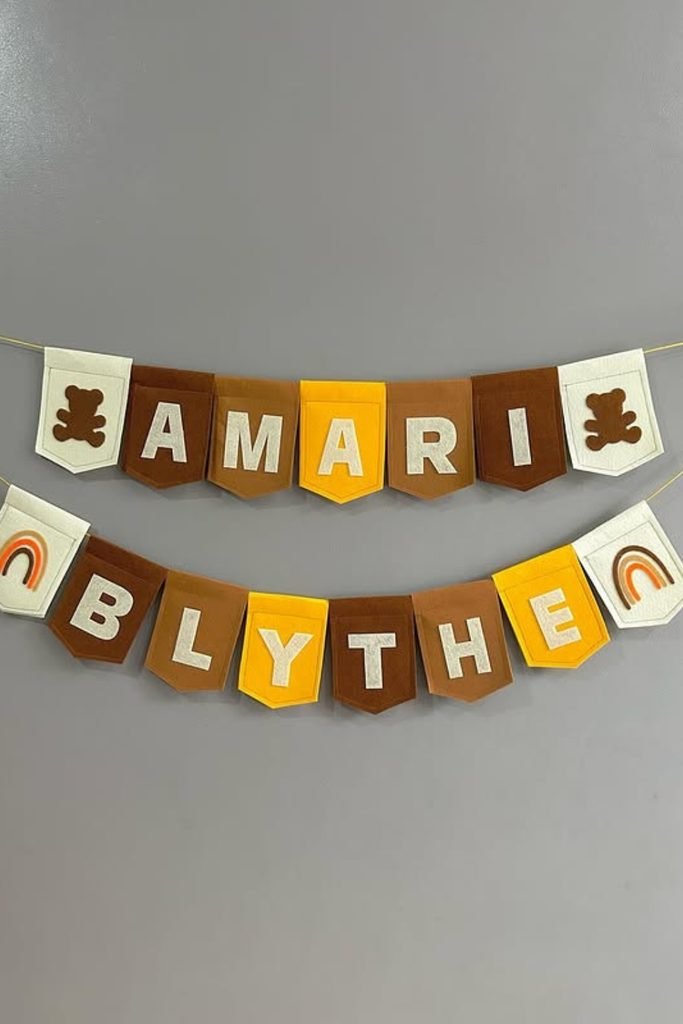
A woodland color palette works nicely for children’s birthday banners, especially when brown, mustard, and cream fabrics alternate.
Make pointed felt pennants, attach contrasting fabric letters, and add teddy bear appliqués to the end flags.
Split longer names across two strings, then include little rainbow patches for extra detail without overcrowding the lettering.
Double Name Banner
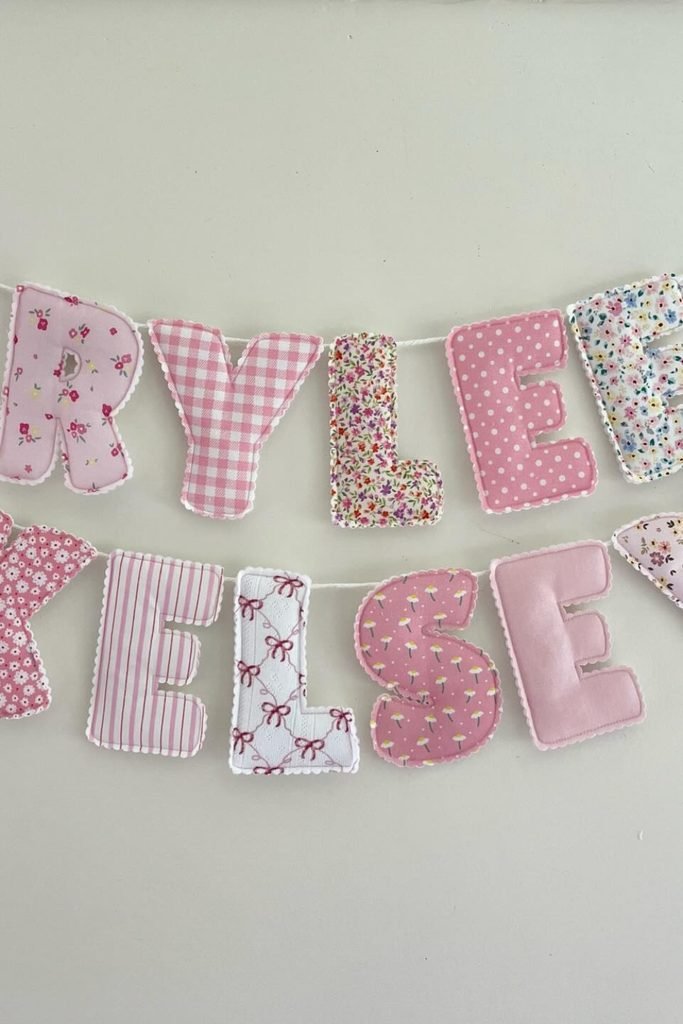
Two rows of fabric letters are a clever solution when you want to display a longer name without stretching across the entire wall.
Mix pink gingham, tiny florals, and striped cotton, then lightly stuff each letter before finishing its edges with stitching.
Hang both strings at slightly different heights, allowing enough space between the rows so the letters remain easy to read.
Quilted Birthday Bunting
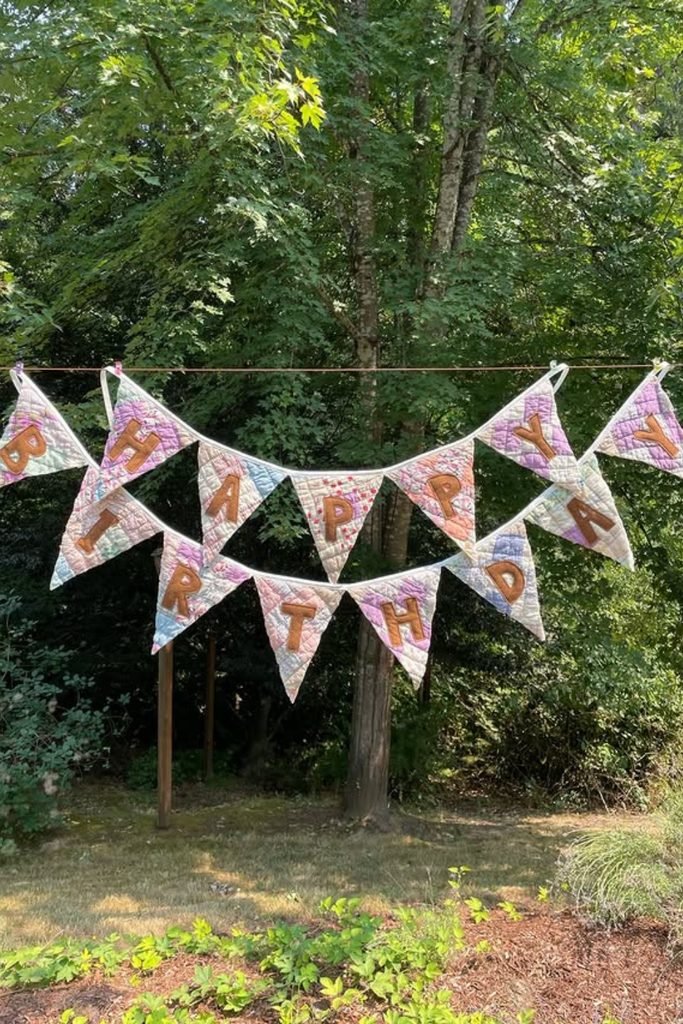
Old quilt scraps can become a memorable birthday decoration when you turn their colorful patterns into oversized triangular pennants.
Cut matching triangles from quilted fabric, add large contrasting letters, and sew fabric loops along the top edges.
String the flags between sturdy outdoor supports for a garden celebration, securing both ends against wind and sudden movement.
Colorful Fabric Letters
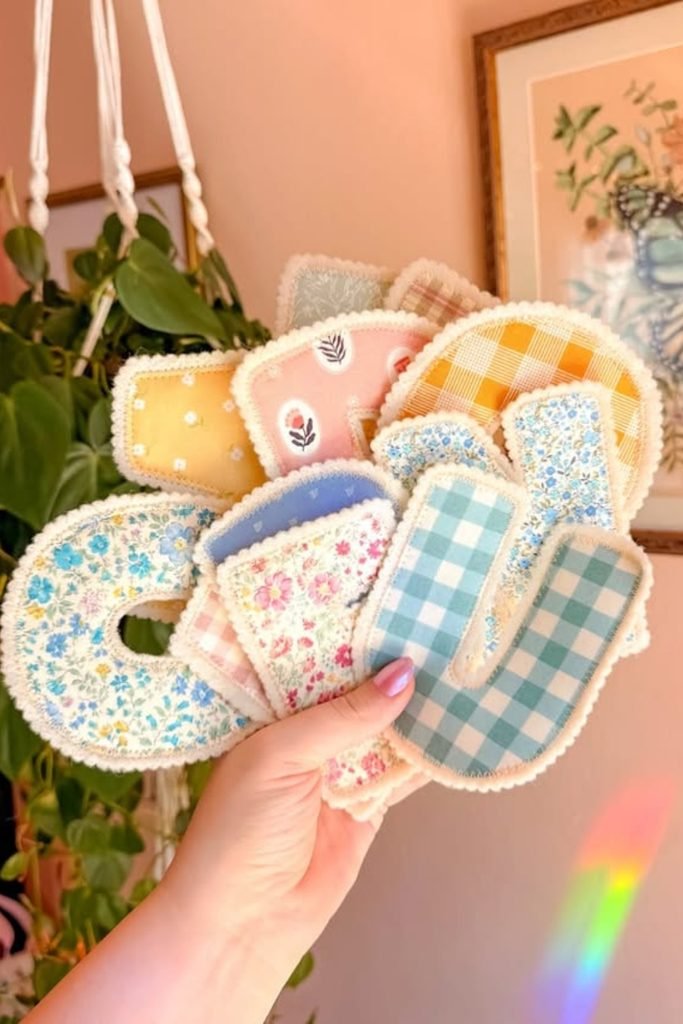
Before choosing matching fabrics, try mixing cheerful florals, gingham, and tiny prints to give each handmade letter its own personality.
Cut oversized alphabet shapes, sandwich lightweight batting between matching pieces, and finish the edges with soft cream scalloped trim.
Use these letters to spell birthday names or short messages, choosing different fabric combinations for a playful, personalized banner.
Pastel Patchwork Banner
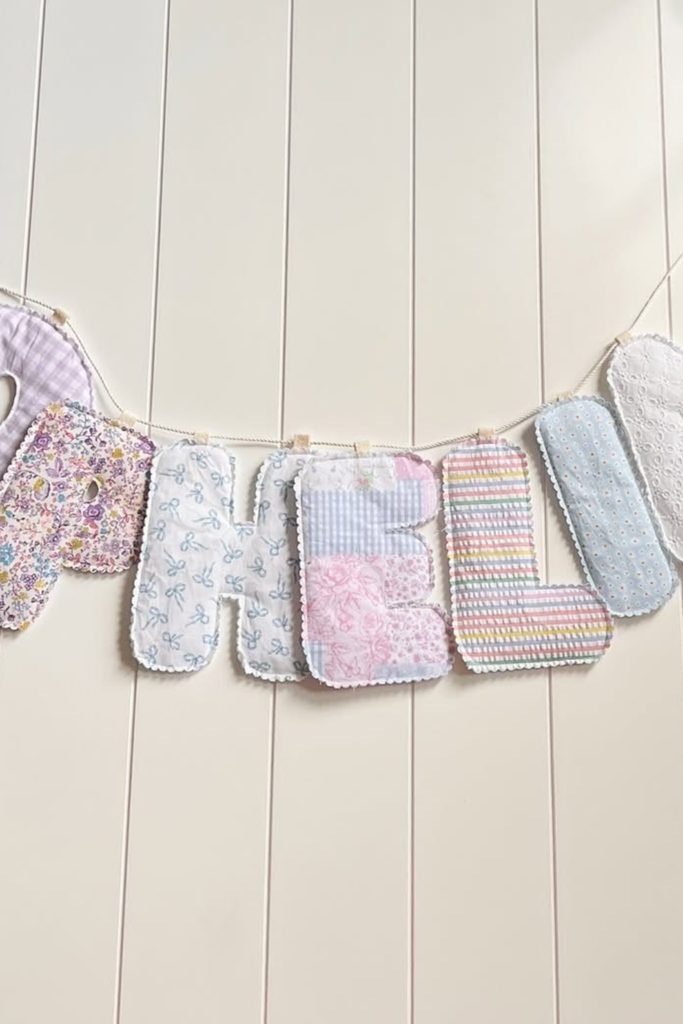
Leftover quilting squares are perfect for creating a soft alphabet banner without purchasing a separate fabric for every letter.
Combine lavender checks, delicate florals, and pastel stripes, then piece smaller scraps together before cutting your chosen letter shapes.
Attach the padded letters to cotton cord with small fabric loops, making a gentle nursery decoration that can be reused.
Woodland Name Garland
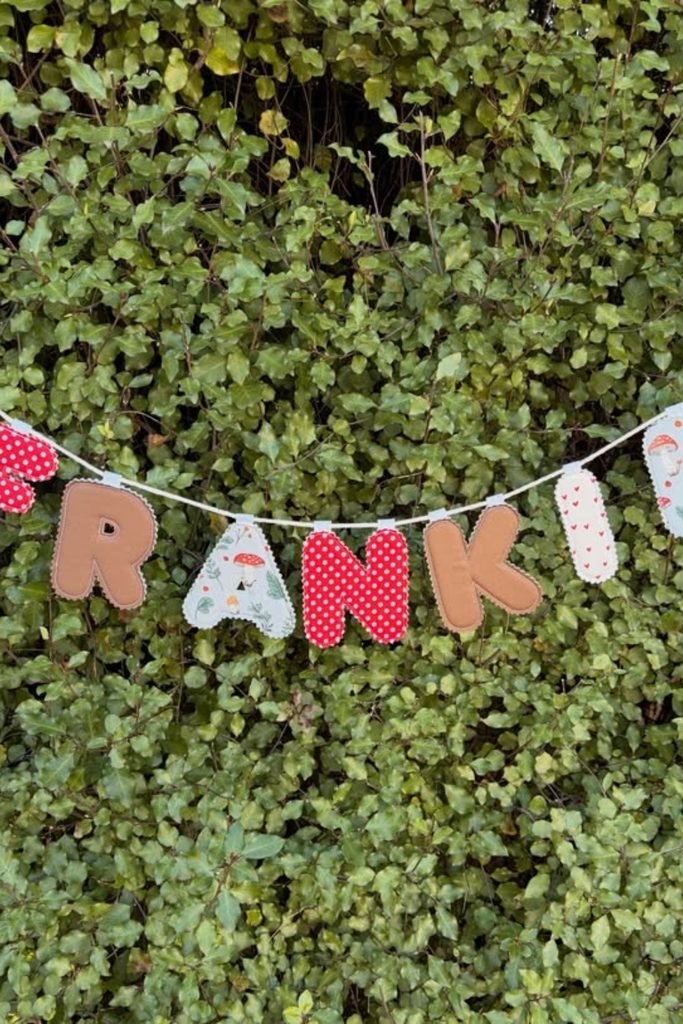
Planning a woodland birthday party gives you the perfect excuse to combine mushroom prints, red polka dots, and earthy brown fabrics.
Use alternating patterns for the fabric letters, adding light padding and stitched borders to help each shape hold its form.
Stretch the finished name garland across a leafy garden backdrop, securing the string firmly so the letters hang evenly outdoors.
Playful Door Banner
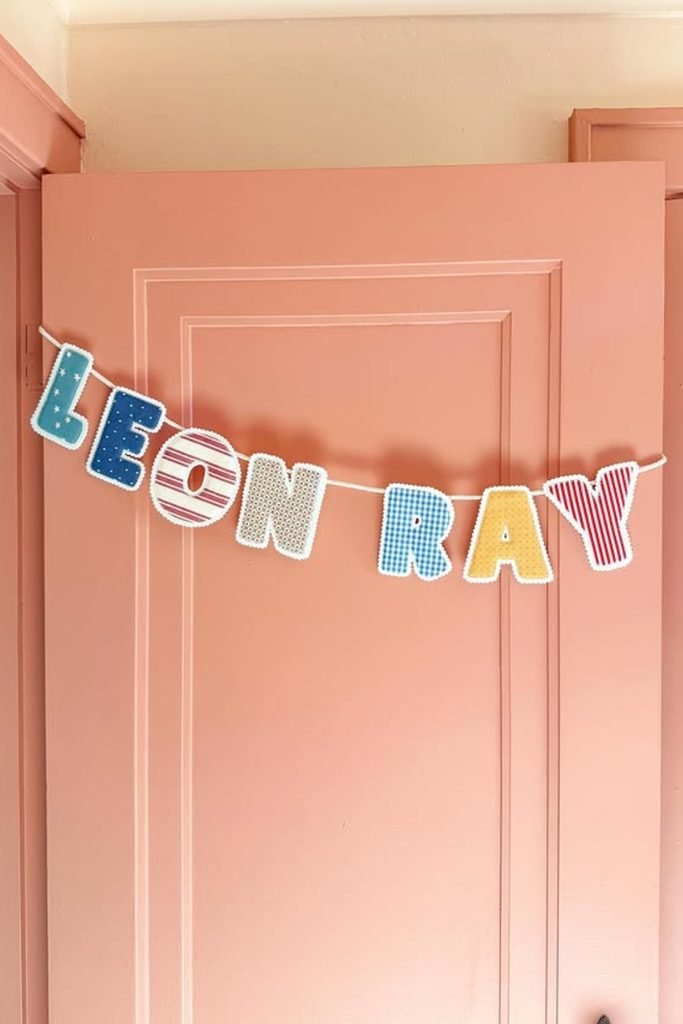
Bright patterned letters can make a bedroom door feel more personal without needing paint, stickers, or permanent decorative changes.
Choose contrasting blue, red, yellow, and striped cotton, then stitch padded letters with cream trim for a coordinated finish.
Drape the name banner across the upper door panel, using removable hooks positioned where they won’t interfere with closing.
Pastel Birthday Letters
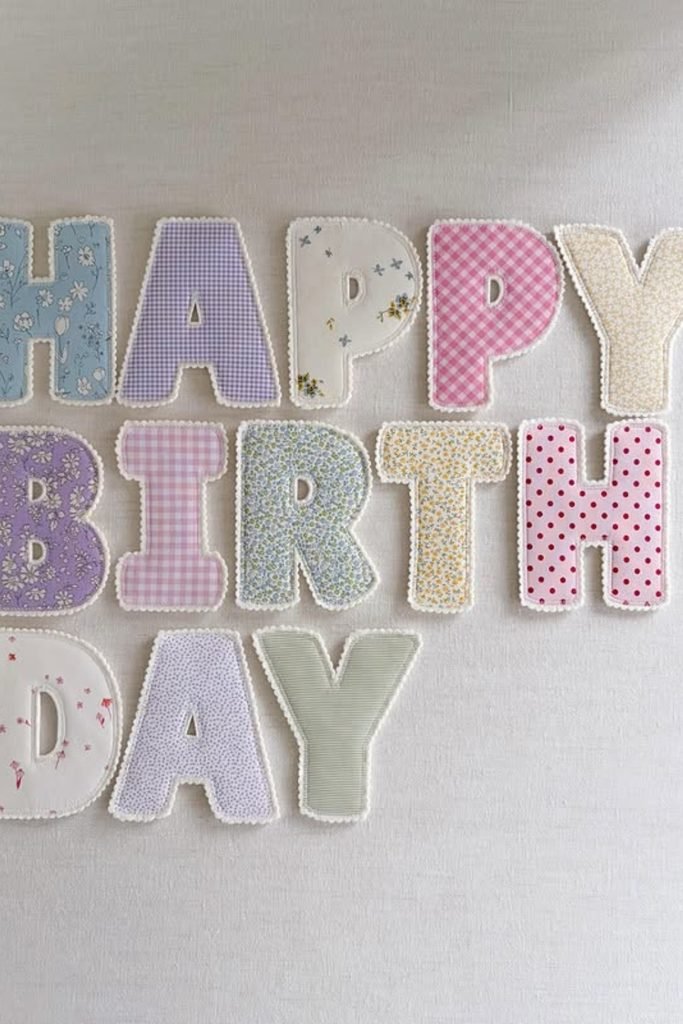
A handmade birthday banner feels more personal when every letter has a different pastel print instead of matching fabric.
Try combining lavender florals, blue cotton, pink gingham, and tiny polka dots, with soft padding between each letter.
Finish the edges with white scalloped stitching, then attach the letters to string for a reusable birthday wall decoration.
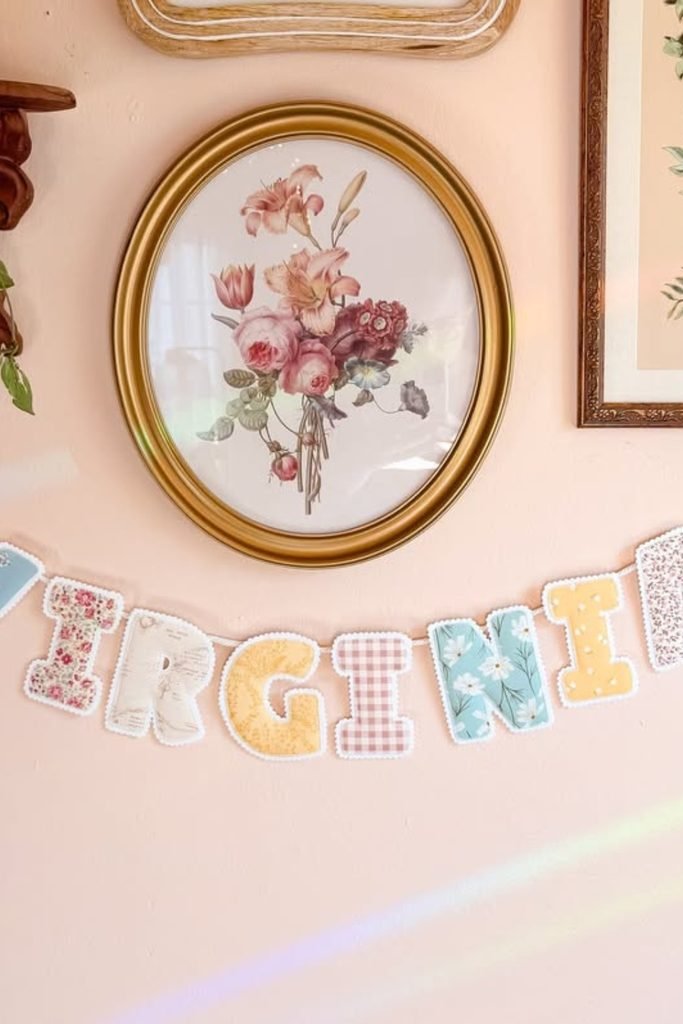
Vintage Floral Garland
Give an empty gallery wall a little personality by adding a floral fabric name garland beneath your favorite framed artwork.
Pair faded blue, buttery yellow, pink gingham, and daisy prints, using cream edging to connect the different patterns visually.
Arrange the letters along a gently curved cotton cord, leaving enough space above furniture for the banner to hang freely.
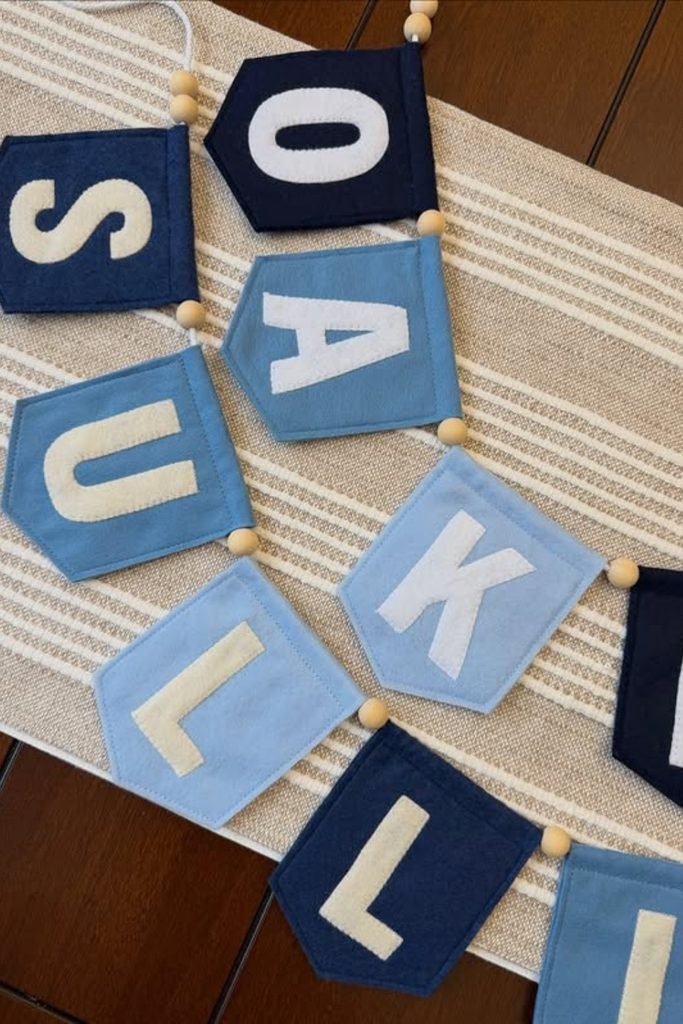
Blue Felt Pennants
Wooden beads can make a simple felt banner look more finished while helping separate individual flags along the string.
Cut alternating navy and powder blue pennants, then attach large cream felt letters using fabric glue or stitching.
Thread unfinished wooden beads between the flags, creating a neat name banner that suits a bedroom or birthday celebration.
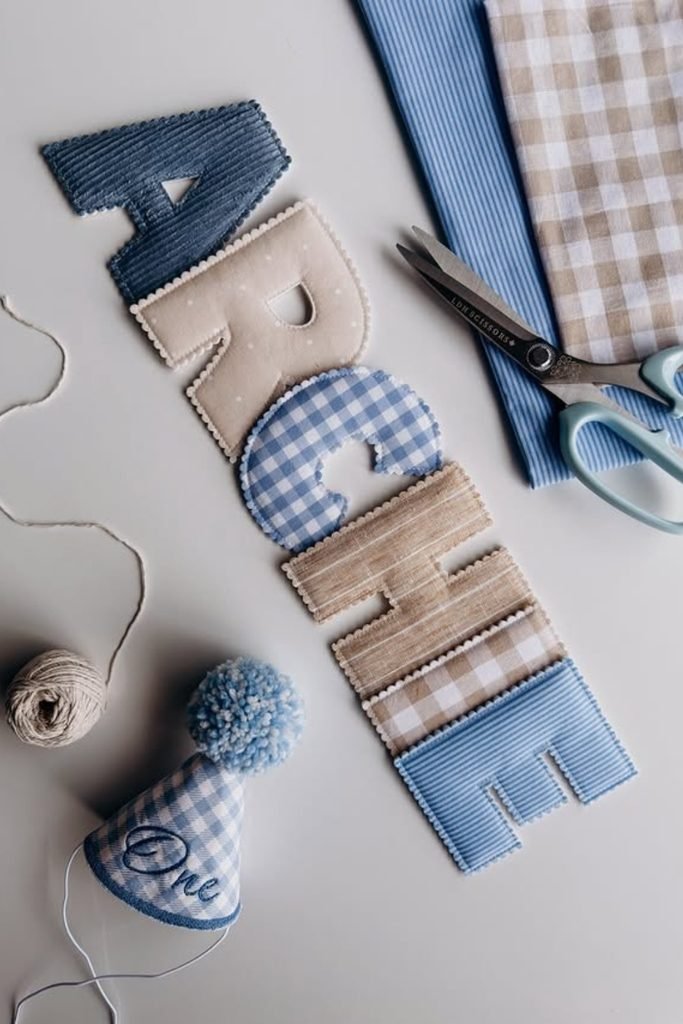
Gingham Birthday Banner
For a first birthday project, combining blue gingham, striped cotton, and textured beige fabric creates a coordinated handmade decoration.
Trace large letters onto your chosen fabrics, add lightweight padding, and finish each edge with closely spaced blanket stitches.
Pair the completed banner with a matching fabric party hat and yarn pompom for a sweet first birthday display.
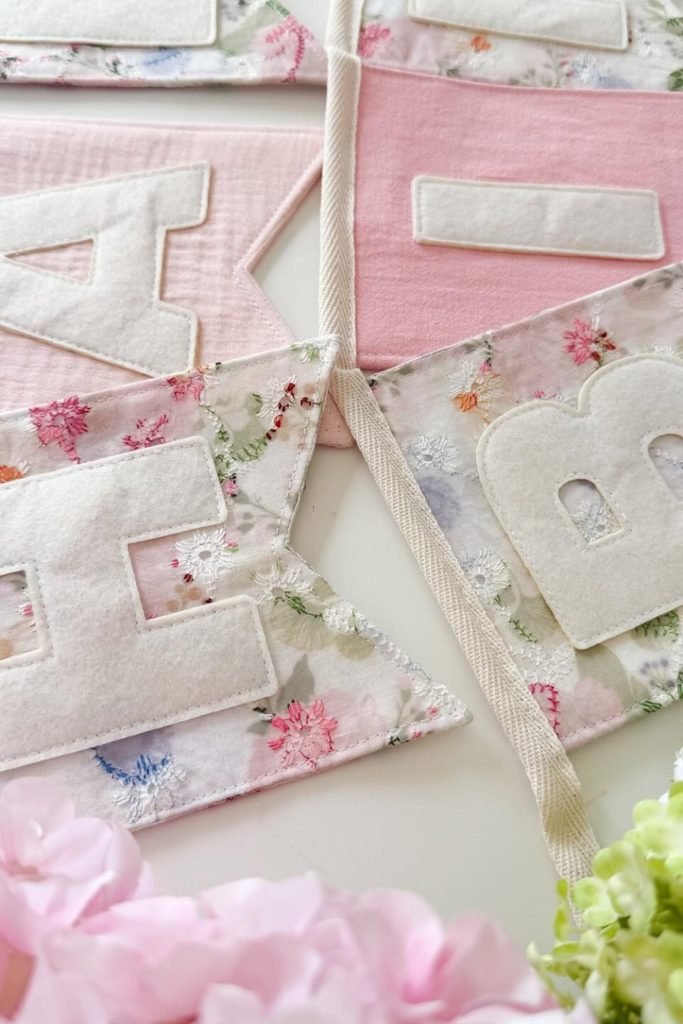
Floral Pennant Banner
Soft floral fabrics can give traditional pointed pennants a gentler finish, making them suitable for birthdays, nurseries, or garden celebrations.
Cut matching swallowtail flags from pink cotton and embroidered floral fabric, then stitch cream felt letters onto each piece.
Join the finished flags with cotton twill tape, allowing enough space for the pointed ends to hang without overlapping.
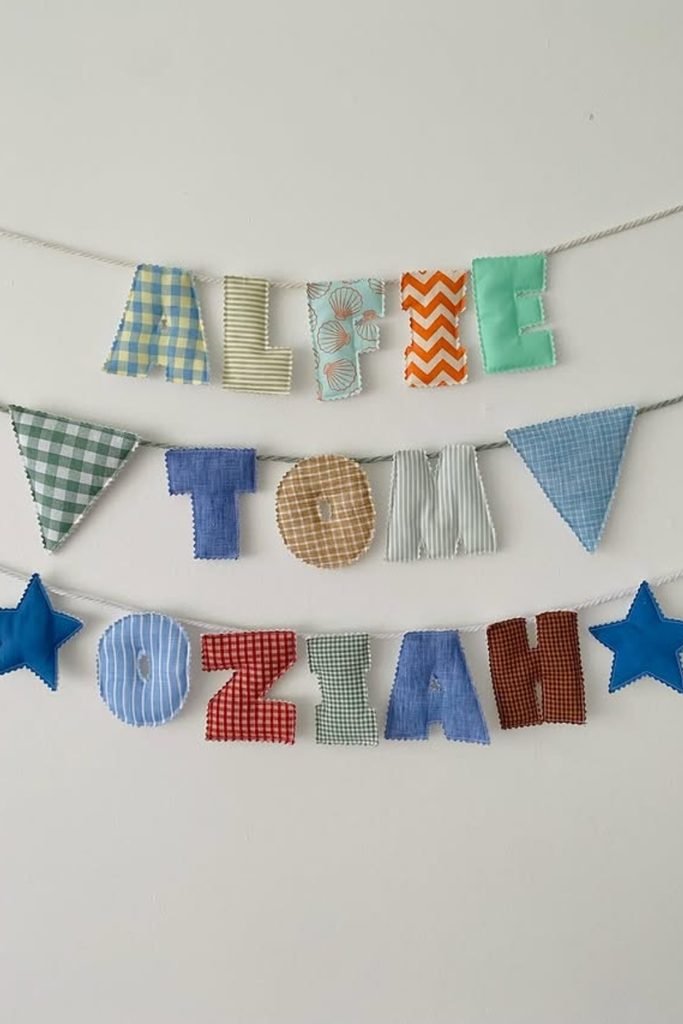
Alphabet Birthday Garland
For a birthday banner with more personality, combine different fabric shapes instead of using ordinary letters across every row.
Spell the birthday message with colorful cotton letters, adding gingham triangles and bright blue stars between the separate sections.
Hang three strings at different heights, creating a layered display that fills a blank wall without needing additional decorations.
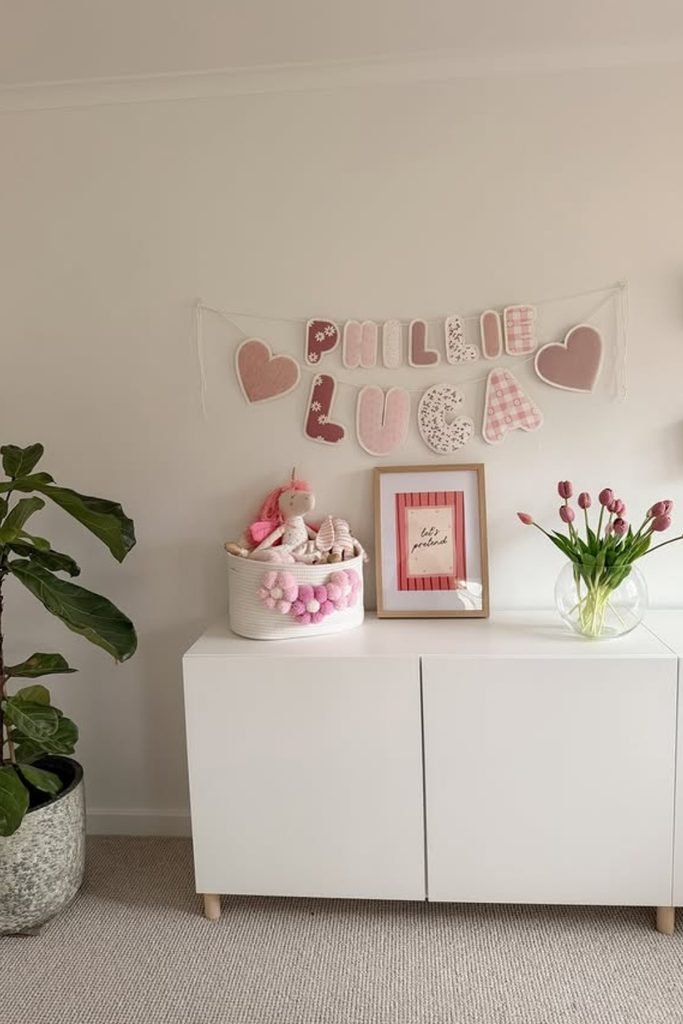
Heart Name Banner
A personalized name banner can become part of everyday room decor when you choose soft colors that match nearby furniture.
Combine dusty rose, blush gingham, and cream floral letters, then add matching padded hearts at both ends of the garland.
Display the two rows above a low cabinet, leaving enough space for framed prints, flowers, and other small decorations.
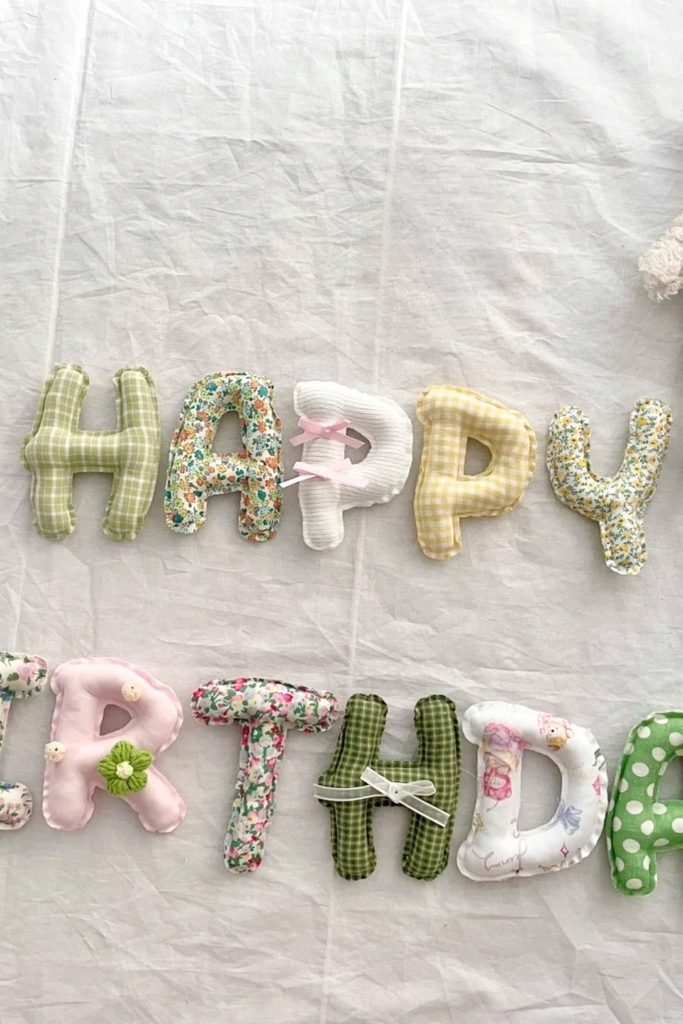
Stuffed Birthday Letters
Instead of making flat birthday bunting, try oversized stuffed letters that can later become reusable decorations for another celebration.
Sew each letter from green gingham, floral cotton, or soft striped fabric, leaving an opening for lightweight polyester stuffing.
Add tiny bows or fabric flowers to selected letters, then attach hanging loops whenever you’re ready to display them.
FAQs
How Do You Stop Fabric Banner Letters From Losing Their Shape?
Use lightweight interfacing or a thin layer of batting between fabric pieces to help letters hold their shape.
For stuffed letters, add enough filling to create a soft, even finish without stretching the seams.
Can You Wash a Handmade Fabric Banner Without Damaging It?
Cotton banners with sewn details can often be gently hand-washed in cool water, while glued letters, felt, and delicate embellishments may need spot cleaning.
Always test the fabric for color bleeding and let the banner air dry completely before storing it.

Hi, my name is Ali Mehmood! I’m a passionate writer and DIY enthusiast who loves turning creative ideas into practical, hands-on projects.
I created this website to share inspiring, budget-friendly ideas that you can do yourself – whether it’s organizing your home, crafting something unique, or creating fun projects for kids and pets.
I believe DIY isn’t just a hobby – it’s a smart way to save money, reduce waste, and enjoy the satisfaction of making things with your own hands.
I’m excited to have you as part of this growing community, and I’ll continue bringing you helpful, realistic, and fun DIY ideas you can actually use.