This post may contain affiliate links: read full affiliate disclosure.
Crochet pumpkins look simple until you start making one and realize that choosing the right yarn and getting even stitches.
Maybe you’ve found a cute design but can’t figure out how to recreate it, or you’re unsure which pattern will work with your crochet skills.
Whether you’re making your first pumpkin or trying something different, you’ll find ideas worth recreating for your home.
Textured Rustic Pumpkins
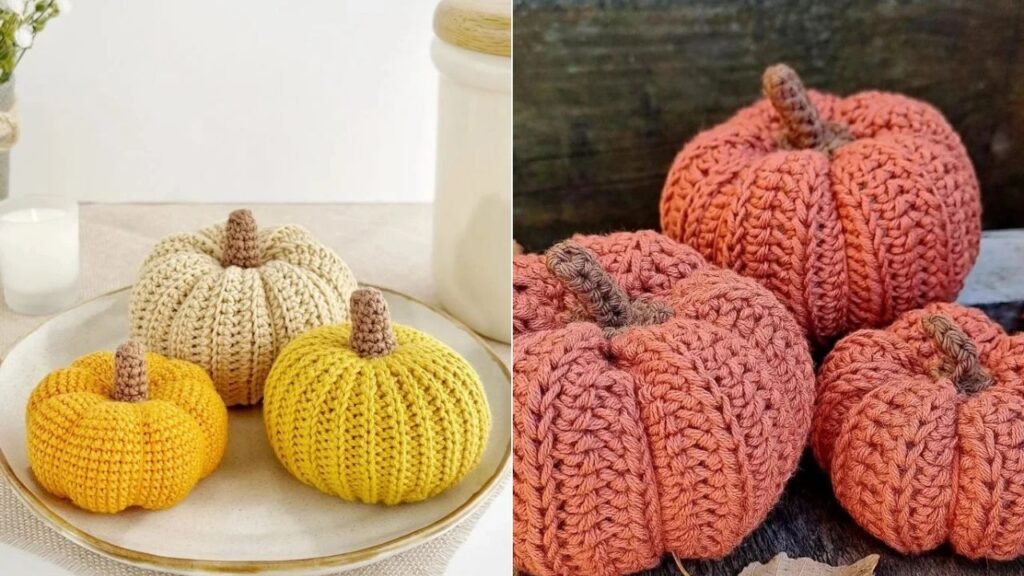
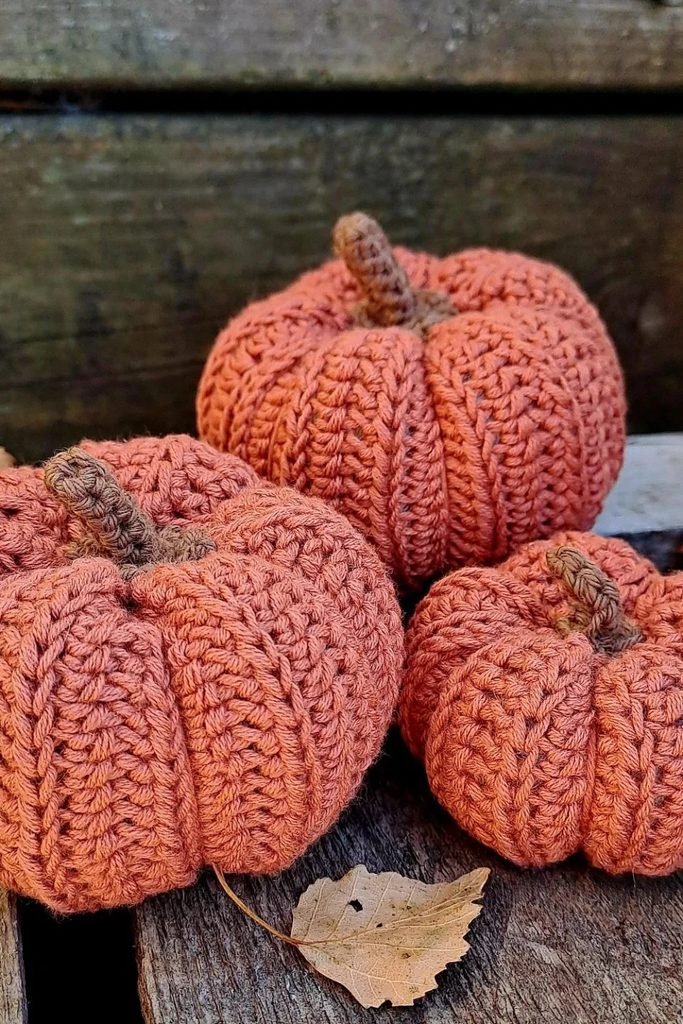
For pumpkins that look more detailed without adding extra decorations, focus on raised crochet stitches and deeper vertical ridges.
Choose muted terracotta yarn and work textured stitch panels, then pull shaping strands through the center for defined sections.
Make three different sizes with matching brown stems, arranging them together on wooden surfaces for a coordinated autumn display.
Colorful Stacked Pumpkins
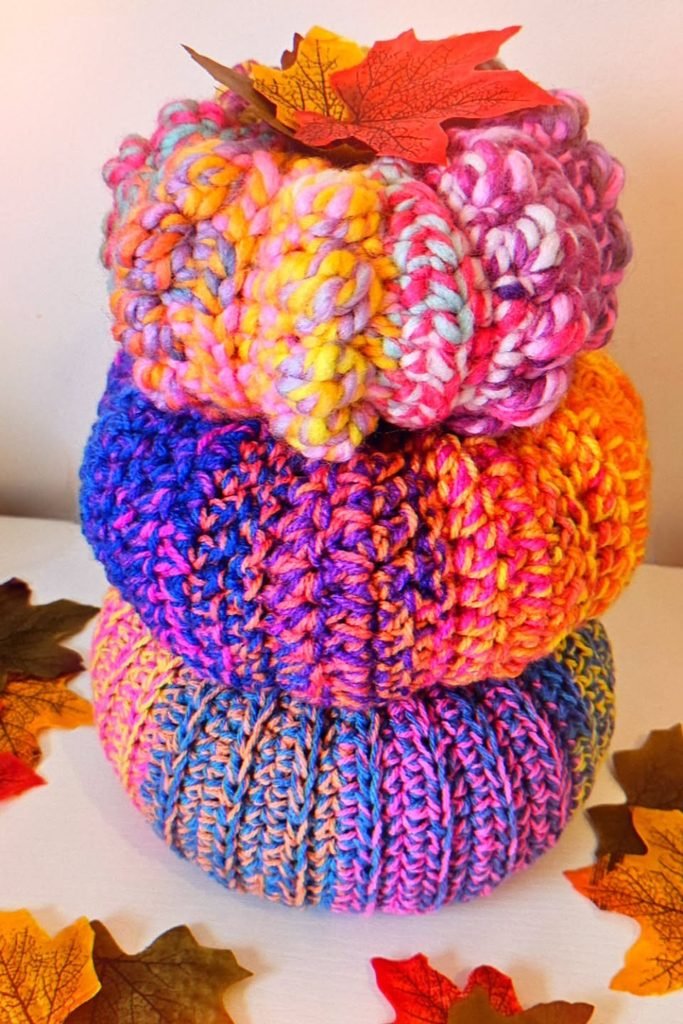
Forget matching orange pumpkins when colorful variegated yarn can create an eye-catching fall arrangement with very little color changing.
Crochet three pumpkins using different multicolored yarn combinations, varying their widths so the largest provides a stable base.
Stack them from largest to smallest, secure the arrangement if needed, and finish with decorative autumn leaves on top.
Neutral Table Pumpkins
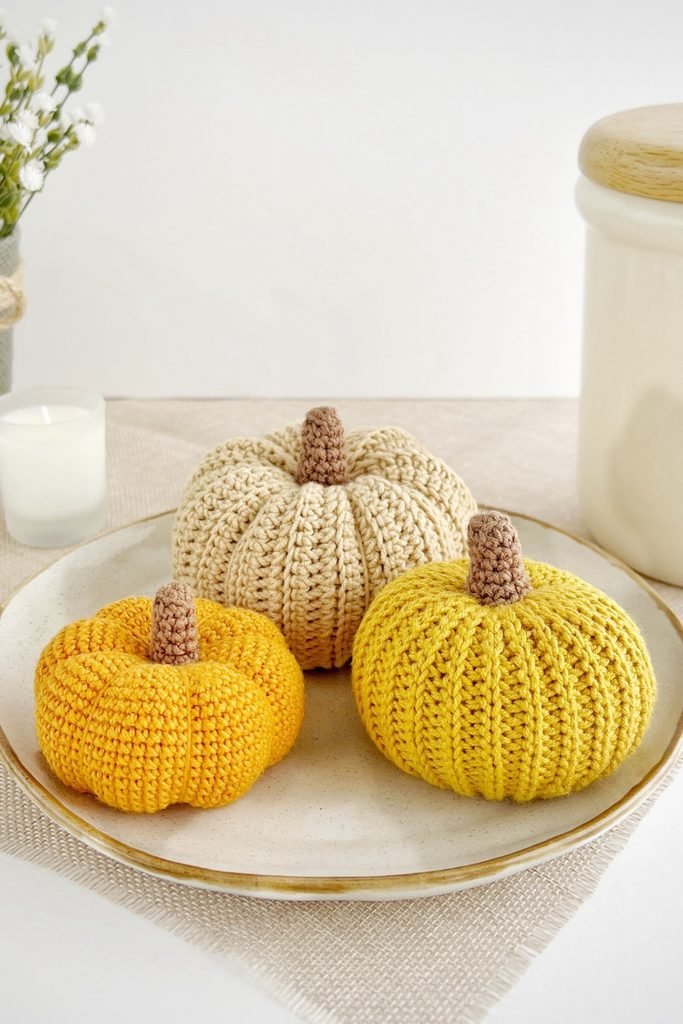
Small crochet pumpkins can make a simple dining table feel seasonal without filling every corner with oversized decorations.
Use cream, golden yellow, and orange yarn to crochet three different sizes, adding matching brown stems for consistency.
Arrange them on a shallow ceramic plate with the tallest pumpkin behind, creating a balanced centerpiece for autumn gatherings.
Deep Ribbed Pumpkins
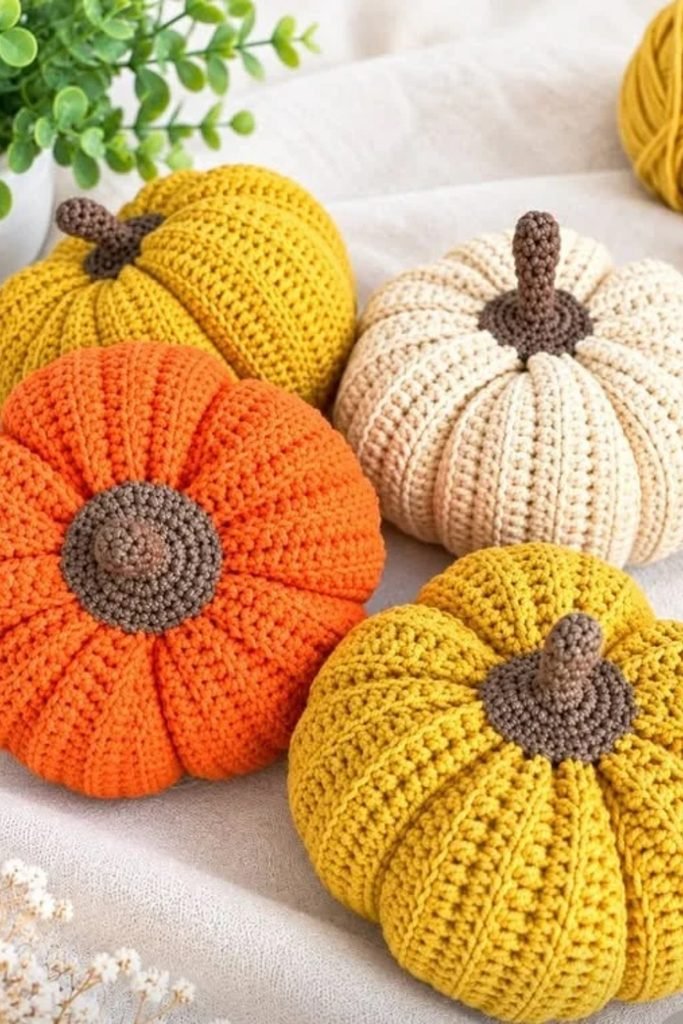
Getting those deep pumpkin grooves is easier when you shape the sections carefully instead of relying entirely on stuffing.
Crochet rounded bodies using orange, mustard, and cream yarn, then wrap strong matching strands around them to define segments.
Pull each strand evenly toward the center, and finish with thick brown stems that sit securely between the raised sections.
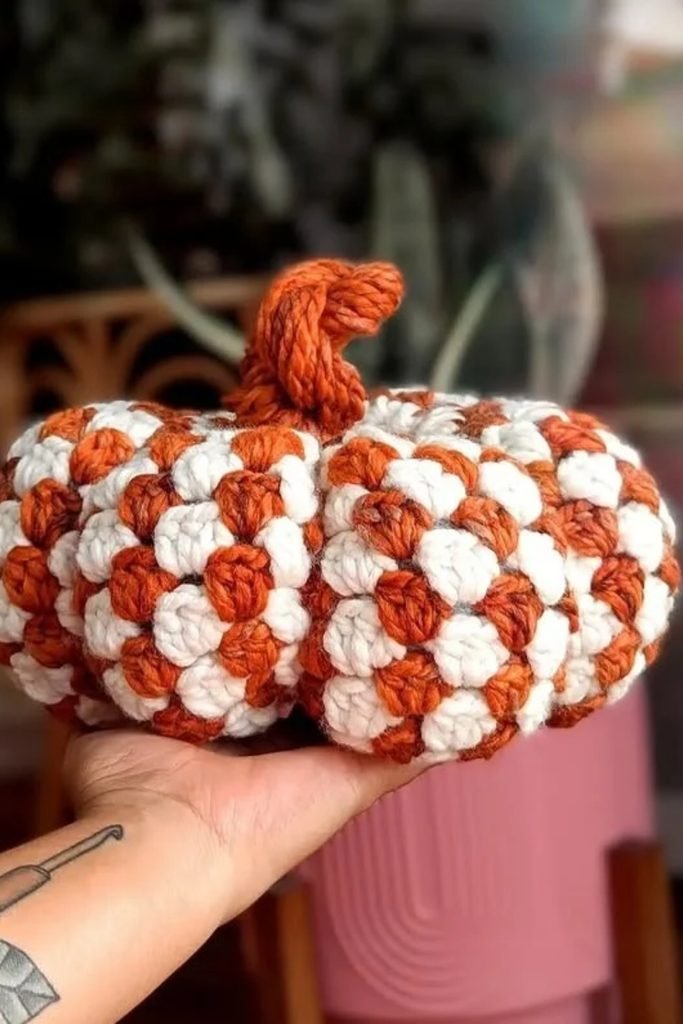
Checkered Crochet Pumpkin
Mixing two yarn colors within textured stitches gives your pumpkin a patterned finish without needing extra decorative accessories.
Alternate burnt orange and cream yarn across raised stitch clusters, following a consistent color sequence for balanced checkered detailing.
Finish with a twisted orange stem, and use this pumpkin as a statement piece among simpler solid-colored fall decorations.
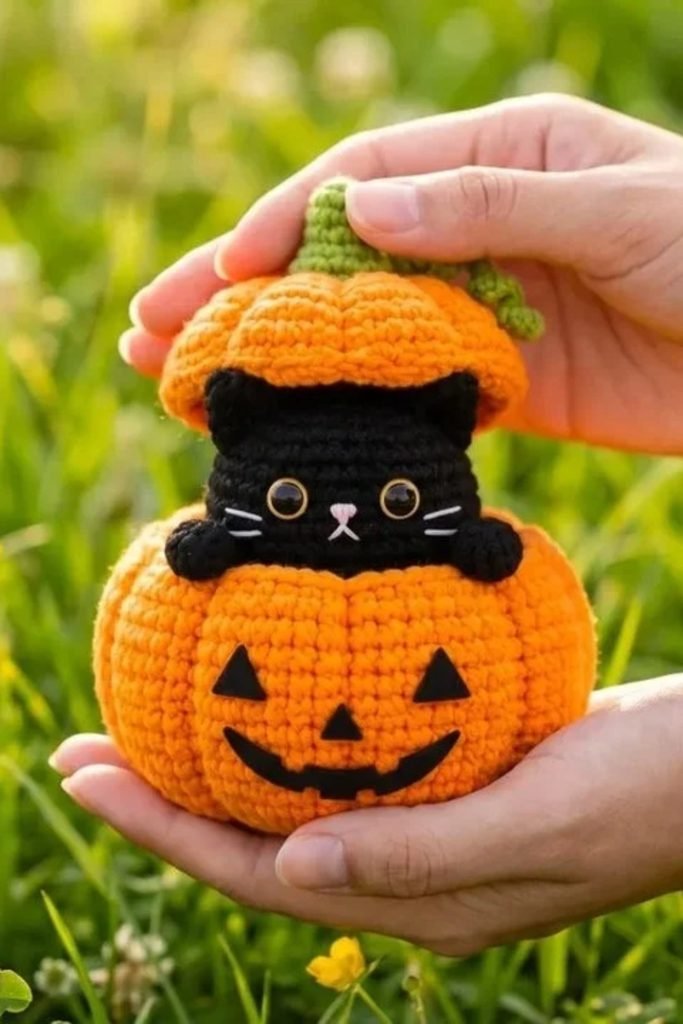
Black Cat Pumpkin
Halloween crochet gets more interesting when you turn an ordinary jack-o’-lantern into a little hiding spot for a black cat.
Make an orange pumpkin with a smiling face, then crochet a separate black cat with tiny paws and embroidered whiskers.
Add a removable pumpkin-shaped lid with a green stem, allowing the cat to peek out for a playful Halloween display.
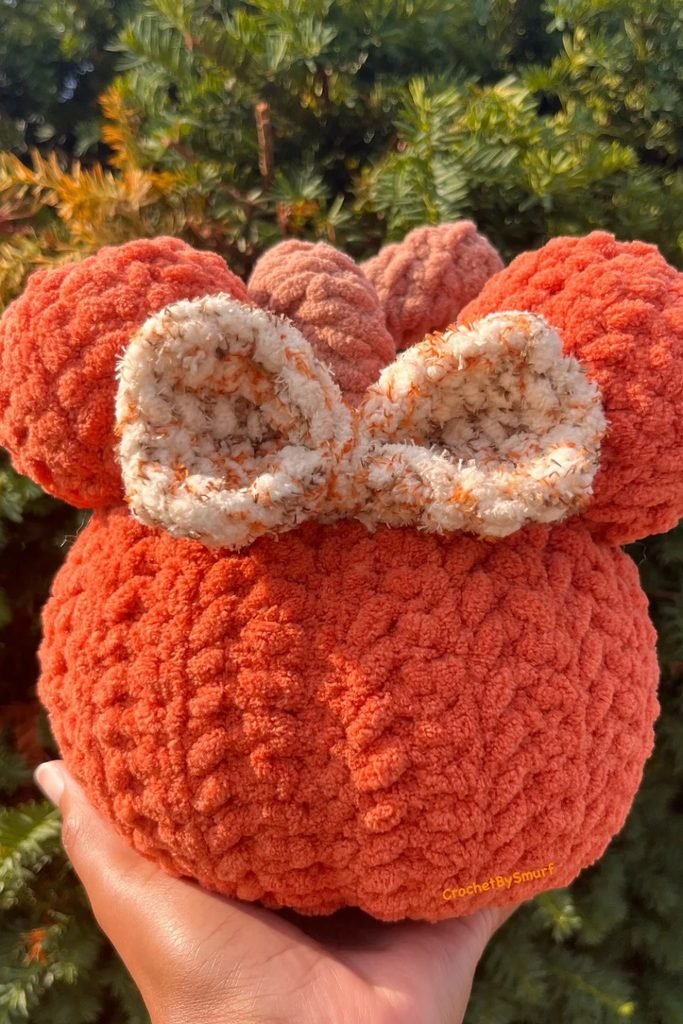
Pumpkin Bow Plush
Looking for a softer Halloween decoration? Turn a chunky orange crochet pumpkin into a cuddly character with oversized ears.
Use plush chenille yarn for the rounded body, then crochet two large cream-colored ears with matching orange flecks for contrast.
Attach a small textured bow between the ears, making this pumpkin a cute addition to your Halloween plush collection.
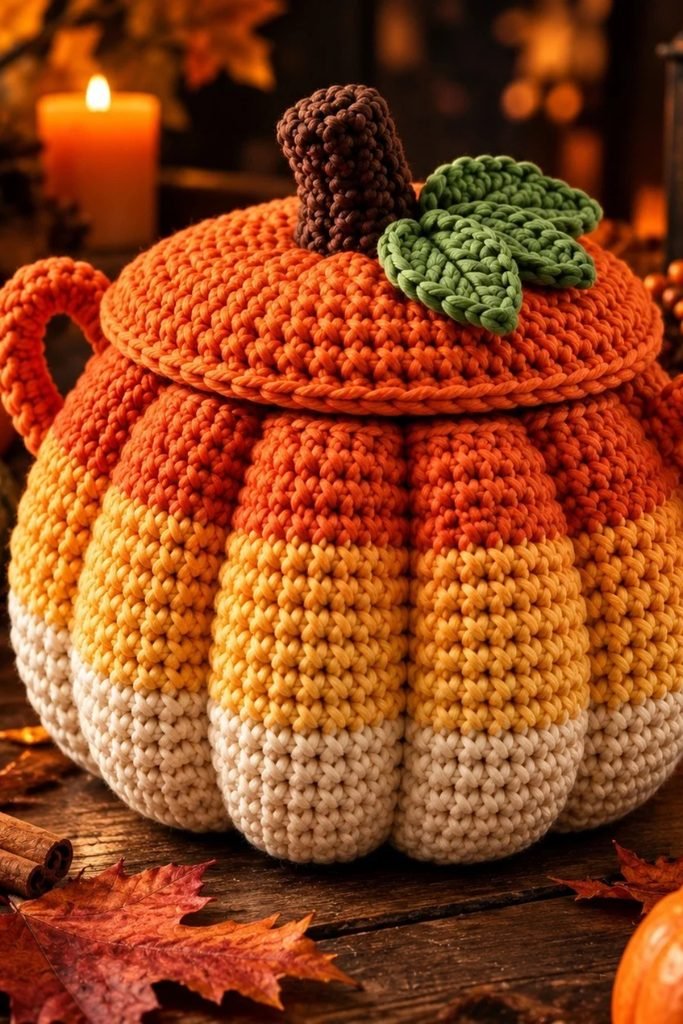
Pumpkin Storage Basket
Your crochet pumpkin can double as seasonal storage when you turn its rounded shape into a lidded basket with handles.
Work sturdy crochet stitches using orange, yellow, and cream yarn, then attach two curved handles along the upper sides.
Create a removable lid with a brown stem and green leaf, giving you a decorative container for lightweight accessories.
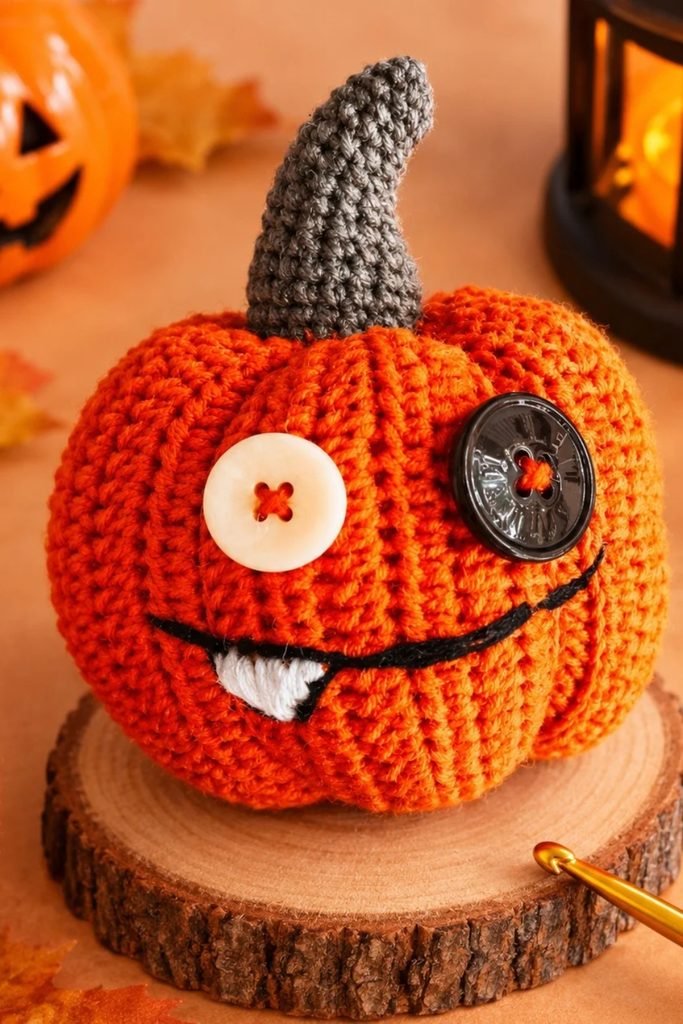
Button Eye Pumpkin
Give your Halloween pumpkin a slightly spooky personality by mixing mismatched button eyes with a crooked embroidered smile.
Crochet a bright orange ribbed body, then attach one white button and one black button at different heights.
Add a curved gray stem and a tiny white tooth, making it perfect for a playful Halloween shelf display.
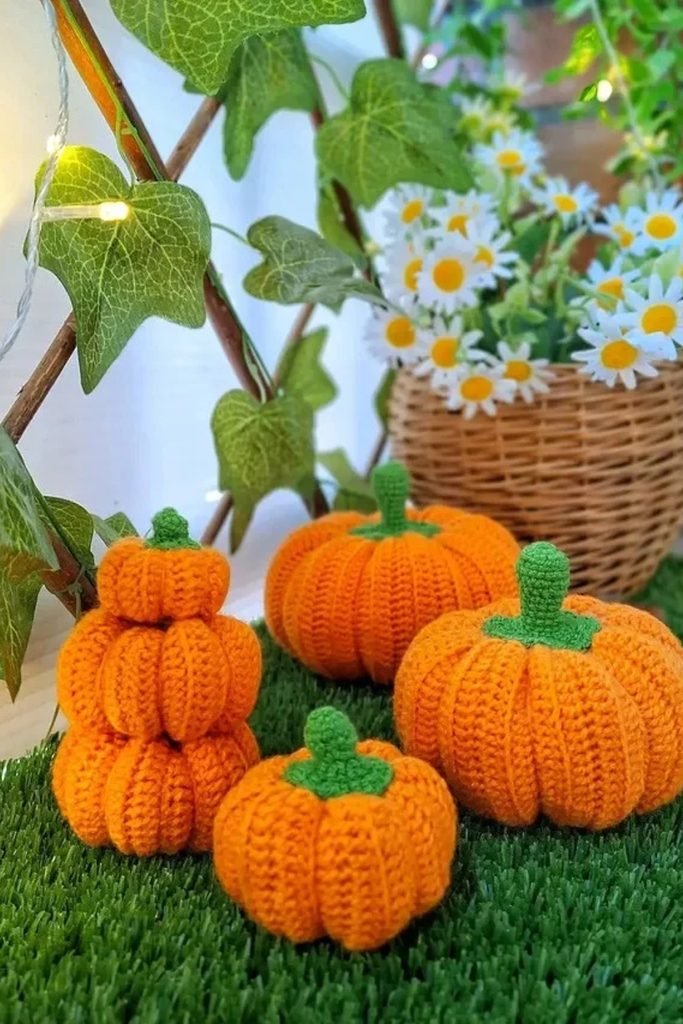
Stacked Garden Pumpkins
Mini crochet pumpkins become more interesting when you arrange them in small towers instead of spreading everything across your display.
Use bright orange yarn for the bodies and green yarn for short stems, making several pumpkins in different sizes.
Sew three pumpkins together for a stable stack, then arrange the remaining pieces on artificial grass near your plants.
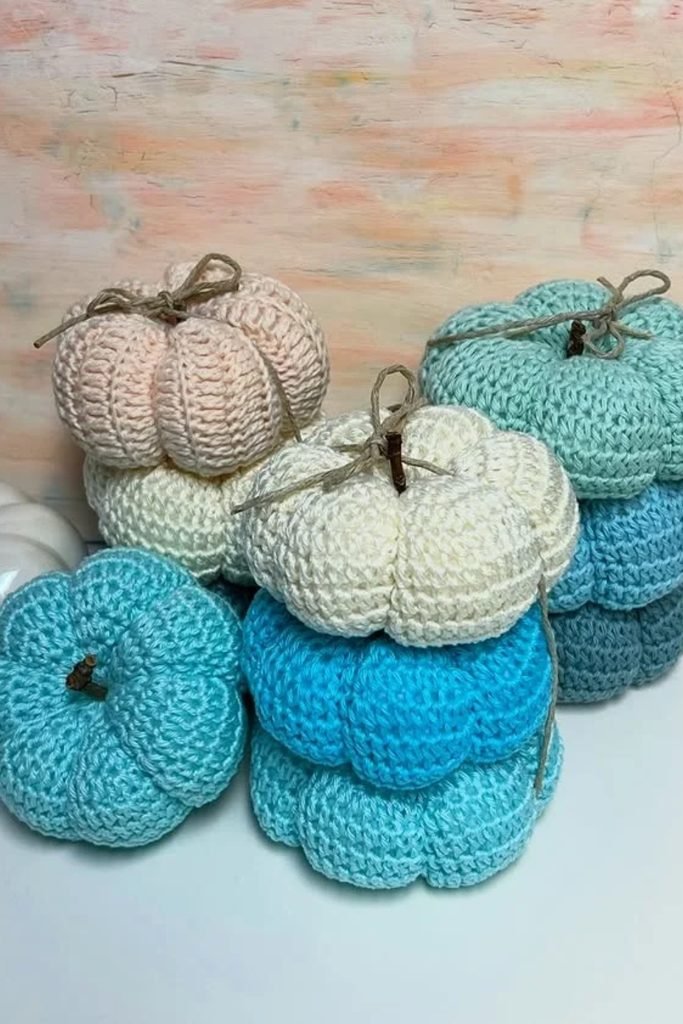
Pastel Crochet Pumpkins
Fall decorations don’t always need orange, so try combining soft blue, blush pink, and ivory yarn for something different.
Crochet pumpkins in several sizes with gently defined ridges, then add small twig stems and simple twine bows.
Arrange the finished pieces in loose groups on a console table, mixing lighter and darker shades for visual balance.
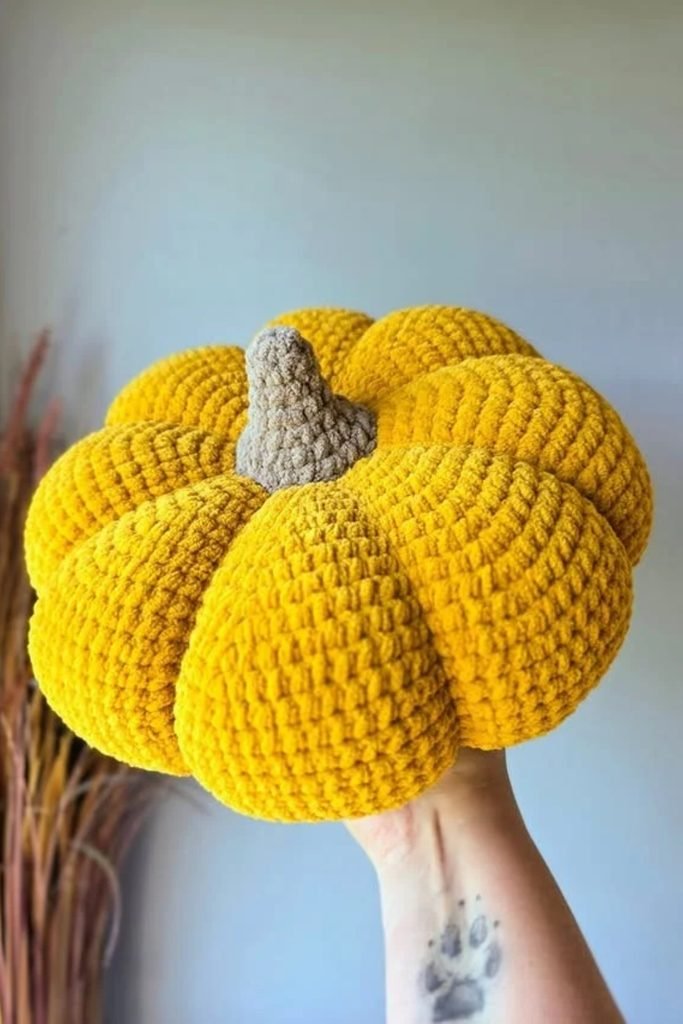
Oversized Yellow Pumpkin
If you want one statement pumpkin instead of several smaller decorations, chunky mustard yellow yarn makes a great choice.
Build a generously stuffed body with rounded sections, using strong shaping strands to create deep grooves between each segment.
Finish with a thick beige crochet stem, then place your oversized pumpkin beside a basket or fireplace for autumn.
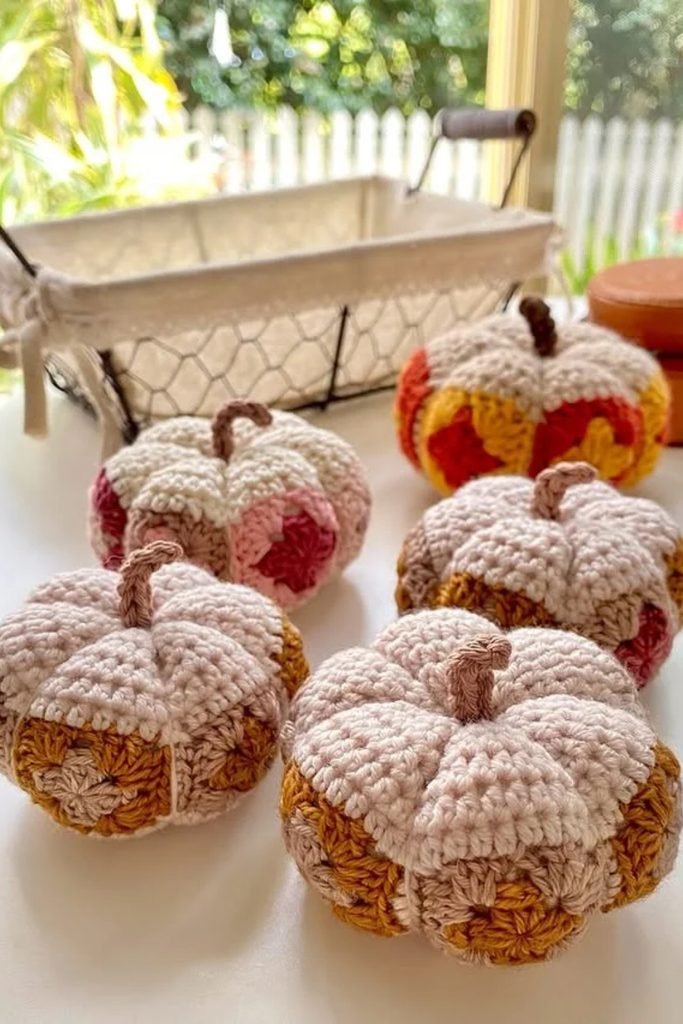
Granny Square Pumpkins
Leftover yarn from granny square projects can become colorful pumpkins without requiring you to start an entirely new design.
Join small granny squares in cream, mustard, pink, and rust shades, then shape the fabric into rounded pumpkin sections.
Add a crocheted cream top and brown stem, making several color combinations for a cheerful handmade fall decoration collection.
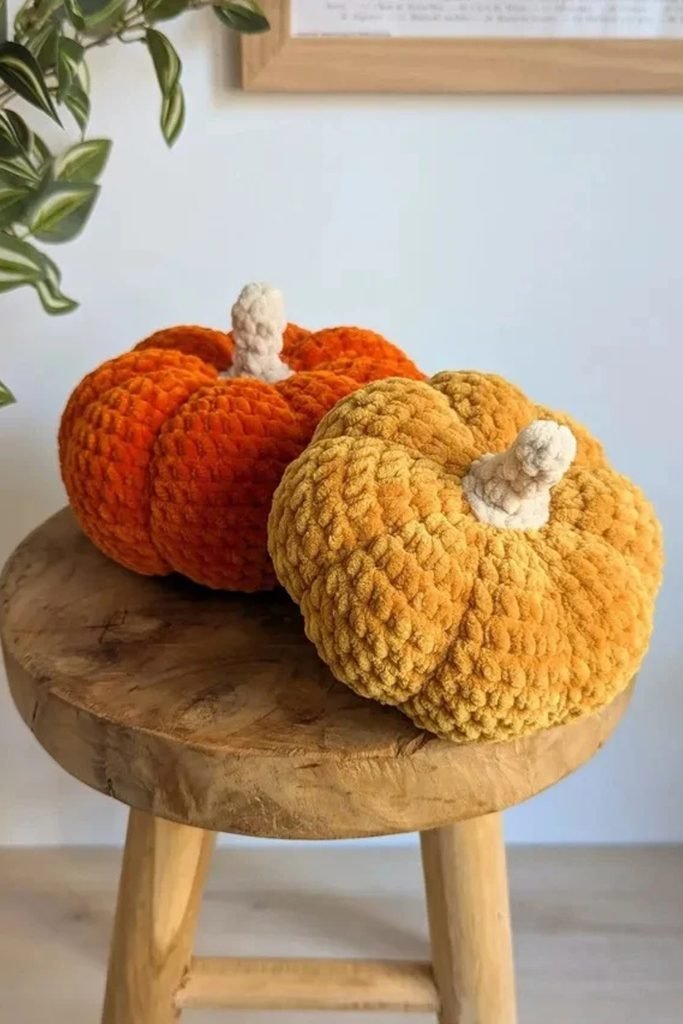
Chunky Velvet Pumpkins
Soft velvet yarn gives crochet pumpkins a plush finish, making them ideal when you want cozy decorations without complicated detailing.
Choose burnt orange and golden yellow chenille yarn, working firm stitches so the stuffing stays hidden beneath the fluffy texture.
Shape wide rounded segments and attach short cream stems, then display the finished pumpkins on a wooden stool or shelf.
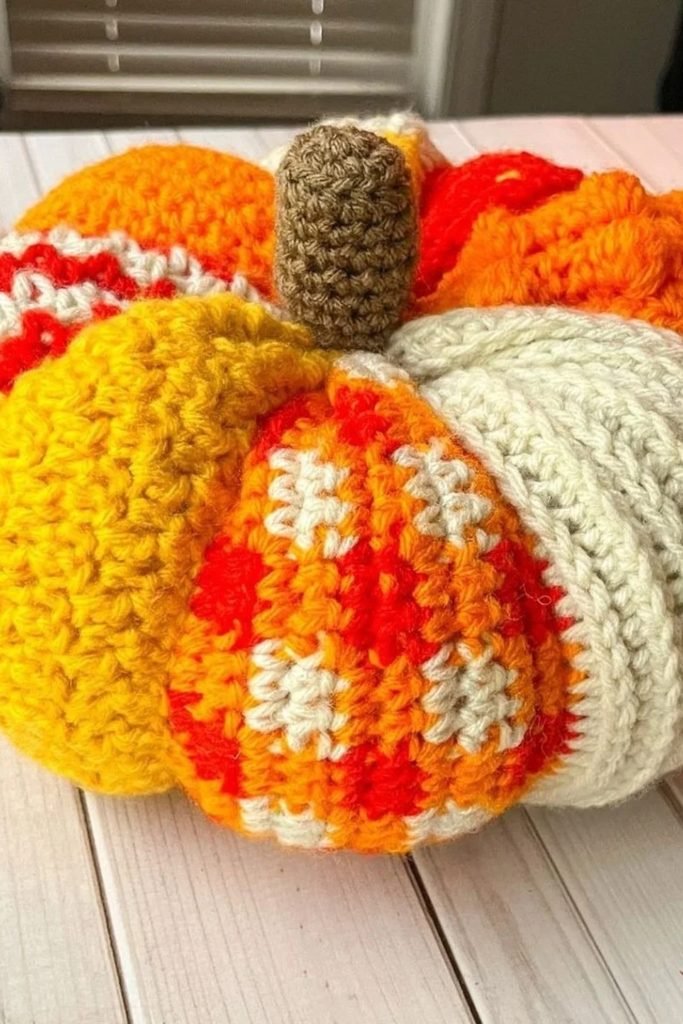
Patchwork Crochet Pumpkin
Instead of using one yarn color throughout, combine different crochet panels to give your pumpkin a playful patchwork finish.
Make individual sections using yellow, orange, cream, and red yarn, mixing solid stitches with colorful patterned panels for variety.
Join the sections carefully, stuff the pumpkin evenly, and add a thick brown stem to bring everything together.
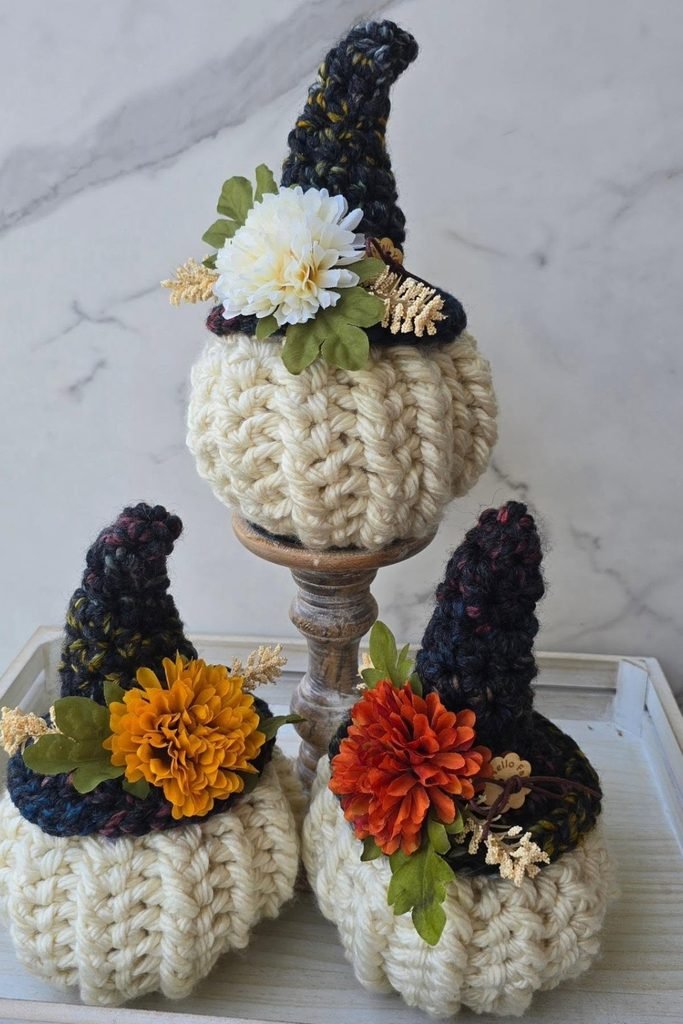
Floral Witch Pumpkins
Want Halloween pumpkins with a softer touch? Pair chunky cream crochet bodies with dark pointed witch hats and colorful flowers.
Use thick ivory yarn for raised pumpkin ridges, then crochet black hats with wide brims and slightly curved tips.
Attach white, mustard, or rust-colored flowers around the hatbands, creating charming decorations for a Halloween mantle or entryway.
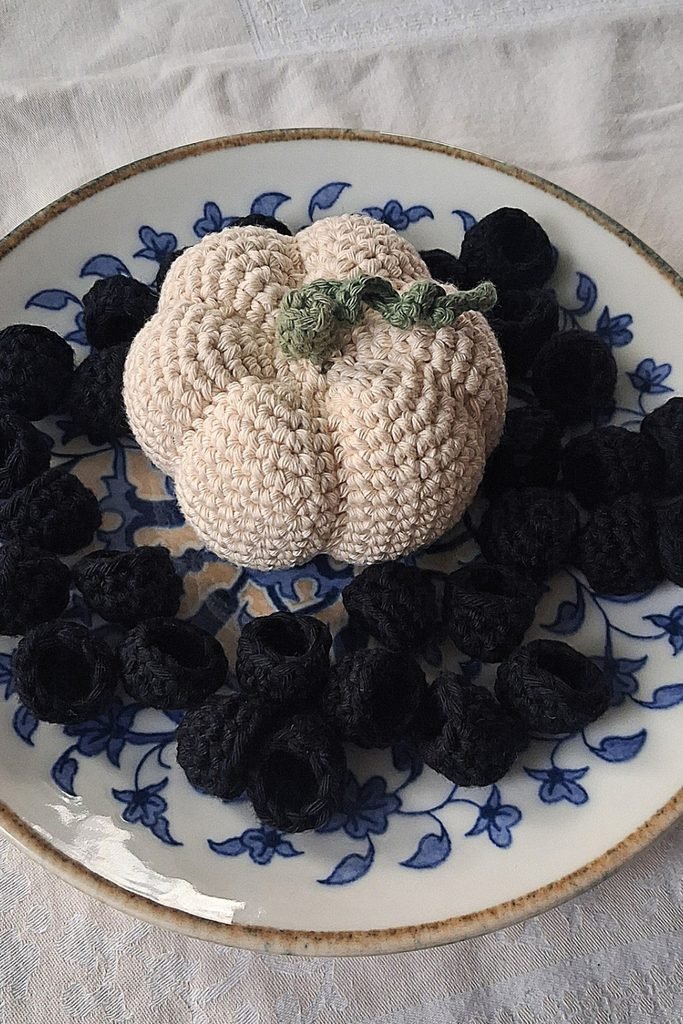
Cream Crochet Pumpkin
Sometimes a simple cream pumpkin makes the prettiest centerpiece, particularly when you want fall decor without traditional orange colors.
Work closely spaced crochet stitches to create rounded sections, then add a small green stem with curling yarn tendrils.
Place your finished pumpkin in a decorative bowl with dark accents, letting the neutral color and textured stitches stand out.
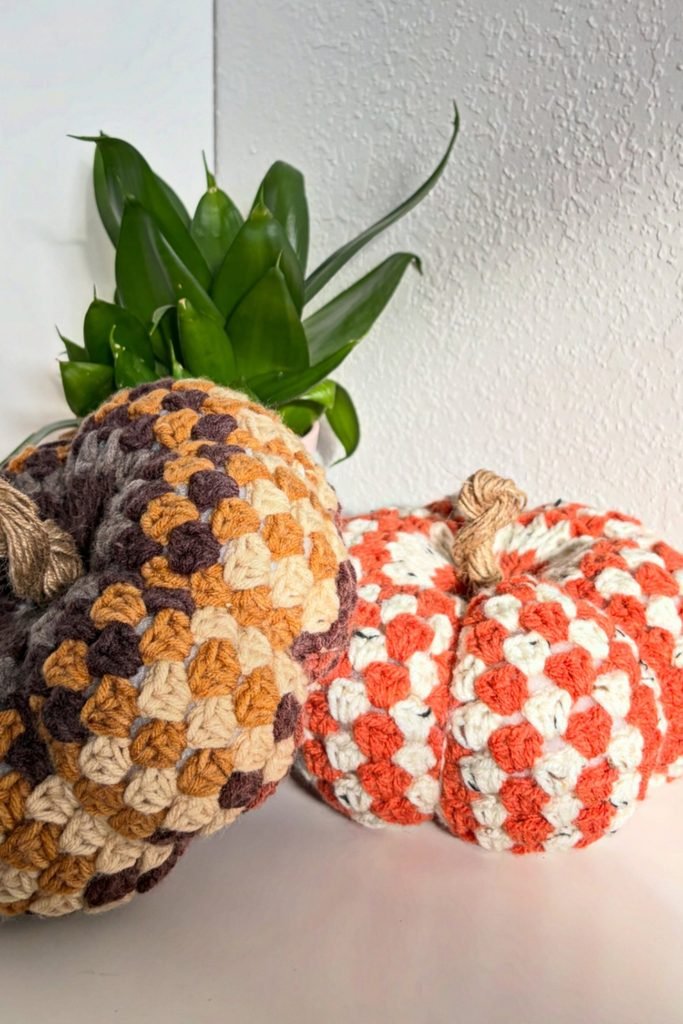
Granny Stitch Pumpkins
Try using granny stitch clusters when you want colorful pumpkin textures without crocheting separate squares and joining them afterward.
Alternate brown, mustard, and cream yarn for one pumpkin, then combine coral and ivory shades for another contrasting design.
Shape the stuffed bodies into rounded segments and finish with twisted twine stems, making an interesting pair for autumn shelves.
FAQs
Can You Crochet a Pumpkin Without Knowing Advanced Stitches?
Yes, you can make a crochet pumpkin using basic stitches like single crochet or half double crochet.
Start with a simple rectangle pattern, sew the edges together, and fill it with stuffing.
How Do You Make Crochet Pumpkins in Different Sizes?
You can adjust your pumpkin size by changing the yarn thickness, hook size, or pattern dimensions.
Just remember to adjust the stuffing and shaping strands so your finished pumpkin stays rounded and balanced.

Hi, my name is Ali Mehmood! I’m a passionate writer and DIY enthusiast who loves turning creative ideas into practical, hands-on projects.
I created this website to share inspiring, budget-friendly ideas that you can do yourself – whether it’s organizing your home, crafting something unique, or creating fun projects for kids and pets.
I believe DIY isn’t just a hobby – it’s a smart way to save money, reduce waste, and enjoy the satisfaction of making things with your own hands.
I’m excited to have you as part of this growing community, and I’ll continue bringing you helpful, realistic, and fun DIY ideas you can actually use.