
This post may contain affiliate links: read full affiliate disclosure.
Tangled necklaces, missing earrings, and rings buried at the bottom of a drawer can make getting ready unnecessarily frustrating.
Even a regular storage box rarely fixes the problem when everything still gets tossed into one space.
A DIY jewelry box lets you build storage around what you actually own, whether you need tiny ring sections, necklace hooks, soft-lined trays.
These DIY jewelry box ideas bring together practical storage and creative details, helping you turn everyday materials into something organized.
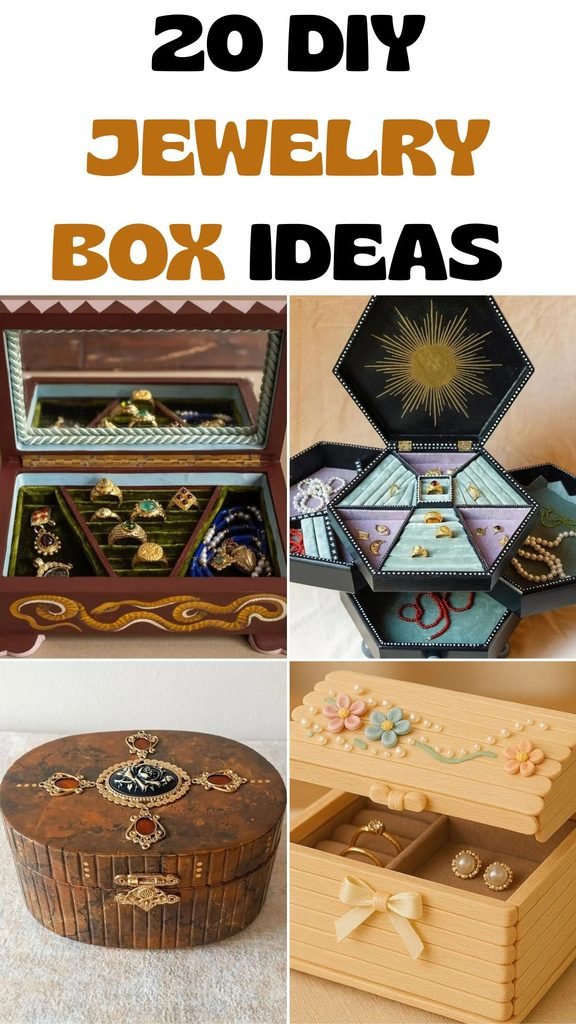
Velvet Dividers
Mixing ring rolls with wider compartments prevents small pieces from disappearing underneath bracelets.
Line each section with velvet or felt before attaching the dividers, so rings and delicate pieces rest against softer surfaces.
A mirror inside the lid adds function without stealing storage space, especially when the box sits permanently on your dressing table.
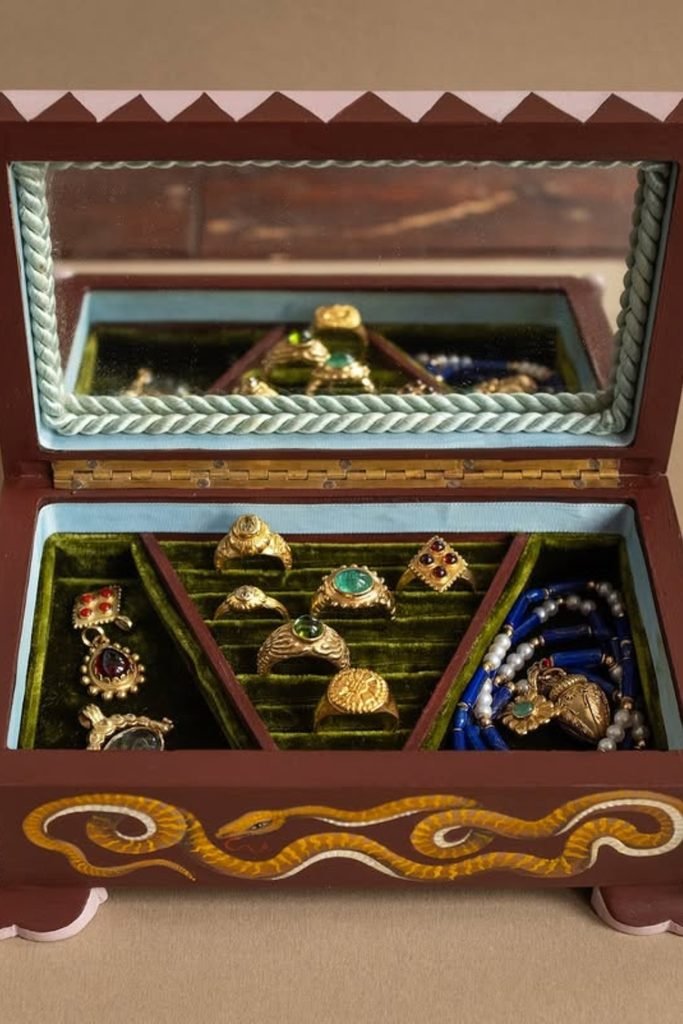
Expanding Storage
When your collection includes everything from rings to long necklaces, an expanding design can separate categories without requiring several individual boxes.
Build the central ring sections first, then surround them with deeper folding compartments sized for pearls, bracelets, and longer chains.
Geometric sections take more careful measuring, but dry-fitting every panel before gluing helps the moving pieces close without catching each other.
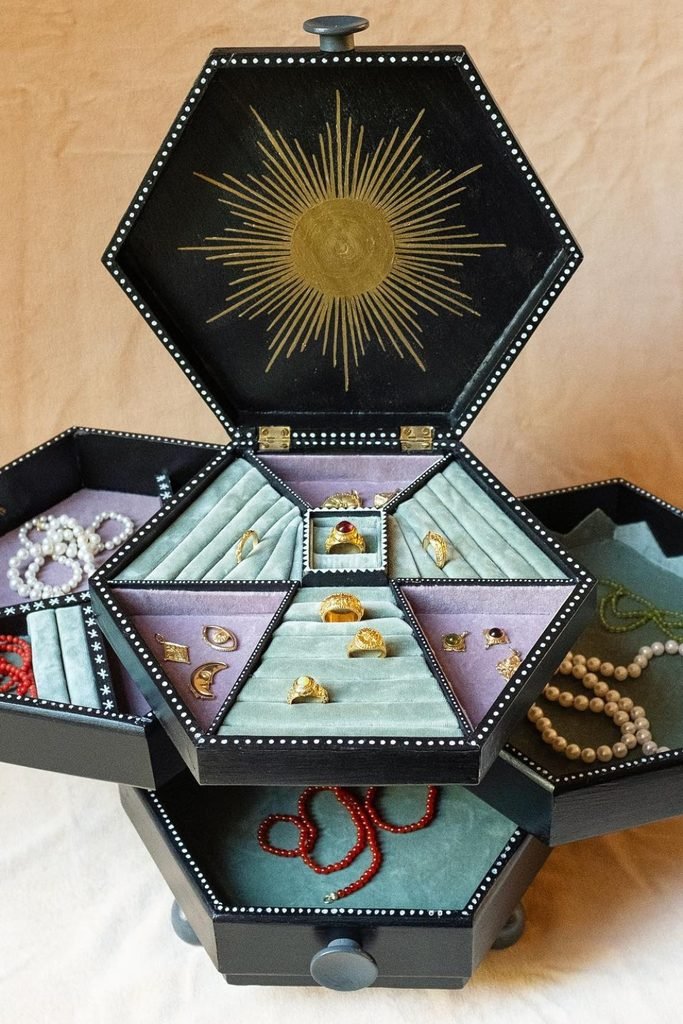
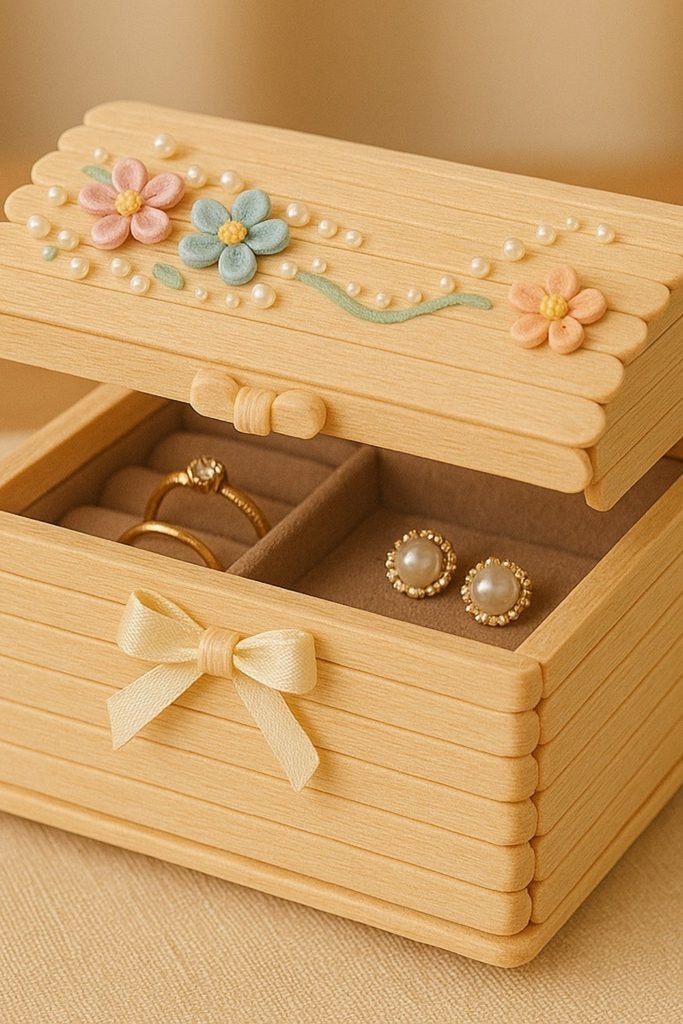
Craft Stickbox
Wooden craft sticks can create a surprisingly structured jewelry box when you layer them evenly instead of relying on expensive lumber.
Use sturdy cardboard underneath as the hidden frame, then glue matching sticks across each surface for cleaner, more consistent edges.
Small fabric-lined sections inside can separate rings and earrings, while simple flowers or ribbon turn the finished box into giftable storage.
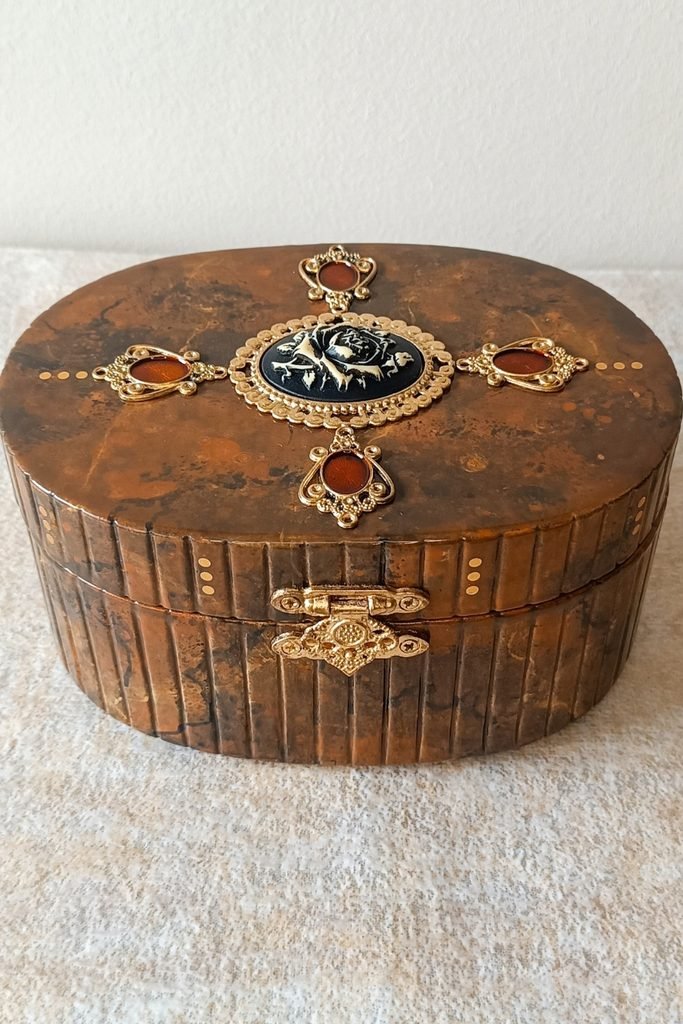
Vintage Finish
An older container becomes far more interesting when you work with its aged character instead of trying to make everything look new.
Create a warm antique finish with layered brown paint, subtle darker patches, and decorative hardware placed around one strong central detail.
Before decorating heavily, check that the lid closes smoothly because bulky embellishments near the edges can interfere with hinges or clasps.
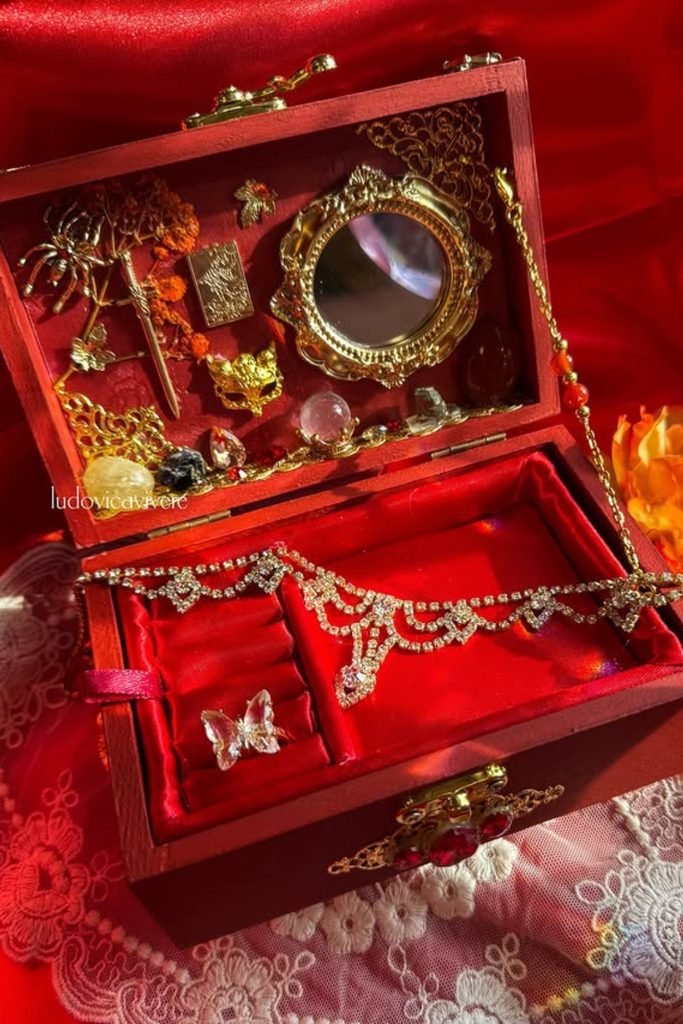
Satin Interior
Soft lining matters most when you store delicate chains and stone jewelry that can scratch against unfinished wooden surfaces.
Wrap thin padding with satin before fitting it inside, then create separate sections so smaller pieces cannot slide beneath necklaces.
Decorative details around the lid can add personality, but leave enough clear space around hinges and edges for smooth closing.
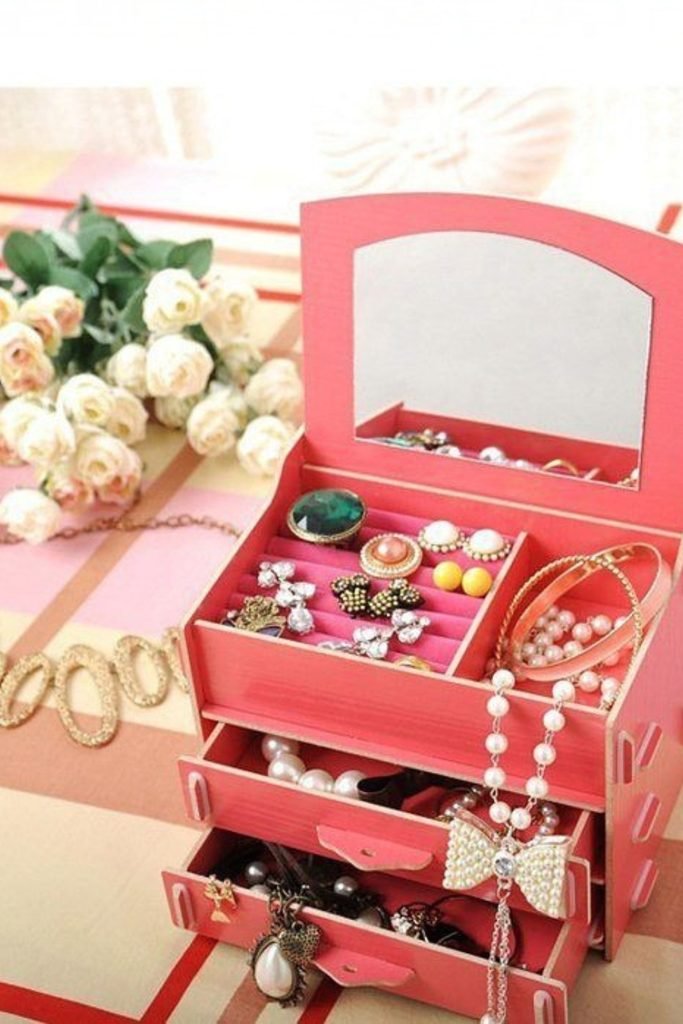
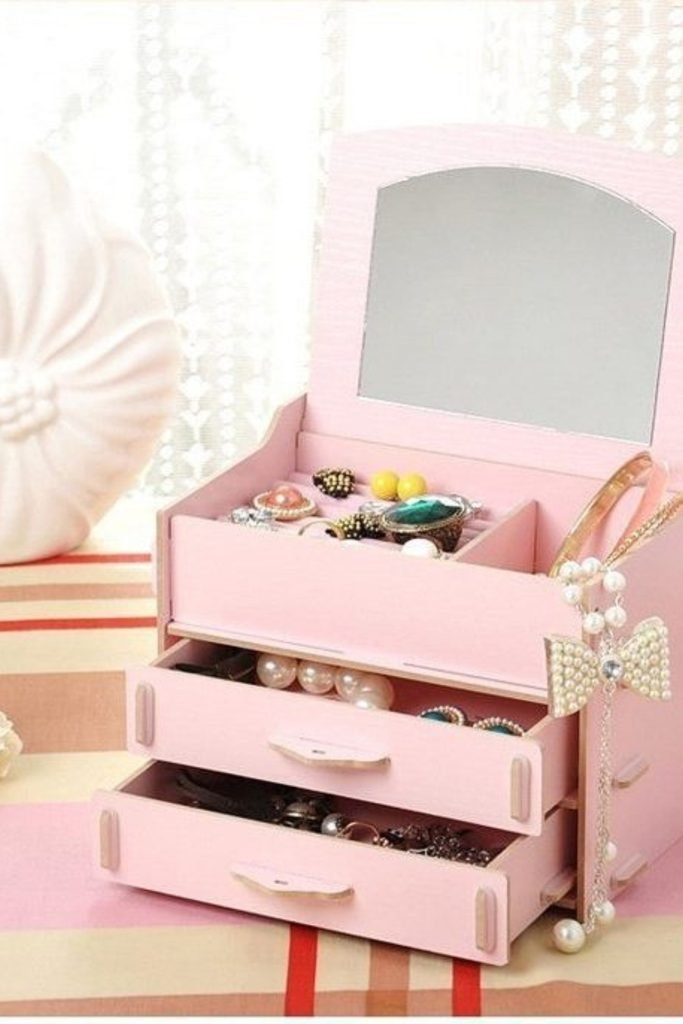
Drawer Tower
Shallow drawers are worth adding when one open compartment always turns earrings, bracelets, and pendants into an inconvenient mixed pile.
Reserve the upper tray for everyday pieces, then use separate lower drawers for jewelry you reach for less frequently.
A mirror fitted above the compartments creates a compact dressing station, making this design especially practical for smaller bedroom surfaces.
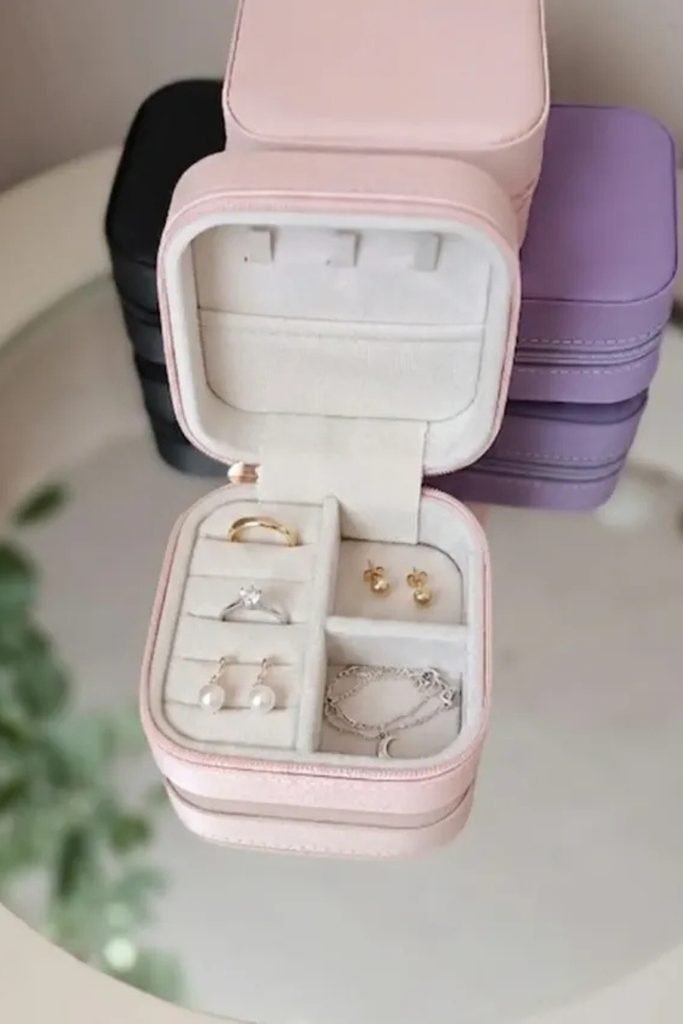
Travel Case
Small collections need thoughtful organization too, especially when loose jewelry can shift, knot, or disappear inside luggage during travel.
Use padded ring slots on one side and an open compartment opposite, leaving enough depth for earrings and delicate bracelets.
A zippered outer case works better than a loose lid for traveling because everything stays contained when the box gets moved.
Stacked Drawers
Building upward can solve limited dresser space when you need several jewelry categories separated without making the organizer excessively wide.
Make each drawer shallow enough for easy viewing, then reserve the divided top section for rings, earrings, and daily favorites.
Side hooks can handle bracelets or short necklaces, using otherwise wasted exterior space while preventing chains from crowding the drawers.
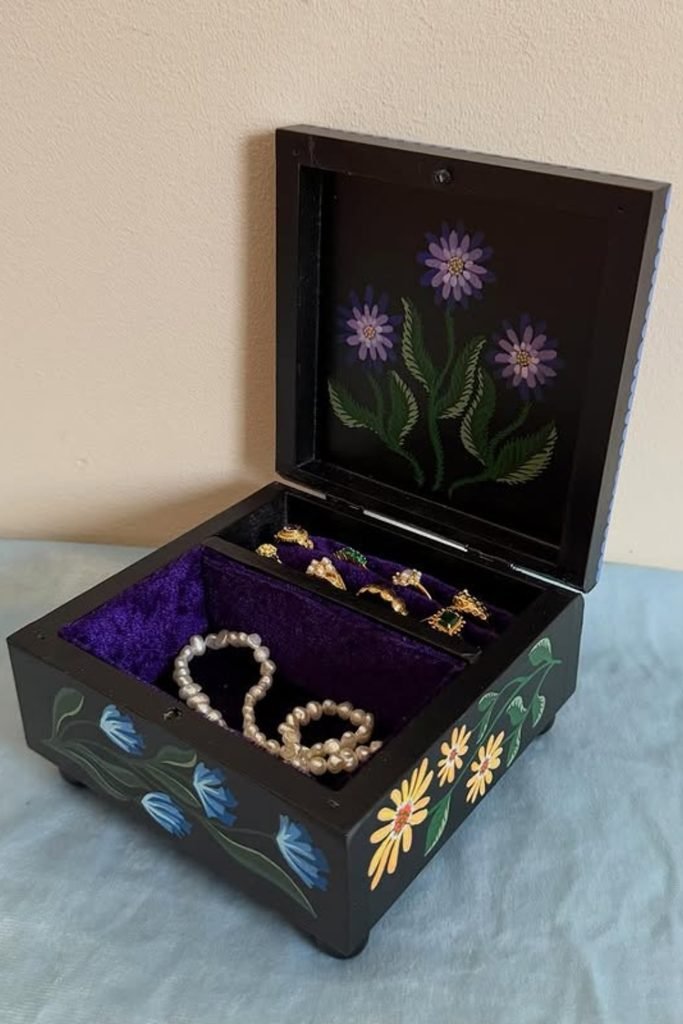
Painted Florals
Hand-painted flowers can turn a plain dark box into something personal without requiring complicated carving, hardwares.
Sketch your floral placement lightly before painting, leaving some dark background visible so the smaller details do not become visually crowded.
Line the main compartment with soft fabric, then add a narrow ring section to prevent everyday pieces from mixing together.
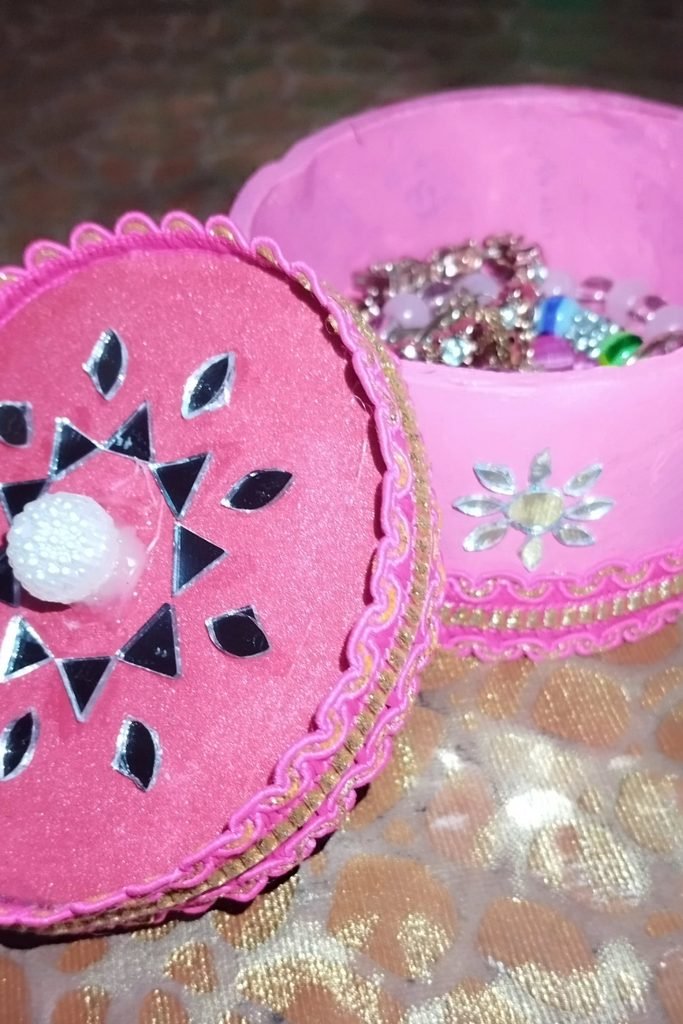
Round Keepsake
A round container makes an easy starting point when you want a jewelry box without measuring and assembling multiple rectangular panels.
Cover the lid with foam or fabric, then use trim around the edges to hide seams and create a cleaner finish.
Decorative gems work best in small clusters, while the open interior leaves enough room for chunky bracelets, bangles, and larger accessories.
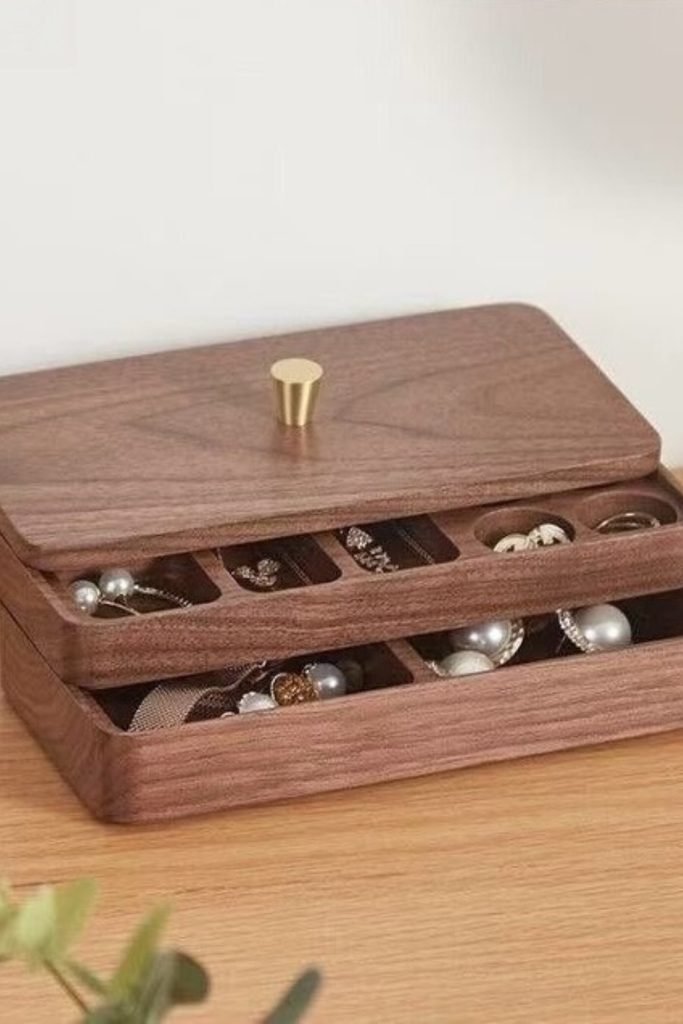
Layered Trays
Instead of building several drawers, stack two shallow trays so you can double storage while maintaining a clean, compact profile.
Divide each level according to jewelry size, using smaller sections for rings and wider spaces for earrings, brooches, or bracelets.
Rounded wooden edges make frequent handling more comfortable, and a simple top knob lets you lift the lid without touching jewelry underneath.
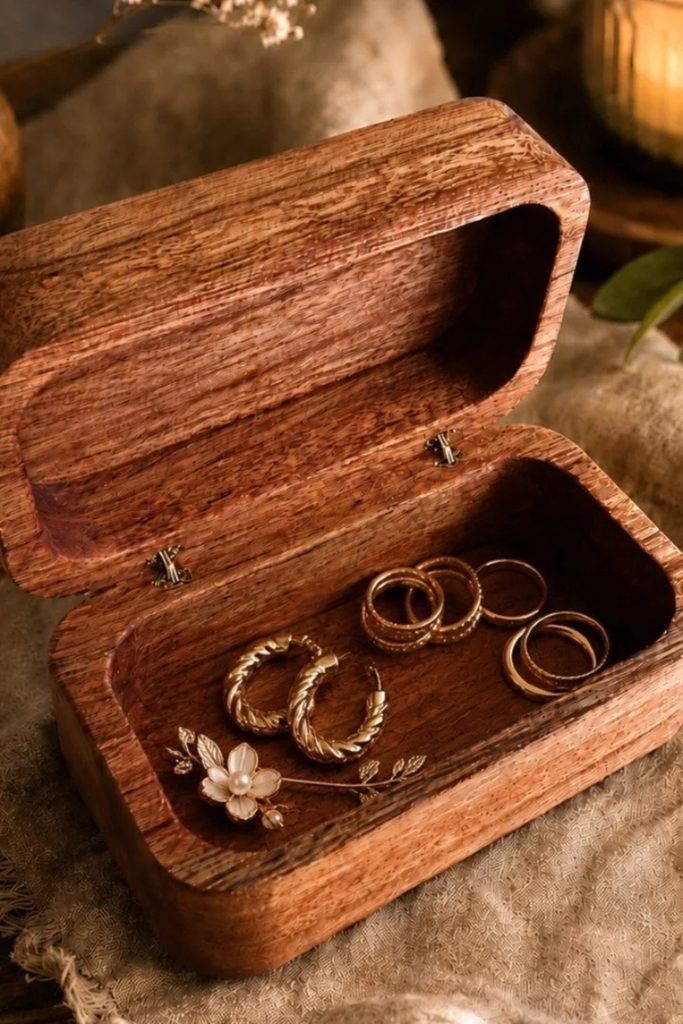
Carved Wood
Skipping dividers can actually work better when your collection mainly contains chunky rings, hoop earrings, brooches, or other larger pieces.
Carve or shape one generous interior cavity, smoothing every corner carefully so unfinished wood cannot catch delicate chains or scratch jewelry.
Let attractive wood grain become the decoration, using a clear protective finish instead of covering the surface with unnecessary embellishments.
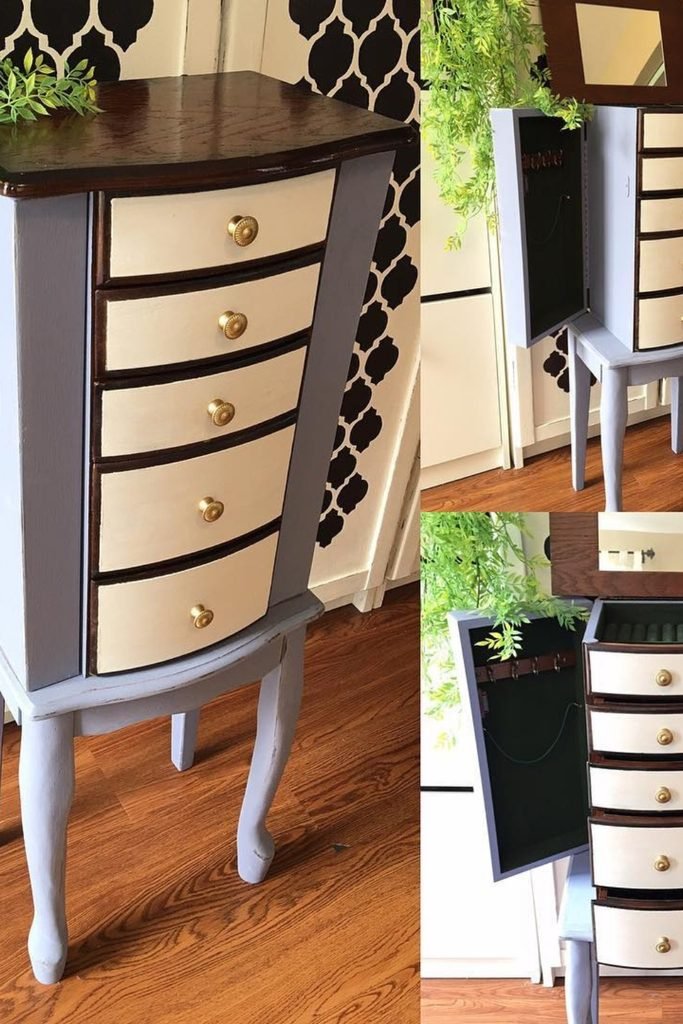
Standing Armoire
A larger jewelry collection quickly outgrows tabletop boxes, so a standing cabinet can turn vertical space into organized storage.
Use shallow drawers for smaller pieces, then add hooks inside the side doors where necklaces can hang separately without tangling.
Finishing the cabinet in contrasting tones helps define each section, while a top mirror makes daily jewelry selection more convenient.
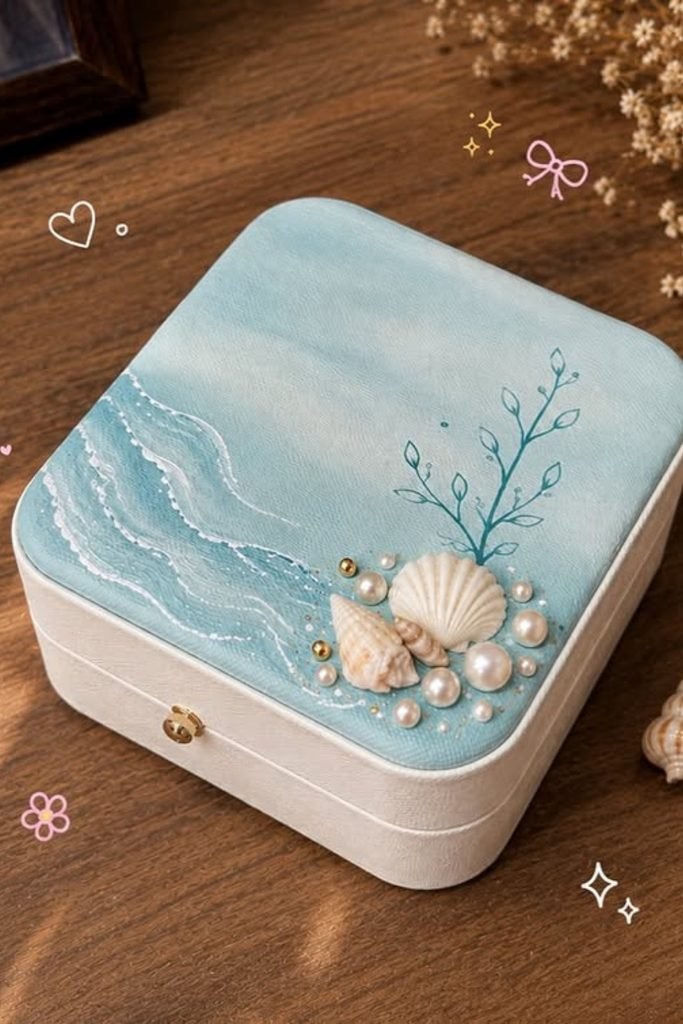
Coastal Keepsake
Small embellishments can completely personalize a plain box, especially when you build the decoration around one clear theme instead of overcrowding it.
Paint a soft ocean background first, then attach lightweight shells and faux pearls only after the surface has fully dried.
Choose a secure clasp for the front so rings and earrings remain contained whenever you move the box between surfaces.
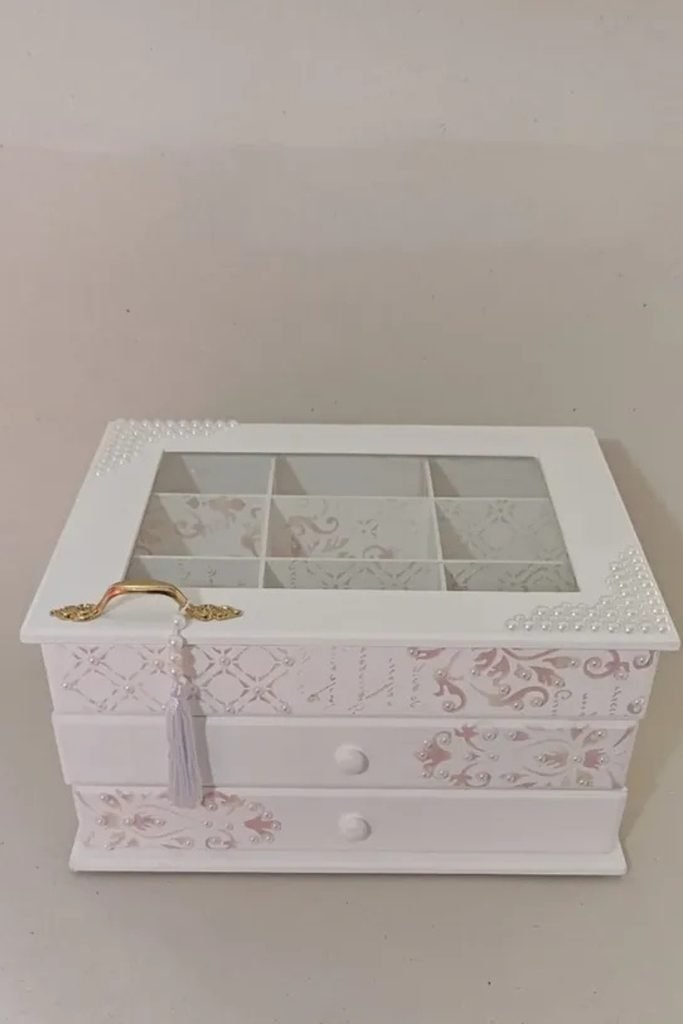
Display Lid
A clear lid saves you from opening every compartment just to remember where a particular ring, bracelet, or earring pair sits.
Build shallow dividers beneath the window, sizing each section before assembly so your most-worn pieces remain visible without overlapping.
Pearl corners, patterned paper, and a small handle can finish the exterior while leaving the transparent center useful and uncluttered.
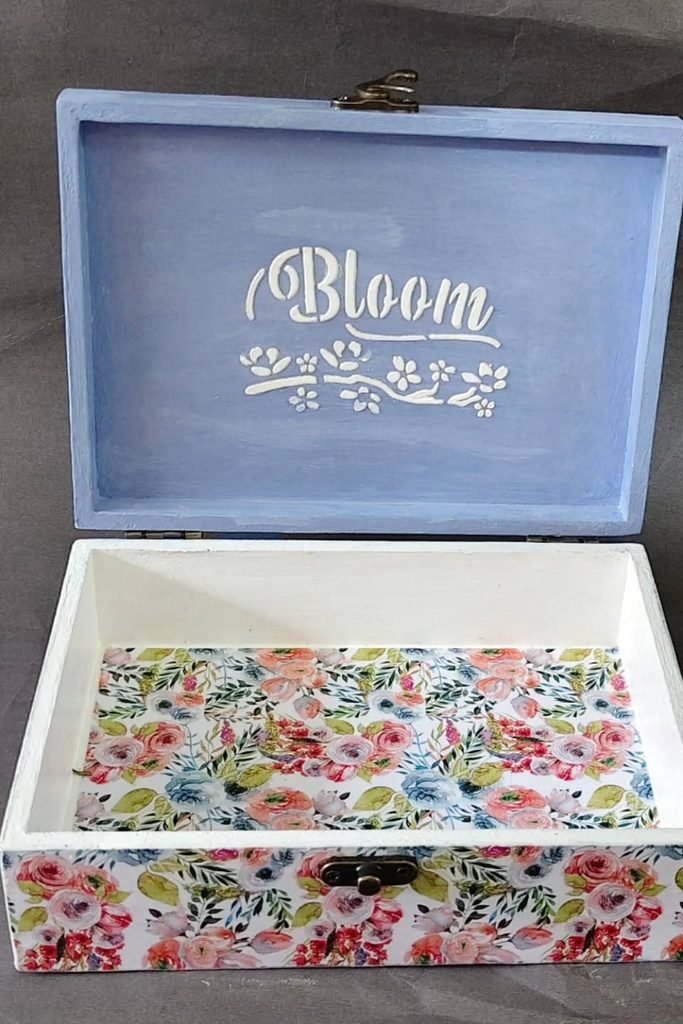
Floral Decoupage
Decoupage is an easy shortcut when detailed hand painting feels intimidating but you still want a plain wooden box to feel customized.
Apply floral paper over smooth surfaces with careful edge alignment, then seal it properly so corners resist lifting during regular handling.
Leaving the interior mostly open makes this approach useful for larger bracelets, watches, brooches, or jewelry stored inside smaller pouches.
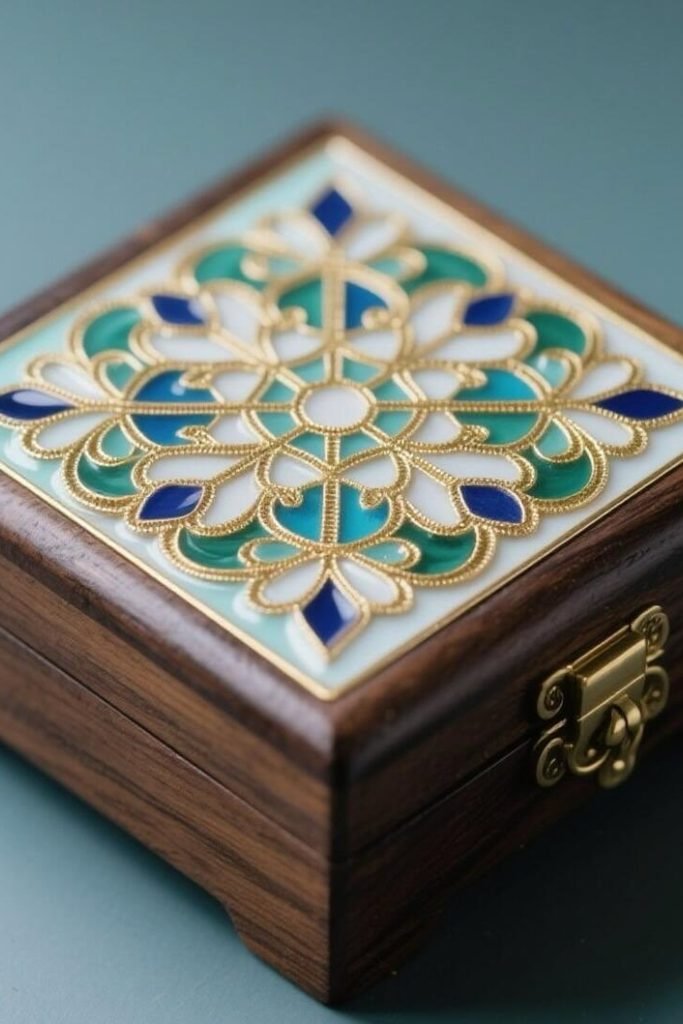
Mosaic Lid
A detailed lid can make a simple wooden box feel special, so concentrate decorative work where it creates the strongest impact.
Outline a symmetrical pattern first, then build the design with paint or small decorative pieces while maintaining clean spacing throughout.
Pair the ornate top with simple stained sides and classic hardware, preventing the finished project from becoming visually too busy.
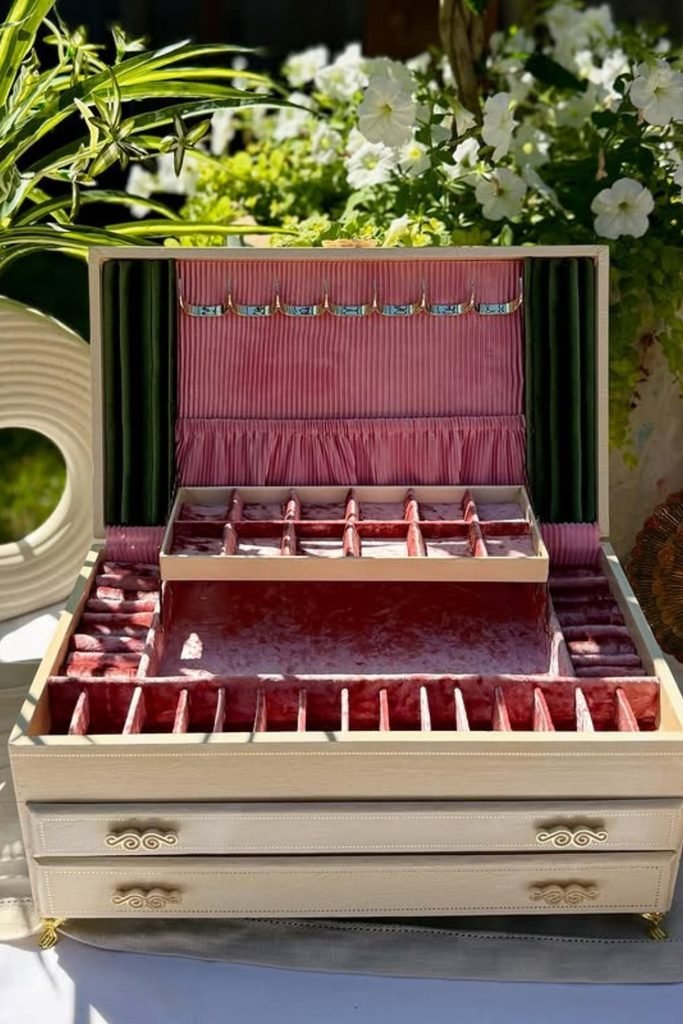
Velvet Organizer
Large collections become easier to manage when every jewelry type has a dedicated section instead of sharing one oversized compartment.
Combine narrow ring channels, small divided cubbies, necklace loops, and open central storage according to the pieces you wear regularly.
Velvet over thin padding creates a softer landing for jewelry, while lower drawers can hold pieces that need less frequent access.
Tiered Rounds
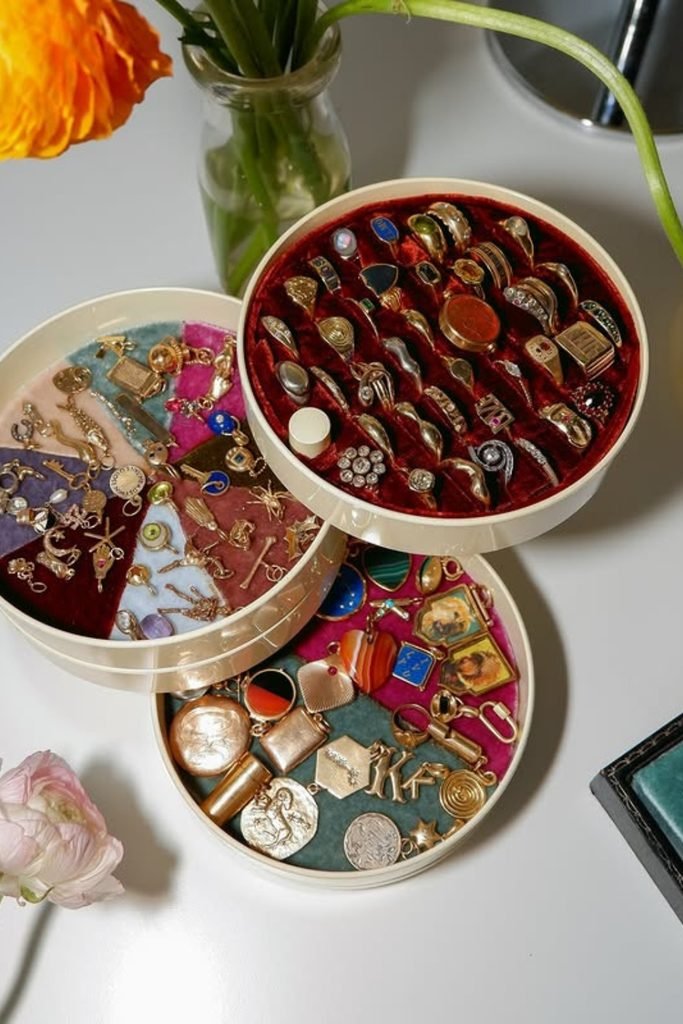
Round stacking trays offer plenty of storage without taking over your dresser, especially when your collection includes many smaller pieces.
Dedicate one level to padded ring rows, another to earrings and charms, then reserve the deepest tray for chunkier jewelry.
Using different lining colors between levels can make tiny pieces easier to spot while adding personality to an otherwise simple structure.
Swing Trays
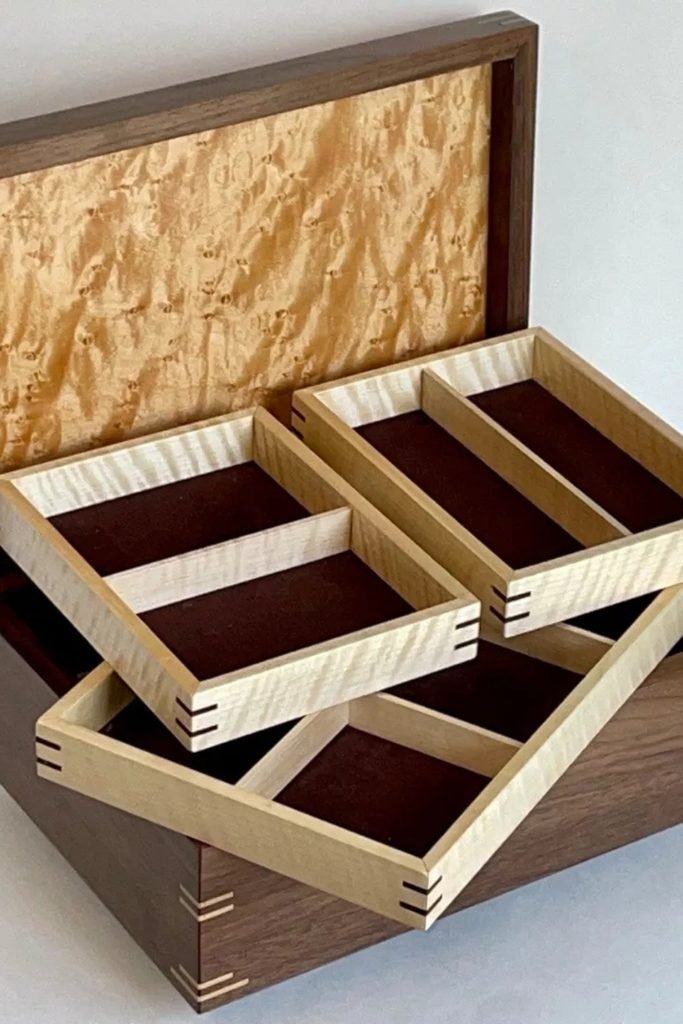
Swing-out trays let you reach several storage levels at once, avoiding the hassle of removing stacked inserts whenever something sits underneath.
Build each tray with only a few generous compartments, then test the pivot points carefully before adding fabric or final finishes.
Contrasting woods can make the handmade joinery part of the design, while soft-lined bases protect jewelry from harder wooden surfaces.
FAQs
What Materials Work Best for a Beginner DIY Jewelry Box?
Cardboard, craft sticks, unfinished wooden boxes, and sturdy recycled containers are easy starting points.
Choose materials you can cut and assemble confidently, then use felt, velvet, fabric, or decorative paper to create a cleaner finish.
How Can I Stop Jewelry From Tangling Inside a DIY Box?
Separate jewelry according to size instead of creating equal compartments everywhere.
Add narrow ring rolls, small sections for earrings, wider spaces for bracelets, and individual hooks or longer compartments for necklaces so chains stay apart.

Hi, my name is Ali Mehmood! I’m a passionate writer and DIY enthusiast who loves turning creative ideas into practical, hands-on projects.
I created this website to share inspiring, budget-friendly ideas that you can do yourself – whether it’s organizing your home, crafting something unique, or creating fun projects for kids and pets.
I believe DIY isn’t just a hobby – it’s a smart way to save money, reduce waste, and enjoy the satisfaction of making things with your own hands.
I’m excited to have you as part of this growing community, and I’ll continue bringing you helpful, realistic, and fun DIY ideas you can actually use.