This post may contain affiliate links: read full affiliate disclosure.
Paper flowers look beautiful on Pinterest, but recreating them isn’t always as easy as it seems.
Many tutorials skip important details, leaving you with flat petals, messy glue marks, or flowers that never look like the inspiration photo.
It can also be confusing to choose the right paper, decide whether you need special tools, or figure out which designs are actually beginner-friendly.
The good news is that you don’t need expensive supplies or years of crafting experience to create flowers you’ll be proud to display.
With the right inspiration, a few simple techniques, and ideas that match your skill level, making beautiful paper flowers becomes much more enjoyable.
In this collection, you’ll find paper flower DIY ideas for everything from bouquets and wall decor to party backdrops, gifts, wreaths, and seasonal decorations.
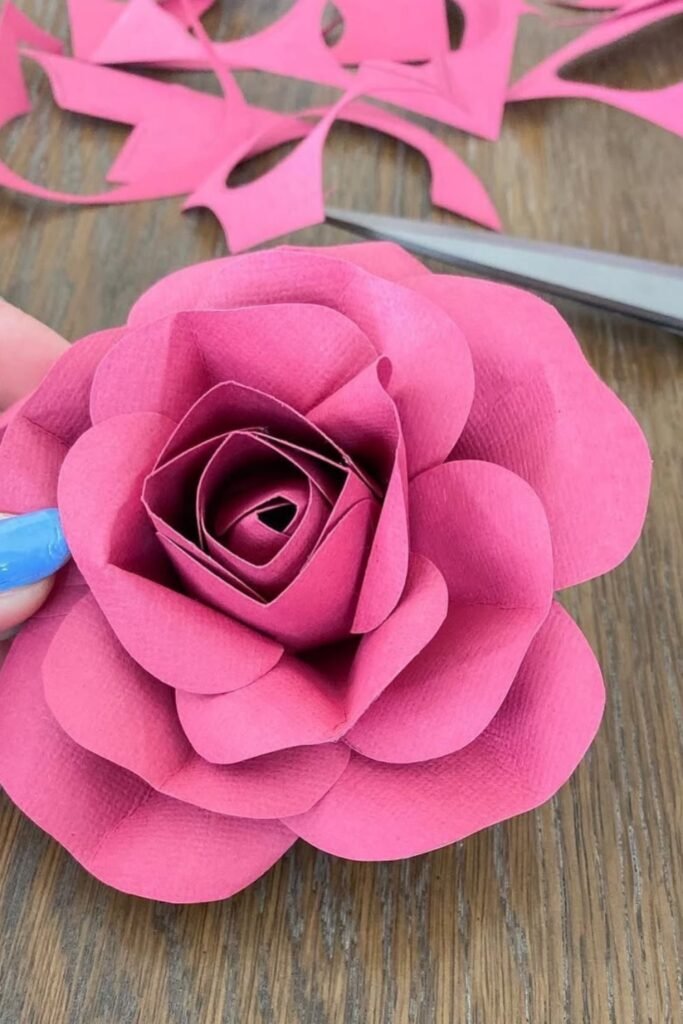
Layered Rose Bloom
Skip perfectly identical petals because slightly different sizes instantly give your paper rose natural depth and a softer handcrafted appearance.
Gently curl every outer petal with a pencil before assembling, helping each layer open beautifully instead of sitting flat together.
This timeless rose works wonderfully inside bouquets, wedding centerpieces, shadow boxes, or thoughtful handmade gifts that never lose their charm.
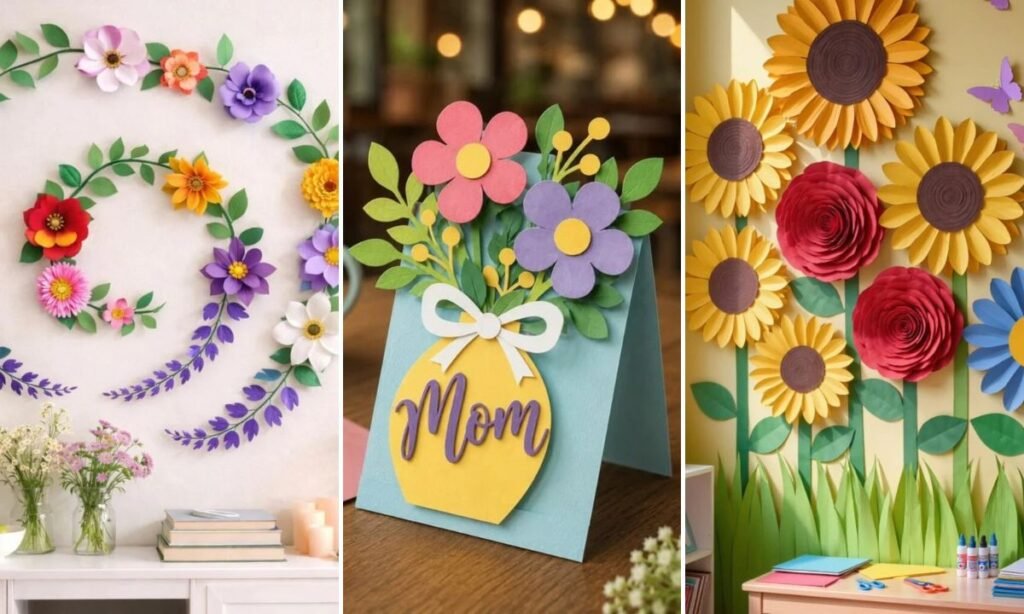
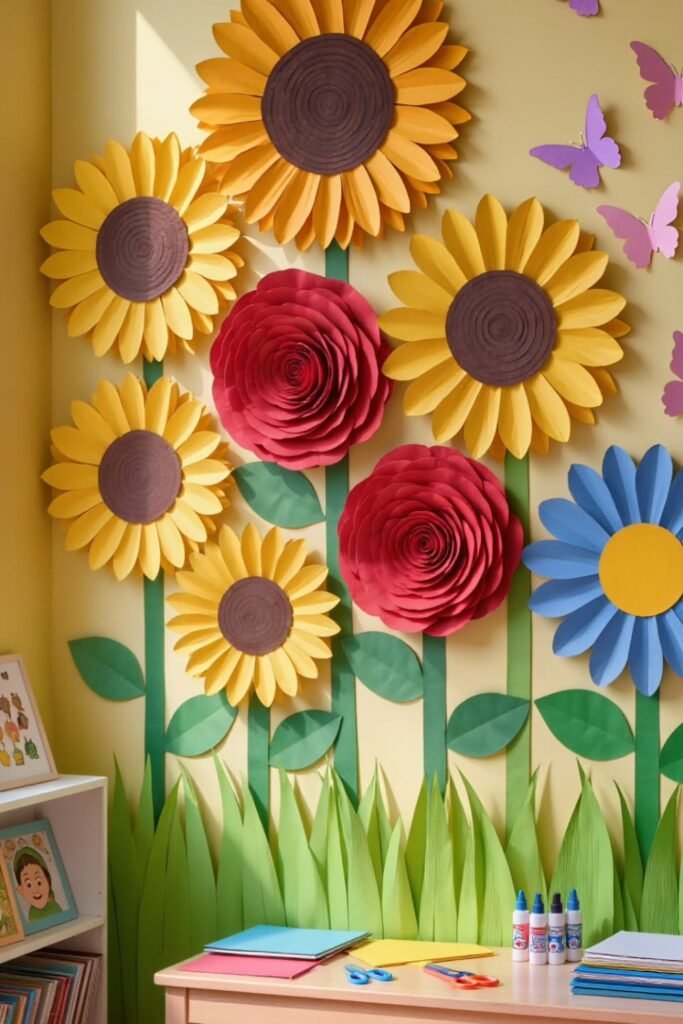
Giant Flower Wall
Turn an empty wall into a cheerful statement by mixing oversized blooms instead of repeating only one flower shape throughout.
Vary flower heights, leaf sizes, and butterfly accents so the display feels playful, balanced, and full of movement from every angle.
This idea brightens classrooms, playrooms, birthday parties, or spring celebrations without spending money on expensive seasonal decorations every year.
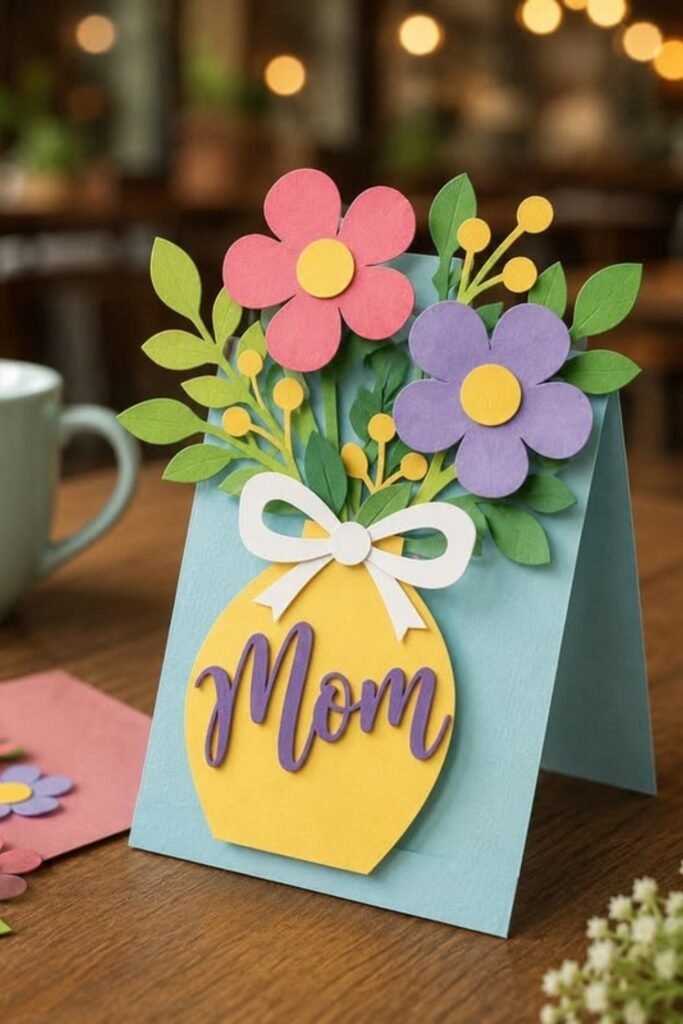
Blooming Gift Card
A handmade card feels far more memorable when layered paper flowers create texture before anyone even opens the thoughtful message inside.
Mix simple blossoms with leafy stems and colorful paper scraps to build dimension without making the design look crowded or overwhelming.
Keep this project ready for Mother’s Day, birthdays, teacher appreciation, or any occasion needing a heartfelt handmade surprise instead of store-bought cards.
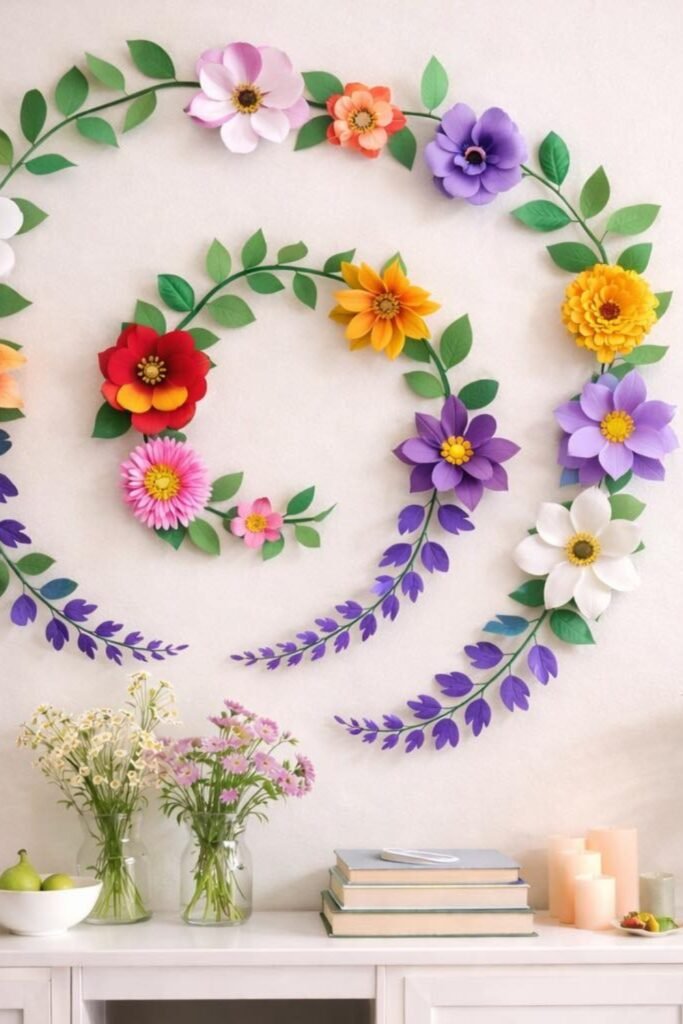
Floral Wall Swirl
Forget straight arrangements because a flowing vine instantly makes scattered paper flowers feel connected into one eye-catching decorative feature.
Blend different flower shapes, colorful blooms, and leafy branches while leaving breathing space so every handcrafted detail stands out naturally.
This graceful layout transforms living rooms, craft spaces, entryways, or party backdrops into welcoming corners filled with handmade seasonal charm.
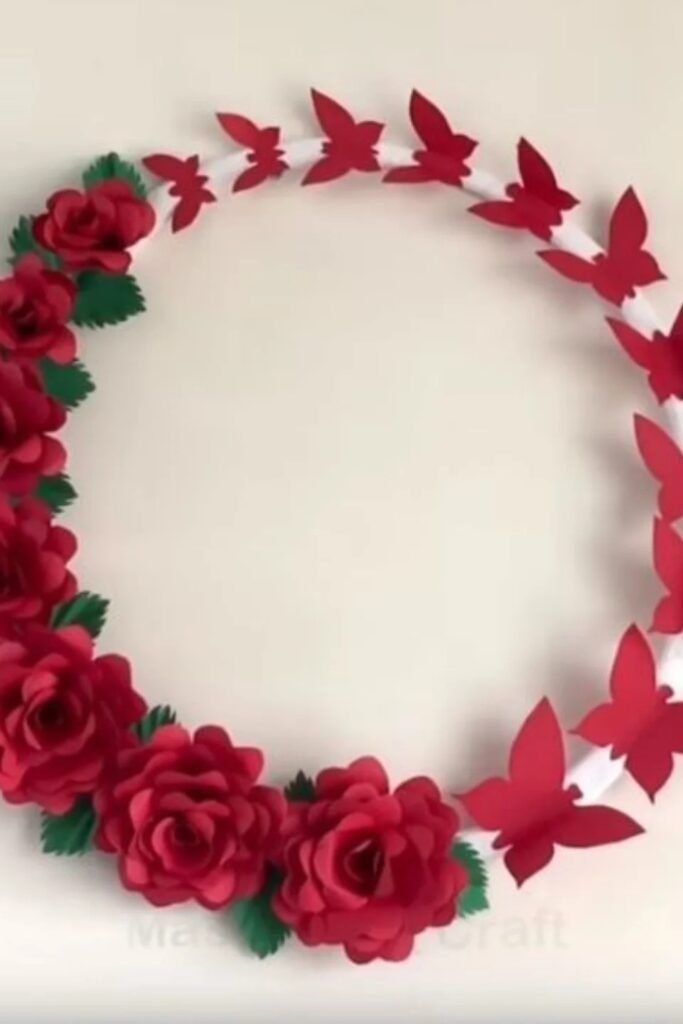
Butterfly Floral Hoop
Give a simple floral hoop extra personality by scattering paper butterflies around the frame instead of filling every section with more flowers.
Cluster larger roses along one side, then gradually reduce decorations to create a balanced design that feels airy without looking unfinished.
This elegant piece instantly elevates bedroom walls, wedding corners, or party entrances while using surprisingly few materials for maximum visual impact.
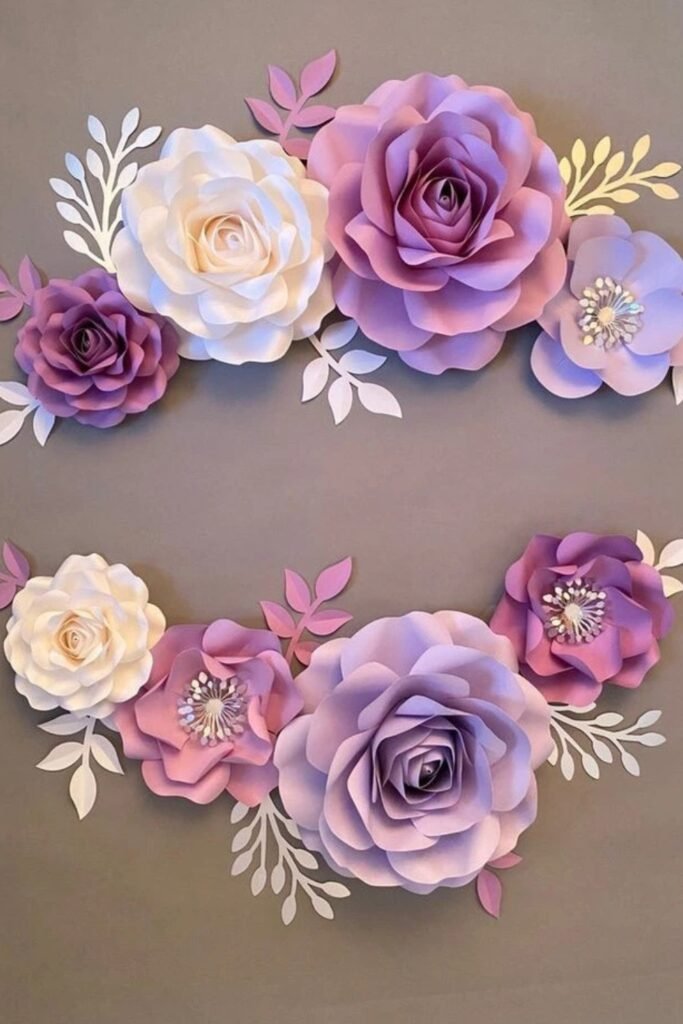
Pastel Bloom Cluster
Soft color palettes always feel more elegant when different flower sizes overlap naturally instead of lining everything up in perfect symmetry.
Blend lavender, blush, and white blooms with delicate paper leaves to add gentle contrast without stealing attention from the statement flowers.
This arrangement creates a sophisticated backdrop for weddings, baby showers, dessert tables, or photo corners where subtle colors photograph beautifully.
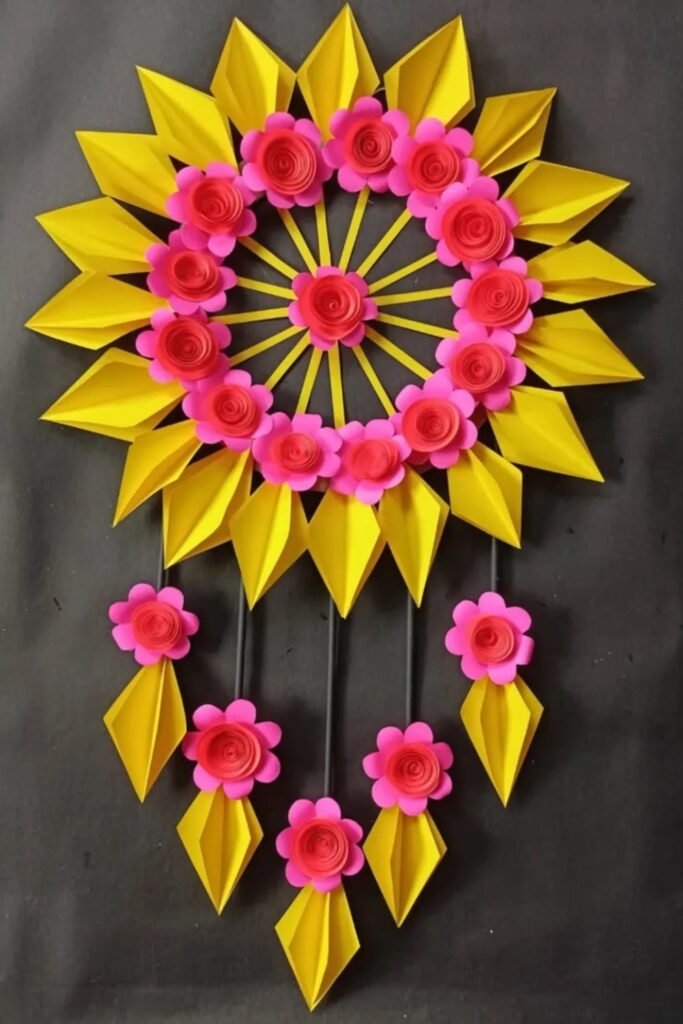
Sunburst Hanging Decor
Bright colors become even more striking when geometric folded petals surround rolled flowers, creating a design that catches attention from every direction.
Keep every folded section evenly spaced before attaching hanging strands, ensuring the finished decoration stays balanced instead of leaning awkwardly to one side.
Hang this cheerful craft near windows, entryways, or festive celebrations whenever you want handmade decor that feels playful without overwhelming the space.
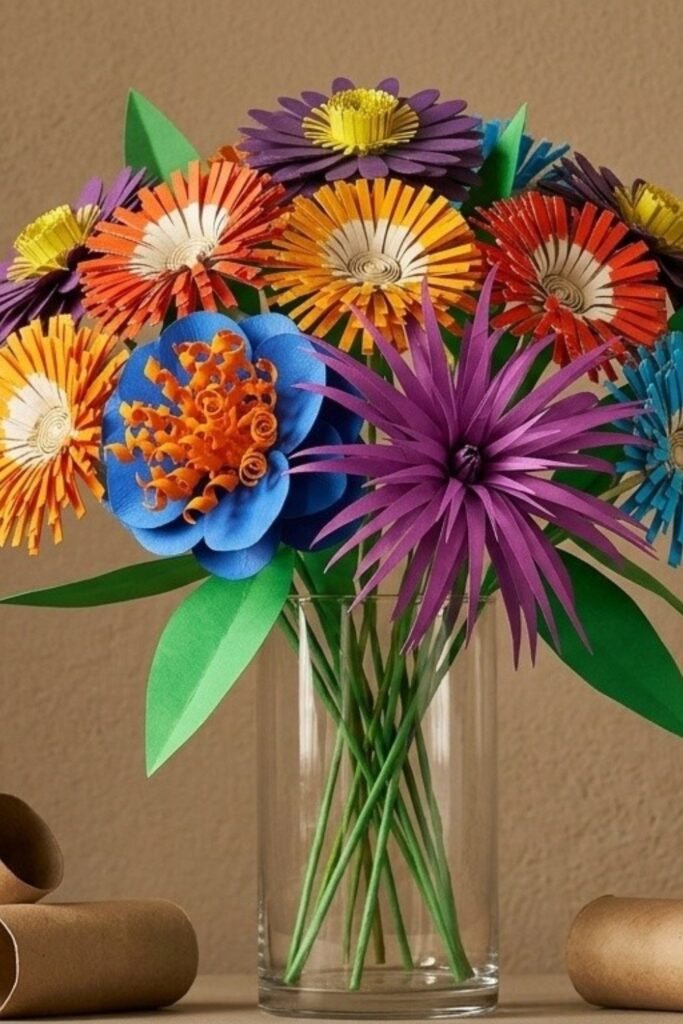
Mixed Paper Bouquet
Who says every stem should match when combining different flower styles creates a bouquet that feels collected naturally over time instead?
Experiment with layered petals, fringed blooms, curled centers, and bold colors to give every flower its own unique personality and texture.
Place everything inside a simple glass vase, letting the colorful arrangement become an affordable centerpiece that brightens shelves, desks, or dining tables.
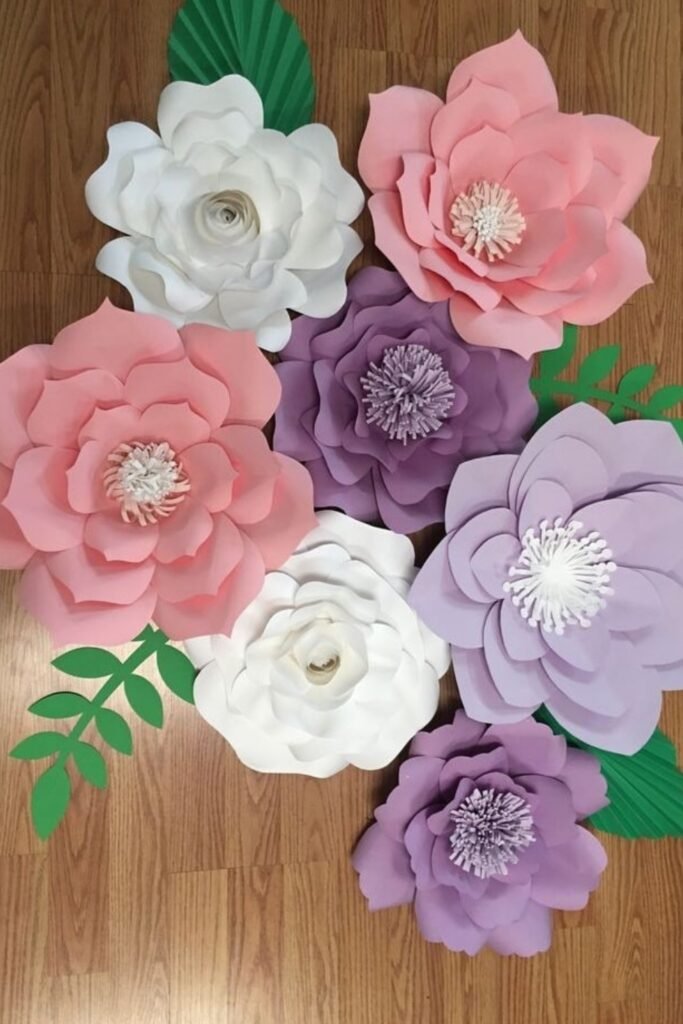
Oversized Bloom Set
Instead of making one oversized flower, combine several coordinating blooms so your wall display feels complete without filling every empty space.
Choose two or three complementary colors, then vary flower centers and petal shapes to create depth while keeping the arrangement visually balanced.
This statement display looks stunning behind dessert tables, wedding seating, nursery corners, or any backdrop needing soft handmade elegance.
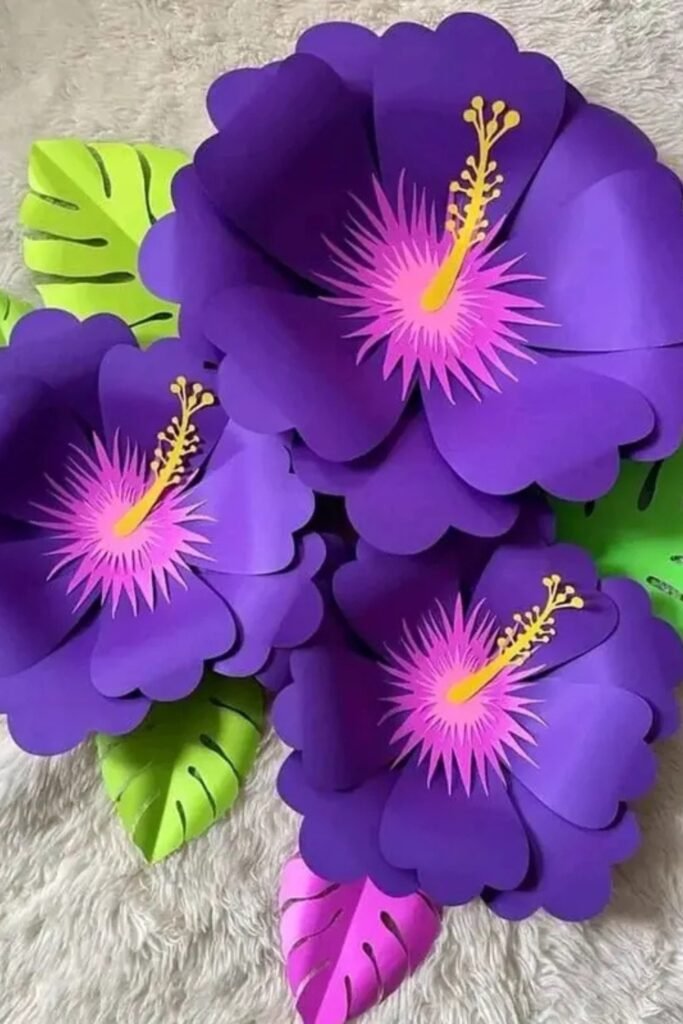
Tropical Hibiscus
Bold colors deserve bold flowers, and oversized hibiscus blooms instantly bring tropical energy without requiring dozens of complicated decorative elements everywhere.
Shape wide rounded petals carefully, then finish each flower with a contrasting center and vibrant leaves for an eye-catching island-inspired appearance.
These dramatic flowers work beautifully for summer parties, luau themes, poolside celebrations, or cheerful accent walls that instantly grab attention.
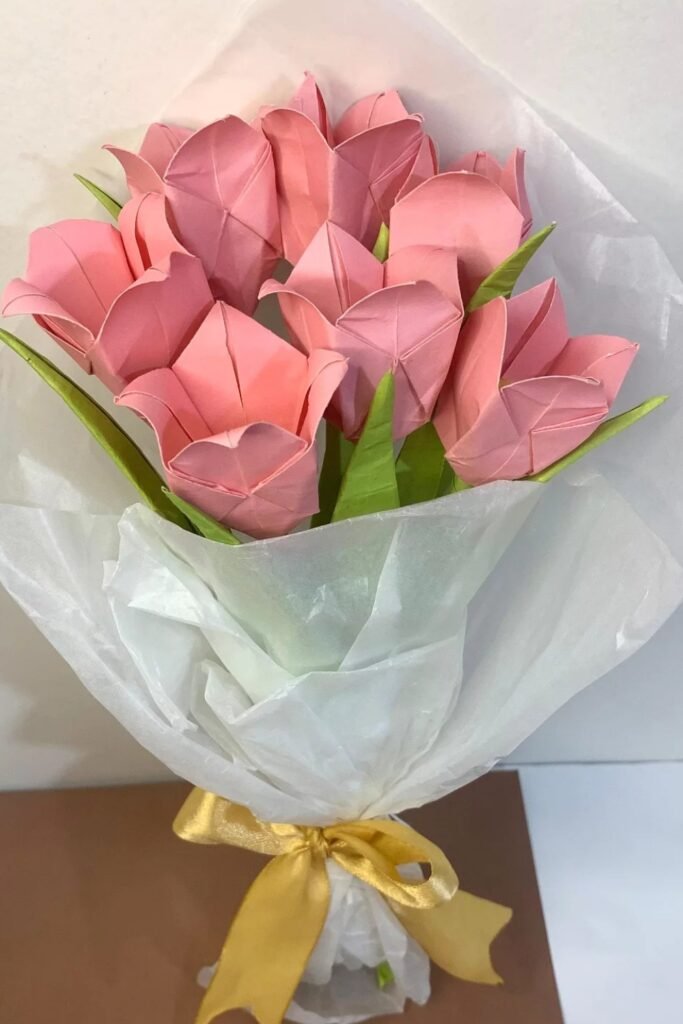
Origami Tulip Bouquet
Sometimes clean folded lines create more elegance than layered petals, especially when every tulip stays crisp and neatly shaped throughout.
Mix slightly different pink shades with simple green leaves, then wrap everything in translucent paper for a bouquet that feels professionally arranged.
Gift this bouquet on birthdays, Mother’s Day, anniversaries, or weddings when you want flowers that stay beautiful long after fresh blooms fade.
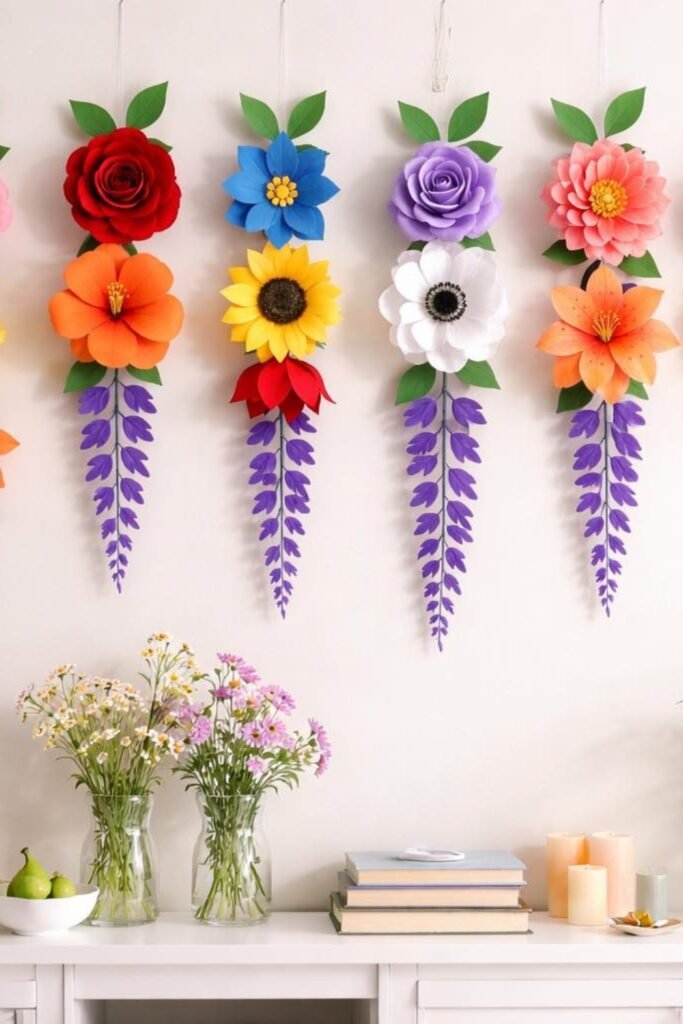
Hanging Floral Strands
Think beyond wreaths by letting individual floral strands fall vertically, creating movement that instantly makes plain walls feel far more decorative.
Mix recognizable flowers with trailing paper foliage instead of repeating identical blooms, giving every hanging piece its own colorful personality and balance.
Arrange several strands together above consoles, wedding entrances, or celebration backdrops for an affordable display that fills vertical space beautifully.
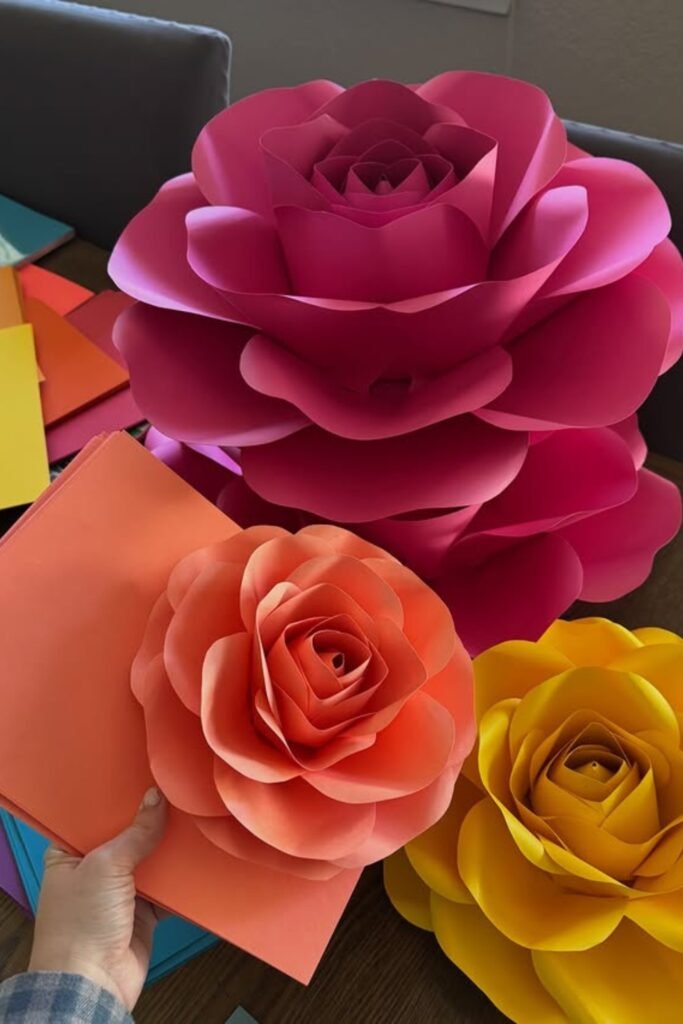
Oversized Rose Trio
One oversized flower already makes an impact, but mixing three different sizes creates a display that feels professionally styled with very little effort.
Choose one bold shade alongside softer accent colors, then gently curl every petal edge for fuller blooms that look naturally opened instead of stiff.
These giant flowers become unforgettable focal points for weddings, birthday backdrops, photo booths, or elegant celebration entrances filled with handmade charm.
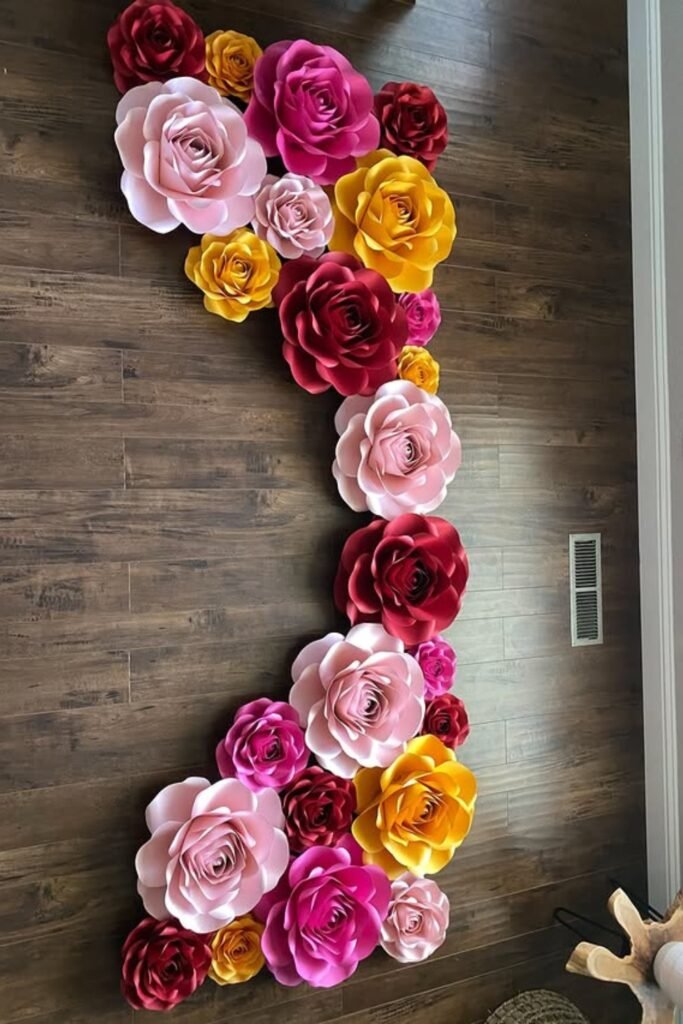
Cascading Rose Display
Break away from perfectly centered arrangements by letting oversized flowers flow vertically, creating movement that instantly fills tall empty walls beautifully.
Mix large statement blooms with smaller filler roses, keeping similar colors grouped naturally so the entire installation feels balanced from top to bottom.
This dramatic design transforms wedding ceremonies, engagement parties, bridal showers, or staircase walls into luxurious photo-worthy backgrounds without fresh flowers.
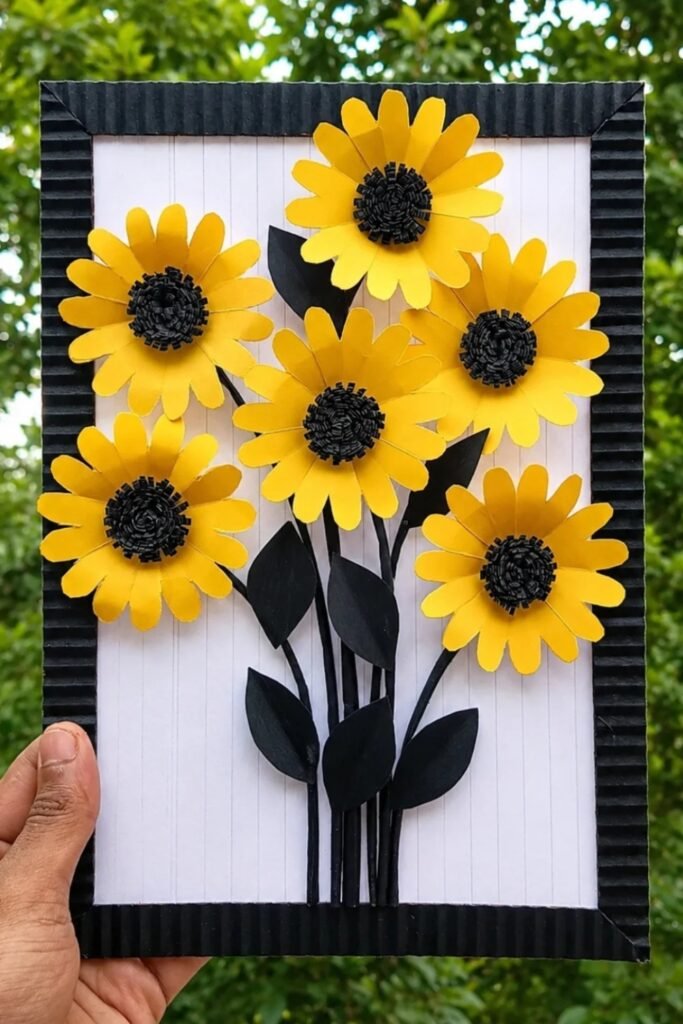
Framed Sunflower Art
Paper flowers become lasting artwork when mounted inside a simple frame instead of sitting loose on shelves collecting dust over time.
Layer black fringed centers above bright petals, then add dark leaves to create bold contrast that makes every sunflower stand out beautifully.
Display this cheerful craft near entryways, farmhouse kitchens, or gift it to someone who loves handmade decor with rustic personality.
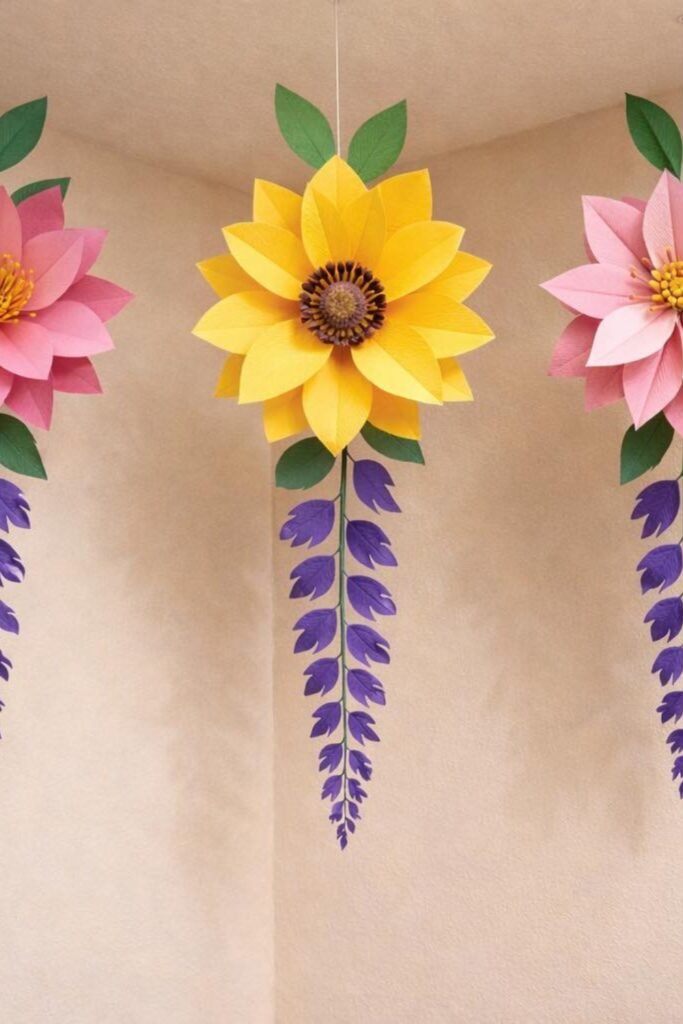
Hanging Floral Drops
Rather than filling an entire wall, suspend a few oversized blooms with trailing foliage to create an elegant floating garden effect overhead.
Keep enough space between every hanging piece so each flower becomes its own statement without competing for attention or looking overcrowded together.
This graceful arrangement suits weddings, baby showers, reading corners, or cozy living spaces needing colorful vertical decor with a lightweight appearance.
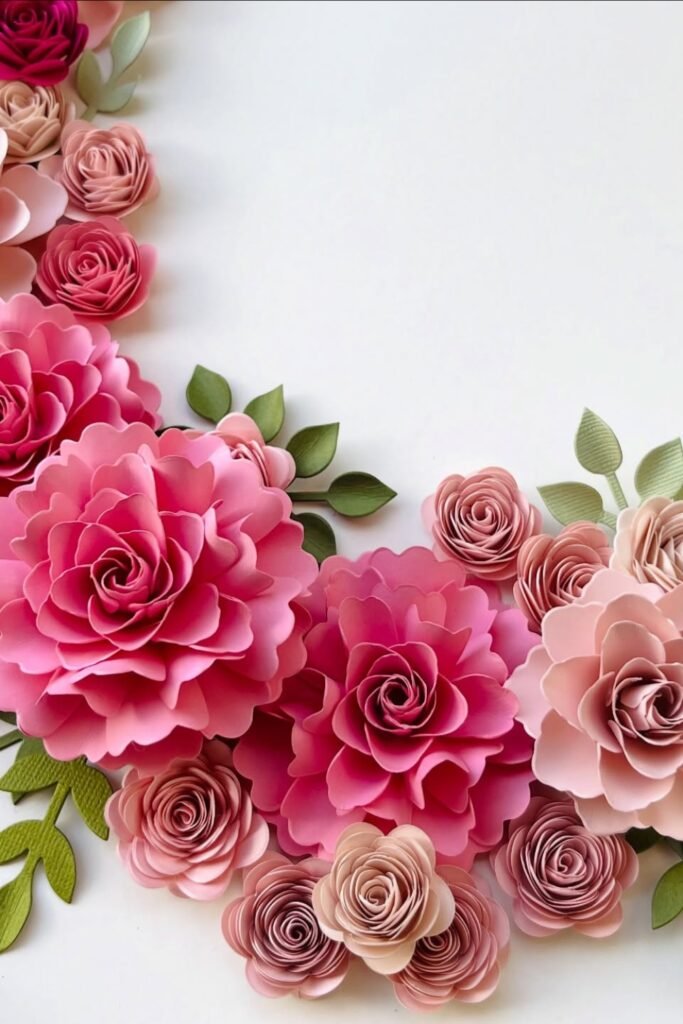
Layered Floral Corner
A floral corner frame naturally draws attention without covering the entire background, leaving plenty of clean space for photos, signs, or names.
Combine oversized blossoms with tightly rolled mini roses, using leafy fillers to soften gaps and make every section feel intentionally connected together.
This elegant arrangement works beautifully around wedding welcome signs, dessert tables, invitations, or personalized party backdrops needing romantic handmade detail.
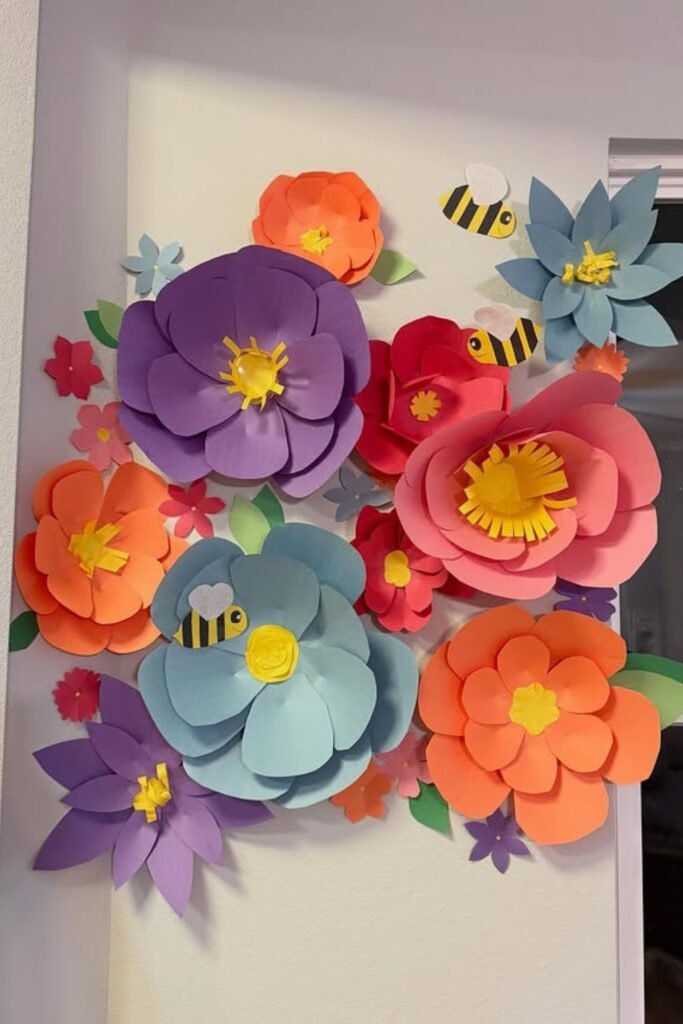
Garden Wall Display
Bring your walls to life by mixing playful flowers with paper bees, creating a scene that feels like a cheerful spring garden indoors.
Choose bold contrasting colors, then scatter smaller blossoms between larger blooms so every empty space feels filled without becoming visually overwhelming.
This fun display brightens children’s rooms, classrooms, spring parties, or craft corners where colorful handmade decorations instantly create a welcoming atmosphere.
FAQs
What is the best paper to use for DIY paper flowers?
Cardstock is perfect for sturdy wall flowers and backdrops, while crepe paper creates softer, more realistic petals.
Tissue paper works well for fluffy blooms, and regular colored paper is great for simple beginner projects.
How do I make my paper flowers look more realistic?
Create depth by using different petal sizes, gently curling the edges with a pencil, and layering petals instead of stacking identical pieces.
Mixing flower sizes, adding paper leaves, and using two or three coordinating shades also helps your finished arrangement look fuller and more natural.

Hi, my name is Ali Mehmood! I’m a passionate writer and DIY enthusiast who loves turning creative ideas into practical, hands-on projects.
I created this website to share inspiring, budget-friendly ideas that you can do yourself – whether it’s organizing your home, crafting something unique, or creating fun projects for kids and pets.
I believe DIY isn’t just a hobby – it’s a smart way to save money, reduce waste, and enjoy the satisfaction of making things with your own hands.
I’m excited to have you as part of this growing community, and I’ll continue bringing you helpful, realistic, and fun DIY ideas you can actually use.