
This post may contain affiliate links: read full affiliate disclosure.
A frameless mirror can make even a well-styled room feel unfinished. You might like everything else in your bathroom or bedroom, and out of place.
Replacing it feels expensive, removing it feels risky, and most DIY tutorials online either oversimplify the process or skip the parts that actually cause problems.
Many people hesitate because they don’t know which materials survive moisture, which adhesive is safe for glass, or whether a small mistake could damage the mirror permanently.
That hesitation is valid. Framing a mirror is not just about looks—it’s about choosing the right method for your space, skill level, and mirror type.
This article breaks down how DIY mirror frames really work, what usually goes wrong, and how to avoid costly mistakes, so you can upgrade your mirror with confidence.
Save this article for later!
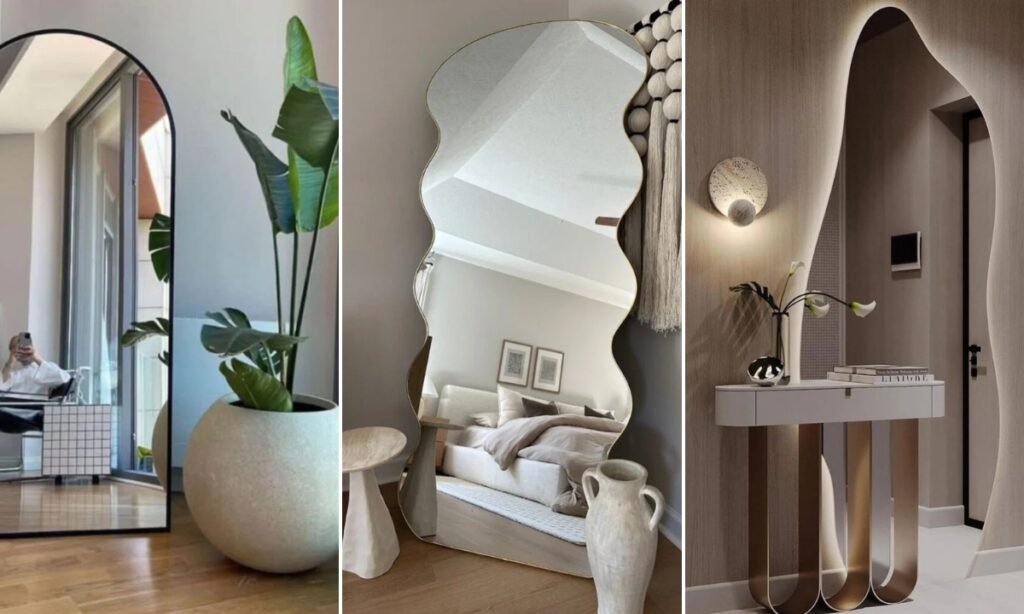
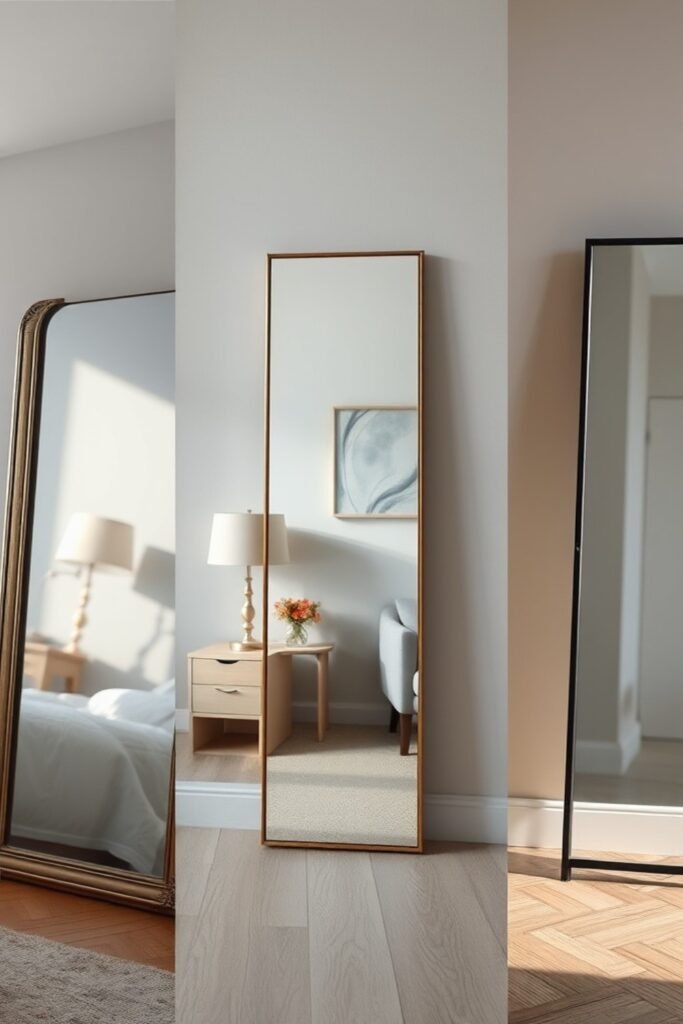
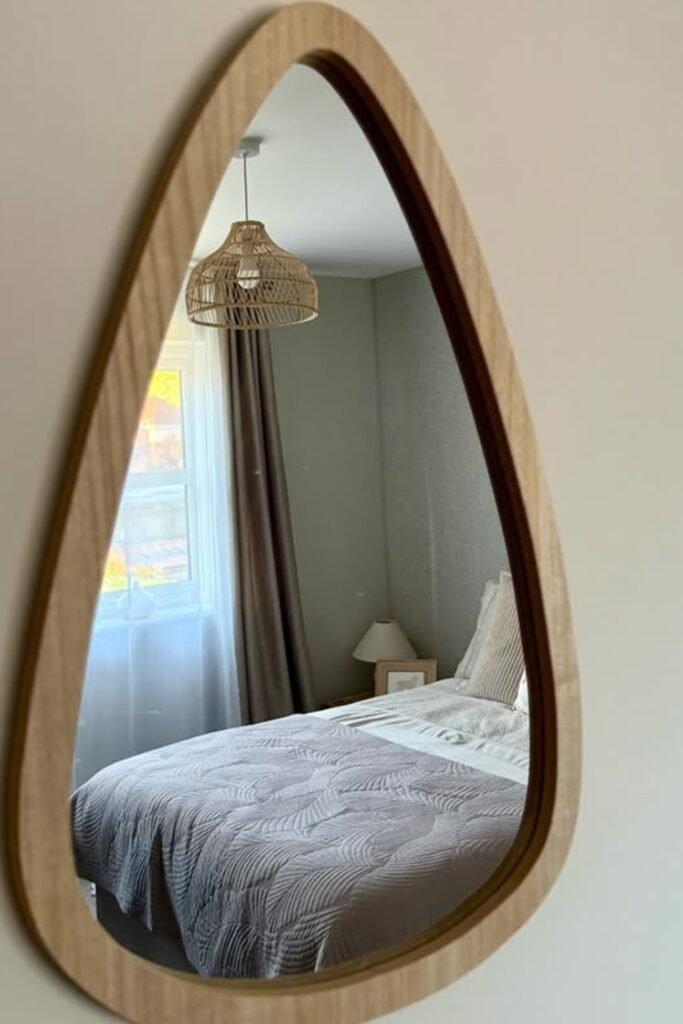
Slim Arched Edge Frame
A slim arched frame instantly softens harsh corners, making tall mirrors feel lighter in bedrooms, hallways, or small apartments.
Recreate this look using flexible metal trim or bent MDF, fixing it around the mirror edge with mirror-safe adhesive.
It works best when the mirror leans slightly, avoiding wall damage while still delivering a bold architectural statement.
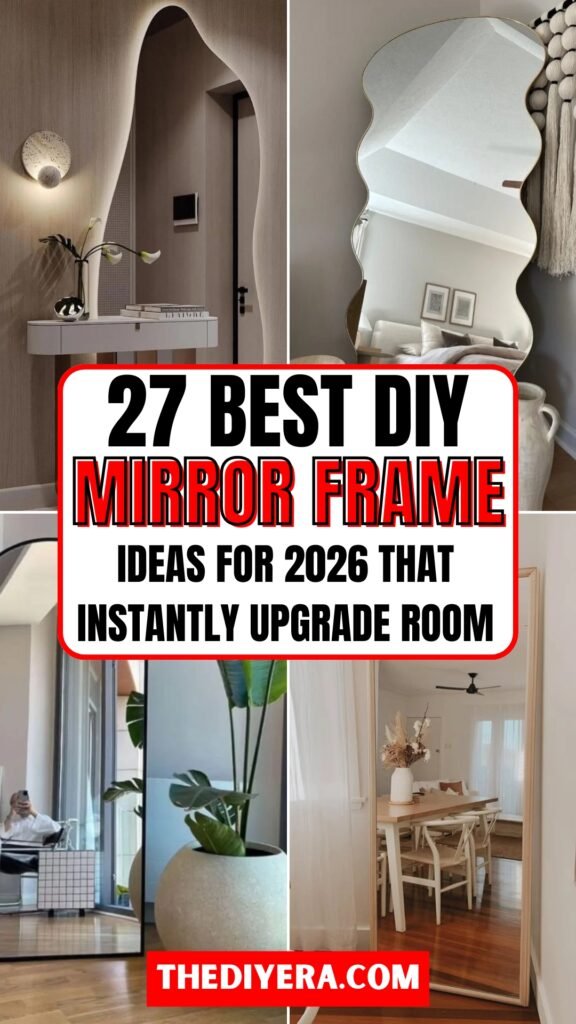
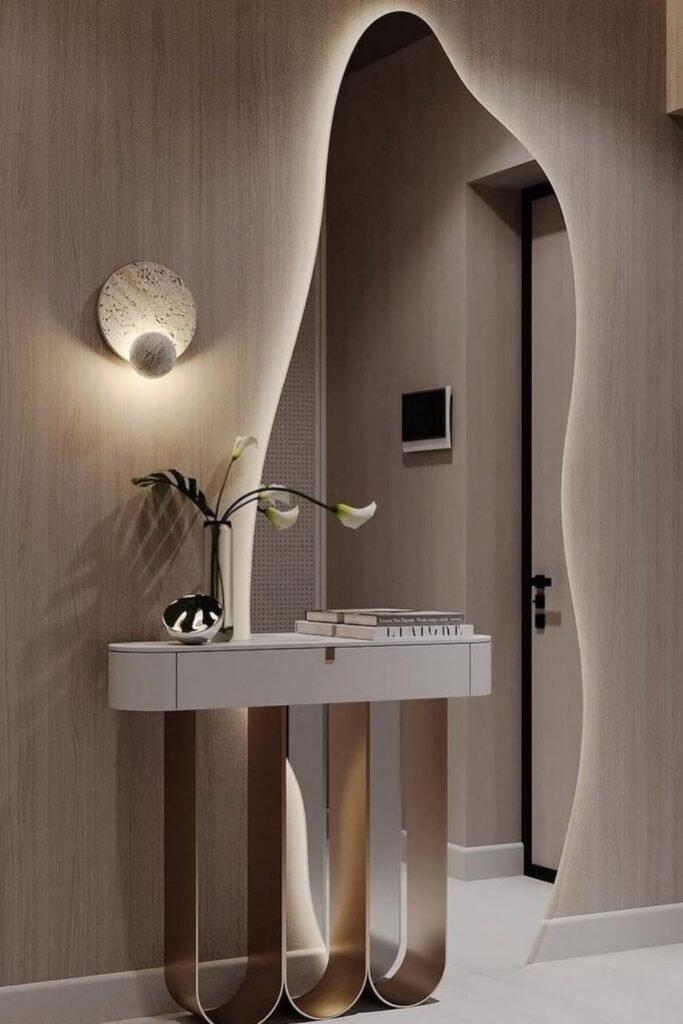
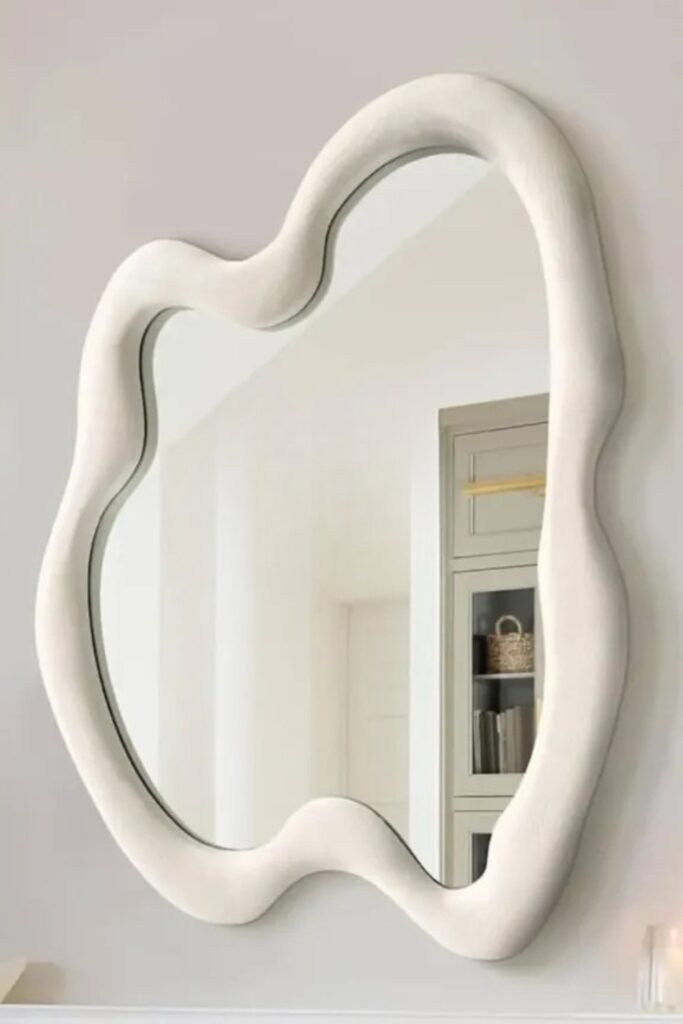
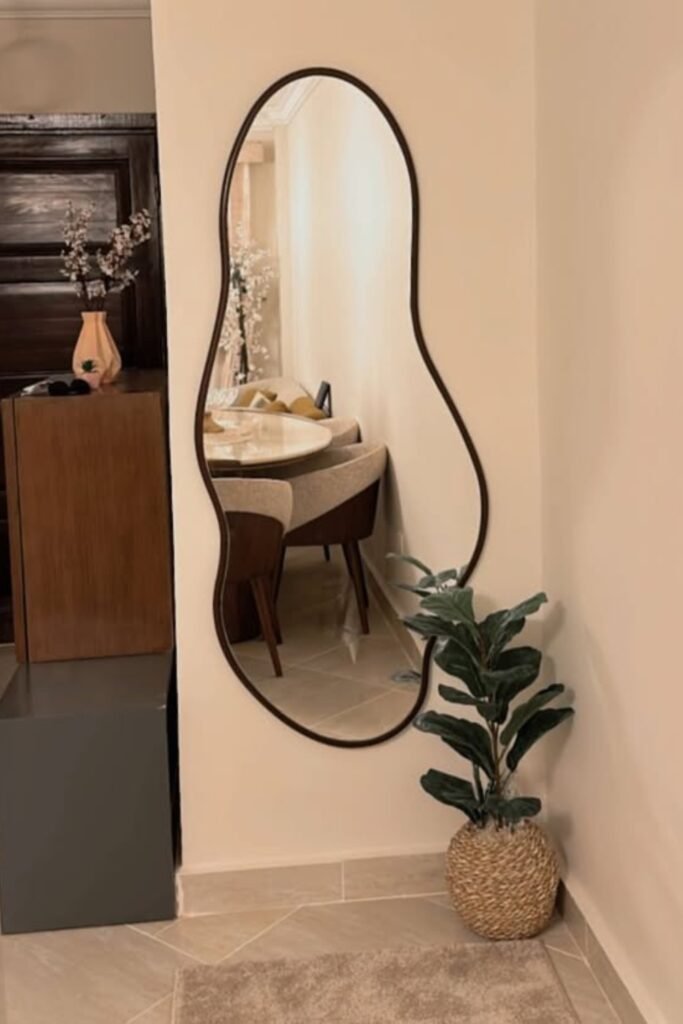
Sculpted Wavy Outline
Organic wavy edges turn a basic mirror into art, perfect for bedrooms or reading corners needing visual movement.
This effect can be DIYed by shaping thin plywood or foam board, then wrapping edges with brass tape strips.
Use it where furniture stays neutral, letting the mirror frame become the focal point without overwhelming space visually.
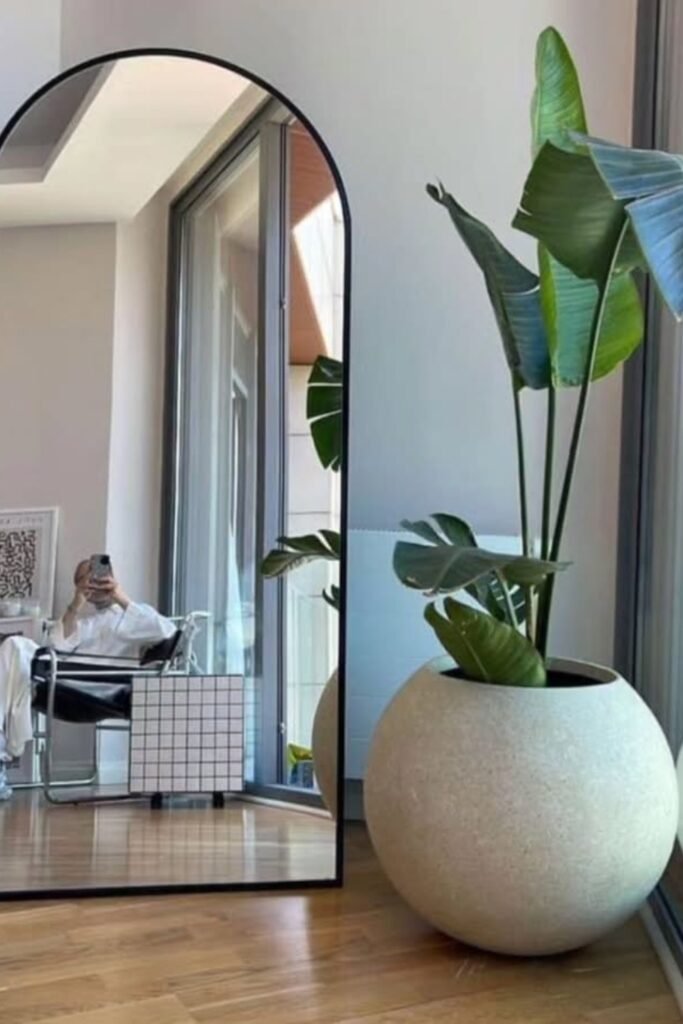
Built-In Frame Niche
Built-in framed mirrors blur the line between décor and architecture, ideal for entryways or console table moments modern.
This DIY relies on wall framing, drywall shaping, and concealed LED strips placed behind a custom-cut mirror panel.
It’s best for long-term homes, since removal isn’t simple but the visual payoff feels intentional and high-end finished.
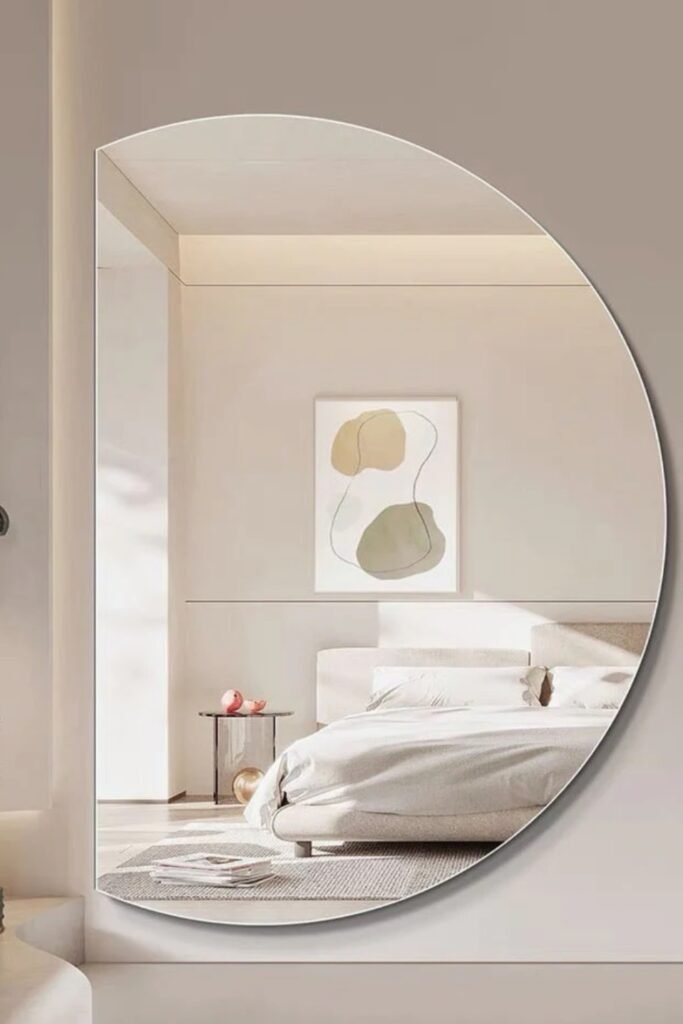
Soft Asymmetrical Cut
Soft asymmetrical shapes help large mirrors feel calm, making bedrooms brighter without the heaviness of thick frames visually.
You can DIY this by ordering custom-cut glass and lightly sanding edges, keeping the profile minimal and modern.
This approach suits spaces where walls stay clean and furniture lines remain low and understated overall visually balanced.
Simple Wood Rectangle
Natural wood frames warm up plain mirrors, working beautifully in dining rooms, living areas, or minimalist bedrooms spaces.
Build this using simple pine boards, mitered corners, and a light stain sealed before mounting around glass edges securely.
It’s ideal when you want a timeless look that adapts easily as furniture styles change over time naturally.

Backlit Arch Frame
Backlit frames solve bad lighting problems, making mirrors functional and atmospheric in bedrooms or dressing corners especially spaces.
This DIY uses LED strips behind the mirror edge, diffused with spacers to create a soft glow evenly around.
Choose this method where overhead lighting feels harsh, and you want the mirror to add mood gently instead.

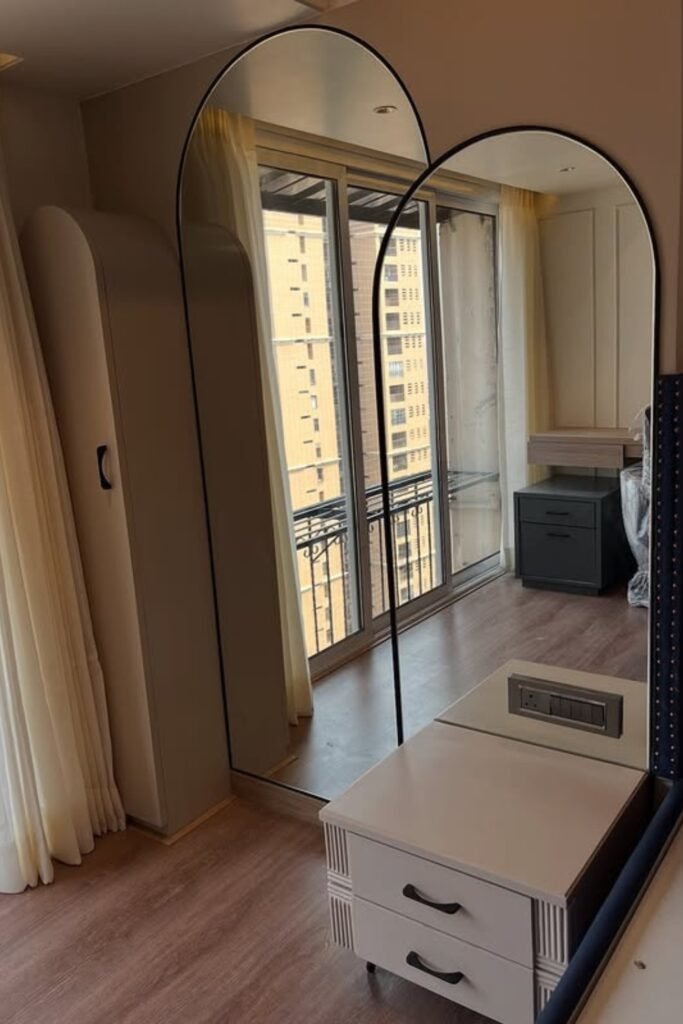
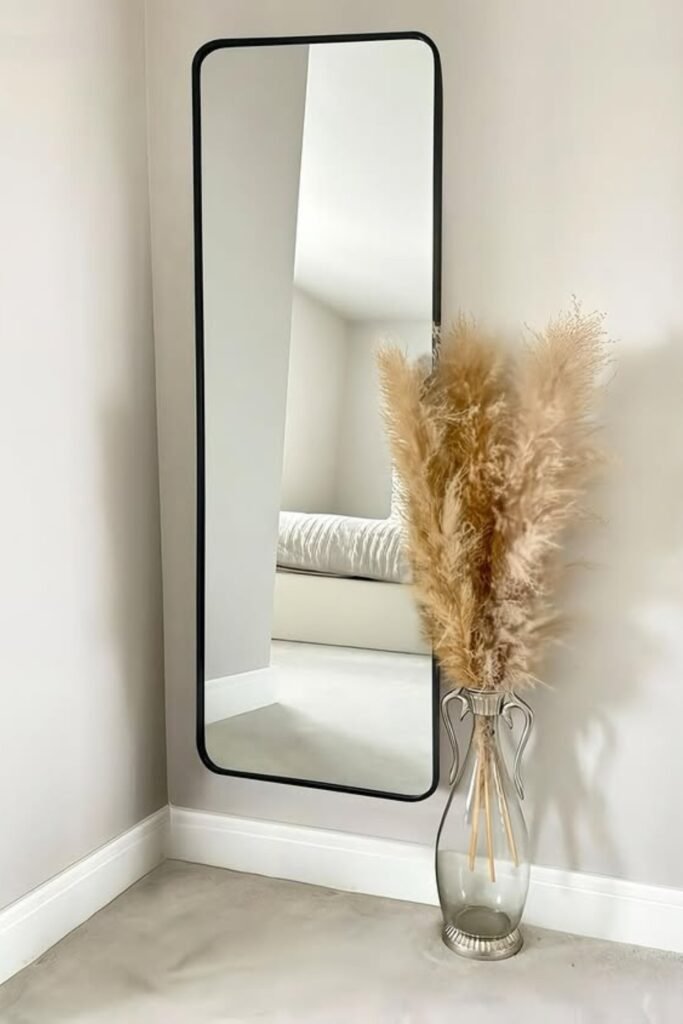
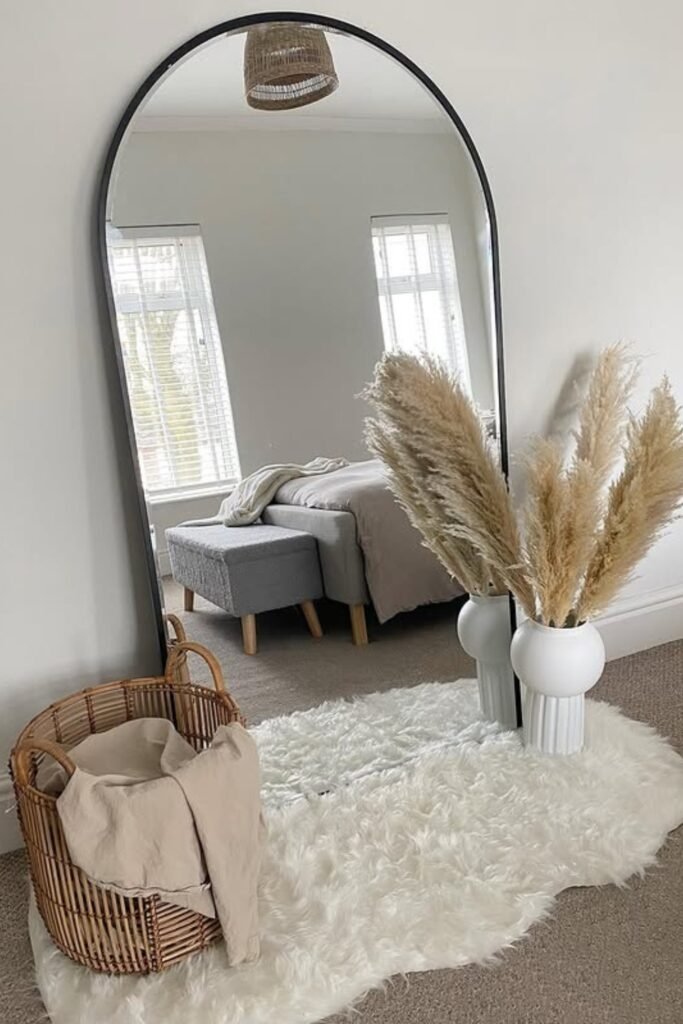
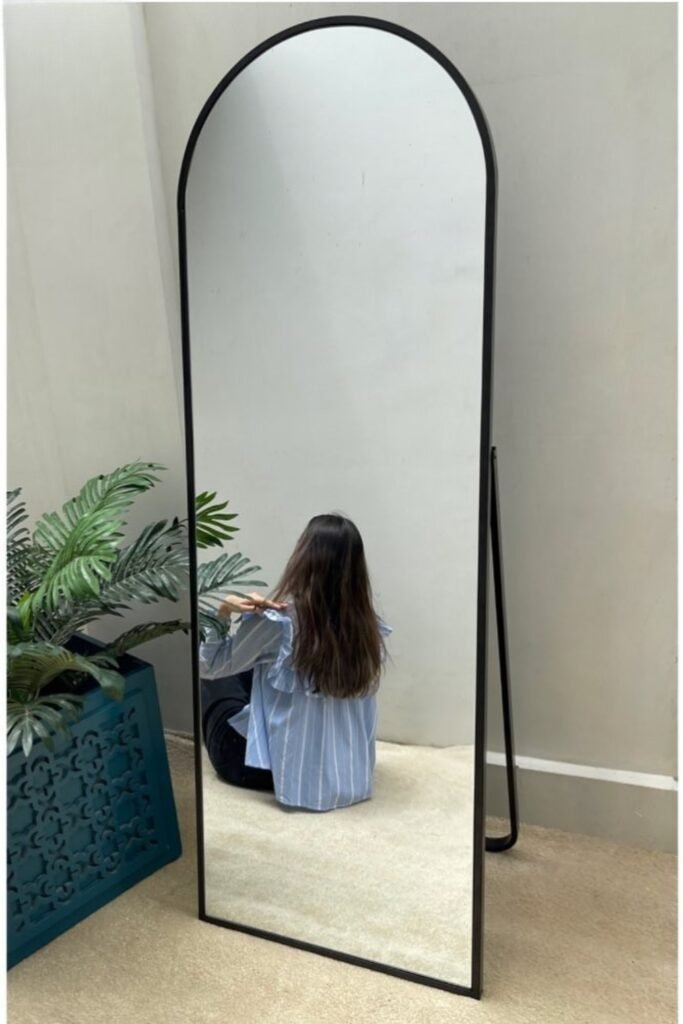
Slim Black Arched Frame
A slim black arched frame makes tight bedrooms feel taller by visually stretching vertical wall space upward naturally.
Recreate it using thin metal trim or painted MDF, fixed directly onto mirror edges with strong adhesive safely.
This works best when mirrors lean slightly, avoiding drilling while still giving a clean architectural outline look indoors.
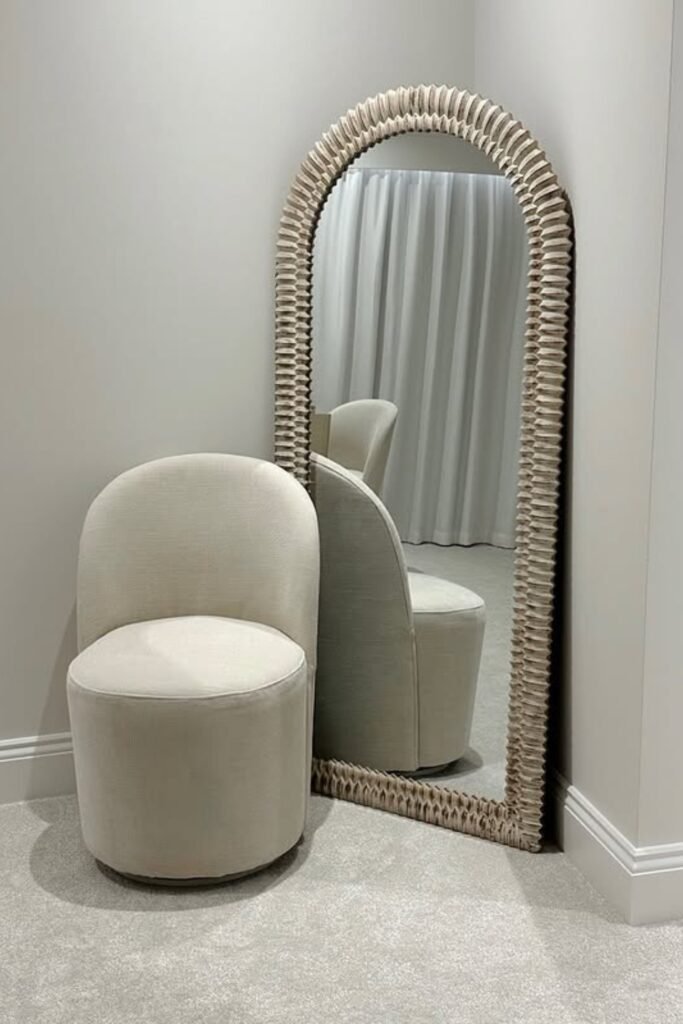
Textured Sculpted Arch
Deeply textured frames add softness and depth, turning empty corners into intentional dressing or reading spots inside homes.
Build this look by layering carved wood strips around an arched mirror, then sealing surfaces evenly before installing.
It suits low-traffic rooms where the frame becomes furniture-like, not something brushed past daily by people often there.
Minimal Black Rectangle
A thin rectangular frame keeps modern rooms calm while giving plain mirrors a finished boundary without visual noise.
Use flat metal bars or painted timber, mounting flush against walls for a crisp shadow line effect around.
This approach fits rentals well because frames can attach to mirror backs, not walls directly during temporary stays.
Classic White Wood Frame
Wide white frames brighten darker rooms, helping mirrors blend with trim and soft wall colors already used inside.
Cut basic boards with square joints, paint before assembly, then secure carefully around mirror edges using even pressure.
This works best where decor changes often, since white frames adapt easily without repainting or replacing materials later.
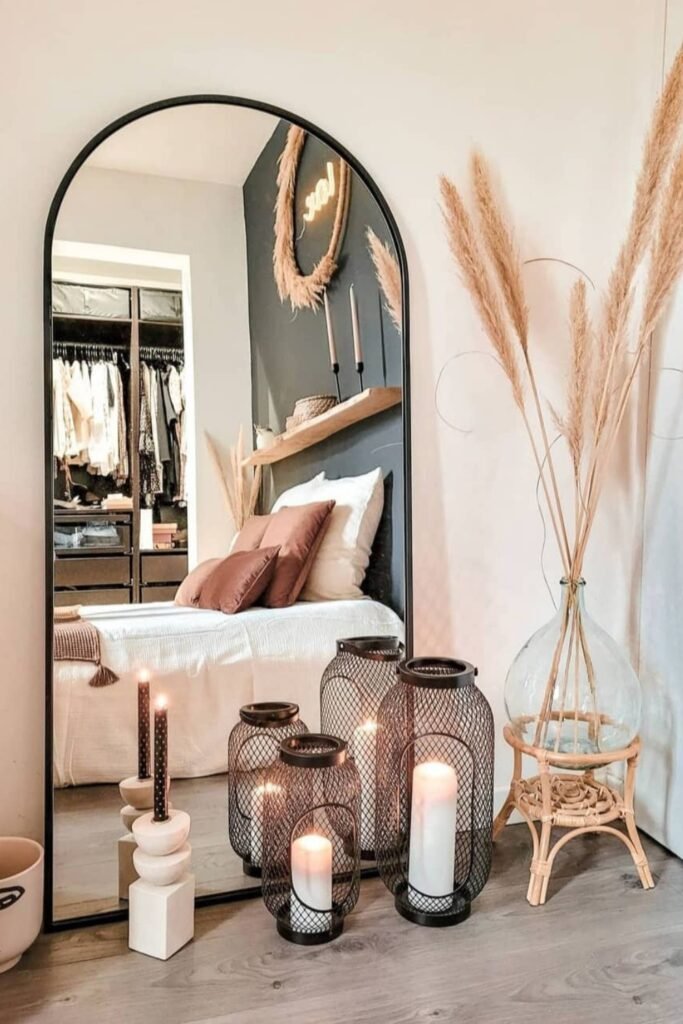
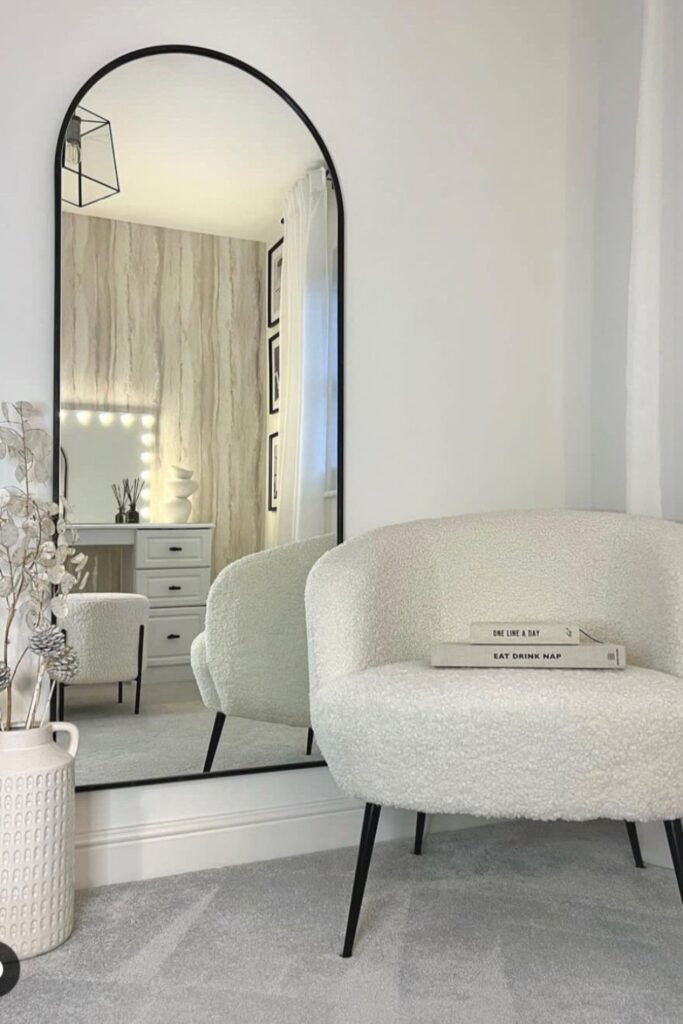
Bedroom Arch Statement
Arched black frames create a strong focal point, anchoring bedrooms with soft textures and neutral palettes visually together.
DIY this using pre-cut arch mirrors or flexible trim, keeping frame thickness minimal for elegance and balance overall.
Place it where lighting hits evenly, preventing harsh reflections and keeping the mirror practical daily for use indoors.
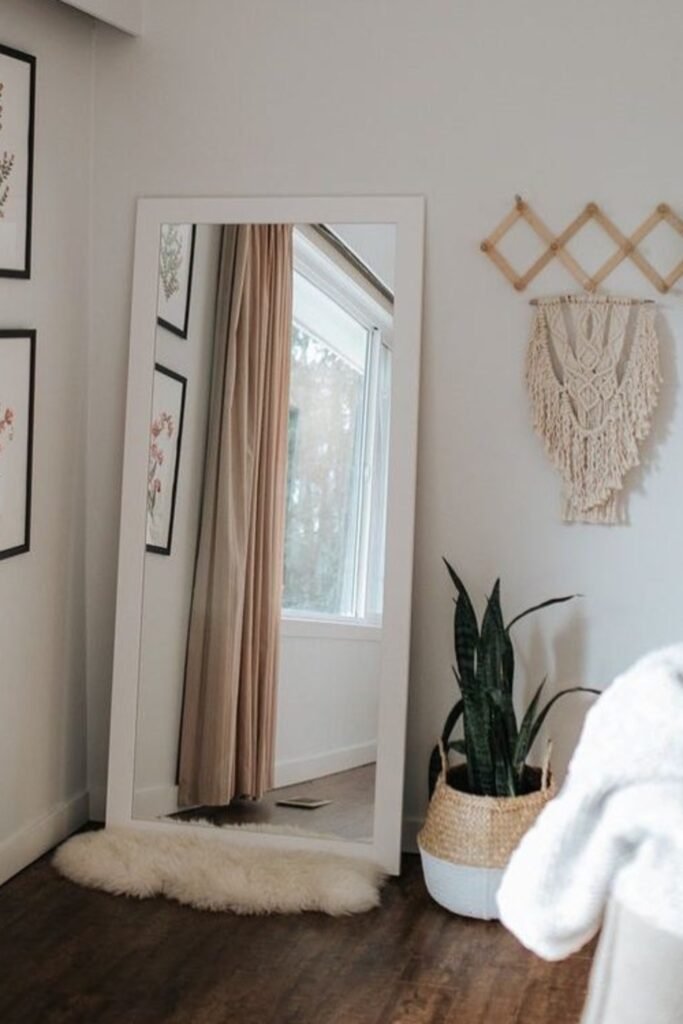
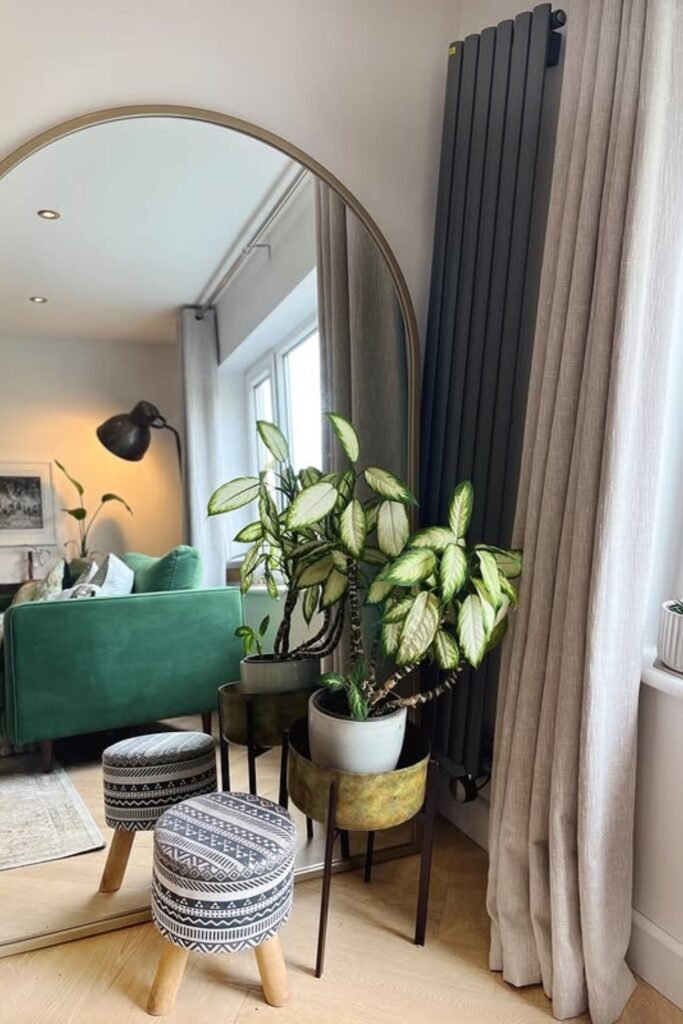
Leaning Floor Mirror Frame
Large floor mirrors framed lightly make small rooms feel expansive without adding bulky furniture pieces around the space.
Attach slim frames directly to mirror edges, then lean securely against walls with discreet floor stops hidden behind.
This method suits renters and quick upgrades, since installation avoids drilling and permanent wall changes during short-term living.
Antique Brass Leaner
An antique brass frame adds warmth, making bedrooms feel layered without overpowering soft furniture or light wall colors.
Build it using slim metal trim wrapped around mirror edges, secured neatly with mirror-safe adhesive along corners.
This style works best leaned, allowing easy placement and subtle character without drilling or permanent installation concerns.
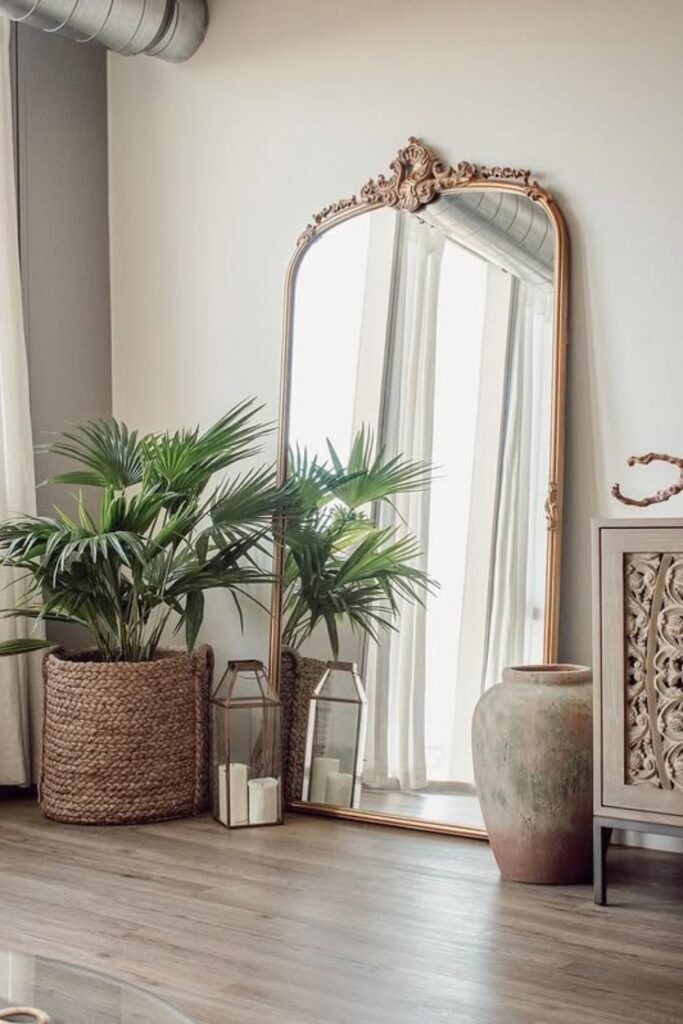
Gold Arch Floor Frame
Rounded gold frames soften modern interiors, balancing sharp furniture lines while reflecting natural light beautifully indoors.
Recreate this look by bending lightweight metal trim around arched mirrors, keeping joints tight for a seamless outline.
Place it near windows or seating areas where reflections enhance brightness without cluttering the visual flow.
Minimal Black Arch
Black arched frames ground airy rooms, adding contrast that defines mirror edges without heavy decorative details visually.
Use thin steel or painted aluminum trim, attached cleanly around mirror edges for a crisp silhouette finish.
This approach suits modern homes where simplicity matters more than ornamentation or layered textures overall.
Warm Brass Entry Mirror
Brass-toned frames elevate entryways, instantly making narrow spaces feel styled and intentionally welcoming from first glance.
DIY this by framing tall mirrors with narrow brass strips, sealing edges carefully to avoid fingerprints later.
It works well in transitional areas where durability and visual impact need to balance daily movement.

Soft Decor Leaning Frame
A light frame paired with decor accents turns mirrors into styling anchors rather than standalone reflective surfaces inside.
Attach a subtle frame directly to mirror edges, then style surrounding objects to support the frame visually.
This setup fits bedrooms where mirrors double as décor, not just functional pieces.
Black Metal Stand Frame
Metal stand frames add stability, letting mirrors stand independently without wall support or visible mounting hardware.
Construct this using welded or bolted metal supports fixed behind framed mirrors for balance and safety.
This is ideal for renters who want flexibility, since mirrors move easily without wall modifications.
Cane Wrapped Rectangle Frame
Cane-wrapped frames soften sharp mirror edges, making bedrooms feel warmer without adding bulky wood or heavy ornamentation.
Recreate this by fixing cane webbing sheets onto a thin wooden frame, sealing edges before attaching around glass.
It works best in calm spaces where texture adds interest without competing with furniture lines or wall art.

Ornate Vintage Arch
Decorative carved frames turn simple mirrors into statement pieces, ideal for living rooms or styled entry corners.
DIY this using resin moldings attached to a basic frame, painted or finished to highlight carved details cleanly.
This approach suits spaces with fewer accessories, allowing the mirror to carry most visual weight naturally.
Dark Sculpted Wave
Sculpted wave frames add movement, helping plain hallways or empty corners feel intentional rather than forgotten.
Shape this look using layered MDF or foam board, sand curves smoothly, then finish with stain or paint.
It’s best placed where foot traffic stays light, protecting the sculpted edges from accidental bumps.
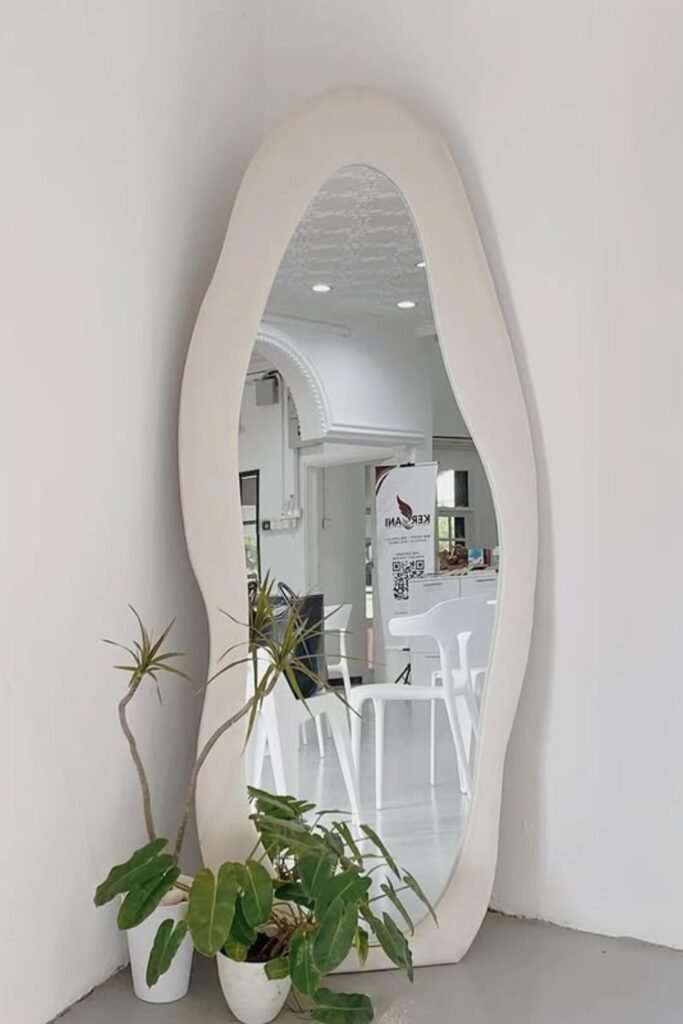
Soft Organic White Form
Organic white frames create gallery-like calm, making modern interiors feel softer and more approachable visually.
Build this by sculpting lightweight plaster or compound over a base frame, smoothing curves before final sealing.
Use it in minimalist rooms where the mirror acts as functional art rather than decoration filler.
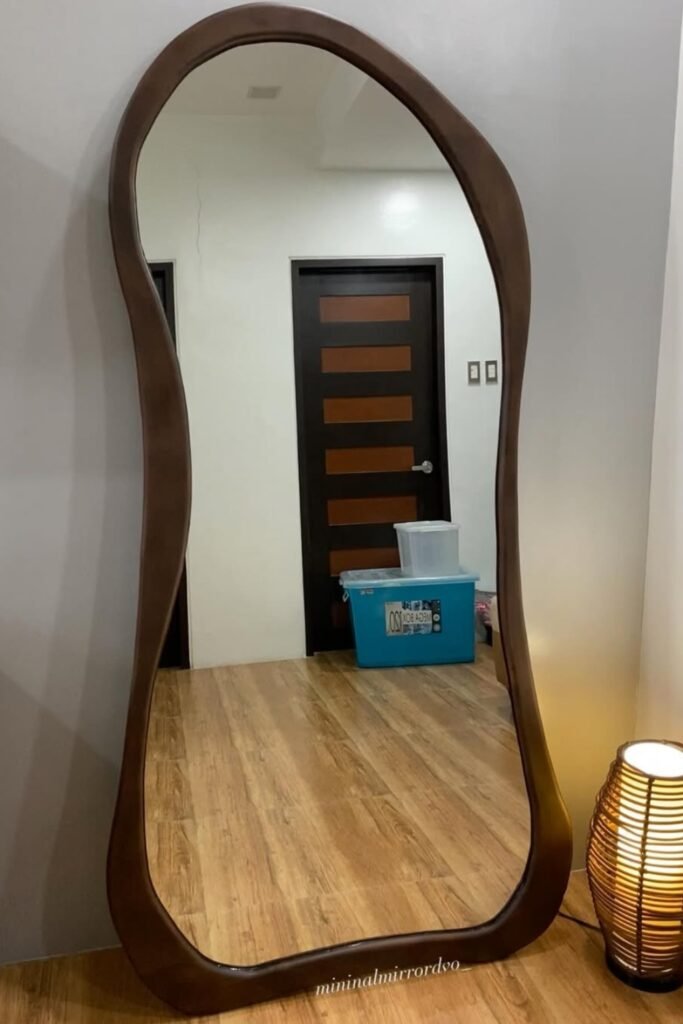
Natural Wood Pebble Frame
Rounded wood frames bring warmth, pairing well with bedrooms that rely on natural textures and soft lighting.
Cut layered plywood into an irregular outline, sand thoroughly, then oil or seal for durability.
This works best on walls where the mirror stays mounted, keeping the organic shape stable over time.
Sculpted Cloud Edge
Cloud-like frames blur harsh geometry, helping kitchens or dining areas feel relaxed and design-forward instantly.
Create this using carved foam or resin-coated forms, mounted carefully around a mirror panel.
It fits modern homes where playful shapes balance clean cabinetry and straight architectural lines nearby.
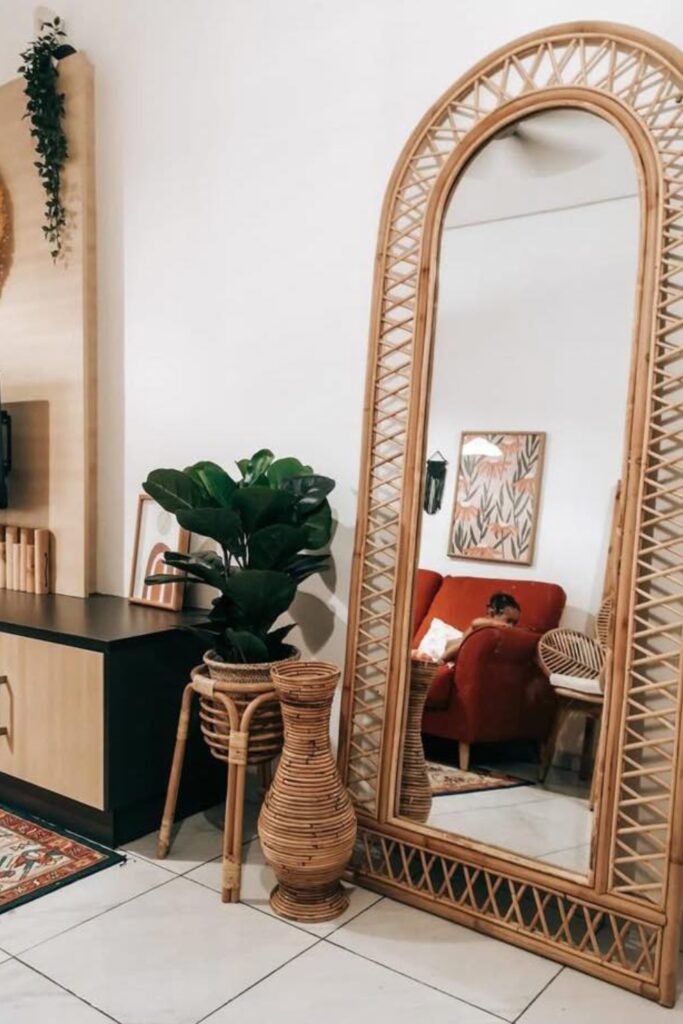
Rattan Arch Statement
A woven rattan arch instantly adds warmth, turning living rooms into relaxed, boho-inspired spaces without heavy furniture presence.
Recreate this by bending rattan or cane strips around a wooden arch frame, securing tightly before mounting the mirror.
It works best in airy rooms where natural textures soften modern cabinetry and clean wall finishes.
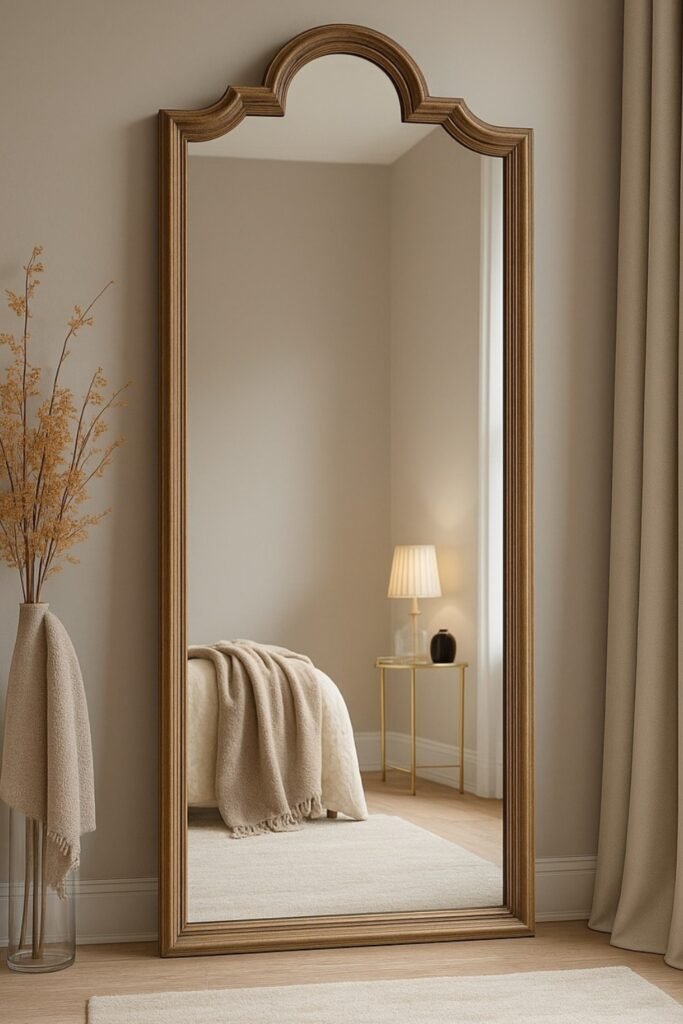
Classic Molded Wood Arch
Traditional molded frames bring elegance, making bedrooms feel finished even with minimal decor and neutral color palettes.
Build this look using layered wood moldings, carefully cut to form arches, then stained evenly for depth.
Place it where symmetry matters, such as beside beds or dressers, to maintain visual balance.
Asymmetrical Organic Outline
Irregular outlines break rigid layouts, helping narrow corners or hallways feel intentional instead of awkwardly unused.
Shape this DIY using flexible MDF or plywood, sanding curves smooth before painting or sealing edges.
This style suits modern homes where softer lines contrast straight walls and structured furniture layouts.

Hi, my name is Ali Mehmood! I’m a passionate writer and DIY enthusiast who loves turning creative ideas into practical, hands-on projects.
I created this website to share inspiring, budget-friendly ideas that you can do yourself – whether it’s organizing your home, crafting something unique, or creating fun projects for kids and pets.
I believe DIY isn’t just a hobby – it’s a smart way to save money, reduce waste, and enjoy the satisfaction of making things with your own hands.
I’m excited to have you as part of this growing community, and I’ll continue bringing you helpful, realistic, and fun DIY ideas you can actually use.


