
This post may contain affiliate links: read full affiliate disclosure.
Building a DIY paver patio feels exciting until you start thinking about the parts you cannot see later: the base, the digging depth, the sand layer, the slope, and the drainage.
Most beginners are not confused by the idea of placing pavers. They worry about doing all that work and then watching the patio sink, shift, hold water, or grow weeds after a few rainy weeks.
That is why this project needs more than a pretty layout. A strong patio starts with the ground under it.
When you understand how deep to dig, what type of base to use, how to level the area, and how to move water away from the house, the whole process becomes much easier.
In this article, you will learn how to plan a DIY paver patio the right way, avoid the most common beginner mistakes, and build an outdoor space that looks clean, stable, and useful.
Let’s dive in!
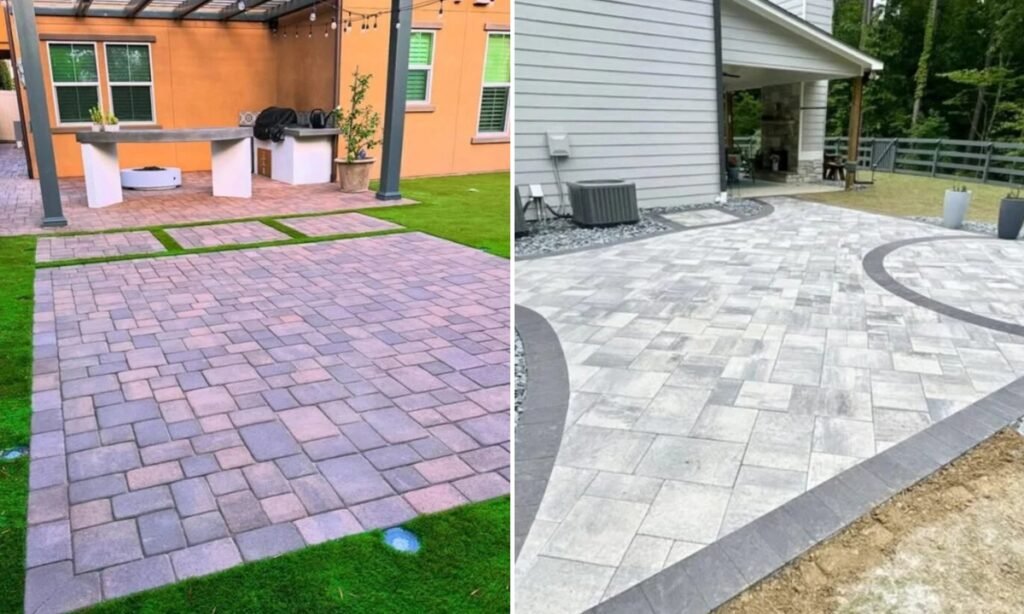
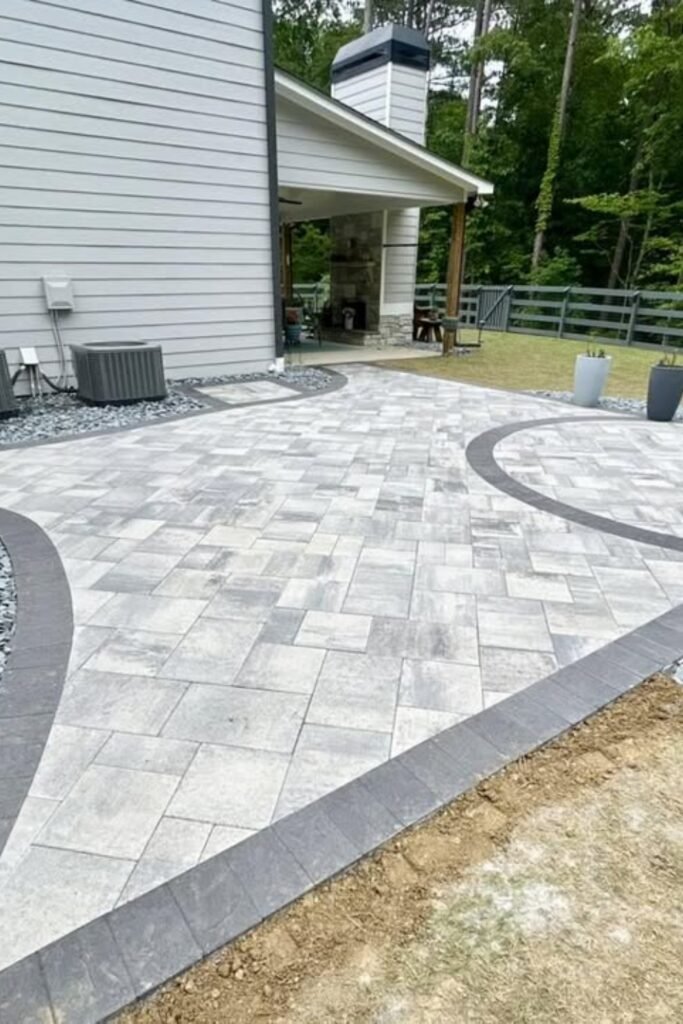
Curved Border
Use a curved paver border when your patio sits beside a long house wall and needs a softer shape instead of another hard rectangle outside.
The dark edge frames the lighter center, helps the curve feel intentional, and gives rock beds or planting zones a cleaner visual stopping point outside.
For a DIY build, mark the curve carefully with a hose first, so the border does not look uneven once installed beside the lawn later.
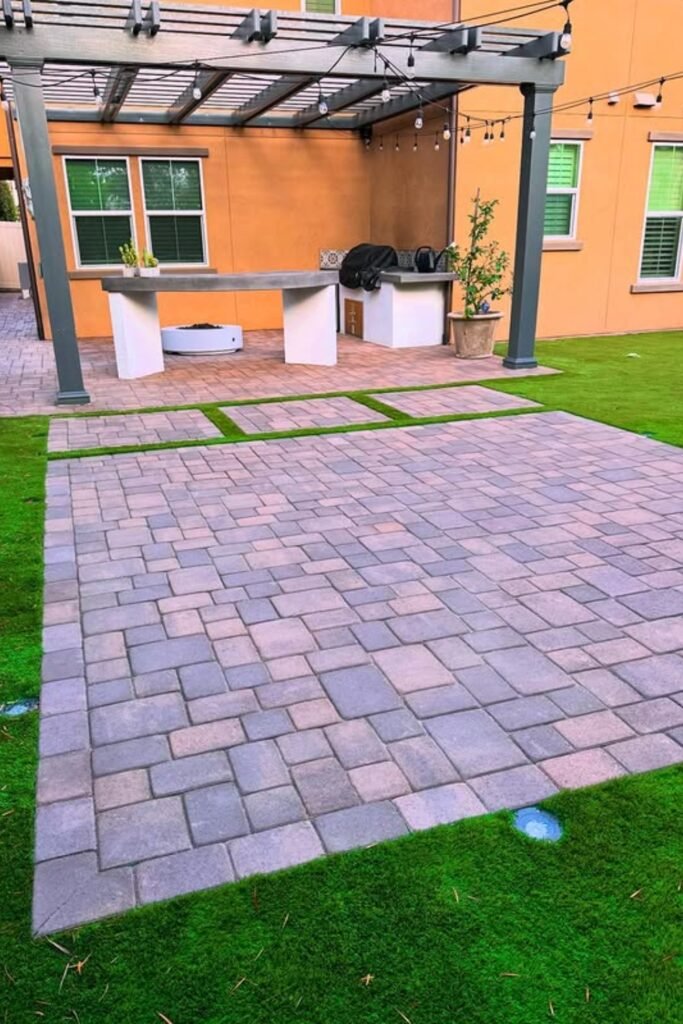
Grill Zone
Choose a simple rectangular paver patio when you want a grill zone, because straight edges make the base easier to measure and compact properly from the start.
The steady surface works well under counters, appliances, stools, or storage, especially if you plan to use the space for weekend cooking with guests nearby.
Leave thin grass breaks or border strips nearby to soften the hardscape, so the patio still feels connected to the yard around the cooking area.
Soft Round Edge
Round the patio edge if your backyard already has curved beds, open lawn, or a softer landscape style around the house near the main seating.
The darker border is doing more than decoration here because it separates the patio from mulch and makes the curve easier to read from outside.
Keep furniture slightly inside the curve, so chairs do not sit too close to the edge or feel awkward on the lawn during daily use.

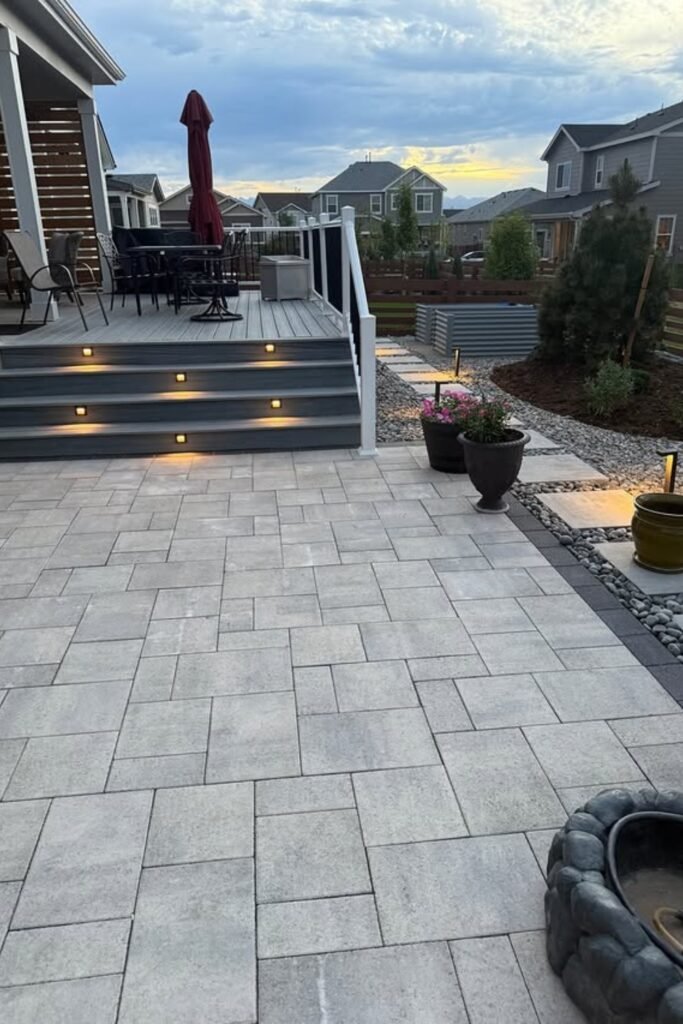
Lighted Walkway
Use large pavers to connect a deck with a lower patio when your backyard has steps, gravel pockets, and different outdoor levels near the house.
Path lights make this transition feel safer after sunset, but they also help the whole patio look more finished and planned from every viewing angle.
Keep the walking route wide enough for guests, planters, and furniture movement, so the patio stays practical instead of only decorative during busy outdoor evenings.
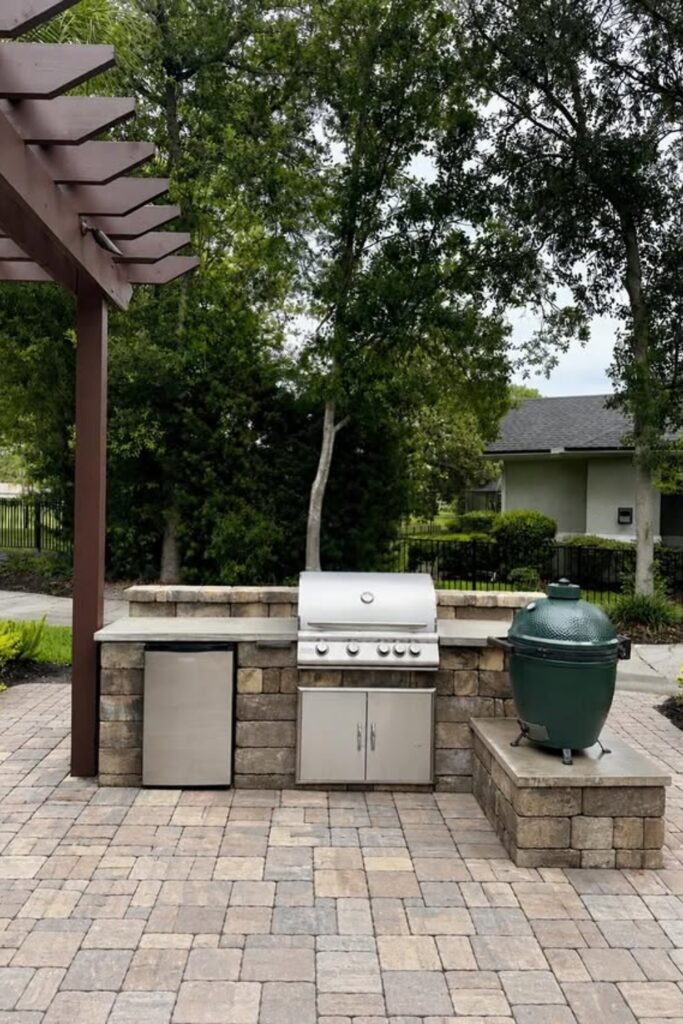
Outdoor Kitchen
Build the paver patio around your cooking zone when you want the grill, counter space, and smoker to feel like one permanent outdoor setup together.
Matching stone walls and square pavers keep the area sturdy, while the pergola gives shade without closing off the view around the yard too much.
Leave enough walking space in front of appliances, so guests can move comfortably while someone cooks, opens cabinets, or checks food during gatherings outside together.
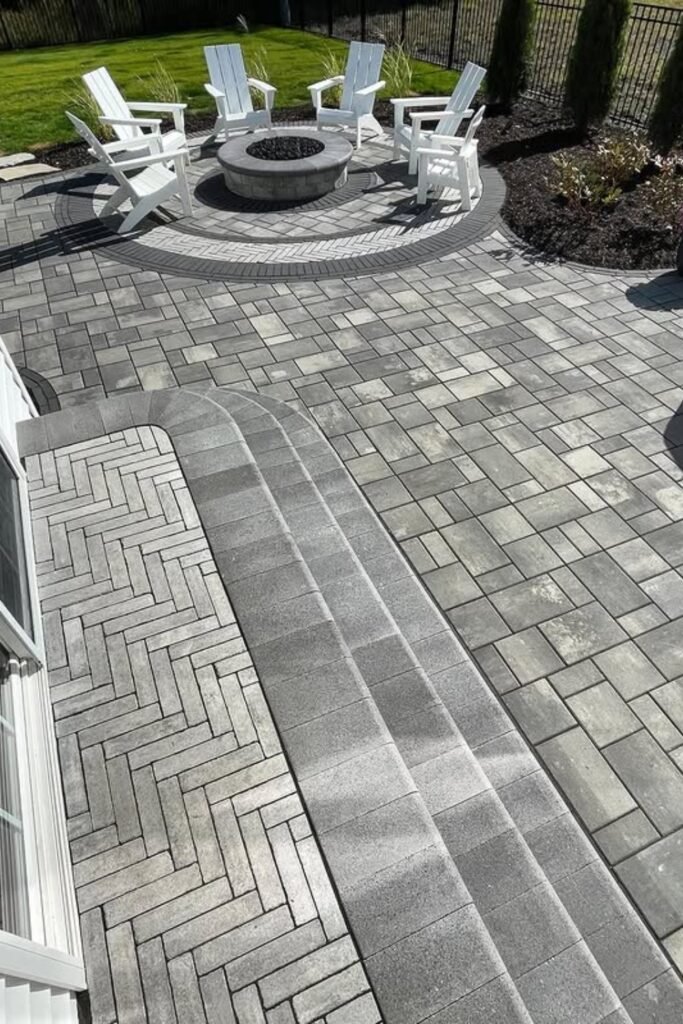
Frame The Fire
Use a circular paver detail around the fire pit when you want the seating area to feel separate from the main patio without building walls.
The darker ring draws attention to the chairs, while the wider patio gives you extra room for traffic, planters, and casual conversation nearby guests too.
If your patio connects to steps, change the paver pattern near the doorway so the entrance feels intentional, not like leftover space beside the house.
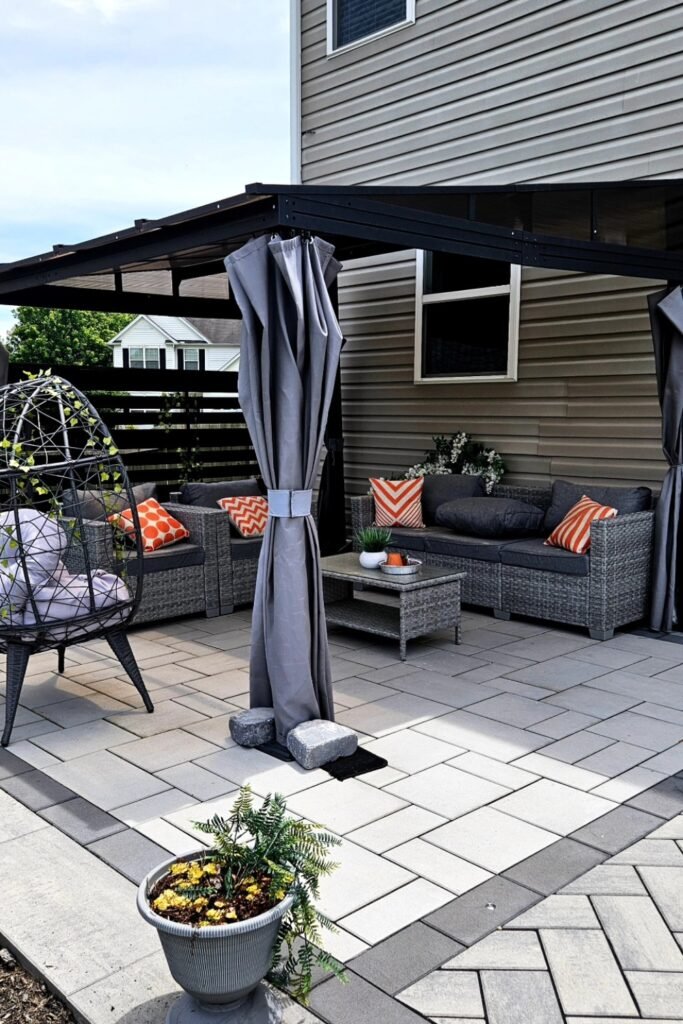
Anchor The Lounge
Set a gazebo on a clean paver pad when you want your backyard seating to feel like a real outdoor room instead of scattered furniture.
The dark border helps define the lounge area, while large light pavers keep the floor calm under sofas, tables, and accent chairs for daily use.
Add curtains or privacy screens only where you need shade or coverage, so the patio stays open but still feels cozy during long summer evenings.
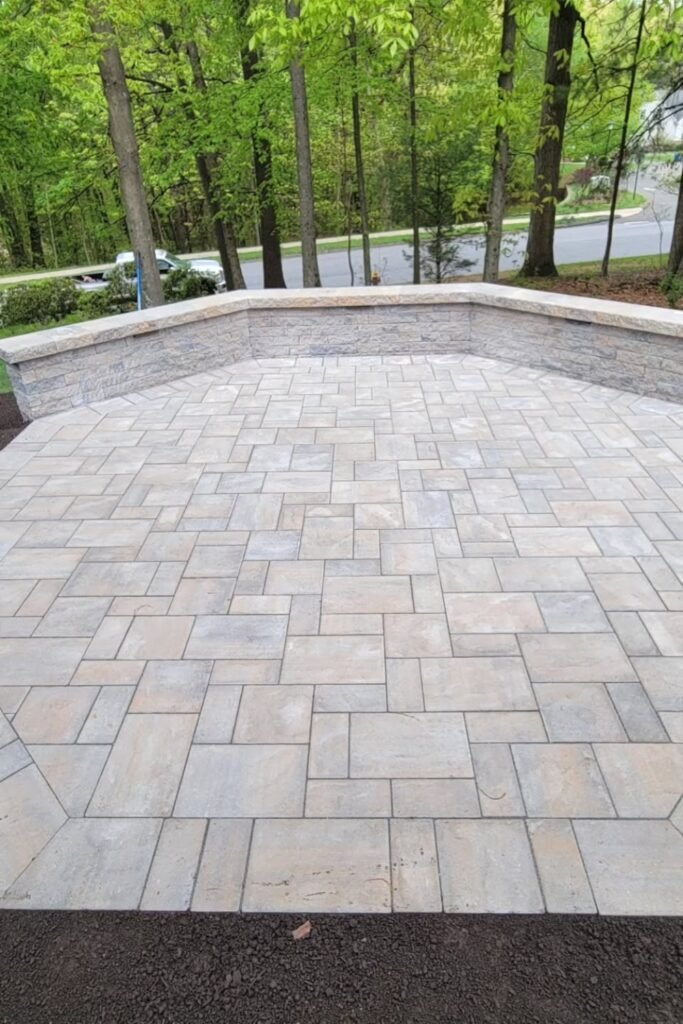
Use Seating Walls
A low stone wall can turn a simple paver patio into a more finished space without adding loose furniture around every edge of the yard.
It works especially well on sloped or wooded lots because the wall creates a clear boundary and makes the patio feel protected from open sides.
Keep the center pattern clean if the wall already adds detail, so the floor does not compete with the built-in border around the raised patio.
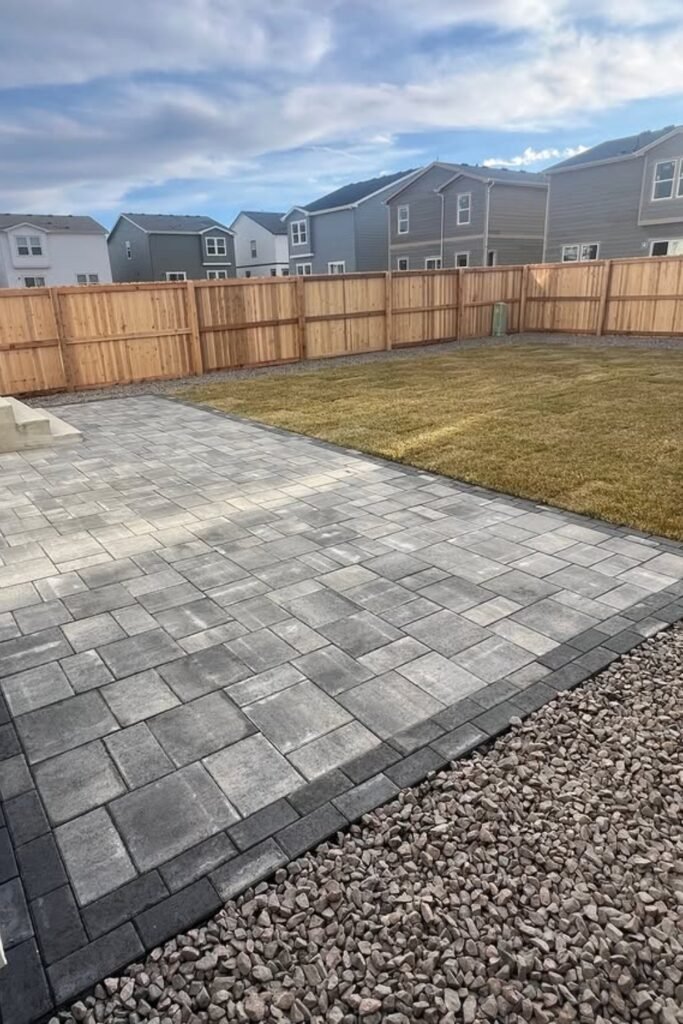
Keep Lawn Breathing
Leave a wide lawn beside the paver patio when your yard needs both hard seating space and open play area for kids or pets outside.
The dark border gives the square layout a cleaner finish, while gravel along the edge keeps mud from washing onto the pavers after rainstorms.
For a beginner build, this simple shape is easier to measure, compact, and maintain than curves, especially near a fence or side yard corner space.
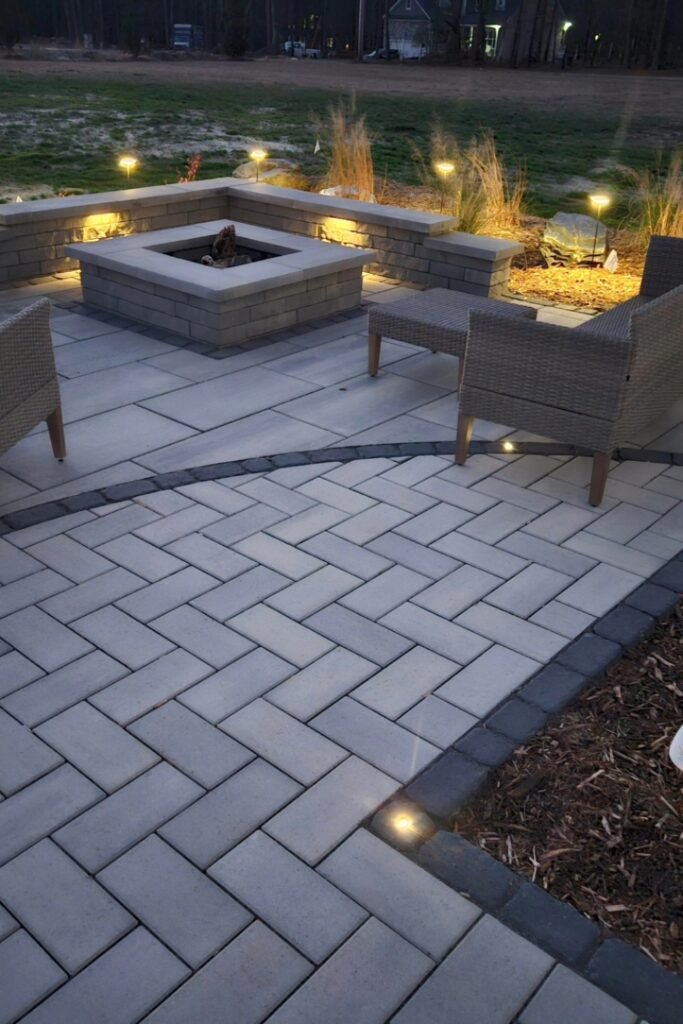
Light The Firepit
Bring lights into the paver design when the patio will serve as your evening hangout, not only a daytime seating spot outside with guests nearby.
The built-in fire pit, seating wall, and low path lights create zones without making the space feel crowded or too heavy at night for guests.
Use darker pavers as borders or curved accents, so the fire area feels special while the walking paths still stay clear and safe after sunset.
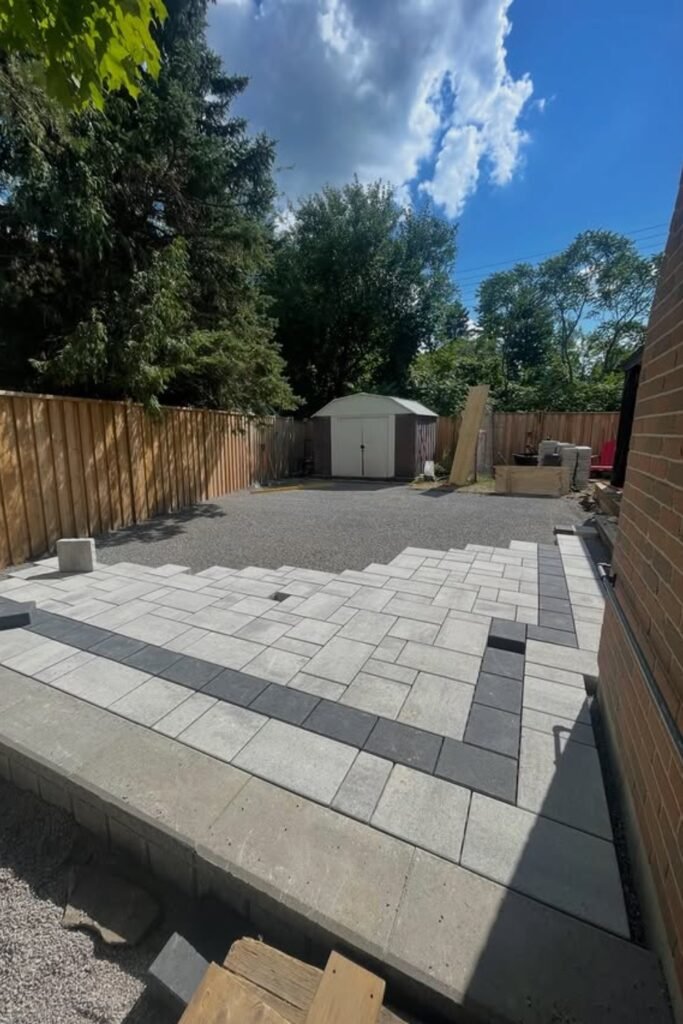
Plan The Zones
Break a large backyard into zones when one surface needs to handle storage, walking space, and future patio seating near the house without clutter later.
The paver section works as the finished living area, while gravel farther back keeps the shed and work zone easier to manage on busy weekends.
Add a strong border before furniture goes in, because separate materials can look messy if the edge line is not planned early during installation work.
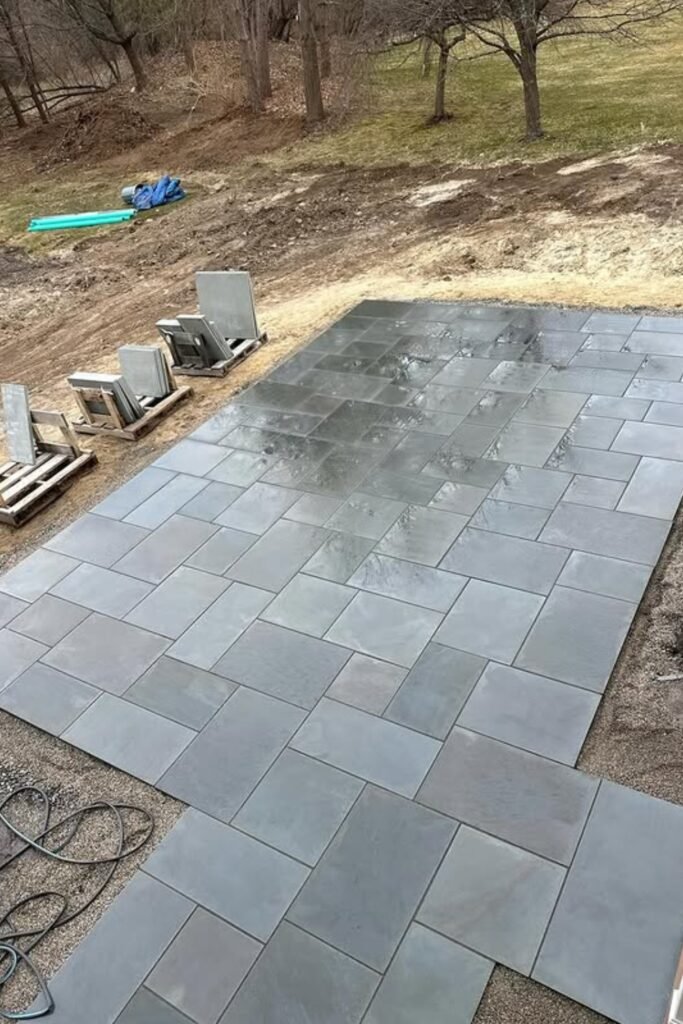
Handle The Slope
Large-format pavers can look clean on open ground, but the base matters more when the yard has slope, exposed soil, and runoff after rainstorms.
Use this style only after the ground is properly graded, because wide slabs will show low spots faster than smaller textured pavers over time outside.
Keep gravel around unfinished edges until landscaping is ready, so water can move away and the patio does not sit against loose dirt after storms.
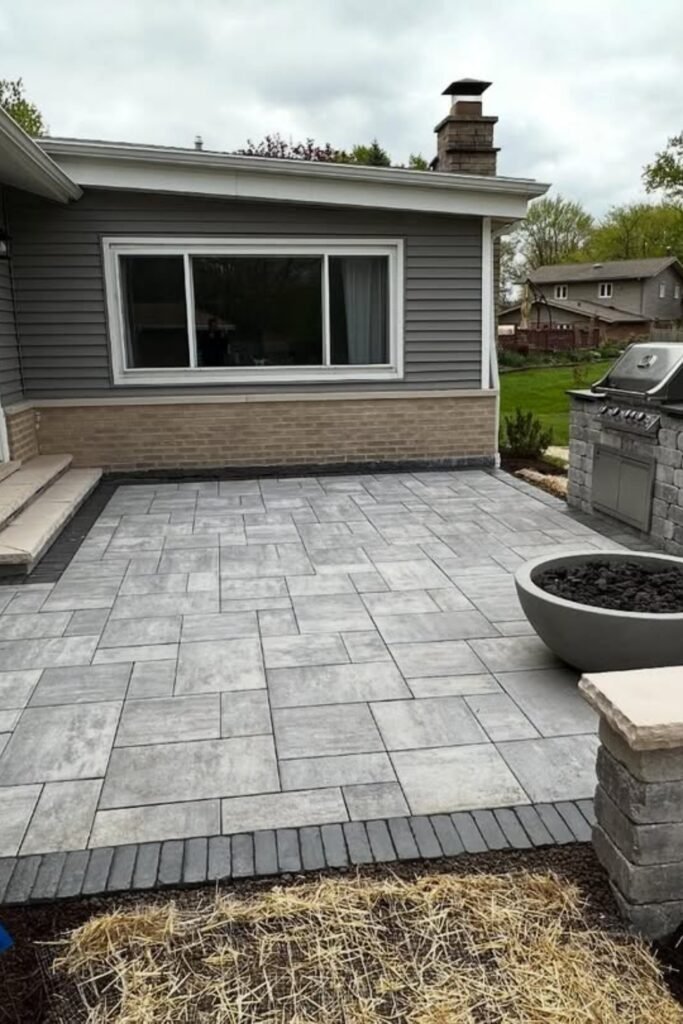
Build Near Kitchen
Place the paver patio close to your back door when you want the grill, seating wall, and indoor access to work together easily.
The dark border gives the light pavers a clean finish, while the built-in counter keeps the cooking zone from feeling random outside.
Leave enough open floor in the center, so furniture, guests, and grill movement never feel squeezed between the house and stone features.
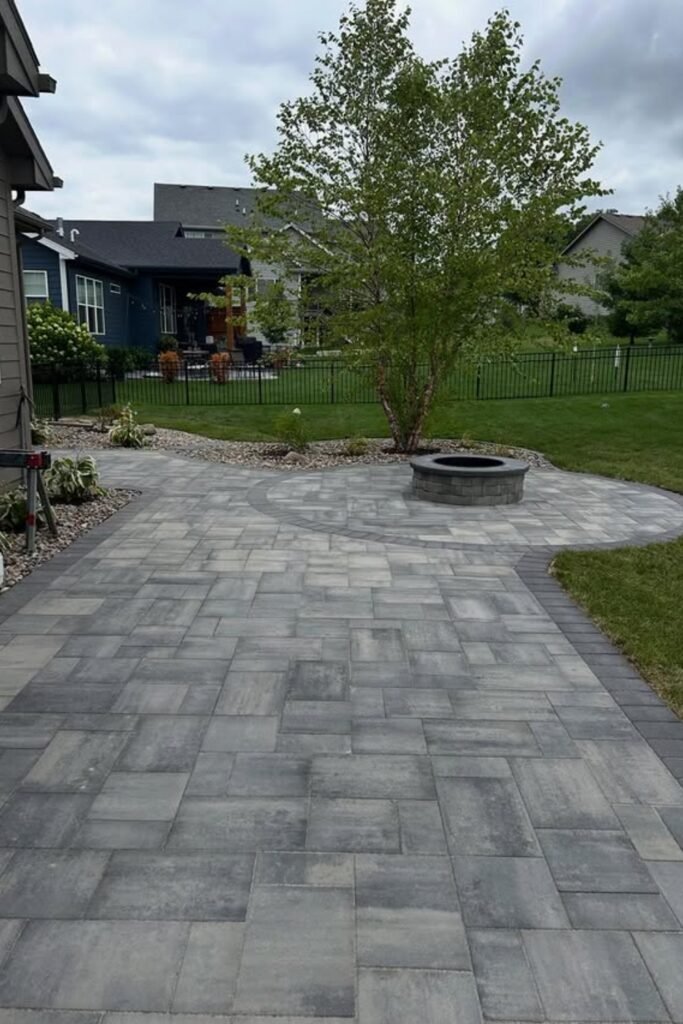
Curve Around Fire
Let the patio curve around a fire pit when you want a softer backyard layout that feels connected to the lawn and garden beds.
The round fire area becomes the focal point, while the wide paver path gives people room to walk without crossing through chairs.
Use gravel borders near planting areas, so water can drain better and the patio edge stays cleaner after rain or regular lawn watering.
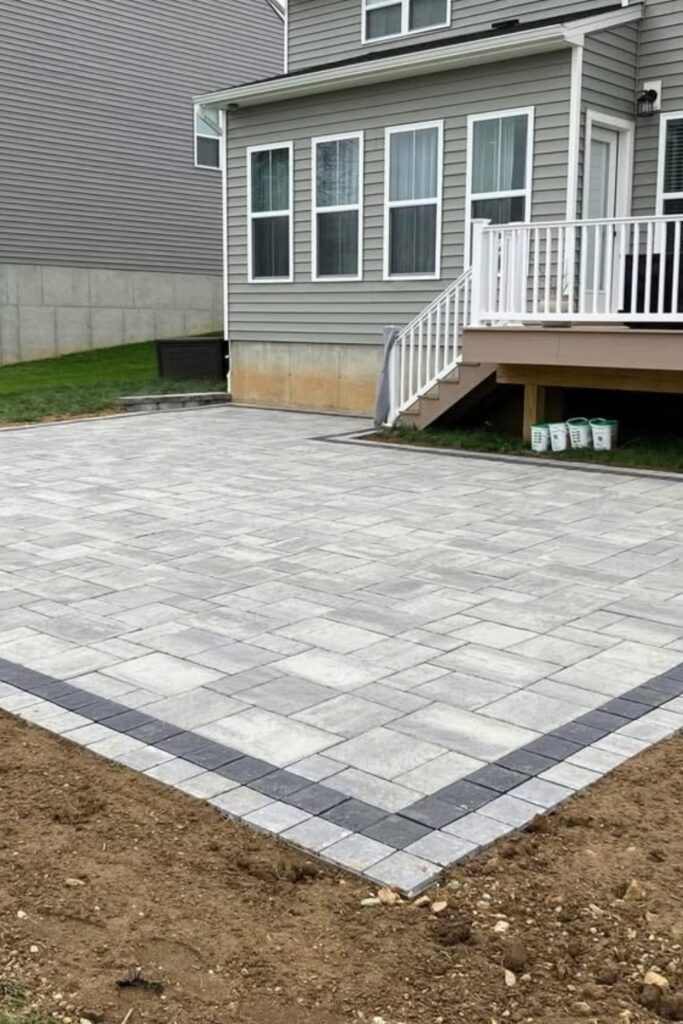
Size For Gatherings
Go larger with the patio footprint when your deck needs a true outdoor extension instead of a tiny landing under the stairs.
The dark border helps the big square layout feel finished, while the simple paver pattern keeps the surface calm and easy to furnish.
Before you copy this idea, measure your table, chairs, grill, and walking space so the patio does not feel crowded after installation.
Check Every Row
Watch the paver lines closely during installation because small gaps or crooked rows become much harder to fix once the patio grows.
A rubber mallet, straight edge, and patient layout work help each paver sit tighter before sand locks the joints in place later.
This is where DIY patience matters most, because a strong base still needs careful placement to make the final surface look professional.
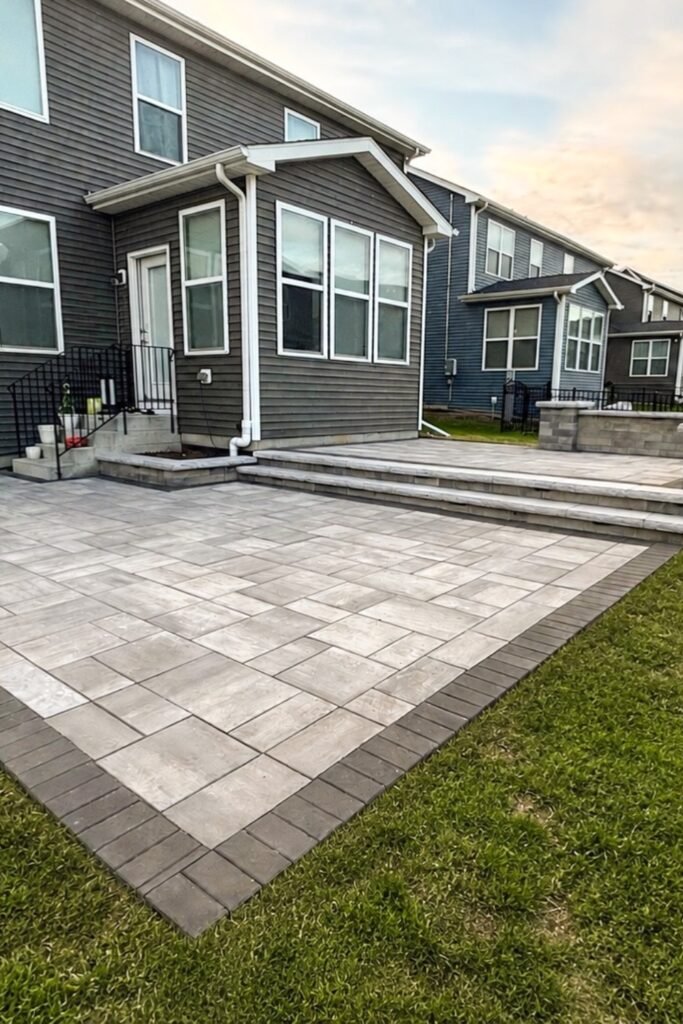
Extend The Deck
Raise the paver patio near the deck when you want both levels to feel connected instead of looking like two separate outdoor areas.
The wide steps make the transition smoother, while the dark border frames the lower patio and gives the whole backyard a cleaner finish.
Keep the main floor open for furniture, so the space can handle dining, lounging, and walking without feeling tight near the house.
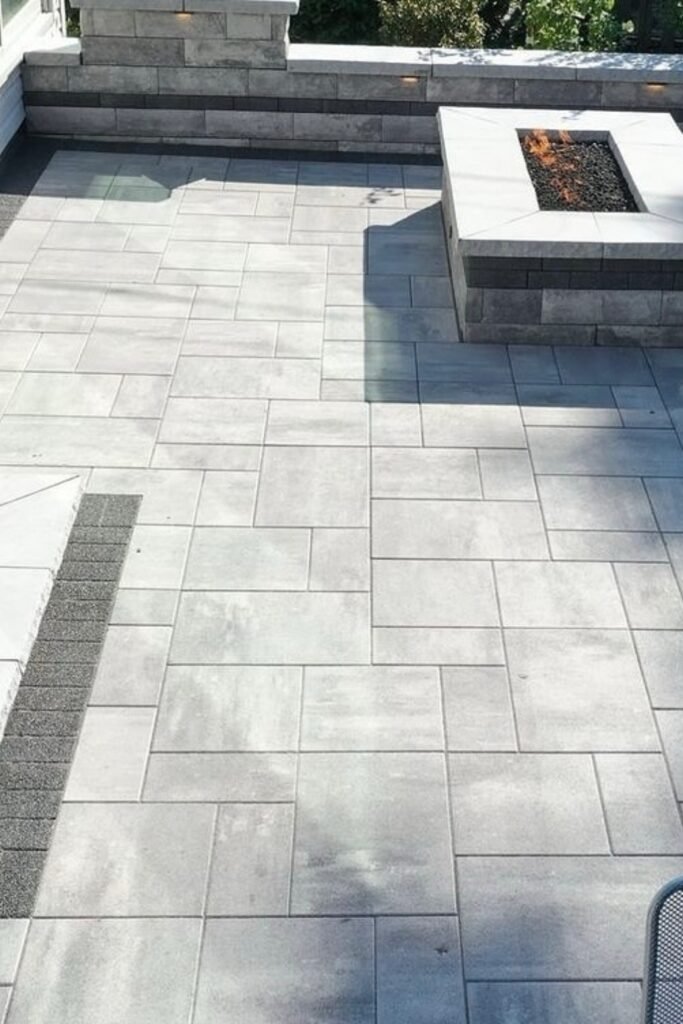
Box The Fire
Use a built-in fire feature when you want the paver patio to feel more finished and less like loose chairs around open concrete.
The seating wall adds structure, protects the edge, and creates a cozy corner without needing extra furniture against every side of the patio.
Keep the center clear around the fire, so people can move safely and chairs do not sit too close to the heat.
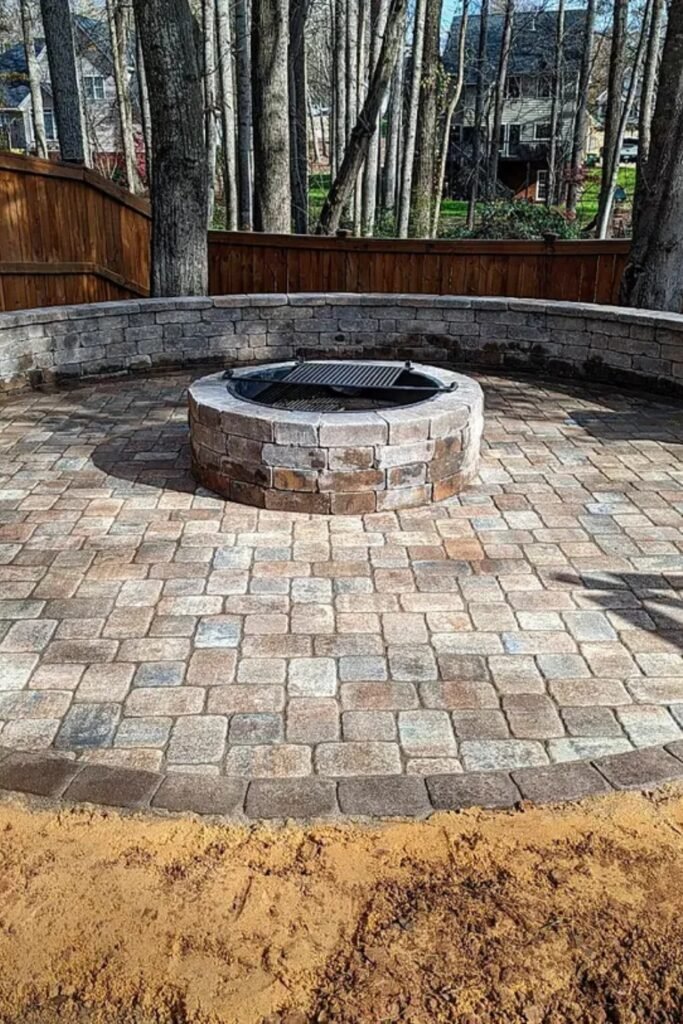
Go Rustic Round
Choose a rustic circular paver patio when the fire pit needs to feel like the main feature instead of an extra backyard add-on.
The curved seating wall makes the space feel tucked in, while the mixed paver colors bring warmth against the fence and trees.
For this look, keep the outside border strong because round patios show uneven edges faster than simple square layouts after installation.
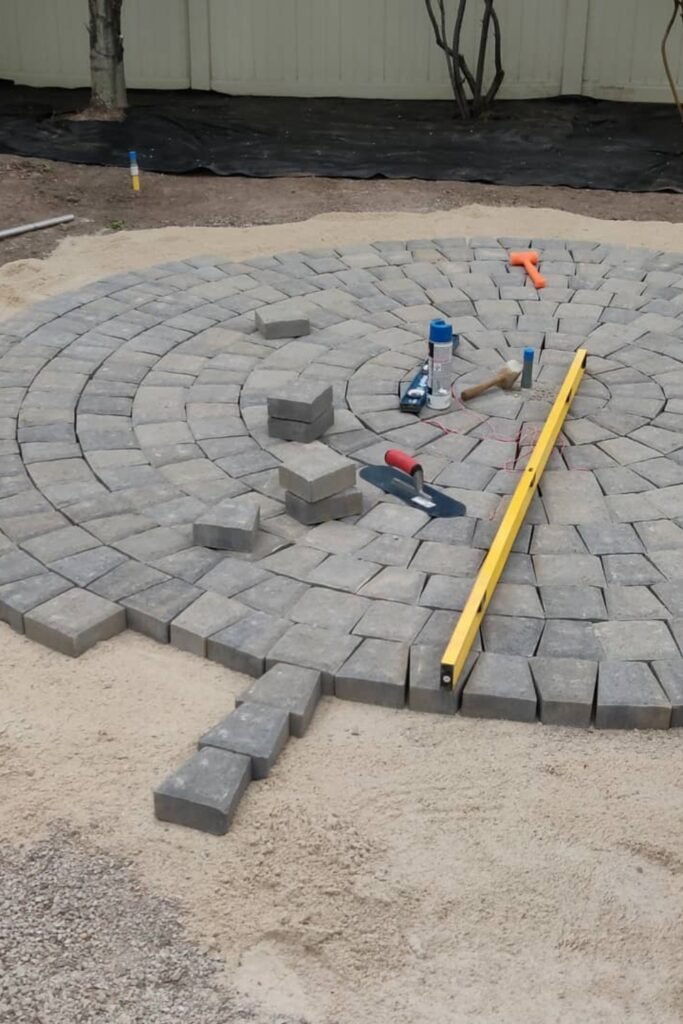
Start From Center
Lay circular pavers from the center outward when you want the pattern to stay balanced instead of drifting unevenly toward one side.
A string line, level, and steady spacing matter here because every ring depends on the row before it staying clean and tight.
Use this idea for a fire pit zone, but expect more patience because round patterns take more planning than basic patio blocks.
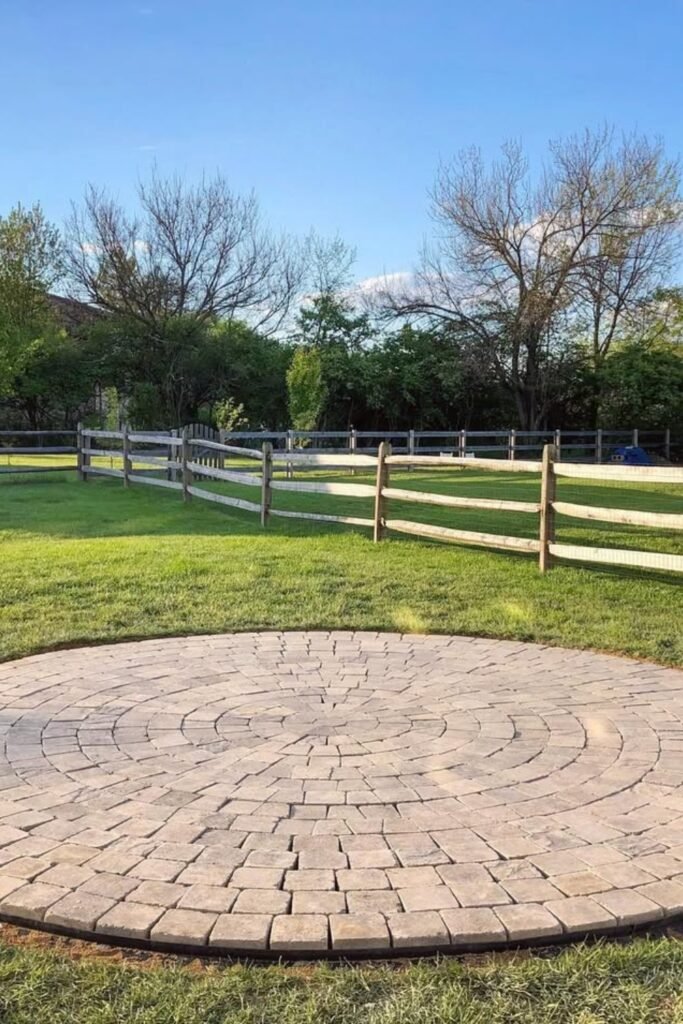
Perfect Circle
Choose a full circular patio when you want a simple open yard to have one clear destination without adding walls, steps, or heavy furniture.
The ring pattern naturally pulls attention toward the center, so it works well for a future fire pit, seating set, or small table.
Keep the edge restraint strong and consistent, because round patios need a clean outer line to stop the shape from looking uneven later.
FAQs
Can a beginner build a DIY paver patio?
Yes, a beginner can build a DIY paver patio, but the project becomes easier when you start with a simple square or rectangular layout.
The hard part is not placing the pavers; it is preparing the base, keeping the slope right, and compacting each layer properly.
Avoid curved edges, large patios, or complicated patterns for your first project because they need more cutting, measuring, and leveling.
What is the biggest mistake to avoid when building a paver patio?
The biggest mistake is treating the base like a quick step. A weak or uneven base can make the pavers sink, shift, or collect water after rain.
Always dig deep enough, add the right gravel base, compact it well, and use only a thin sand layer for leveling.
If the foundation under the pavers is strong, the finished patio has a much better chance of lasting.

Hi, my name is Ali Mehmood! I’m a passionate writer and DIY enthusiast who loves turning creative ideas into practical, hands-on projects.
I created this website to share inspiring, budget-friendly ideas that you can do yourself – whether it’s organizing your home, crafting something unique, or creating fun projects for kids and pets.
I believe DIY isn’t just a hobby – it’s a smart way to save money, reduce waste, and enjoy the satisfaction of making things with your own hands.
I’m excited to have you as part of this growing community, and I’ll continue bringing you helpful, realistic, and fun DIY ideas you can actually use.


