
This post may contain affiliate links: read full affiliate disclosure.
Making a DIY worm compost bin sounds easy until you start thinking about what can go wrong.
Nobody wants a bin that smells bad, attracts fruit flies, leaks onto the floor, or sends worms crawling up the sides because the bedding is too wet, too dry, or too full of food scraps.
They want to compost kitchen waste at home, but they also want the setup to feel clean, simple, and easy to manage without turning into a messy science experiment.
The right container, bedding, airflow, moisture, worms, and feeding routine all matter more than the bin looking perfect.
Once those parts are balanced, the worms can quietly turn fruit peels, vegetable scraps, cardboard, and paper into rich worm castings for your plants.
In this article, you’ll learn how to build a DIY worm compost bin, what to put inside it, where to keep it, and how to avoid the common problems that make beginners give up too soon.
Let’s dive in!
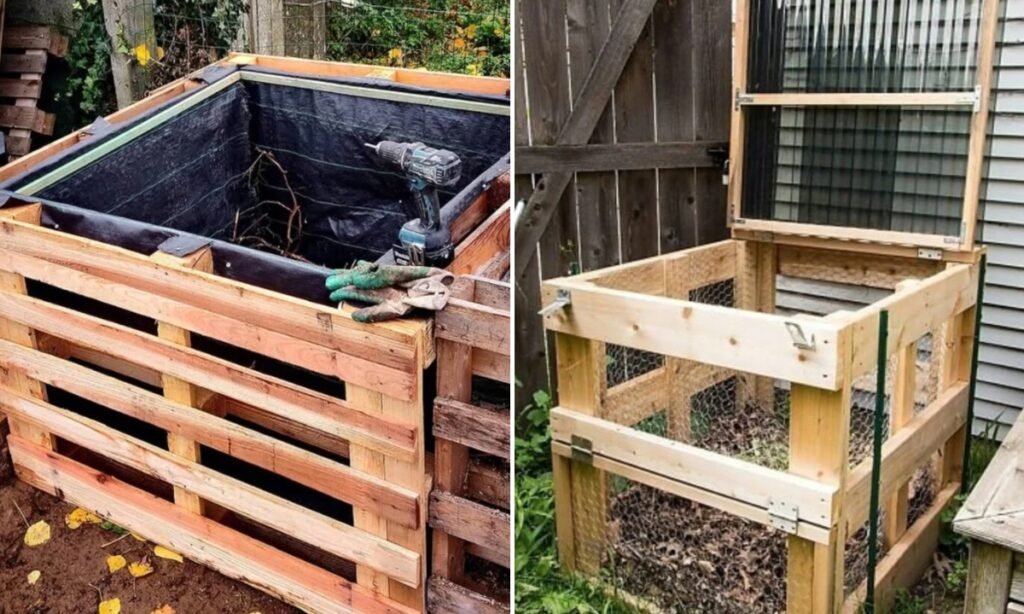
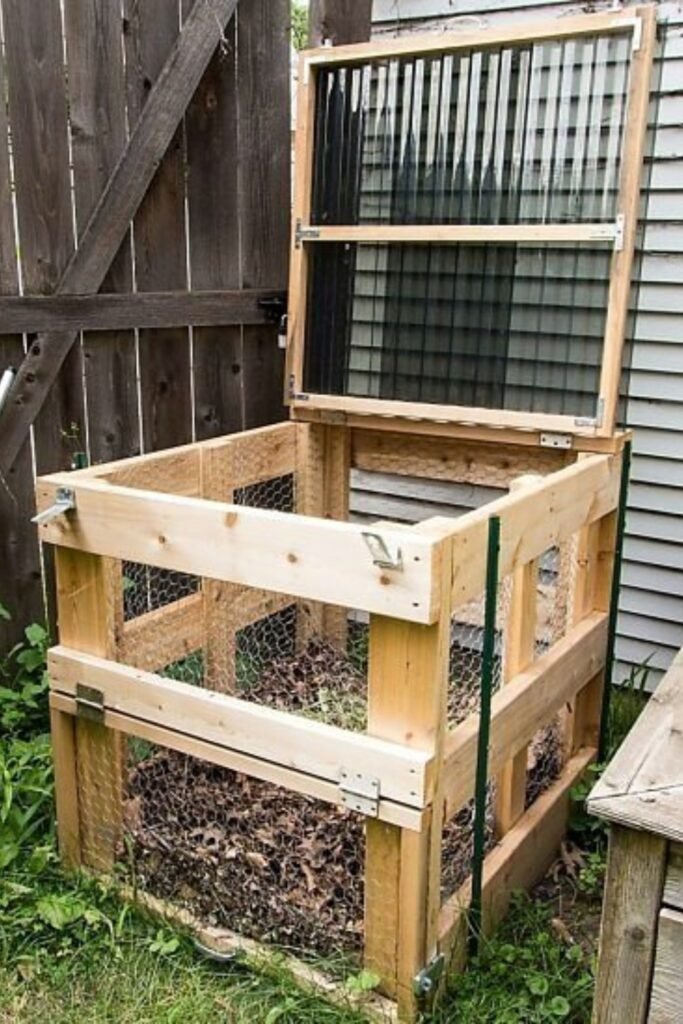
Screened Lid Bin
A hinged screen lid solves two beginner problems at once because it lets air move through the bin while still covering leaves, scraps, and bedding.
Place this setup near a fence or garden bed where you can open the top easily without dragging scraps across the whole backyard.
The wire sides also help you check moisture faster, so you can add dry cardboard before the pile turns heavy, wet, or sour.
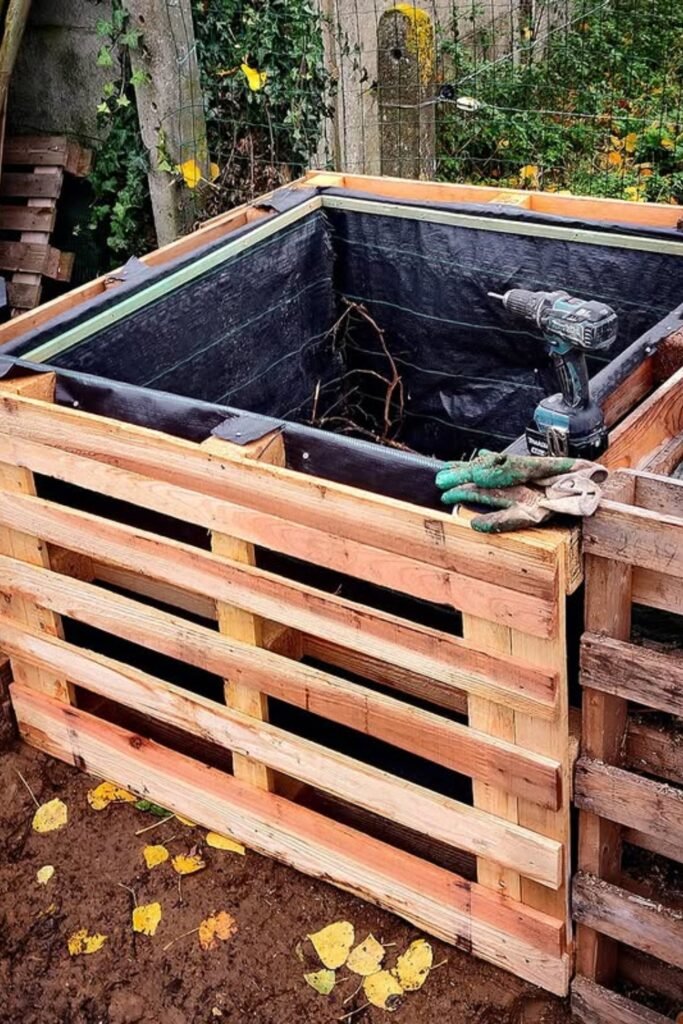
Lined Pallet Bin
Reclaimed pallets work well when you want a low-cost compost bin that still feels sturdy enough for regular garden waste and kitchen scraps.
The dark liner helps hold smaller bedding pieces inside, which matters if you plan to add shredded paper, leaves, or worm-friendly carbon material.
Keep the inside loose instead of packed tight, because worms and compost microbes need airflow to break everything down without creating bad smells.
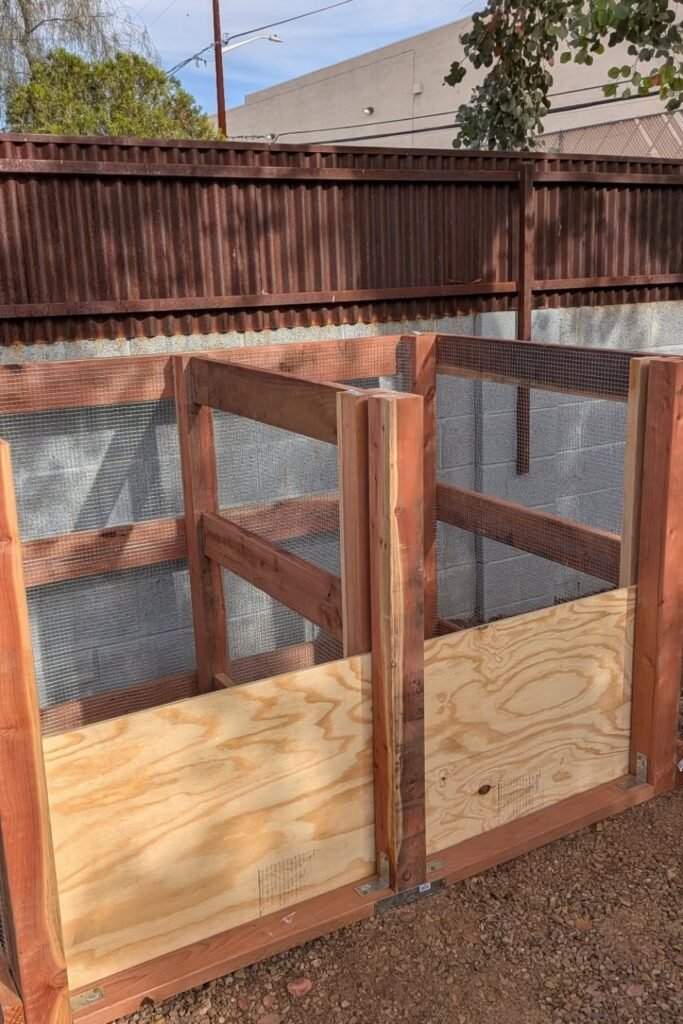
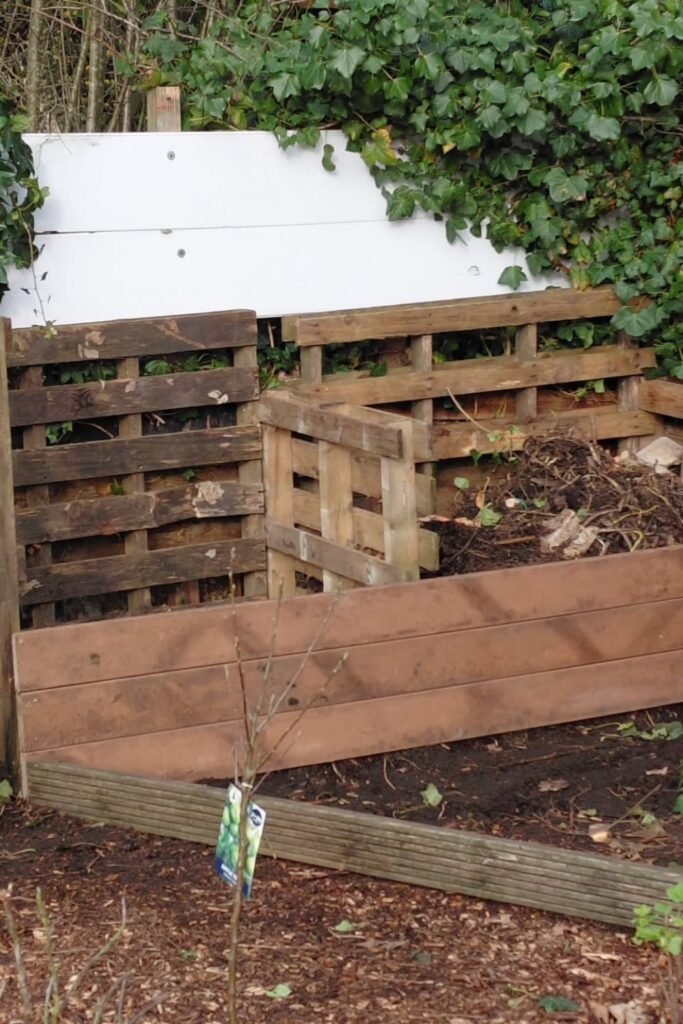
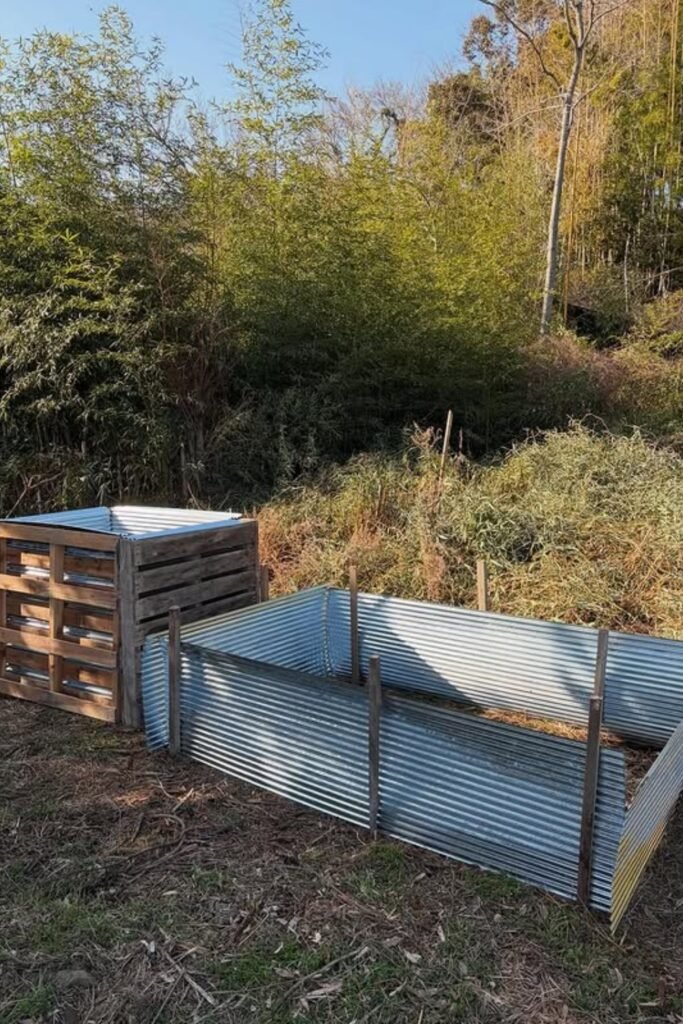
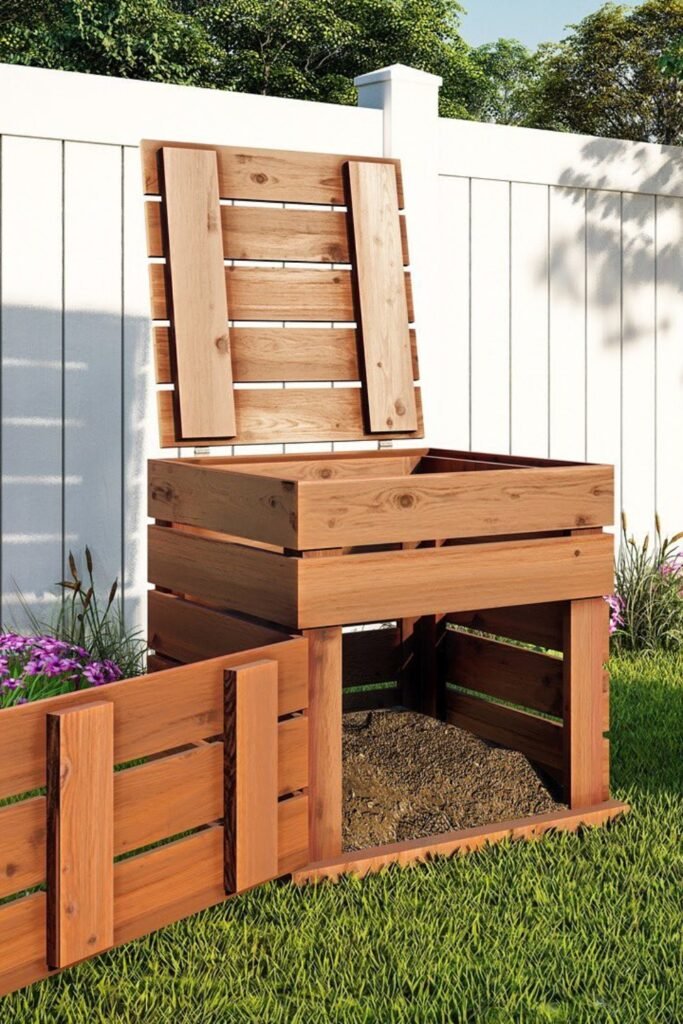
Two-Bay System
Two compost sections make the whole process easier because one side can stay active while the other side rests and finishes breaking down.
Use the fresh side for scraps, leaves, and bedding, then stop adding new material once it starts turning darker and more soil-like.
The mesh panels give helpful airflow, but the plywood base area keeps heavier material contained when the bin fills after several weeks.
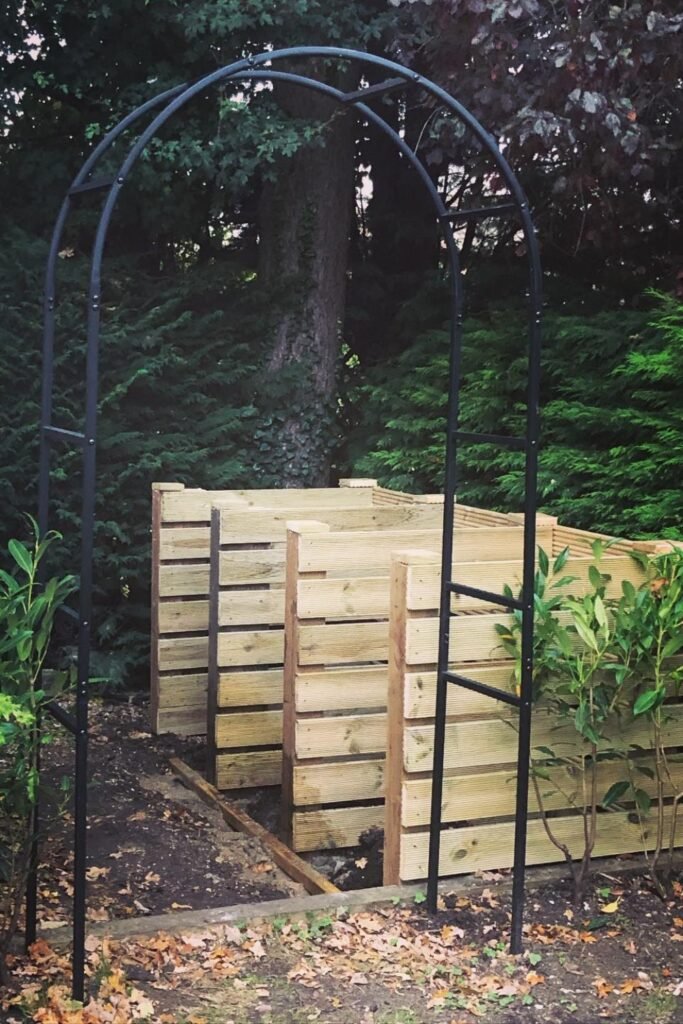
Backyard Arch Setup
A compost area under a garden arch can look planned instead of messy, especially when the bin sits between shrubs, trees, and shaded borders.
Choose this kind of placement when you want the bin close enough for daily scraps but still tucked away from the main sitting area.
The open wooden slats make it easy to add leaves and bedding, while the shaded corner helps protect worms from harsh afternoon heat.
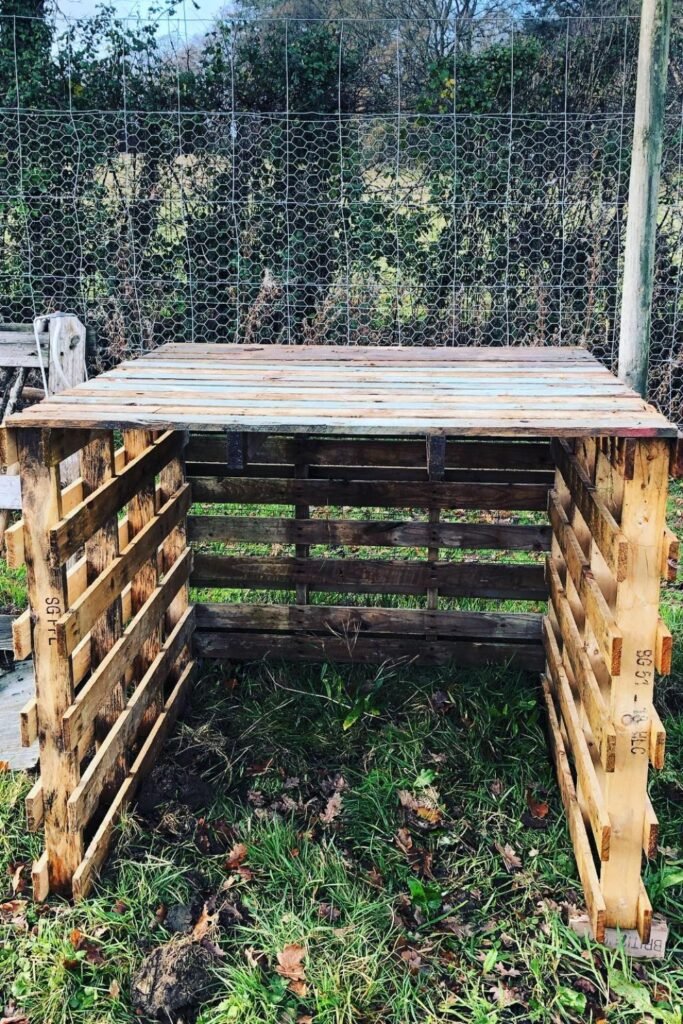
Open Pallet Roof
A pallet roof gives this compost bin quick cover without making the whole setup feel closed, which helps when rain becomes a regular problem.
Keep the sides open enough for airflow, then add dry leaves or cardboard inside so worms still have bedding that stays balanced.
This idea works well in a garden corner where you want a cheap, practical bin made mostly from leftover wooden pallets.
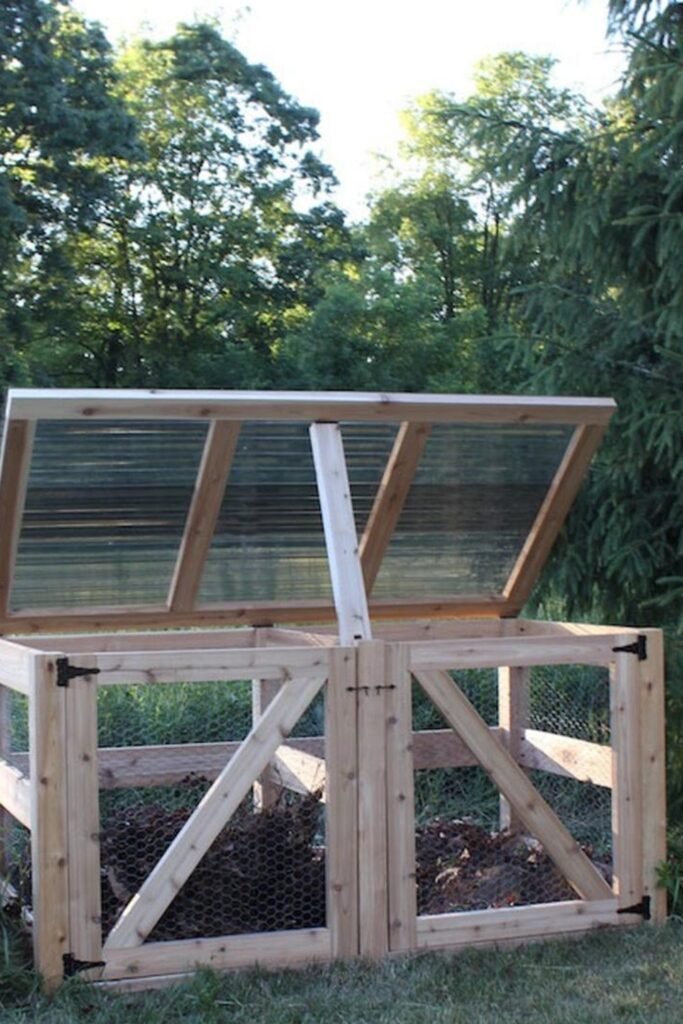
Clear Lift Lid
A clear lift-up lid is useful when you want light protection from rain but still need fast access for scraps and garden waste.
The divided structure lets you manage two compost zones, so one side can break down while the other side gets fresh material.
Place it near trees or tall shrubs, because partial shade helps the bin stay cooler and more comfortable for worms in warm weather.
Layered Pallet Bays
Layered pallet bays are helpful when your compost pile gets messy, because each section gives you a place for different stages.
Use one bay for dry leaves, one for fresh scraps, and one for older material that needs time to finish breaking down.
The mixed wood pieces do not need to look perfect; they only need to hold shape, allow airflow, and keep compost contained.
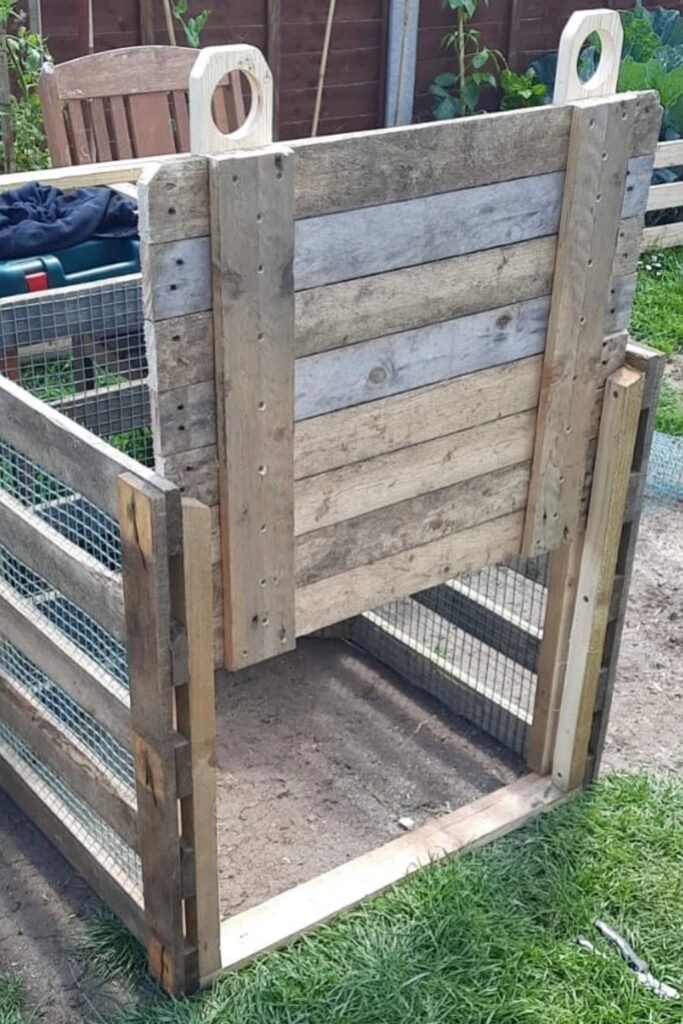
Removable Panel
A tall removable front panel makes harvesting much easier, especially when finished compost collects near the bottom after several weeks.
Instead of digging from the top every time, slide the front board up and pull out the darker, crumbly material first.
The side mesh keeps air moving through the bin, while the strong front boards hold heavier compost without spilling into the walkway.
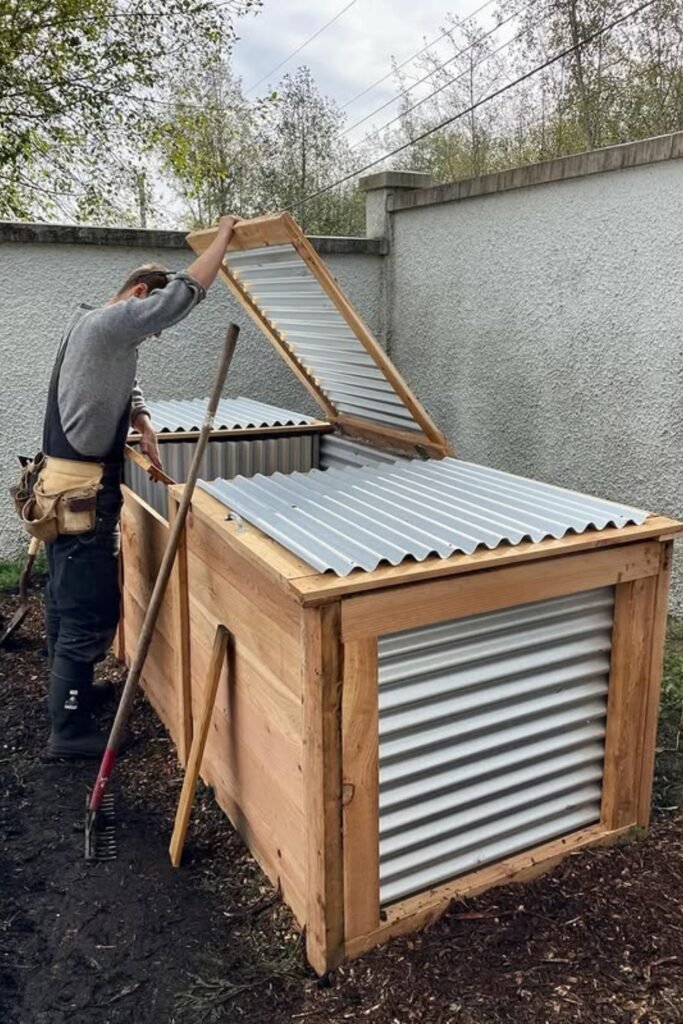
Metal Roof Bin
Corrugated metal panels are useful when you want a compost bin that can handle rain better than a fully open wooden structure.
Use the lift-up roof for easy access, then keep plenty of dry bedding inside so the pile does not become too wet.
The wood frame keeps it sturdy, while the metal sides and top make the bin feel cleaner for a permanent backyard setup.
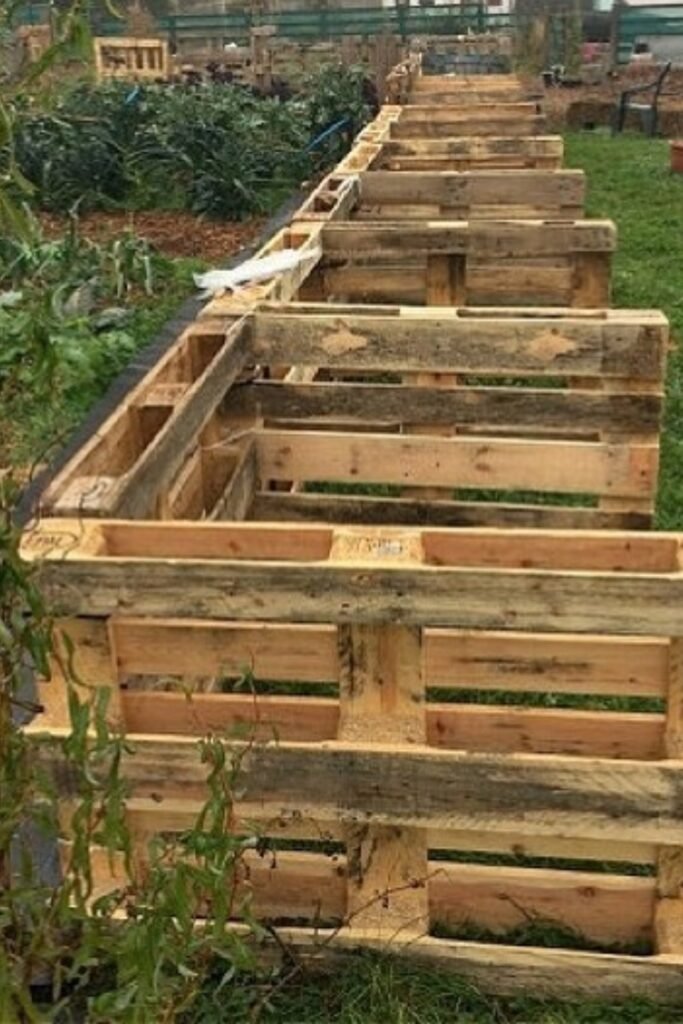
Long Pallet Row
A long row of pallet bins works best when you have a larger garden and want compost moving through different stages.
Start fresh scraps at one end, then let older material rest farther down the row until it turns dark and soil-like.
The open pallet gaps give airflow, but add cardboard or dry leaves inside so worm-friendly bedding does not fall out too quickly.
Open Metal Bay
Metal-sided compost bays are great for bigger outdoor spaces because they hold bulky yard waste without needing a complicated wooden build.
Place this kind of setup near brush piles, garden beds, or tree lines where it can handle leaves, stems, and grass.
Add softer bedding and kitchen scraps in layers if you want worms to move through the material without facing too much heat.
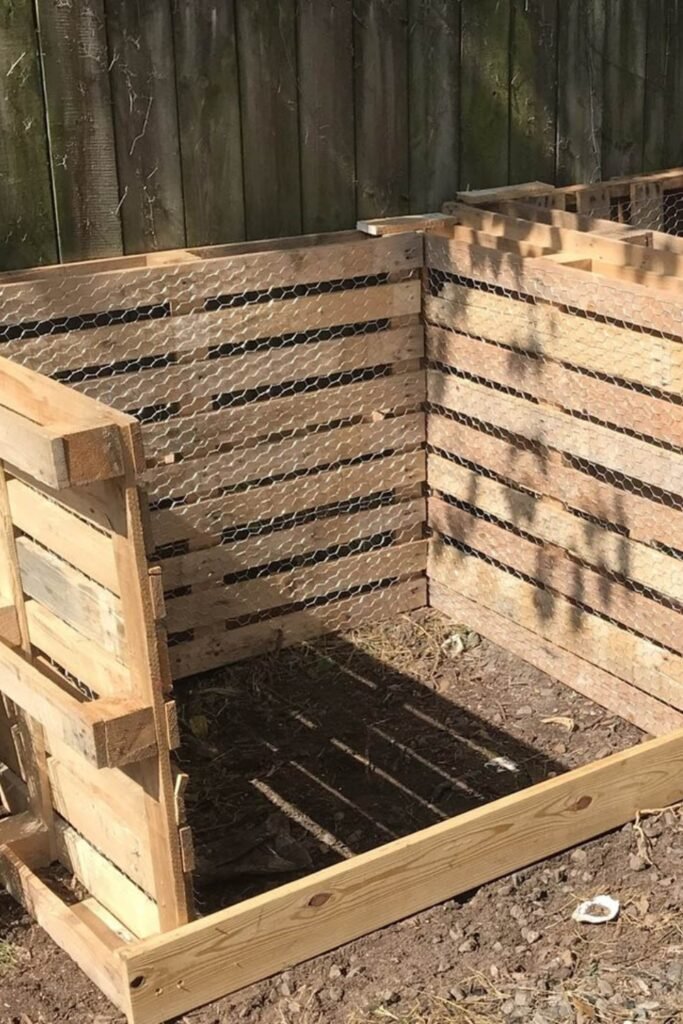
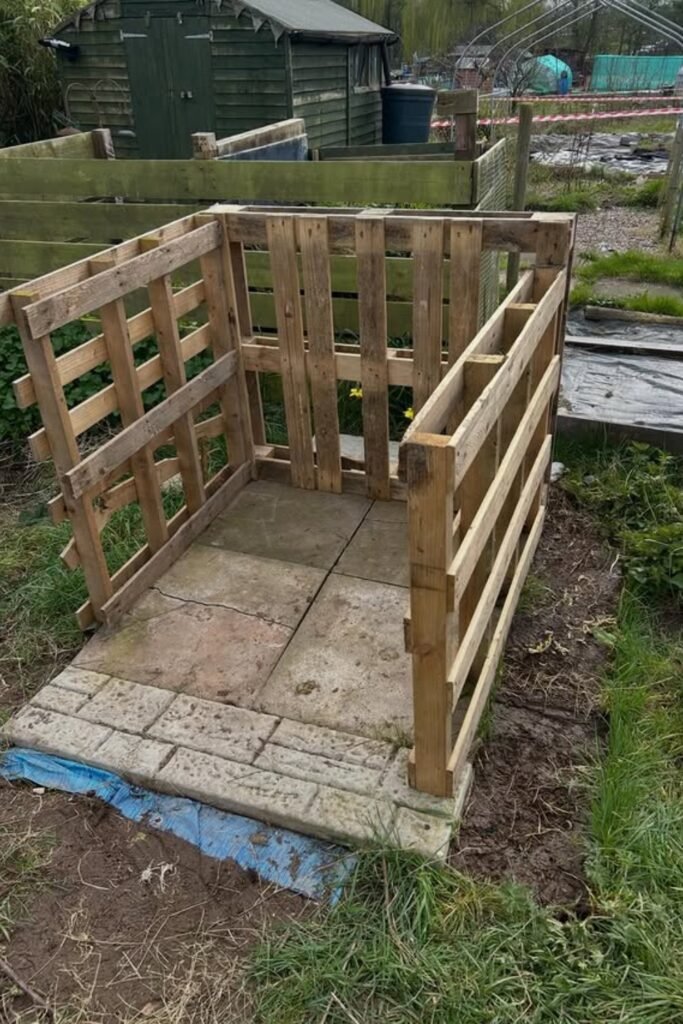
Chicken Wire Pallets
Chicken wire inside pallet walls gives the bin better airflow while stopping loose bedding, leaves, and scraps from spilling through wide gaps.
Use this idea when you already have pallets but need a cleaner structure for compost that stays contained during turning.
Keep the front open enough for access, because you will need space to add dry material and pull finished compost later.
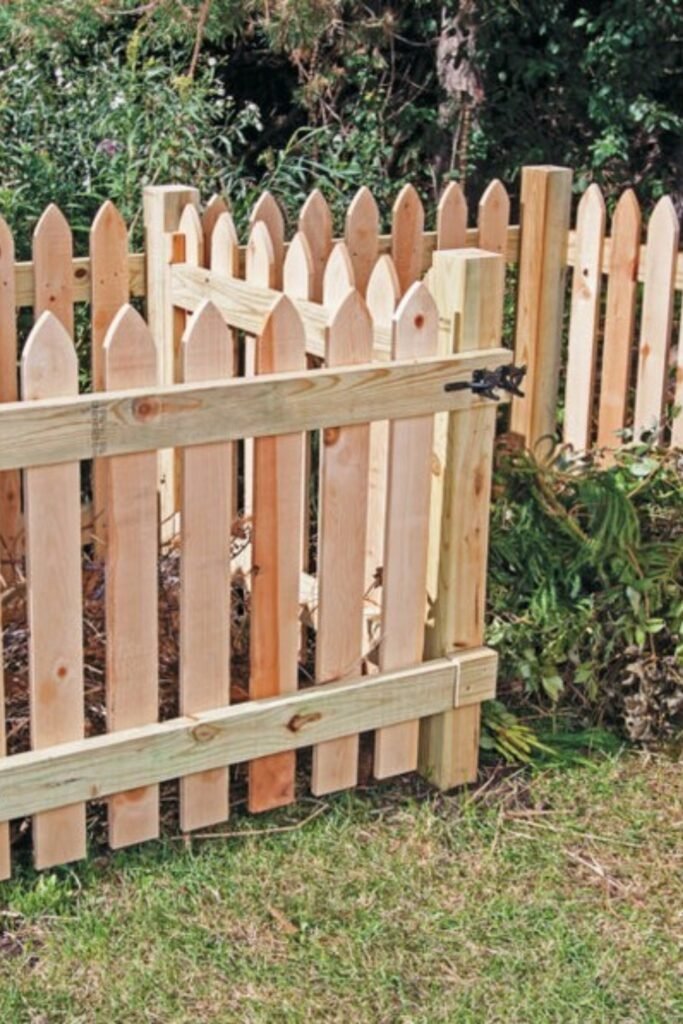
Picket Fence Bin
A picket-style compost bin works when you want the setup to look friendly near a lawn, play area, or visible garden edge from the house.
Use the hinged gate for quick access, then keep leaves and bedding below the fence line so the pile still feels neat from outside view.
It is better for dry yard waste and covered scraps, because the open design needs extra browns to control smells and flies through summer weeks.
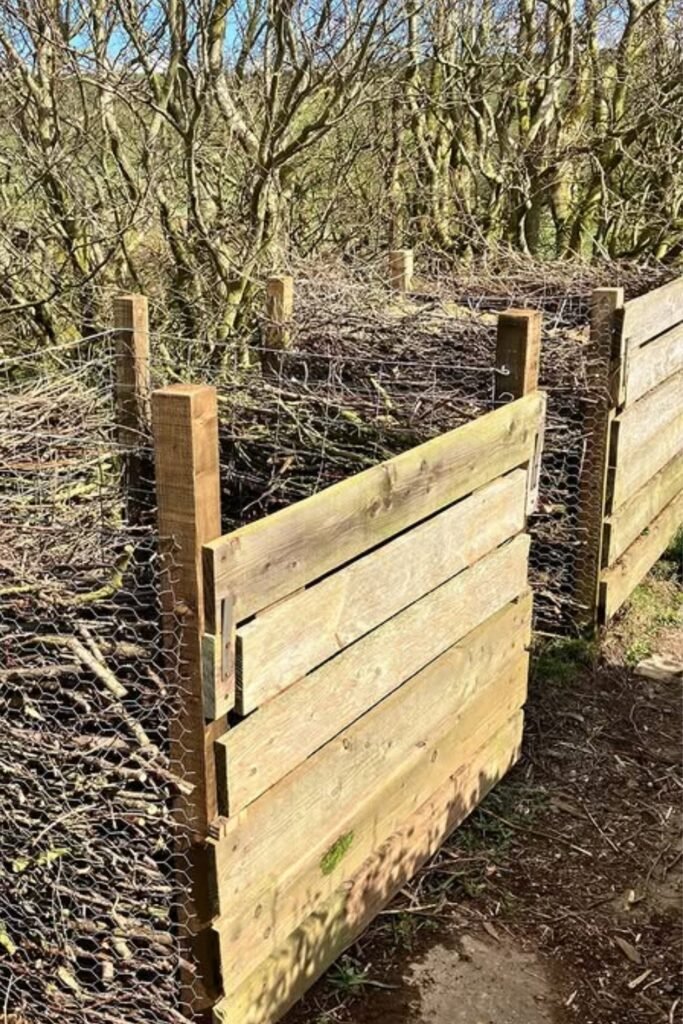
Brush Wire Bay
A wire-and-board bay is useful when you deal with bulky twigs, hedge trimmings, and dry garden waste before finer compost material goes inside.
Stack woody pieces along one side, then add softer leaves and scraps in thinner layers so the pile does not become too airy.
The chicken wire keeps branches contained while still letting air pass through, which helps outdoor compost break down without feeling packed or soggy.
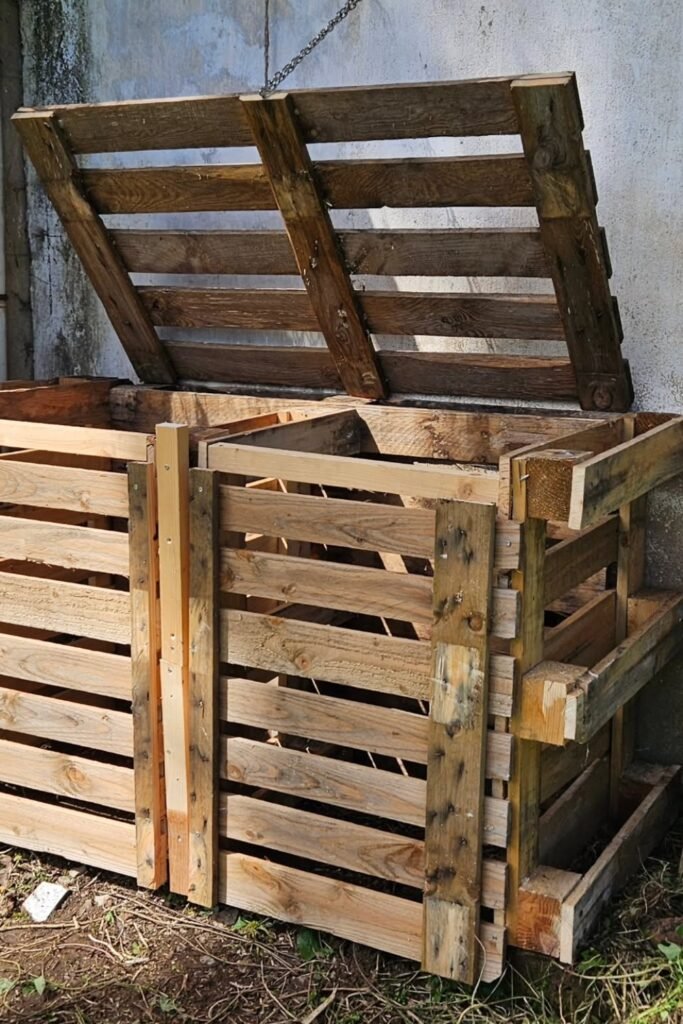
Raised Pallet Lid
A raised pallet lid is a simple way to protect the bin without building a heavy roof that becomes annoying to lift every day.
Attach a chain or strong support so the lid stays open safely while you add bedding, scraps, or dry leaves into the bin.
Because the pallet has wide gaps, cover food waste with cardboard or leaves so pests do not treat the bin like an open feeder.
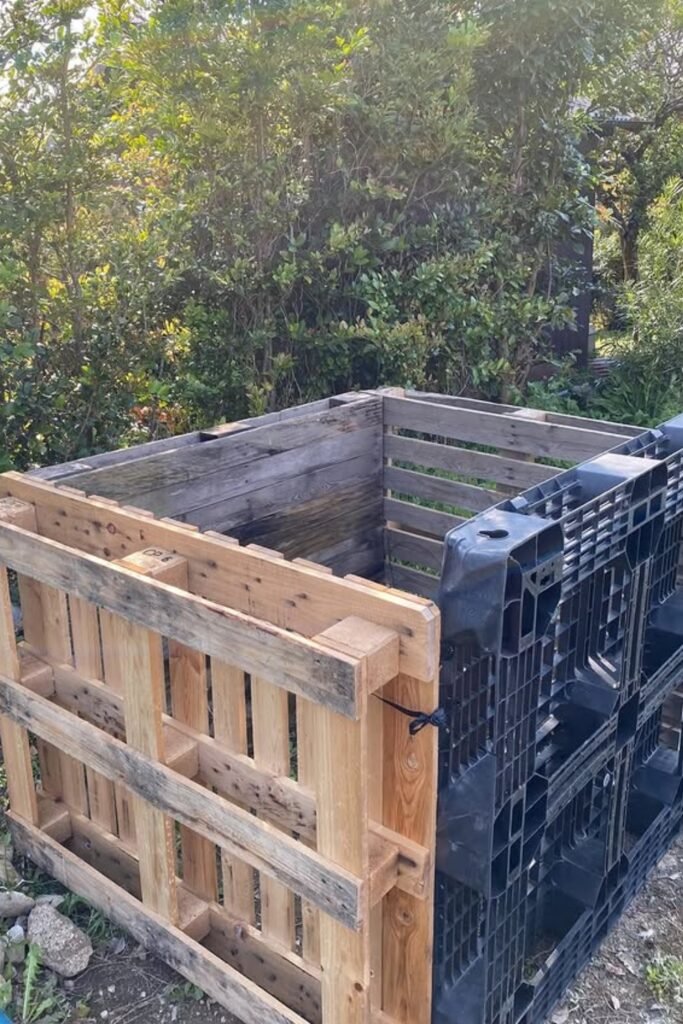
Mixed Panel Bin
Mixing wooden pallets with a plastic side panel can work well when you need one stronger wall for structure, wind, or regular tool contact.
Place the tougher panel where you walk most, then keep the wooden sides open enough to let air move through the compost.
This kind of build suits a hidden garden corner where function matters more than matching materials, as long as the bin stays stable.
Front Access Bin
Front access makes a compost bin easier to empty because you can pull finished material from the bottom instead of digging from above.
Use the upper opening for fresh scraps and bedding, then let gravity move older compost down as worms and microbes work through it.
A clean wooden design like this works well near flower beds where you want the bin to feel useful without looking messy.
Paved Base Bin
A paved base helps keep the compost area cleaner, especially if your garden gets muddy or you need stable footing during wet weather.
Build the pallet walls around the slab, then leave enough room at the front so you can turn, scoop, or harvest compost easily.
The open sides give airflow, but add cardboard, leaves, or straw inside to stop small scraps from falling through the pallet gaps.
FAQs
How do I keep a DIY worm compost bin from smelling bad?
A worm compost bin usually smells bad when it has too much food, too much moisture, or not enough dry bedding.
Start with small amounts of scraps, bury them under shredded cardboard or dry leaves, and check the bedding often.
It should feel damp, not soggy. If the bin smells sour, stop feeding for a few days and mix in more dry browns.
Can I make a worm compost bin if I only have a small backyard?
Yes, you can make a worm compost bin even in a small backyard as long as you choose the right size and placement.
A compact wooden bin, pallet bin, or storage-tote setup can work well near a fence, garden bed, or shaded corner.
Keep it away from harsh sun, add airflow, and use a lid or cover to control rain, pests, and messy scraps.

Hi, my name is Ali Mehmood! I’m a passionate writer and DIY enthusiast who loves turning creative ideas into practical, hands-on projects.
I created this website to share inspiring, budget-friendly ideas that you can do yourself – whether it’s organizing your home, crafting something unique, or creating fun projects for kids and pets.
I believe DIY isn’t just a hobby – it’s a smart way to save money, reduce waste, and enjoy the satisfaction of making things with your own hands.
I’m excited to have you as part of this growing community, and I’ll continue bringing you helpful, realistic, and fun DIY ideas you can actually use.


